Game Objects and Scripts
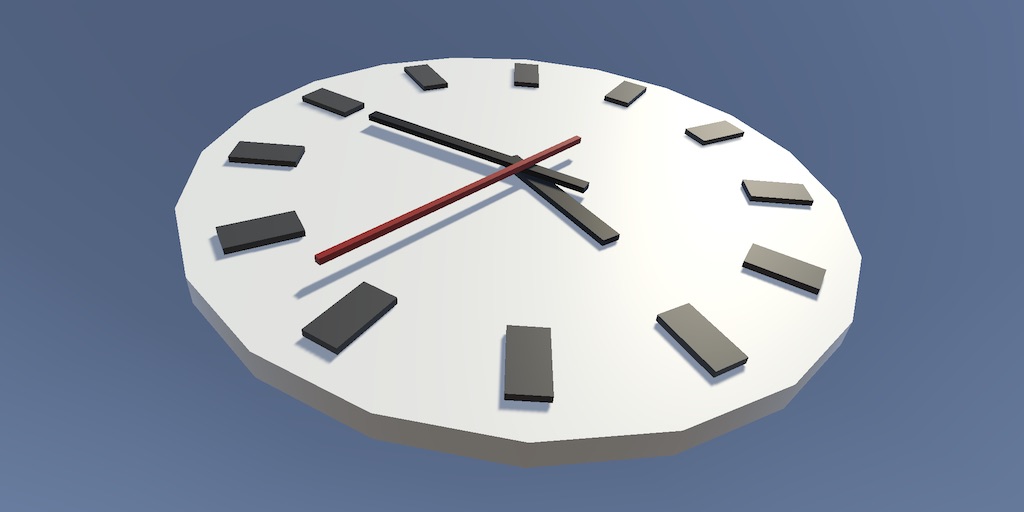
Creating a Clock
- Build a clock with simple objects.
- Write a C# script.
- Rotate the clock's arms to show the time.
- Animate the arms.
This is the first tutorial in a series about learning the basics of working with Unity. In it we will create a simple clock and program a component to have it display the current time. You don't need to have any experience with the Unity editor yet, but you're assumed to have some experience with multi-window editor applications in general.
At the bottom of all my recent tutorials you'll find links to the tutorial license, a repository containing the finished tutorial project, and a PDF version of the tutorial page.
This tutorial is made with Unity 2020.3.6f1.
Creating a Project
Before we can start working with the Unity editor we must first create a project.
New Project
When you open Unity you will be presented with the Unity Hub. This is a launcher and installer app from where you can create or open projects, install Unity versions, and do some other things. If you don't have Unity 2020.3 or higher installed add it now.
Occasionally my tutorials contain little questions and their answers, always in a gray box, like the one above. On a web page the answer is hidden by default. This can be toggled by clicking or tapping the question.
When you create a new project you get to pick its Unity version and a template. We'll use the standard 3D template. Once it's created it gets added to the list of projects and gets opened in the appropriate version of the Unity editor.
Editor Layout
If you haven't customized the editor yet, you will end up with its default window layout.
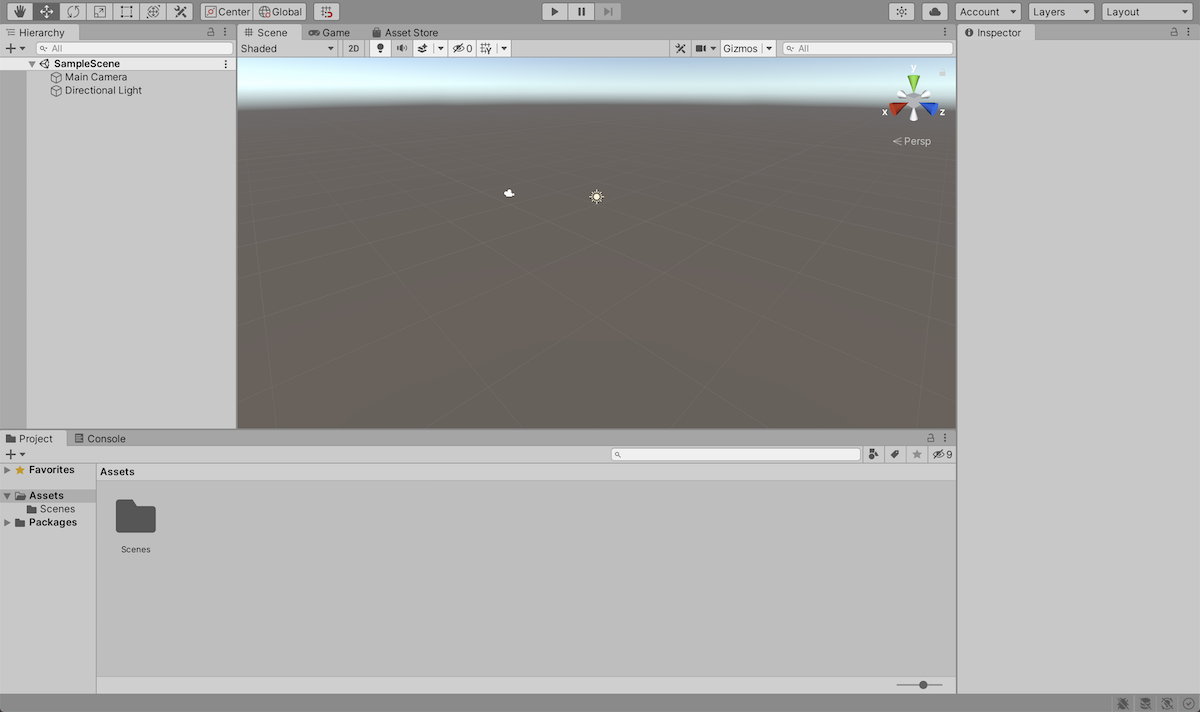
The default layout contains all the windows that we need, but you can customize it as you like, by reordering and grouping windows. You can also open and close windows, like the one of the asset store. Each window also has its own configuration options, accessible via the triple-dot button in their top right corner. Besides that most also have a toolbar with more options. If your window doesn't look the same as in the tutorials—for example the scene window has a uniform background instead of a skybox—then one of its options is different.
You can switch to a preconfigured layout via the dropdown menu at the top right of the Unity editor. You can also save your current layout there so you can revert to it later.
Packages
Unity's functionality is modular. Besides the core functionality there are extra packages that can be downloaded and included in your project. The default 3D project currently includes a few packages by default, which you can see in the project window under Packages.
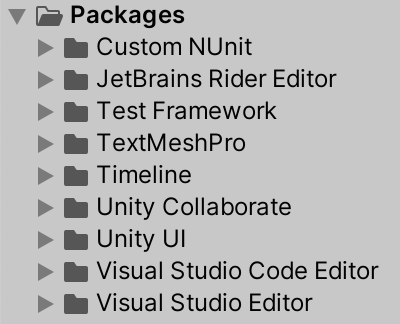
These packages can be hidden, by toggling the button at the top right of the project window that looks like an eye with a dash through it. This is purely to reduce visual clutter in the editor, the packages are still part of the project. The button also displays how many such packages there are.
You can control which packages are included in your project via the package manager, which can be opened via the Window / Package Manager menu item.
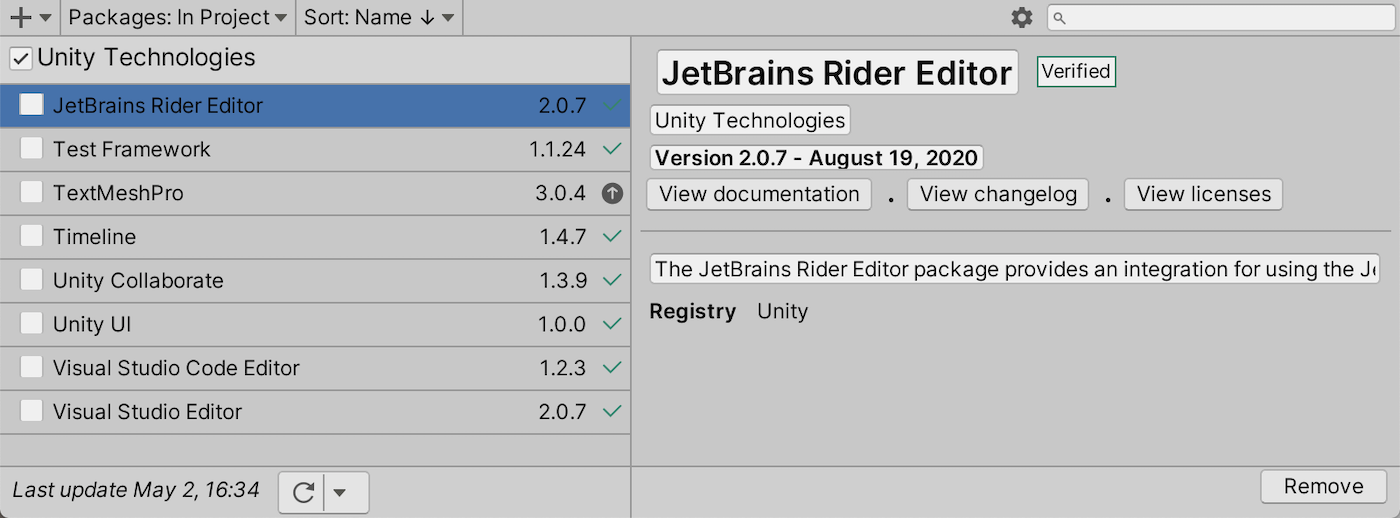
The packages add extra functionality to Unity. For example, Visual Studio Editor adds integration for the Visual Studio editor, used to write code. This tutorial doesn't use the functionality of the included packages, so I removed them all. The only exception is Visual Studio Editor because that's the editor that I use for writing code. If you use a different editor you'd want to include its integration package, if it exists.
The easiest way to remove packages is by first using the toolbar to limit the package list to In Project only. Then select the packages one at a time and use the Remove button at the bottom right of the window. Unity will recompile after each removal, so it takes a few seconds before the process is finished.
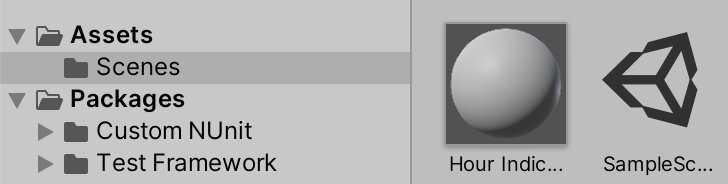
After removing everything except Visual Studio Editor I am left with three packages visible in the project window: Custom NUnit, Test Framework, and Visual Studio Editor. The other two are still there because Visual Studio Editor depends on them.
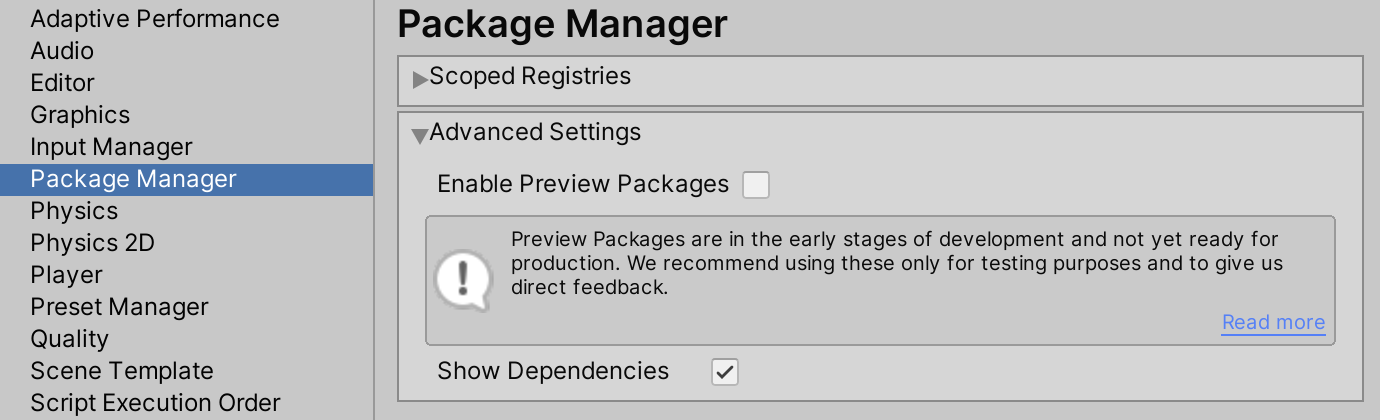
You can make dependencies and implicitly imported packages visible in the package manager via the project settings window, opened via Edit / Project Settings... Select its Package Manager category and then enable Show Dependencies under Advanced Settings.
Color Space
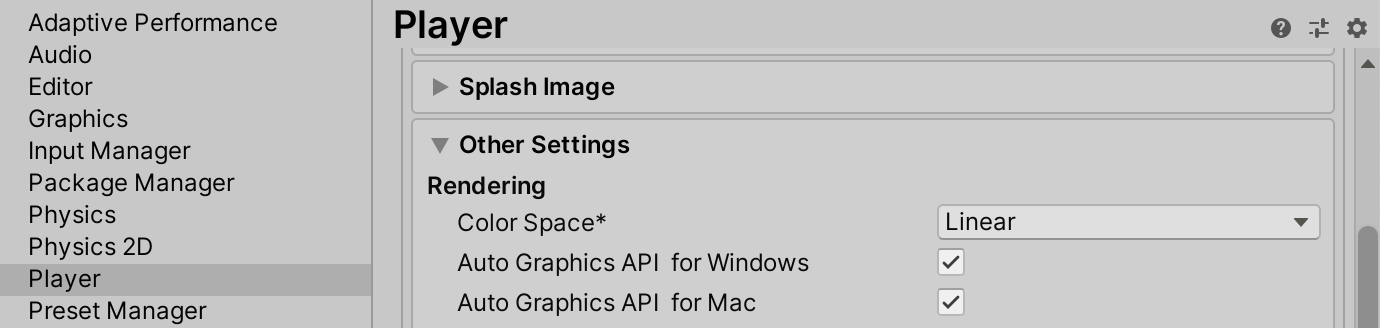
Nowadays rendering is usually done in linear color space, but Unity still configured to use gamma color space by default. For best visual results select the Player category of the project settings window, open the Other Settings panel, and scroll down to its Rendering section. Make sure that Color Space is set to Linear. Unity will show warning that this might take a long time, but this won't be the case for a nearly-empty project. Confirm to switch.
Sample Scene
The new project contains a sample scene named SampleScene, which is opened by default. You can find its asset under Assets / Scenes in the project window.
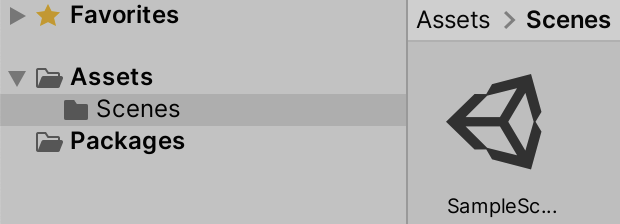
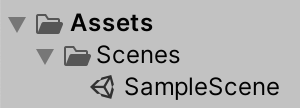
By default the project window uses a two-column layout. You can switch to a one-column layout via its triple-dot configuration menu option.
The sample scene contains a main camera and a directional light. These are game objects. They are listed in the hierarchy window, under the scene.
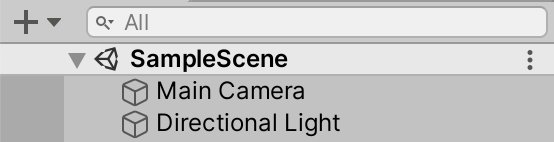
You can select a game object either via the hierarchy window or the scene window. The camera has a scene icon that looks like an oldfashioned film camera while the directional light's icon looks like a sun.
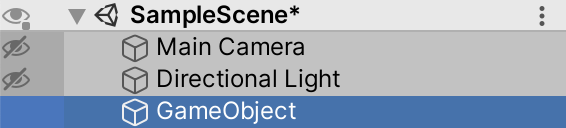
When an object is selected details about it will be shown in the inspector window, but we'll cover those when we need them. We won't need to modify the camera nor the light, so we can hide them in the scene by clicking the eye icon to the left of them in the hierarchy window. This icon is invisible by default but will appear when we hover the cursor there. This is purely to reduce visual clutter in the scene window.

Building a Simple Clock
Now that our project is set up correctly we can start creating our clock.
Creating a Game Object
We need a game object to represent the clock. We'll start with the simplest possible game object, which is an empty one. It can be created via the GameObject / Create Empty menu option. Alternatively, you can use the Create Empty option in the context menu of the hierarchy window, which you can open with an alternative click, usually a right-click or a two-finger tap. This will add the game object to the scene. It's visible and immediately selected in the hierarchy window under SampleScene, which is now marked with an asterisk to indicate that it has unsaved changes. You can also immediately change its name or leave that for later.
The inspector window shows the details of the game object as long as it is selected. At its top is a header with the object's name plus a few configuration options. By default, the object is enabled, is not static, is untagged, and sits on the default layer. These settings are fine, except its name. Rename it to Clock.
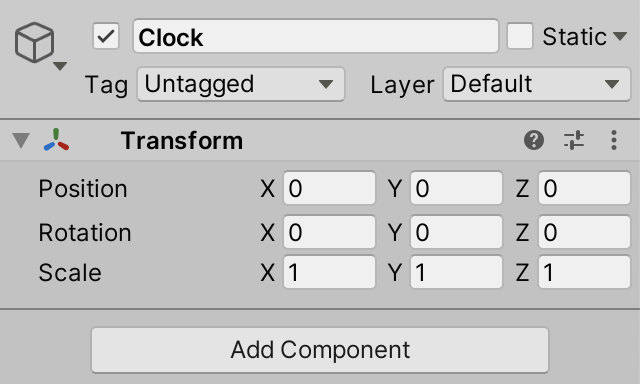
Below the header is a list of all the components of the game object. The list always has a Transform component at the top, which is all our clock currently has. It controls the position, rotation, and scale of the game object. Make sure that all the clock's position and rotation values are set to 0. Its scale should be uniformly 1.
Because the game object is empty it isn't visible in the scene window itself. However, a manipulation tool is visible at the game object's location, which is at the center of the world.
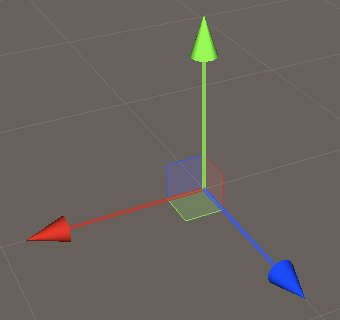
Which manipulation tool is active can be controlled via the buttons at the top left of the editor toolbar. The modes can also be activated via the Q, W, E, R, T, and Y keys. The rightmost button in the group is for enabling custom editor tools, which we don't have. The move tool is active by default.

Next to the mode buttons are three more buttons to control the placement, orientation, and snapping of manipulation tools.
Creating the Face of the Clock
Although we have a clock object, we don't see anything yet. We'll have to add 3D models to it so something gets rendered. Unity contains a few primitive objects that we can use to build a simple clock. Let's begin by adding a cylinder to the scene via GameObject / 3D Object / Cylinder. Make sure that it has the same Transform values as our clock.
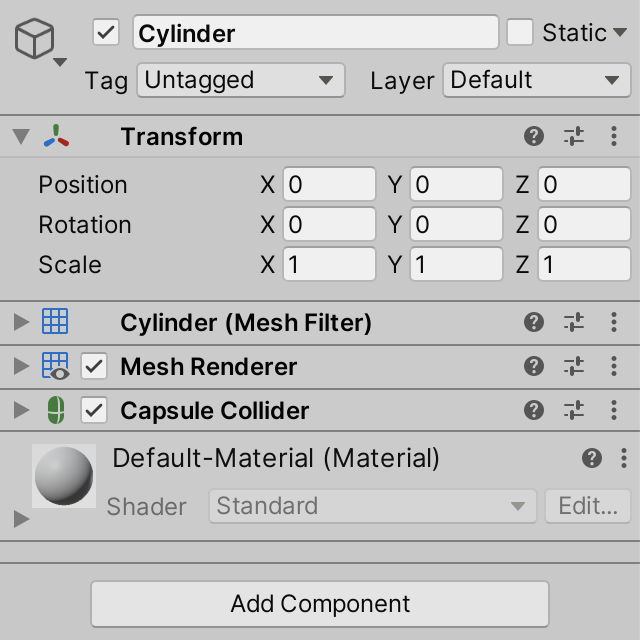
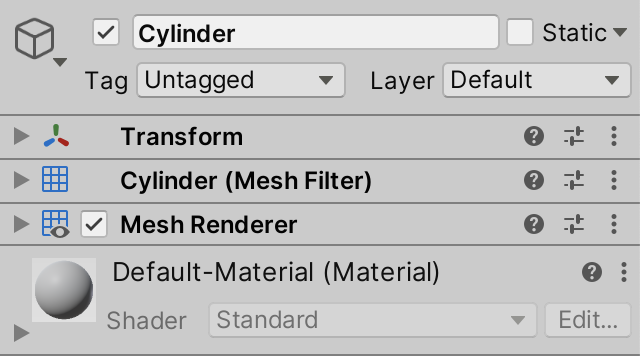
The new object has three more components than an empty game object. First, it has a MeshFilter, which contains a reference to the built-in cylinder mesh.

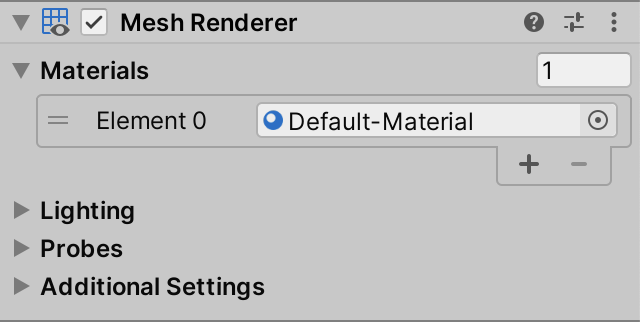
MeshFilter component, set to cylinder.Second is a MeshRenderer. This component's purpose is to ensure that the object's mesh gets rendered. It also determines what material is used for rendering, which is the default material. This material is also shown in the inspector, below the component list.
MeshRenderer component, set to default material.Third is a CapsuleCollider, which is for 3D physics. The object represents a cylinder, but it has a capsule collider because Unity doesn't have a primitive cylinder collider. We don't need it, so we can remove this component. If you'd like to use physics with your clock, you're better off using a MeshCollider component. Components can be removed via the triple-dot dropdown menu in their top right corner.
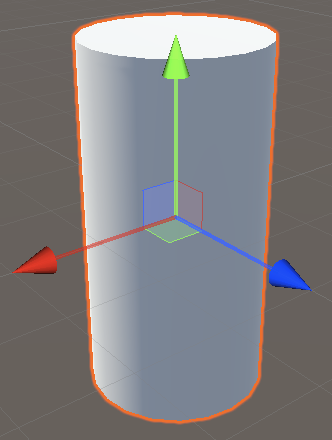
We'll turn the cylinder into the clock's face, by flattening it. This is done by decreasing the Y component of its scale. Reduce it to 0.2. As the cylinder mesh is two units high, its effective height becomes 0.4 units. Let's also make a big clock, so increase the X and Z components of its scale to 10.
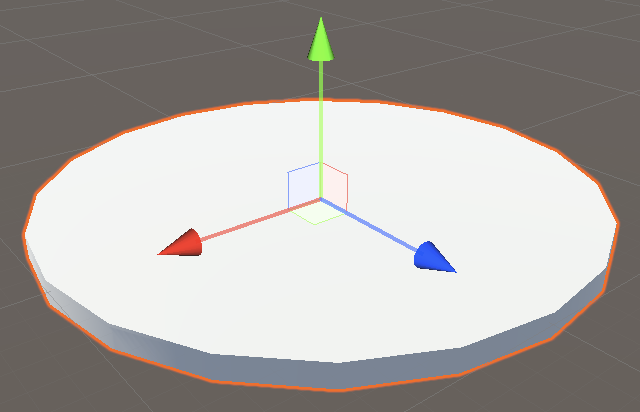
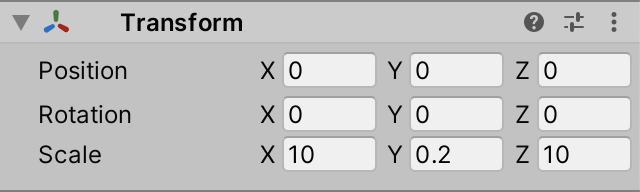
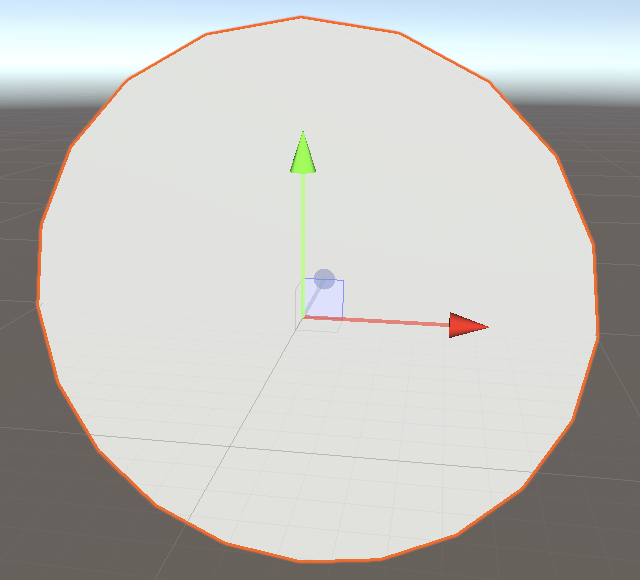
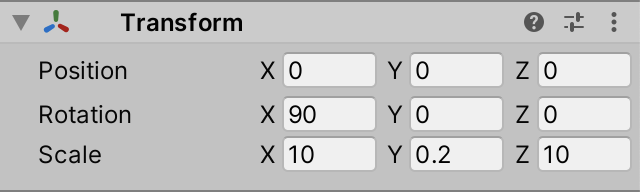
Our clock is supposed to stand or hang on a wall, but its face is currently laying flat. We can fix this by rotating the cylinder a quarter turn. In Unity the X axis points right, the Y axis points up, and the Z axis points forward. So let's design our clock with the same orientation in mind, meaning that we see its front while we're looking at it along the Z axis. Set the cylinder's X rotation to 90 and adjust the scene view so the clock's front is visible, so the blue Z arrow of the move tool points away from you, into the screen.
Change the name of the cylinder object to Face, as it represents the face of the clock. It is only one part of the clock, so we make it a child of the Clock object. We do this by dragging the face onto the clock in the hierarchy window.

Child objects are subject to the transformation of their parent object. This means that when Clock changes position, Face does as well. It's as if they are a single entity. The same goes for rotation and scale. You can use this to make complex object hierarchies.
Creating the Clock Periphery
The outer ring of a clock's face usually has markings that help indicate what time it is displaying. This is known as the clock periphery. Let's use blocks to indicate the hours of a 12-hour clock.
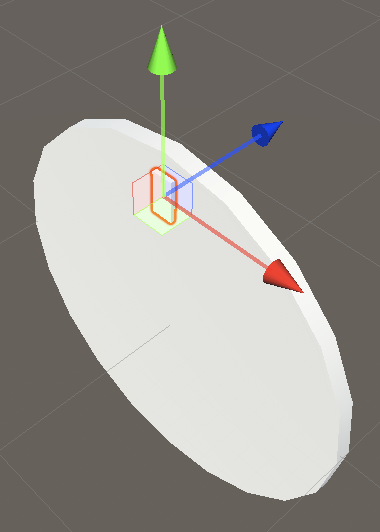
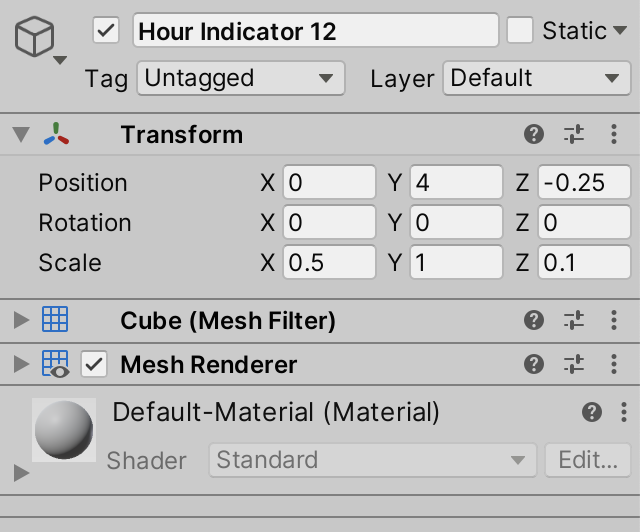
Add a cube object to the scene via GameObject / 3D Object / Cube, name it Hour Indicator 12, and also make it a child of Clock. The order of the child objects in the hierarchy doesn't matter, you could place it either above or below the face.

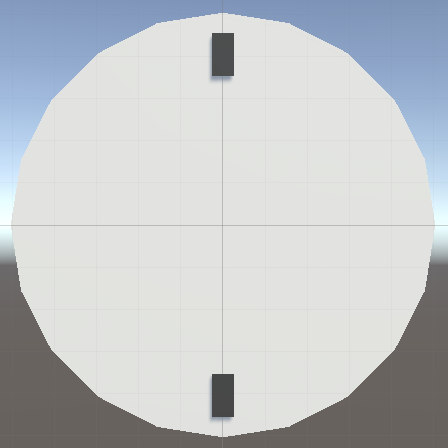
Set its X scale to 0.5, Y scale to 1, and Z scale to 0.1 so it becomes a narrow flat long block. Then set its X position to 0, Y position to 4, and Z position to −0.25. That places it on top of the face to indicate hour 12. Also remove its BoxCollider component.
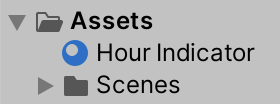
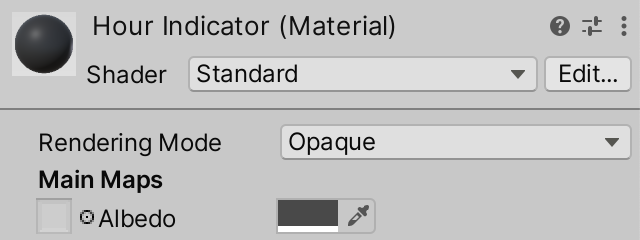
The indicator is hard to see, because it has the same color as the face. Let's create a separate material for it, via Assets / Create / Material, or via the plus button or context menu of the project window. This gives us a material asset that is a duplicate of the default material. Change its name to Hour Indicator.
Select the material and change its Albedo to something else, by clicking its color field. That opens a color popup window which offers various ways to pick a color. I chose dark gray, corresponding to hexadecimal 494949, which is the same as uniform 73 for RGB 0–255 mode. We don't use the alpha channel so its value is irrelevant. We can also leave all other material properties as they are.
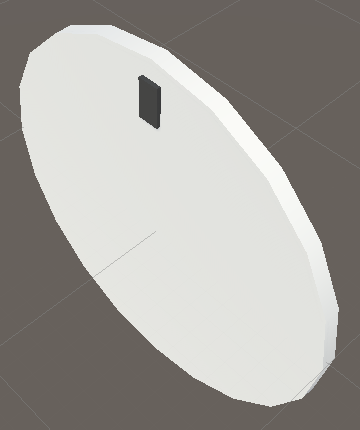
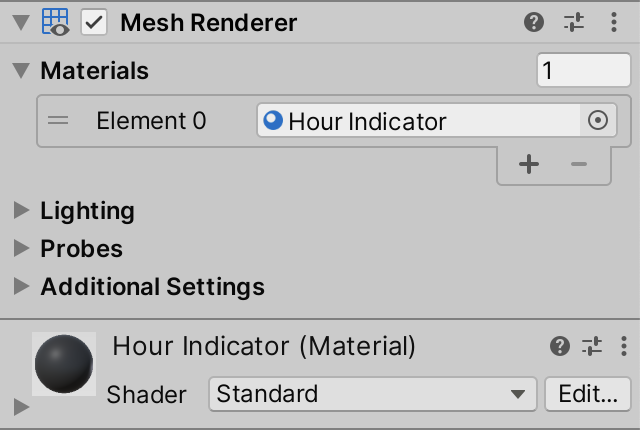
Make the hour indicator use this material. You can do this by dragging the material onto the object in either the scene or hierarchy window. You can also drag it to the bottom of the inspector window when the indicator game object is selected, or change Element 0 of the Materials array of its MeshRenderer.
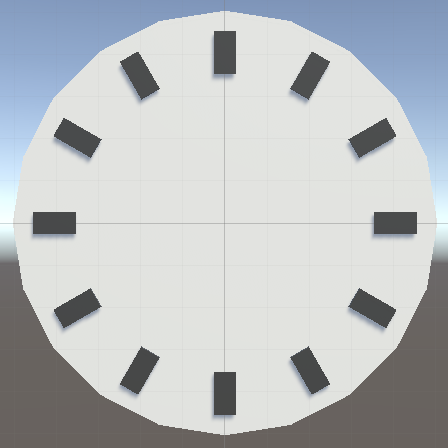
Twelve Hour Indicators
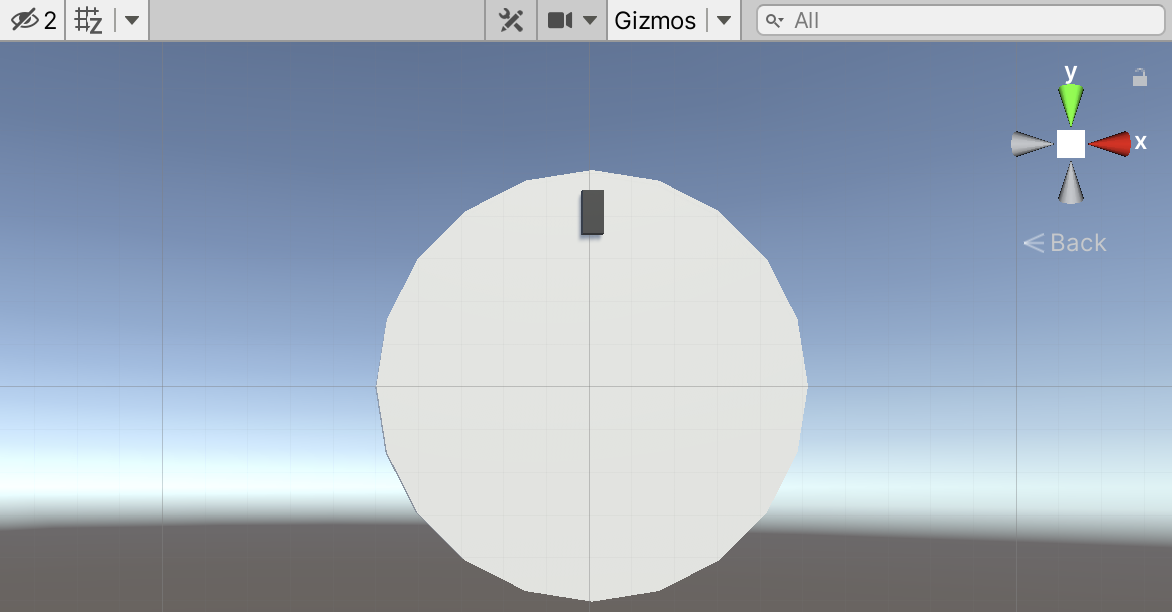
We could make do with a single indicator for hour 12, but let's include one for every hour. Begin by orienting the scene view camera so we look straight down the Z axis. You can do this by clicking on the axis cones of the view camera gizmo at the top right of the scene view. You can also change the axis of the scene grid to Z via the grid toolbar button.
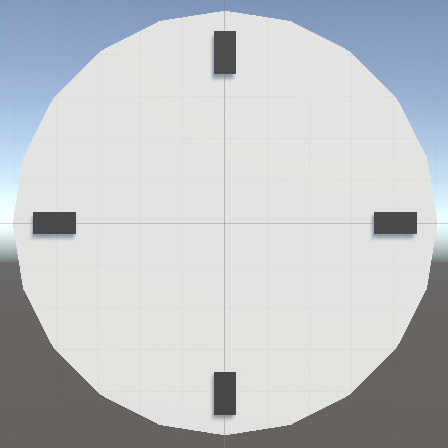
Duplicate the Hour Indicator 12 game object. You can do this via Edit / Duplicate, via the indicated keyboard shortcut, or via the its context menu in the hierarchy window. The duplicate will appear underneath the original in the hierarchy window, also a child of Clock. Its name is set to Hour Indicator 12 (1). Rename it to Hour Indicator 6 and negate the Y component of its position so it indicates hour 6.
Create indicators for hours 3 and 9 in the same way. In this case their X positions should be 4 and −4 while their Y positions should be zero. Also, set their Z rotation to 90 so they're turned a quarter circle.
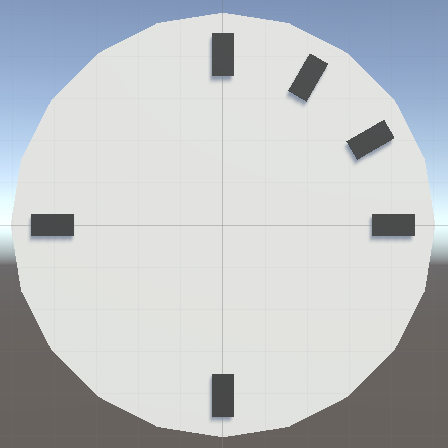
Then create another duplicate of Hour Indicator 12, this time for hour 1. Set its X position to 2, its Y position to 3.464, and its Z rotation to −30. Then duplicate that one for hour 2, swap its X and Y positions, and double its Z rotation to −60.
Duplicate these two indicators and negate their Y positions and their rotations to create the indicators for hours 4 and 5. Then use the same trick on hours 1, 2, 4, and 5 to create the remaining indicators, this time negating their X positions and again their rotations.
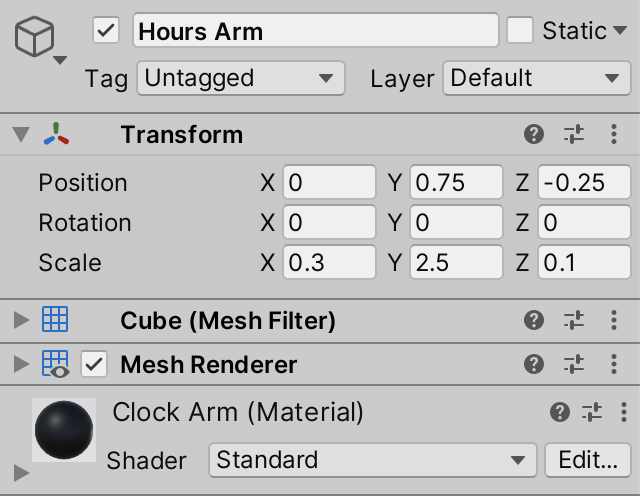
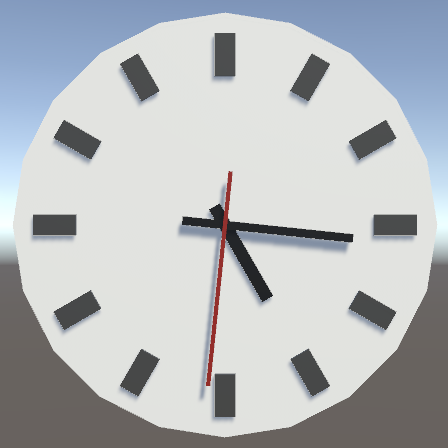
Creating the Arms
The next step is to create the arms of the clock. We start with the hour arm. Again duplicate Hour Indicator 12 and name it Hours Arm. Then create a Clock Arm material and make the arm use it. In this case I made it solid black, hexadecimal 000000. Decrease the arm's X scale to 0.3 and increase its Y scale to 2.5. Then change its Y position to 0.75 so it points towards hour 12, but also a bit in the opposite direction. That makes it look as if the arm has a little counterweight when it rotates.

The arm must rotate around the center of the clock, but changing its Z rotation makes it rotate around its own center.
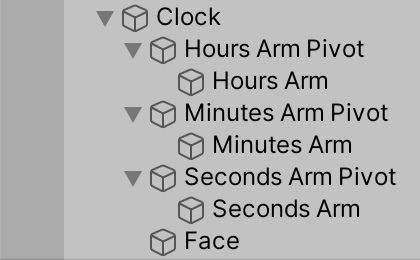
This happens because rotation is relative to the local position of the game object. To create the appropriate rotation we have to introduce a pivot object and rotate that one instead. So create a new empty game object and make it a child of Clock. You can do this directly by creating the object via the context menu of Clock in the hierarchy window. Name it Hours Arm Pivot and make sure that its position and rotation are zero and its scale is uniformly 1. Then make Hours Arm a child of the pivot.

Now try rotating the pivot. If you do this via the scene view make sure that the tool handle position mode is set to Pivot instead of Center.
Duplicate Hours Arm Pivot twice to create a Minutes Arm Pivot and a Seconds Arm Pivot. Rename them accordingly, including the duplicated arm child objects.
Minutes Arm should be narrower and longer than Hours Arm, so set its X scale to 0.2 and Y scale to 4, then increase its Y position to 1. Also change its Z position to −0.35 so it sits on top of the hours arm. Note that this applies to the arm, not its pivot.
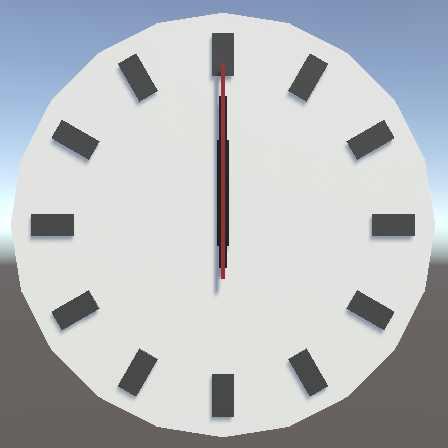
Transform of Minutes Arm.Adjust Seconds Arm as well. This time use 0.1 and 5 for the XY scale and 1.25 and −0.45 for the YZ position.
Transform of Seconds Arm.Let's make the seconds arm stand out by creating a separate material for it. I gave it a dark red color, hexadecimal B30000. Also, I turned off the grid in the scene window as we finished building our clock.
If you haven't done so already, this is a good moment to save the scene, via File / Save or the indicated keyboard shortcut.
It is also a good idea to keep the project's assets organized. As we have three materials let's put them in a Materials folder that we create via Assets / Create / Folder or via the project window. You can then drag the materials there.


Animating the Clock
Our clock currently does not tell the time, it's always stuck at twelve o'clock. To animate it we have to add a custom behavior to it. We do this by creating a custom component type, which is defined via a script.
C# Script Asset
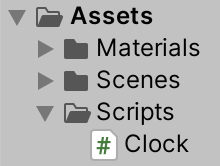
Add a new script asset to the project via Assets / Create / C# Script and name it Clock. C# is the programming language used for Unity scripts and is pronounced as C-sharp. Let's also immediately put it in a new Scripts folder to keep the project tidy.

Clock script, one and two column layout.When the script is selected the inspector will show its contents. But to edit the code we'll have to use a code editor. You can open the script for editing by pressing the Open... button in its inspector or by double-clicking it in the hierarchy window. Which program gets opened can be configured via Unity's preferences.
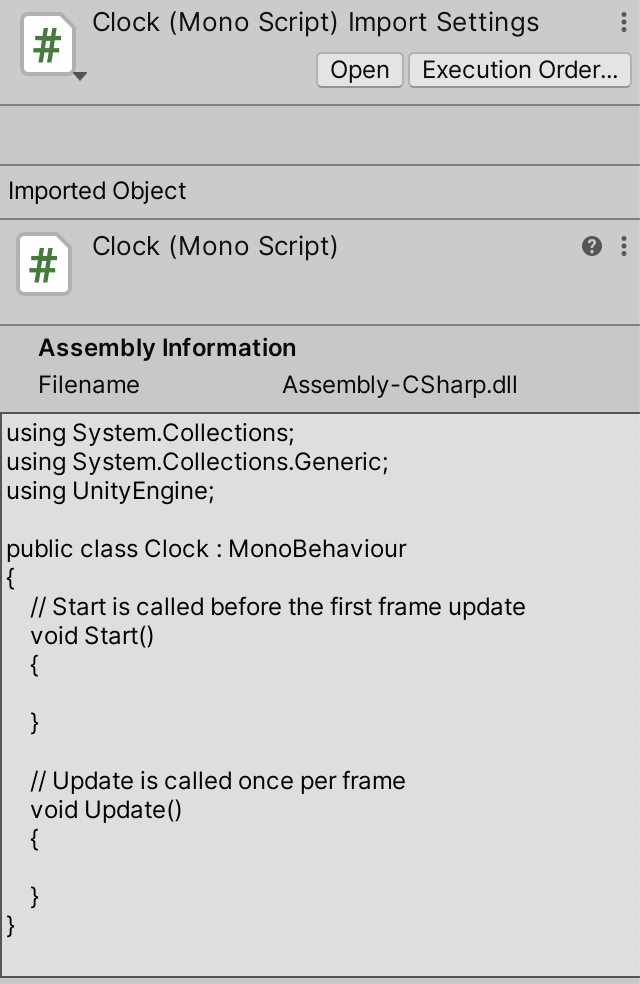
Clock asset.Defining a Component Type
Once the script is loaded in your code editor begin by deleting the standard template code, as we'll create the component type from scratch.
An empty file defines nothing. It must contain the definition of our clock component. What we're going to define isn't a single instance of a component. Instead, we define the general class or type known as Clock. Once that's established, we could create multiple such components in Unity, even though we'll limit ourselves to a single clock in this tutorial.
In C#, we define the Clock type by first stating that we're defining a class, followed by its name. In the code fragments below, changed code has a yellow background, or dark red if you're using the dark web page theme to view this tutorial. As we start with an empty file, the contents of it should literally become class Clock and nothing else, though you could add spaces and newlines between words as you like.
class Clock
Because we don't want to restrict which code has access to our Clock type, it is good form to prefix it with the public access modifier.
public class Clock
At this point we don't have valid C# syntax yet. If you were to save the file and go back to the Unity editor then compilation errors will get logged in its console window.
We indicated that we're defining a type, so we must actually define what it is like. That's done by a block of code that follows the declaration. The boundaries of a code block are indicated with curly brackets. We're leaving it empty for now, so just write {}.
public class Clock {}
Our code is now valid. Save the file and switch back to Unity. The Unity editor will detect that the script asset has changed and triggers a recompilation. After that is done, select our script. The inspector will inform us that the asset does not contain a MonoBehaviour script.
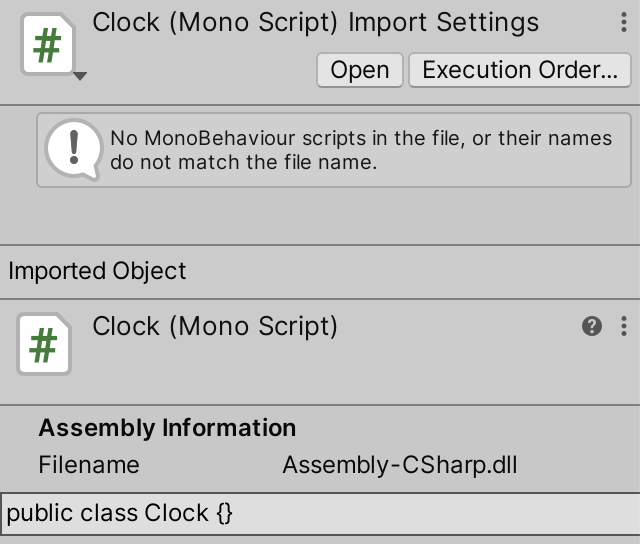
What this means is that we cannot use this script to create components in Unity. At this point, our Clock defines a basic C# object type. Our custom component type must extend Unity's MonoBehaviour type, inheriting its data and functionality.
To turn Clock into a subtype of MonoBehaviour, we have to change our type declaration so that it extends that type, which is done with a colon after our type name, followed by what it extends. This makes Clock inherit everything of the MonoBehaviour class type.
public class Clock : MonoBehaviour {}
However, this will result in an error after compilation. The compiler complains that it cannot find the MonoBehaviour type. This happens because the type is contained in a namespace, which is UnityEngine. To access it, we have to use its fully-qualified name, UnityEngine.MonoBehaviour.
public class Clock : UnityEngine.MonoBehaviour {}
It is inconvenient to always have to include the UnityEngine prefix when accessing Unity types. Fortunately we can declare that the namespace should be searched automatically to complete type names in the C# file. This is done by adding using UnityEngine; at the top of the file. The semicolon is required to mark the end of the statement.
using UnityEngine;
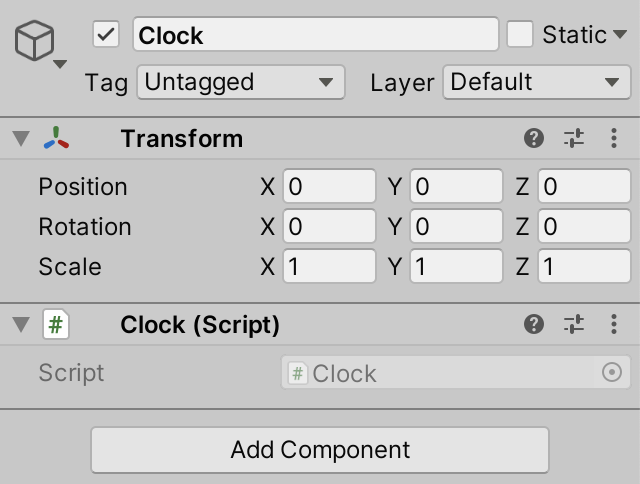
public class Clock : MonoBehaviour {}
Now we can add our custom component to the Clock game object in Unity. This can be done either by dragging the script asset onto the object, or via the Add Component button at the bottom of the object's inspector.
Clock component.Note that most code types in my tutorials are linked to online documentation. For example, MonoBehaviour is a link that takes you to Unity's online scripting API page for that type.
Getting Hold of an Arm
To rotate the arms, Clock objects need to know about them. Let's start with the hours arm. Like all game objects, it can be rotated by adjusting its Transform component. So we have to add knowledge of the arm pivot's Transform component to Clock. This can be done by adding a data field inside its code block, defined as a name followed by a semicolon.
The name hours pivot would be appropriate for the field. However, names have to be single words. The convention is to make the first word of a field name lowercase and capitalize all other words, then stick them together. So we'll name it hoursPivot.
public class Clock : MonoBehaviour {

	hoursPivot;
}
We also have to declare the type of the field, which in this case is UnityEngine.Transform. It has to be written in front of the field's name.
Transform hoursPivot;
Our class now defines a field that can hold a reference to another object, whose type has to be Transform. We have to make sure that it holds a reference to the Transform component of the hours arm pivot.
Fields are private by default, which means that they can only be accessed by the code belonging to Clock. But the class doesn't know about our Unity scene, so there's no direct way to associate the field with the correct object. We can change that by declaring the field as serializable. This means that it should be included in the scene's data when Unity saves the scene, which it does by putting all data in a sequence—serializing it—and writing it to a file.
Marking a field as serializable is done by attaching an attribute to it, in this case SerializeField. It's written in front of the field declaration between square brackets, typically on the line above it but can also be placed on the same line.
	[SerializeField]
	Transform hoursPivot;
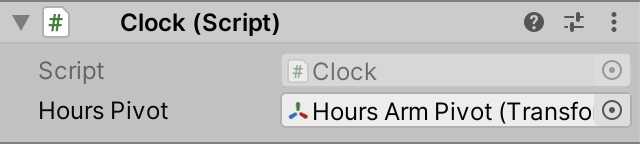
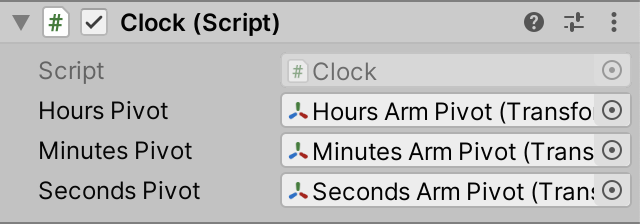
Once the field is serializable Unity will detect this and display it in the inspector window of the Clock component of our Clock game object.
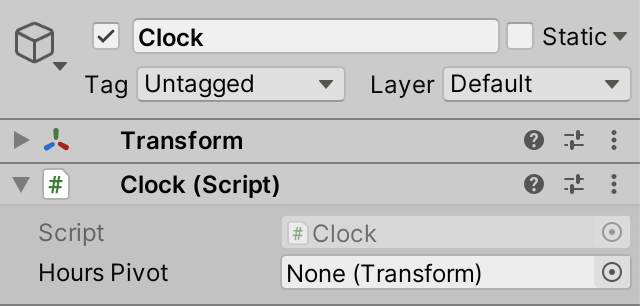
To make the proper connection, drag the Hours Arm Pivot from the hierarchy onto the Hours Pivot field. Alternatively, use the circular button at the right of the field and search for the pivot in the list that pops up. In both cases the Unity editor grabs the Transform component of Hours Arm Pivot and puts a reference to it in our field.
Knowing all Three Arms
We have to do the same for the minutes and seconds arm pivots. So add two more serializable Transform fields to Clock with appropriate names.
	[SerializeField]
	Transform hoursPivot;

	[SerializeField]
	Transform minutesPivot;

	[SerializeField]
	Transform secondsPivot;
It is possible to make these field declarations more concise, because they share the same attribute, access modifier, and type. They can be consolidated into a comma-separated list of field names following the attribute and type declaration.
[SerializeField] Transform hoursPivot, minutesPivot, secondsPivot;//[SerializeField]//Transform minutesPivot;//[SerializeField]//Transform secondsPivot;
Hook up the other two arms in the editor as well.

Waking Up
Now that we have access to the arm pivots the next step is to rotate them. To do this, we need to tell Clock to execute some code. This is done by adding a code block to the class, known as a method. The block has to be prefixed by a name, which is capitalized by convention. We'll name it Awake, suggesting that the code should be executed when the component awakens.
public class Clock : MonoBehaviour {

	[SerializeField]
	Transform hoursPivot, minutesPivot, secondsPivot;

	Awake {}
}
Methods are somewhat like mathematical functions, for example `f(x) = 2x + 3`. That function takes a number—represented by the variable parameter `x`—doubles it, then adds three. It operates on a single number, and its result is a single number as well. In the case of a method, it's more like `f(p) = c` where `p` represents input parameters and `c` represents whatever code it executes.
Like a mathematical function a method can produce a result, but this isn't required. We have to declare the type of the result—as if it were a field—or write void to indicate that there is no result. In our case, we just want to execute some code without providing a resulting value, so we use void.
void Awake {}
We also don't need any input data. However, we still have to define the method's parameters, as a comma-separated list between round brackets. It's just an empty list in our case.
void Awake () {}
We now have a valid method, although it doesn't do anything yet. Just like Unity detected our fields, it also detects this Awake method. When a component has an Awake method, Unity will invoke that method on the component when it awakens. This happens after it's been created or loaded while in play mode. We're currently in edit mode, so this doesn't happen yet.
Note that Awake and other special Unity event methods have bold text in my tutorials and link to their online Unity scripting API page.
Rotating via Code
To rotate the arms we have to create a new rotation. We can change the rotation of a Transform by assigning a new one to its localRotation property.
Although the rotation of a Transform component is defined with Euler angles in degrees per axis in the inspector, in code we have to do it with a quaternion.
We can create a quaternion based on Euler angles by invoking the Quaternion.Euler method. Do this by writing it in Awake, followed by a semicolon to end the statement.
	void Awake () {
		Quaternion.Euler;
	}
The method has parameters used to describe the desired rotation. In this case we'll provide a comma-separated list of containing three arguments, all between round brackets, after the method name. We supply three numbers for the X, Y, and Z rotations. Use zero for the first two and −30 for the Z rotation.
Quaternion.Euler(0, 0, -30);
The result of this invocation is a Quaternion struct value containing a 30° clockwise rotation around the Z axis, matching hour 1 on our clock.
To apply this rotation to the hour arm assign the result of Quaternion.Euler to hoursPivots.localRotation, using the = assignment statement.
hoursPivot.localRotation = Quaternion.Euler(0, 0, -30);
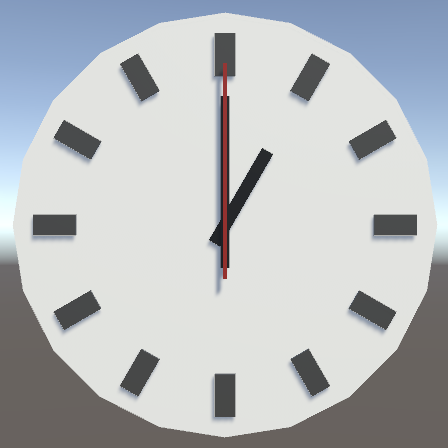
Now enter play mode in the editor. You can do this via Edit / Play, the indicated keyboard shortcut, or by pressing the play button at top center of the editor window. Unity will switch focus to the game window, which renders what the Main Camera in the scene sees. The clock component will awaken, and the clock will be set to one o'clock.
If the camera isn't focused on the clock you can move it so the clock becomes visible, but keep in mind that the scene is reset when exiting play mode, so any changes that you make to the scene while in play mode will not persist. This isn't true for assets though, changes to them always persist. You can also have the scene window—or even multiple scene and game windows—open while in play mode. Exit play mode before continuing.
Getting the Current Time
The next step is to figure out the current time when we awaken. We can use the DateTime struct to access the system time of the device we're running on. DateTime isn't a Unity type, it is found in the System namespace. It is part of the core functionality of the .NET framework, which is what Unity uses to support scripting.
DateTime has a Now property that produces a DateTime value containing the current system date and time. To check whether it's correct we'll log it to the console at the start of Awake. We can do that by passing it to the Debug.Log method.
using System;
using UnityEngine;

public class Clock : MonoBehaviour {

	[SerializeField]
	Transform hoursPivot, minutesPivot, secondsPivot;

	void Awake () {
		Debug.Log(DateTime.Now);
		hoursPivot.localRotation = Quaternion.Euler(0, 0, -30);
	}
}
Now we get a timestamp logged each time we enter play mode. You can see it both in the console window and in the status bar at the bottom of the editor window.
Rotating the Arms
We're getting close to a working clock. Let's again start with the hours. DateTime has an Hour property that gets us the hours portion of a DateTime value. Invoking it on the current timestamp will give us the hour of the day.
Debug.Log(DateTime.Now.Hour);
So to have the hours arm show the current hour we have to multiply the −30° rotation by the current hour. Multiplication is done with the asterisk * character. We also no longer need to log the current time so can get rid of that statement.
//Debug.Log(DateTime.Now.Hour);hoursPivot.localRotation = Quaternion.Euler(0, 0, -30 * DateTime.Now.Hour);
To make it clear that we're converting from hours to degrees, we can define an hoursToDegrees field containing the conversion factor. The angles of Quaternion.Euler are defined as floating-point values, so we'll use the float type. Because we already know the number, we can immediately assign it as part of the field declaration. Then multiply with the field instead of the literal -30 in Awake.
	float hoursToDegrees = -30;

	[SerializeField]
	Transform hoursPivot, minutesPivot, secondsPivot;

	void Awake () {
		hoursPivot.localRotation =
			Quaternion.Euler(0, 0, hoursToDegrees * DateTime.Now.Hour);
	}
If we declare a whole number without a suffix then it's assumed to be an integer, which is a different value type. Although the compiler converts them automatically, let's make explicit that all our numbers are of type float, by adding the f suffix to them.
	float hoursToDegrees = -30f;

	[SerializeField]
	Transform hoursPivot, minutesPivot, secondsPivot;

	void Awake () {
		hoursPivot.localRotation =
			Quaternion.Euler(0f, 0f, hoursToDegrees * DateTime.Now.Hour);
	}
The amount of degrees per hour is always the same. We can enforce this by adding the const prefix to the declaration of hoursToDegrees. This turns it into a constant instead of a field.
const float hoursToDegrees = -30f;
Let's give the same treatment to the other two arms, using the appropriate properties of DateTime. Both a minute and a second are represented by a rotation of negative six degrees.
	const float hoursToDegrees = -30f, minutesToDegrees = -6f, secondsToDegrees = -6f;

	[SerializeField]
	Transform hoursPivot, minutesPivot, secondsPivot;

	void Awake () {
		hoursPivot.localRotation =
			Quaternion.Euler(0f, 0f, hoursToDegrees * DateTime.Now.Hour);
		minutesPivot.localRotation =
			Quaternion.Euler(0f, 0f, minutesToDegrees * DateTime.Now.Minute);
		secondsPivot.localRotation =
			Quaternion.Euler(0f, 0f, secondsToDegrees * DateTime.Now.Second);
	}
We're using DateTime.Now three times, to retrieve the hour, minute, and second. Each time we go through the property again, which requires some work, which could theoretically result in different time values. To make sure that this doesn't happen, we should retrieve the time only once. We can do this by declaring a variable inside the method and assign the time to it, then use this value afterwards. Let's name it time.
	void Awake () {
		DateTime time = DateTime.Now;
		hoursPivot.localRotation =
			Quaternion.Euler(0f, 0f, hoursToDegrees * time.Hour);
		minutesPivot.localRotation =
			Quaternion.Euler(0f, 0f, minutesToDegrees * time.Minute);
		secondsPivot.localRotation =
			Quaternion.Euler(0f, 0f, secondsToDegrees * time.Second);
	}
In case of a variable it's possible to omit the type declaration, replacing it with the var keyword. This can shorten the code but is only possible when the variable's type can be inferred from what is assigned to it when it is declared. Also, I prefer to only do this when the type is explicitly mentioned in the statement, which is the case here.
var time = DateTime.Now;
Animating the Arms
We get the current time when entering play mode, but after that the clock remains motionless. To keep the clock synchronized with the current time, change the name of our Awake method to Update. This is another special event method that gets invoked by Unity every frame instead of just once, as long as we stay in play mode.
	void Update () {
		var time = DateTime.Now;
		hoursPivot.localRotation =
			Quaternion.Euler(0f, 0f, hoursToDegrees * time.Hour);
		minutesPivot.localRotation =
			Quaternion.Euler(0f, 0f, minutesToDegrees * time.Minute);
		secondsPivot.localRotation =
			Quaternion.Euler(0f, 0f, secondsToDegrees * time.Second);
	}
Note that our Clock component has gained a toggle in front of its name in the inspector. This allows us to disable it, which prevents Unity from invoking its Update method.
Clock component that can be disabled.Continuously Rotating
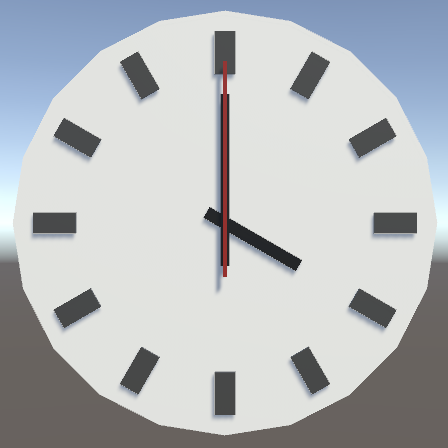
The arms of our clock indicate exactly the current hour, minute, or second. It behaves like a digital clock, discrete but with arms. Typically clocks have slowly-rotating arms that provide an analog representation of time. Let's change our approach so our clock becomes analog.
DateTime doesn't contain fractional data. Fortunately, it does have a TimeOfDay property. This gives us a TimeSpan value that contains the data in the format that we need, via its TotalHours, TotalMinutes, and TotalSeconds properties.
Begin by getting the TimeOfDay struct value from DateTime.Now and store that in the variable instead. As the TimeSpan type isn't mentioned in this statement I'll make the variable's type explicit. Then adjust the properties that we use to rotate the arms.
	void Update () {
		TimeSpan time = DateTime.Now.TimeOfDay;
		hoursPivot.localRotation =
			Quaternion.Euler(0f, 0f, hoursToDegrees * time.TotalHours);
		minutesPivot.localRotation =
			Quaternion.Euler(0f, 0f, minutesToDegrees * time.TotalMinutes);
		secondsPivot.localRotation =
			Quaternion.Euler(0f, 0f, secondsToDegrees * time.TotalSeconds);
	}
This will result in compiler errors, complaining that we cannot convert from double to float. This happens because the TimeSpan properties produce values with the double-precision floating point type, known as double. These values provide higher precision than float values, but Unity's code only works with single-precision floating point values.
We can solve this problem by explicitly converting from double to float. This process is known as casting and is done by writing the new type within round brackets in front of the value to be converted.
		hoursPivot.localRotation =
			Quaternion.Euler(0f, 0f, hoursToDegrees * (float)time.TotalHours);
		minutesPivot.localRotation =
			Quaternion.Euler(0f, 0f, minutesToDegrees * (float)time.TotalMinutes);
		secondsPivot.localRotation =
			Quaternion.Euler(0f, 0f, secondsToDegrees * (float)time.TotalSeconds);
Now you know the fundamentals of object creation and writing code in Unity. The next tutorial is Building a Graph.