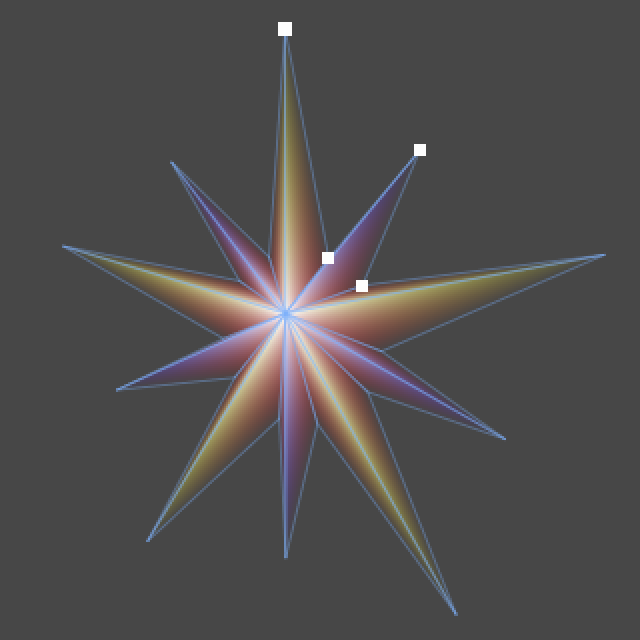
Star, an introduction to WYSIWYG editing
Introduction
- dynamically generate a mesh
- support WYSIWYG editing
- support editing in the scene view
This tutorial comes after the Custom List tutorial.
This tutorial is for Unity version 4.3 and above.
Creating the star
We will be using the color point and editor list that we created previously, but we can get rid of all the testing code and objects.
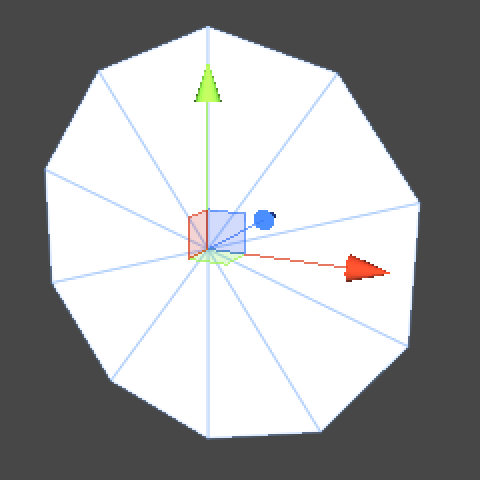
The first thing we add is a C# script named Star. We'll use
this script to create a circle made of triangles to produce
a starlike effect, which requires a Mesh.
using UnityEngine;

public class Star : MonoBehaviour {

	private Mesh mesh;
}
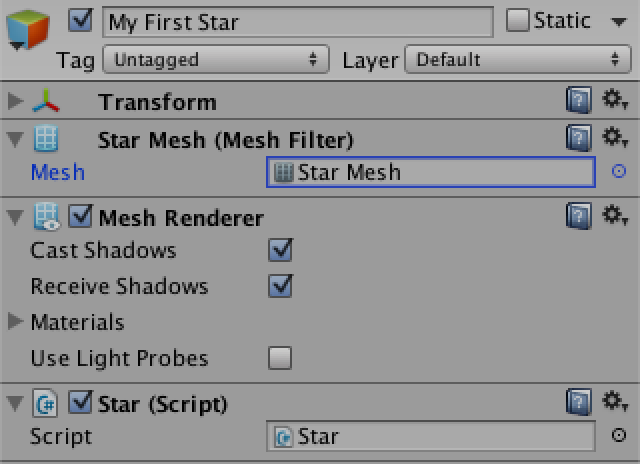
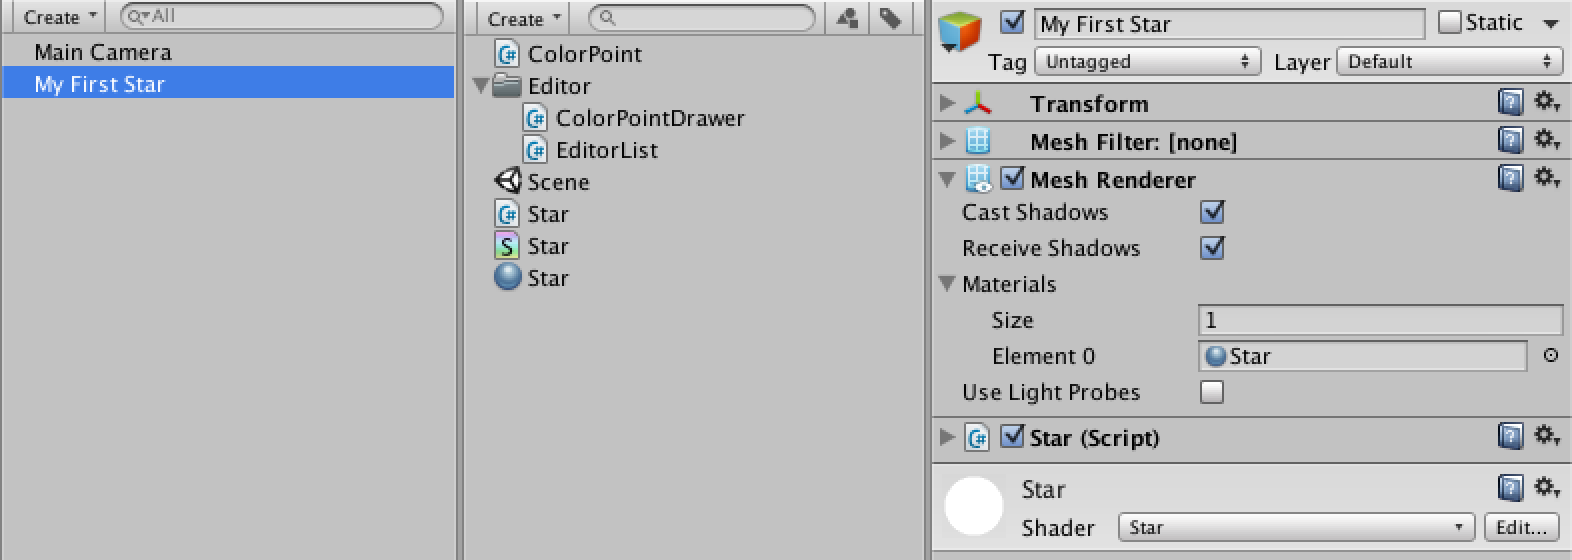
MeshFilter component, which in turn
is used by a MeshRenderer component. Only then will the mesh be drawn by Unity.
So it is required that both these components are attached to the game object that our star component
is also attached to.
Of course we can manually add these components, but we can also do this automatically by
adding a RequireComponent attribute to our component.
using UnityEngine;

[RequireComponent(typeof(MeshFilter), typeof(MeshRenderer))]
public class Star : MonoBehaviour {

	private Mesh mesh;

}
Start Unity event method for now, so it
happens as soon as we enter play mode. We also assign the mesh to the MeshFilter in one go
and give it a descriptive name.
	void Start () {
		GetComponent<MeshFilter>().mesh = mesh = new Mesh();
		mesh.name = "Star Mesh";
	}
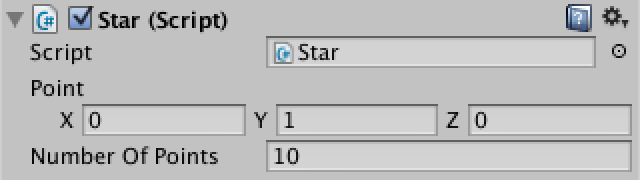
The first vertex of our triangle fan sits at the center of the star, with all other vertices placed around it clockwise. We'll use a quaternion to rotate the points. The rotation angle is negative because we assume that we're looking down the Z axis, which makes positive rotation around Z go counterclockwise. We don't need to set the first vertex because vectors are set to zero by default.
	public Vector3 point = Vector3.up;
	public int numberOfPoints = 10;

	private Mesh mesh;
	private Vector3[] vertices;

	void Start () {
		GetComponent<MeshFilter>().mesh = mesh = new Mesh();
		mesh.name = "Star Mesh";

		vertices = new Vector3[numberOfPoints + 1];
		float angle = -360f / numberOfPoints;
		for(int v = 1; v < vertices.Length; v++){
			vertices[v] = Quaternion.Euler(0f, 0f, angle * (v - 1)) * point;
		}

		mesh.vertices = vertices;
	}
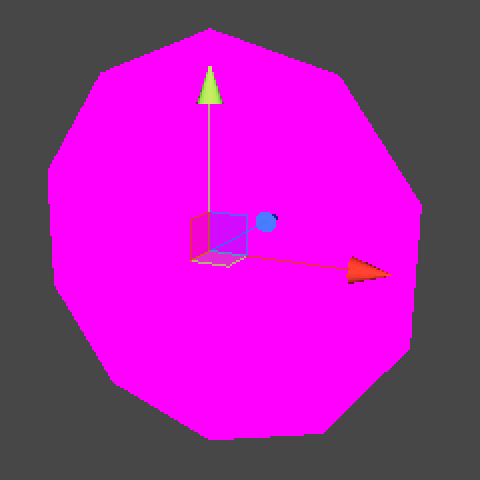
{0, 1, 2, 0, 2, 3, 0, 3, 4, 0, 4, 1}.
	private int[] triangles;

	void Start () {
		GetComponent<MeshFilter>().mesh = mesh = new Mesh();
		mesh.name = "Star Mesh";

		vertices = new Vector3[numberOfPoints + 1];
		triangles = new int[numberOfPoints * 3];
		float angle = -360f / numberOfPoints;
		for(int v = 1, t = 1; v < vertices.Length; v++, t += 3){
			vertices[v] = Quaternion.Euler(0f, 0f, angle * (v - 1)) * point;
			triangles[t] = v;
			triangles[t + 1] = v + 1;
		}
		triangles[triangles.Length - 1] = 1;

		mesh.vertices = vertices;
		mesh.triangles = triangles;
	}
Create a new shader asset and name it Star, then put the following code in it.
Shader "Star" {
	SubShader {
		Tags { "Queue"="Transparent" "IgnoreProjector"="True" "RenderType"="Transparent" }
		Blend SrcAlpha OneMinusSrcAlpha
		Cull Off
		Lighting Off
		ZWrite Off
		Pass {
			CGPROGRAM
				#pragma vertex vert
				#pragma fragment frag

				struct data {
					float4 vertex : POSITION;
					fixed4 color: COLOR;
				};

				data vert (data v) {
					v.vertex = mul(UNITY_MATRIX_MVP, v.vertex);
					return v;
				}

				fixed4 frag(data f) : COLOR {
					return f.color;
				}
			ENDCG
		}
	}
}
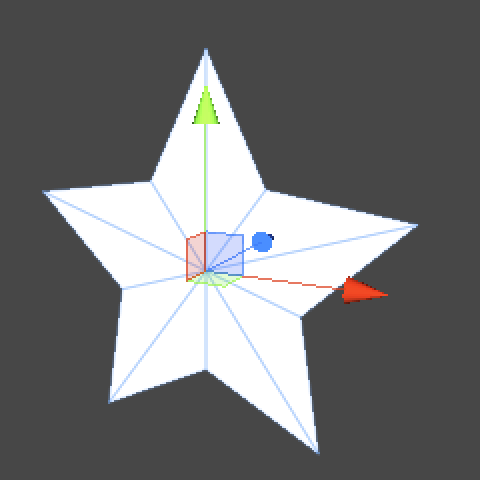
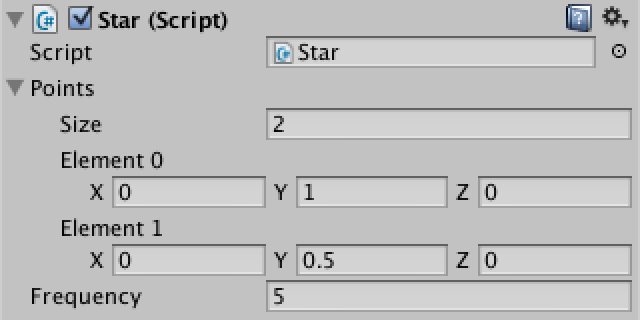
Let's also add a frequency option so we can automatically repeat point sequences instead of having
to configure every single point of the star. This option replaces numberOfPoints.
We also include a check to make sure that the frequency is at least 1, because anything less wouldn't make any sense. And finally it is only possible to construct a mesh when we have at leasts three points.
	public Vector3[] points;
	public int frequency = 1;

	void Start () {
		GetComponent<MeshFilter>().mesh = mesh = new Mesh();
		mesh.name = "Star Mesh";

		if (frequency < 1) {
			frequency = 1;
		}
		if (points == null) {
			points = new Vector3[0];
		}
		int numberOfPoints = frequency * points.Length;
		vertices = new Vector3[numberOfPoints + 1];
		triangles = new int[numberOfPoints * 3];

		if (numberOfPoints >= 3) {
			float angle = -360f / numberOfPoints;
			for(int repetitions = 0, v = 1, t = 1; repetitions < frequency; repetitions++){
				for(int p = 0; p < points.Length; p += 1, v += 1, t += 3){
					vertices[v] = Quaternion.Euler(0f, 0f, angle * (v - 1)) * points[p];
					triangles[t] = v;
					triangles[t + 1] = v + 1;
				}
			}
			triangles[triangles.Length - 1] = 1;
		}
		mesh.vertices = vertices;
		mesh.triangles = triangles;
	}
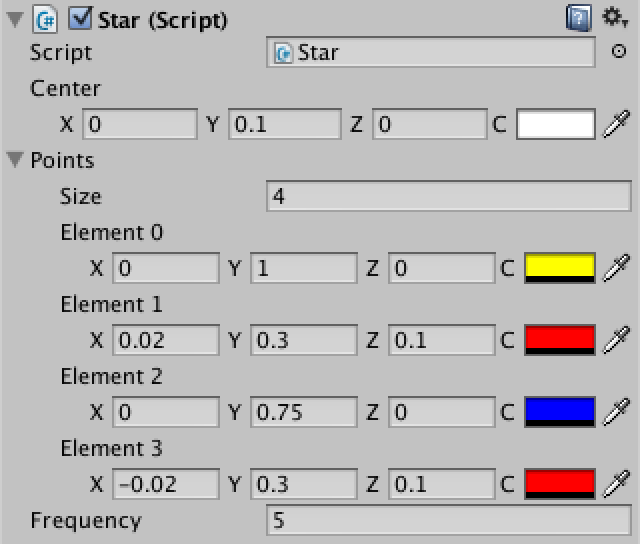
ColorPoint data
structure instead of just vectors for our points array. Let's also use a color point to define the
center of the star, so we could move it around as well.
	public ColorPoint center;
	public ColorPoint[] points;

	private Color[] colors;

	void Start () {
		GetComponent<MeshFilter>().mesh = mesh = new Mesh();
		mesh.name = "Star Mesh";

		if (frequency < 1) {
			frequency = 1;
		}
		if (points == null) {
			points = new ColorPoint[0];
		}
		int numberOfPoints = frequency * points.Length;
		vertices = new Vector3[numberOfPoints + 1];
		colors = new Color[numberOfPoints + 1];
		triangles = new int[numberOfPoints * 3];

		if (numberOfPoints >= 3) {
			vertices[0] = center.position;
			colors[0] = center.color;
			float angle = -360f / numberOfPoints;
			for(int repetitions = 0, v = 1, t = 1; repetitions < frequency; repetitions++){
				for(int p = 0; p < points.Length; p += 1, v += 1, t += 3){
					vertices[v] = Quaternion.Euler(0f, 0f, angle * (v - 1)) * points[p].position;
					colors[v] = points[p].color;
					triangles[t] = v;
					triangles[t + 1] = v + 1;
				}
			}
			triangles[triangles.Length - 1] = 1;
		}
		mesh.vertices = vertices;
		mesh.colors = colors;
		mesh.triangles = triangles;
	}

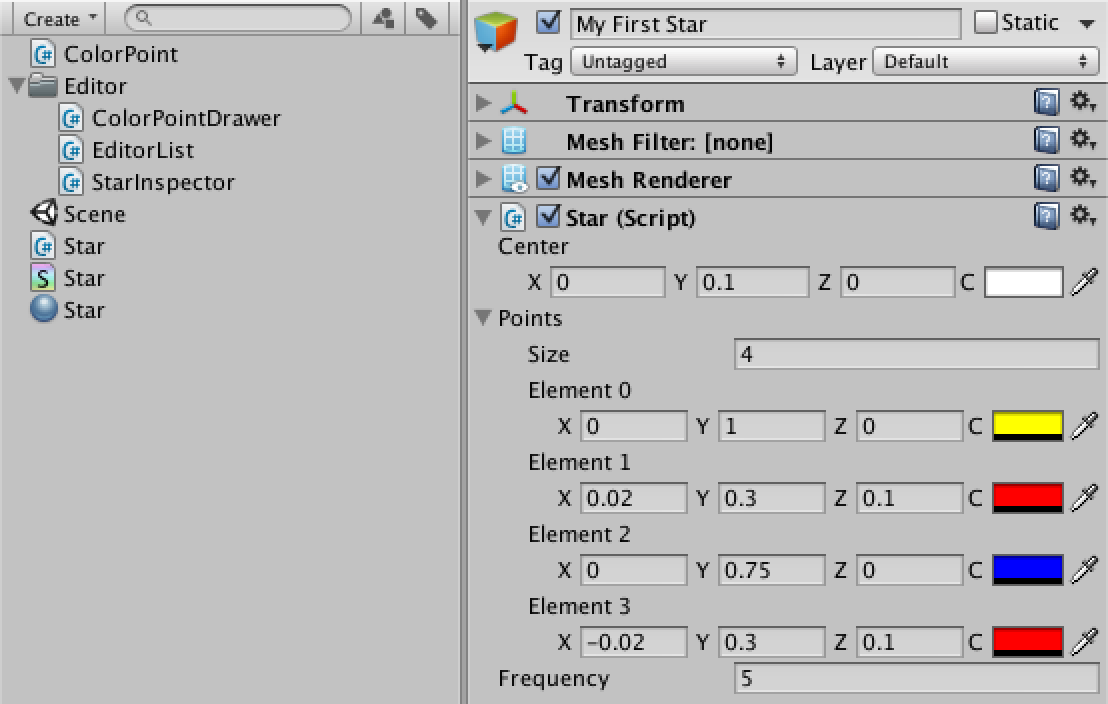
Improving the Inspector
ColorPoint it's looking decent, but we can improve it by
creating a custom editor.
Create a new C# script named StarInspector in the Editor folder. Make it a custom editor with a straightforward GUI method, just like we did in the Custom List tutorial.
using UnityEditor;
using UnityEngine;

[CustomEditor(typeof(Star)), CanEditMultipleObjects]
public class StarInspector : Editor {

	public override void OnInspectorGUI () {
		serializedObject.Update();
		EditorGUILayout.PropertyField(serializedObject.FindProperty("center"));
		EditorGUILayout.PropertyField(serializedObject.FindProperty("points"), true);
		EditorGUILayout.PropertyField(serializedObject.FindProperty("frequency"));
		serializedObject.ApplyModifiedProperties();
	}
}
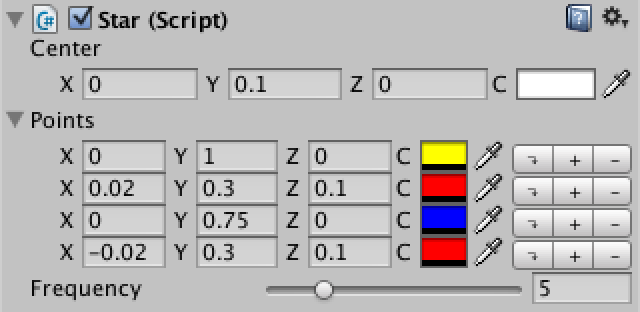
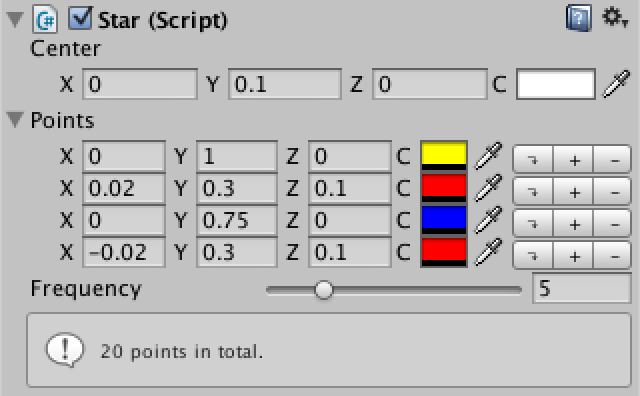
EditorList to display the points more compact and with
button. Let's also use an integer slider with a range of 1–20 for the frequency.
	public override void OnInspectorGUI () {
		serializedObject.Update();
		EditorGUILayout.PropertyField(serializedObject.FindProperty("center"));
		EditorList.Show(
			serializedObject.FindProperty("points"),
			EditorListOption.Buttons | EditorListOption.ListLabel);
		EditorGUILayout.IntSlider(serializedObject.FindProperty("frequency"), 1, 20);
		serializedObject.ApplyModifiedProperties();
	}
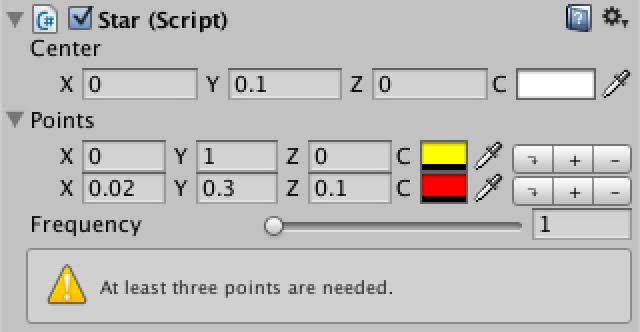
	public override void OnInspectorGUI () {
		SerializedProperty
			points = serializedObject.FindProperty("points"),
			frequency = serializedObject.FindProperty("frequency");
		serializedObject.Update();
		EditorGUILayout.PropertyField(serializedObject.FindProperty("center"));
		EditorList.Show(points, EditorListOption.Buttons | EditorListOption.ListLabel);
		EditorGUILayout.IntSlider(frequency, 1, 20);
		int totalPoints = frequency.intValue * points.arraySize;
		if (totalPoints < 3) {
			EditorGUILayout.HelpBox("At least three points are needed.", MessageType.Warning);
		}
		else {
			EditorGUILayout.HelpBox(totalPoints + " points in total.", MessageType.Info);
		}
		star.ApplyModifiedProperties();
	}
WYSIWYG
The first thing we need to do is tell Unity that our component should be active in edit mode. We indicate this
by adding the ExecuteInEditMode class attribute. From now on, our Start method
will be called whenever a star manifests in the editor.
Because we create a mesh in Start, it will be created in edit mode. As we assign it to a
MeshFilter, it will persist and be saved in the scene. We don't want this to happen, because
we generate the mesh dynamically. We can prevent Unity from saving the
mesh by settings the appropriate HideFlags.
using UnityEngine;

[ExecuteInEditMode, RequireComponent(typeof(MeshFilter), typeof(MeshRenderer))]
public class Star : MonoBehaviour {

	public ColorPoint center;
	public ColorPoint[] points;
	public int frequency = 1;

	private Mesh mesh;
	private Vector3[] vertices;
	private Color[] colors;
	private int[] triangles;

	void Start () {
		GetComponent<MeshFilter>().mesh = mesh = new Mesh();
		mesh.name = "Star Mesh";
		mesh.hideFlags = HideFlags.HideAndDontSave;

		if (frequency < 1) {
			frequency = 1;
		}
		if (points == null) {
			points = new ColorPoint[0];
		}
		int numberOfPoints = frequency * points.Length;
		vertices = new Vector3[numberOfPoints + 1];
		colors = new Color[numberOfPoints + 1];
		triangles = new int[numberOfPoints * 3];

		if (numberOfPoints >= 3) {
			vertices[0] = center.position;
			colors[0] = center.color;
			float angle = -360f / numberOfPoints;
			for(int repetitions = 0, v = 1, t = 1; repetitions < frequency; repetitions++){
				for(int p = 0; p < points.Length; p += 1, v += 1, t += 3){
					vertices[v] = Quaternion.Euler(0f, 0f, angle * (v - 1)) * points[p].position;
					colors[v] = points[p].color;
					triangles[t] = v;
					triangles[t + 1] = v + 1;
				}
			}
			triangles[triangles.Length - 1] = 1;
		}
		mesh.vertices = vertices;
		mesh.colors = colors;
		mesh.triangles = triangles;
	}
}
Start only gets called the first time the component is activated.
Let's move the code to its own public method so we can explicitly call it whenever we want to.
We'll also add a few checks that prevent recreation of the mesh and the arrays if that's not needed.
Finally, because we're reusing the mesh, we should clear it when the amount of vertices changes before assigning new data to it. Otherwise it will complain about a mismatch.
	void Start () {
		UpdateMesh();
	}

	public void UpdateMesh () {
		if (mesh == null) {
			GetComponent<MeshFilter>().mesh = mesh = new Mesh();
			mesh.name = "Star Mesh";
			mesh.hideFlags = HideFlags.HideAndDontSave;
		}

		if (frequency < 1) {
			frequency = 1;
		}
		if (points == null) {
			points = new ColorPoint[0];
		}
		int numberOfPoints = frequency * points.Length;
		if (vertices == null || vertices.Length != numberOfPoints + 1) {
			vertices = new Vector3[numberOfPoints + 1];
			colors = new Color[numberOfPoints + 1];
			triangles = new int[numberOfPoints * 3];
			mesh.Clear();
		}

		if (numberOfPoints >= 3) {
			vertices[0] = center.position;
			colors[0] = center.color;
			float angle = -360f / numberOfPoints;
			for(int repetitions = 0, v = 1, t = 1; repetitions < frequency; repetitions++){
				for(int p = 0; p < points.Length; p += 1, v += 1, t += 3){
					vertices[v] = Quaternion.Euler(0f, 0f, angle * (v - 1)) * points[p].position;
					colors[v] = points[p].color;
					triangles[t] = v;
					triangles[t + 1] = v + 1;
				}
			}
			triangles[triangles.Length - 1] = 1;
		}
		mesh.vertices = vertices;
		mesh.colors = colors;
		mesh.triangles = triangles;
	}
ApplyModifiedProperties method returns whether any modifications were
actually made. If so, we should call the UpdateStar method of the changed stars. The editor
contains a targets array with all the currently selected Star components, so we can
iterate through that.
	public override void OnInspectorGUI () {
		SerializedProperty
			points = serializedObject.FindProperty("points"),
			frequency = serializedObject.FindProperty("frequency");
		serializedObject.Update();
		EditorGUILayout.PropertyField(serializedObject.FindProperty("center"));
		EditorList.Show(points, EditorListOption.Buttons | EditorListOption.ListLabel);
		EditorGUILayout.IntSlider(frequency, 1, 20);
		int totalPoints = frequency.intValue * points.arraySize;
		if (totalPoints < 3) {
			EditorGUILayout.HelpBox("At least three points are needed.", MessageType.Warning);
		}
		else {
			EditorGUILayout.HelpBox(totalPoints + " points in total.", MessageType.Info);
		}
		if (serializedObject.ApplyModifiedProperties()) {
			foreach (Star s in targets) {
				s.UpdateMesh();
			}
		}
	}
Unfortunately, there's no easy universal guaranteed way to detect undo events in Unity, but we can get
pretty close. In our case, we can suffice by checking whether a ValidateCommand event happened that
refers to an undo action. As this event must relate to the currently selected object, we just assume it
was our component that got modified.
	public override void OnInspectorGUI () {
		SerializedProperty
			points = serializedObject.FindProperty("points"),
			frequency = serializedObject.FindProperty("frequency");
		serializedObject.Update();
		EditorGUILayout.PropertyField(serializedObject.FindProperty("center"));
		EditorList.Show(points, EditorListOption.Buttons | EditorListOption.ListLabel);
		EditorGUILayout.IntSlider(frequency, 1, 20);
		int totalPoints = frequency.intValue * points.arraySize;
		if (totalPoints < 3) {
			EditorGUILayout.HelpBox("At least three points are needed.", MessageType.Warning);
		}
		else {
			EditorGUILayout.HelpBox(totalPoints + " points in total.", MessageType.Info);
		}
		if (serializedObject.ApplyModifiedProperties() ||
			(Event.current.type == EventType.ValidateCommand &&
			Event.current.commandName == "UndoRedoPerformed")) {
			foreach (Star s in targets) {
				s.UpdateMesh();
			}
		}
	}
We can detect a component reset by adding a Reset method to Star component. This is a Unity event method that is only
used inside the editor. Whenever this event happens, all we need to do is update the mesh.
	void Reset () {
		UpdateMesh();
	}
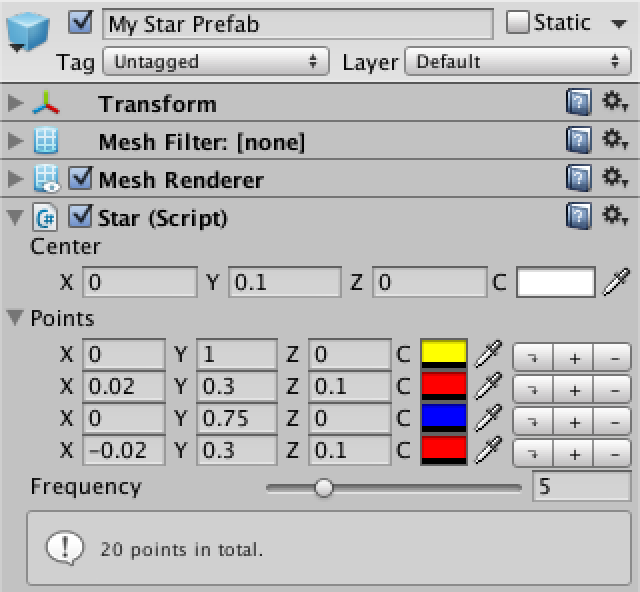
Granted, it doesn't make much sense to use prefabs for our star, because each star generates its own little mesh. If you wanted to use lots of similar stars, it would be a better idea to create a star model in a 3D editor and import the mesh. That way all the stars can share the same mesh. But suppose we do want to support using a prefab, just to instantiate similar stars that we might later tweak individually.
Because prefabs don't exist as instances in the scene, we do not want to create a mesh for them.
Their Unity event methods will never be called, but we would still update it ourselves in our editor.
We can use the PrefabUtility.GetPrefabType method to detect whether our inspector
target is a prefab. If so, we won't update it.
	public override void OnInspectorGUI () {
		SerializedProperty
			points = serializedObject.FindProperty("points"),
			frequency = serializedObject.FindProperty("frequency");
		serializedObject.Update();
		EditorGUILayout.PropertyField(serializedObject.FindProperty("center"));
		EditorList.Show(points, EditorListOption.Buttons | EditorListOption.ListLabel);
		EditorGUILayout.IntSlider(frequency, 1, 20);
		int totalPoints = frequency.intValue * points.arraySize;
		if (totalPoints < 3) {
			EditorGUILayout.HelpBox("At least three points are needed.", MessageType.Warning);
		}
		else {
			EditorGUILayout.HelpBox(totalPoints + " points in total.", MessageType.Info);
		}
		if (serializedObject.ApplyModifiedProperties() ||
			(Event.current.type == EventType.ValidateCommand &&
			Event.current.commandName == "UndoRedoPerformed")) {
			foreach (Star s in targets) {
				if (PrefabUtility.GetPrefabType(s) != PrefabType.Prefab) {
					s.UpdateMesh();
				}
			}
		}
	}
Unfortunately, modifications to the prefab do not cause an update of the mesh of the prefab instance.
It turns out that every prebab modification triggers the OnDisable and OnEnable Unity event methods
of all their instances. We can use this to update our mesh.
And because OnEnable is also always called when an object becomes active, we can simply
replace our Start method with OnEnable. Now changes to the prefab will get picked up by their instances.
	void OnEnable () {
		UpdateMesh();
	}
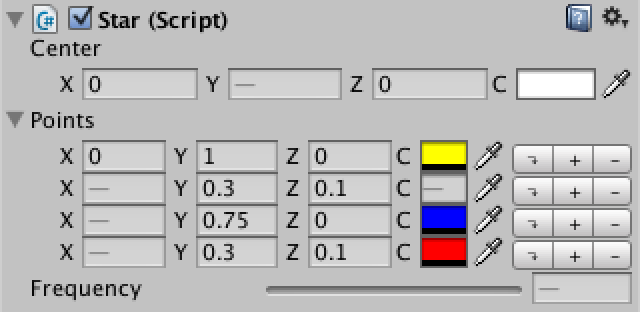
	public override void OnInspectorGUI () {
		SerializedProperty
			points = serializedObject.FindProperty("points"),
			frequency = serializedObject.FindProperty("frequency");
		serializedObject.Update();
		EditorGUILayout.PropertyField(serializedObject.FindProperty("center"));
		EditorList.Show(points, EditorListOption.Buttons | EditorListOption.ListLabel);
		EditorGUILayout.IntSlider(frequency, 1, 20);
		if (!serializedObject.isEditingMultipleObjects) {
			int totalPoints = frequency.intValue * points.arraySize;
			if (totalPoints < 3) {
				EditorGUILayout.HelpBox("At least three points are needed.", MessageType.Warning);
			}
			else {
				EditorGUILayout.HelpBox(totalPoints + " points in total.", MessageType.Info);
			}
		}
		if (serializedObject.ApplyModifiedProperties() ||
			(Event.current.type == EventType.ValidateCommand &&
			Event.current.commandName == "UndoRedoPerformed")) {
			foreach (Star s in targets) {
				if (PrefabUtility.GetPrefabType(s) != PrefabType.Prefab) {
					s.UpdateMesh();
				}
			}
		}
	}
Editing in the Scene View
OnSceneGUI Unity event method to our inspector, we can.
This method will be called once per selected object, during which that object will be assigned to the target
variable. We shouldn't use our SerializedObject here. In fact, it's best to think of this
method as being completely separate from the rest of our editor.
	void OnSceneGUI () {
	}
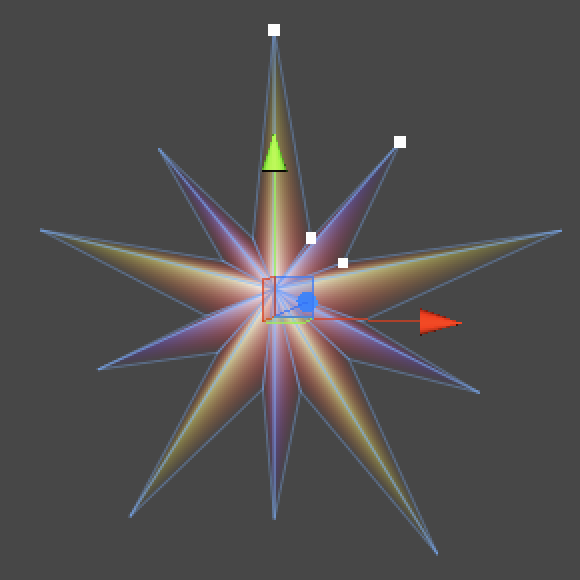
We'll use the Handles.FreeMoveHandle method to draw our handles, which has a couple of parameters.
First, it needs the position – in world space – for the handle. Then it needs the rotation of
the handle, which we'll just leave unrotated. Next it wants the size of the handle, we'll use a small value
here that looks good. Then comes a vector used for the snapping size (hold Control or Command to snap), which we configure as (0.1, 0.1 0.1). The last
parameter is used to define the shape of the handle.
	private static Vector3 pointSnap = Vector3.one * 0.1f;

	void OnSceneGUI () {
		Star star = target as Star;
		Transform starTransform = star.transform;

		float angle = -360f / (star.frequency * star.points.Length);
		for (int i = 0; i < star.points.Length; i++) {
			Quaternion rotation = Quaternion.Euler(0f, 0f, angle * i);
			Vector3 oldPoint = starTransform.TransformPoint(rotation * star.points[i].position);
			Handles.FreeMoveHandle(oldPoint, Quaternion.identity, 0.02f, pointSnap, Handles.DotCap);
		}
	}
	void OnSceneGUI () {
		Star star = target as Star;
		Transform starTransform = star.transform;

		float angle = -360f / (star.frequency * star.points.Length);
		for (int i = 0; i < star.points.Length; i++) {
			Quaternion rotation = Quaternion.Euler(0f, 0f, angle * i);
			Vector3
				oldPoint = starTransform.TransformPoint(rotation * star.points[i].position),
				newPoint = Handles.FreeMoveHandle(
					oldPoint, Quaternion.identity, 0.02f, pointSnap, Handles.DotCap);
			if (oldPoint != newPoint) {
				star.points[i].position = Quaternion.Inverse(rotation) *
					starTransform.InverseTransformPoint(newPoint);
				star.UpdateMesh();
			}
		}
	}
SerializedObject here, but
fortunately the handles can take care of the undo stuff for us. All we need to do is tell them which
object is being edited and how the undo step should be named. We can do that with the
Undo.RecordObject method.
	void OnSceneGUI () {
		Star star = target as Star;
		Transform starTransform = star.transform;

		float angle = -360f / (star.frequency * star.points.Length);
		for (int i = 0; i < star.points.Length; i++) {
			Quaternion rotation = Quaternion.Euler(0f, 0f, angle * i);
			Vector3
				oldPoint = starTransform.TransformPoint(rotation * star.points[i].position),
				newPoint = Handles.FreeMoveHandle(
					oldPoint, Quaternion.identity, 0.02f, pointSnap, Handles.DotCap);
			if (oldPoint != newPoint) {
				Undo.RecordObject(star, "Move");
				star.points[i].position = Quaternion.Inverse(rotation) *
					starTransform.InverseTransformPoint(newPoint);
				star.UpdateMesh();
			}
		}
	}
Downloads
- star.unitypackage
- The finished project.