Hex Map 15
Distances
- Show grid lines.
- Toggle between edit and navigation mode.
- Calculate distances between cells.
- Find a way around obstacles.
- Deal with varying movement costs.
This is part 15 of a tutorial series about hexagon maps. Now that we can create decent maps, we're going to look at navigation.
Showing the Grid
Navigating our maps is done by traveling from cell to cell. You'll have to move through a sequence of cells to go anywhere. To make it easier to judge distances, let's add the option to show the hexagonal grid that our maps are based on.
Grid Texture
Despite the irregularities of our map mesh, the underlying grid is perfectly regular. We can visualize it by projecting a grid pattern onto the map. We can do that with a tiling grid texture.
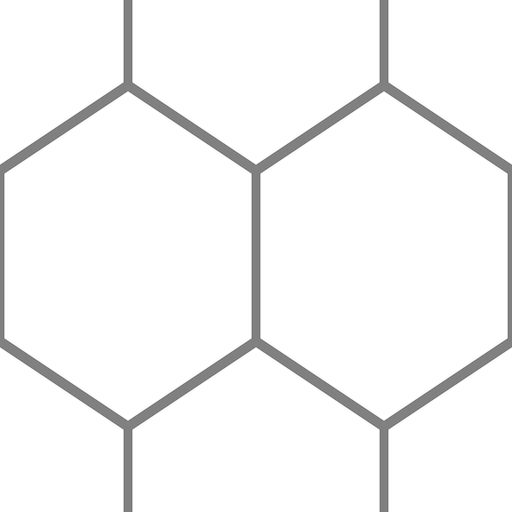
The above texture contains a small portion of an hexagonal grid. It covers 2 by 2 cells. This area is rectangular, but not a square. Because the texture itself is a square, the pattern appears stretched. We'll have to compensate for this when sampling it.
Projecting the Grid
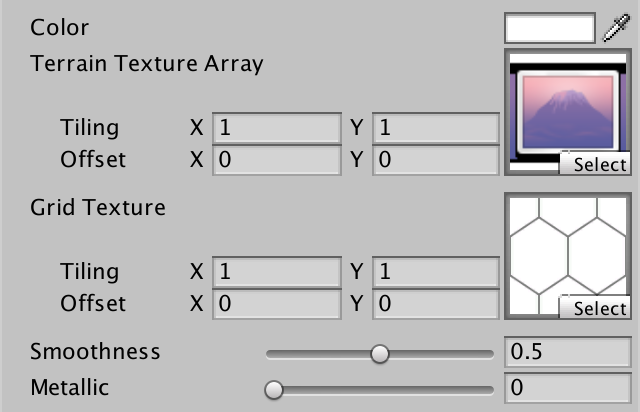
To project the grid pattern, we have to add a texture property to our Terrain shader.
	Properties {
		_Color ("Color", Color) = (1,1,1,1)
		_MainTex ("Terrain Texture Array", 2DArray) = "white" {}
		_GridTex ("Grid Texture", 2D) = "white" {}
		_Glossiness ("Smoothness", Range(0,1)) = 0.5
		_Metallic ("Metallic", Range(0,1)) = 0.0
	}
Sample the texture using the world XZ coordinates, then multiply it with the albedo. As the grid lines of the texture are gray, this will burn the pattern into the terrain.
		sampler2D _GridTex;

		…

		void surf (Input IN, inout SurfaceOutputStandard o) {
			fixed4 c =
				GetTerrainColor(IN, 0) +
				GetTerrainColor(IN, 1) +
				GetTerrainColor(IN, 2);

			fixed4 grid = tex2D(_GridTex, IN.worldPos.xz);

			o.Albedo = c.rgb * grid * _Color;
			o.Metallic = _Metallic;
			o.Smoothness = _Glossiness;
			o.Alpha = c.a;
		}
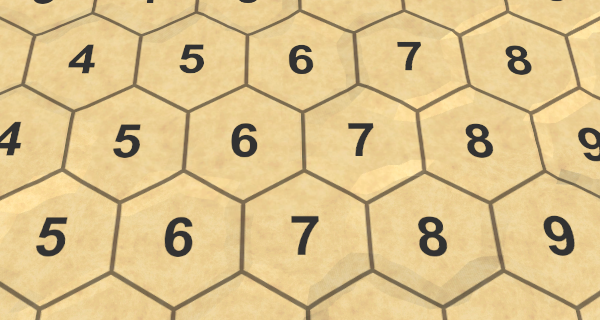
We have to scale the pattern so it fits the cells of our map. The forward distance between adjacent cell centers is 15, twice that to move two cells straight up. So we have to divide our grid's V coordinates by 30. And the inner radius of our cells is 5√3, so four times that is needed to move two cells to the right. Thus we have to divide the grid's U coordinates by 20√3.
			float2 gridUV = IN.worldPos.xz;
			gridUV.x *= 1 / (4 * 8.66025404);
			gridUV.y *= 1 / (2 * 15.0);
			fixed4 grid = tex2D(_GridTex, gridUV);
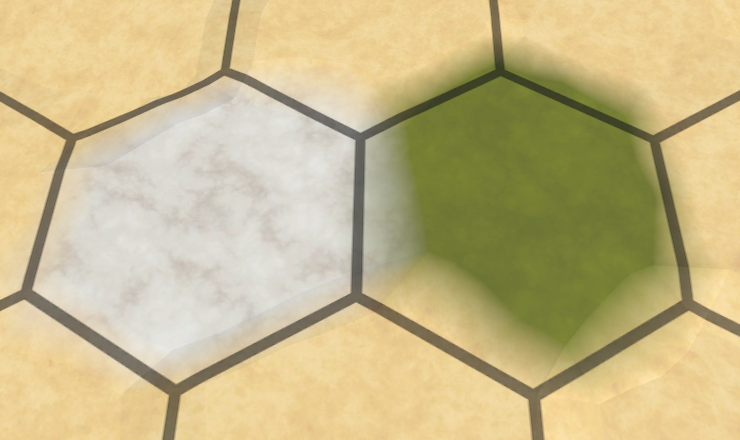
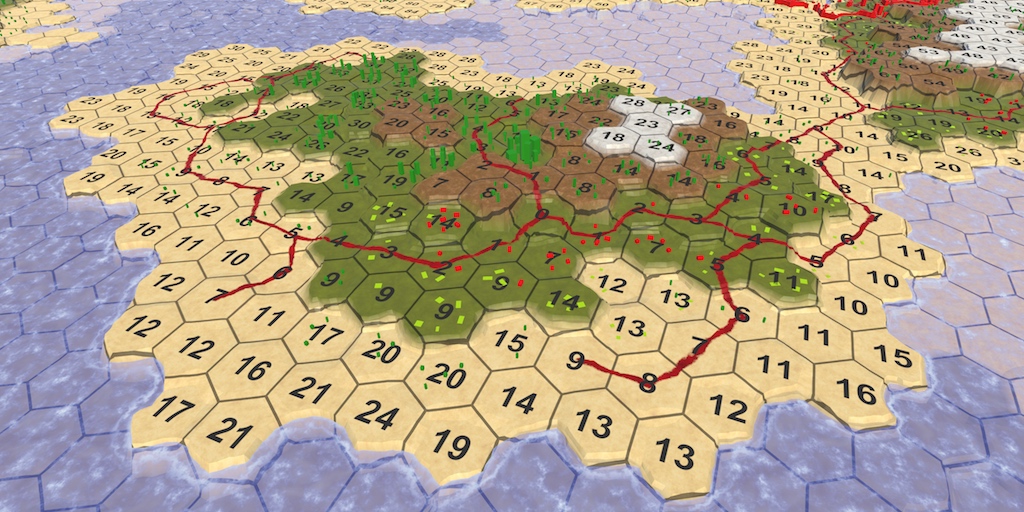
The grid lines now match the map cells. Just like the terrain textures, they ignore elevation. So the lines can get stretched along cliffs.
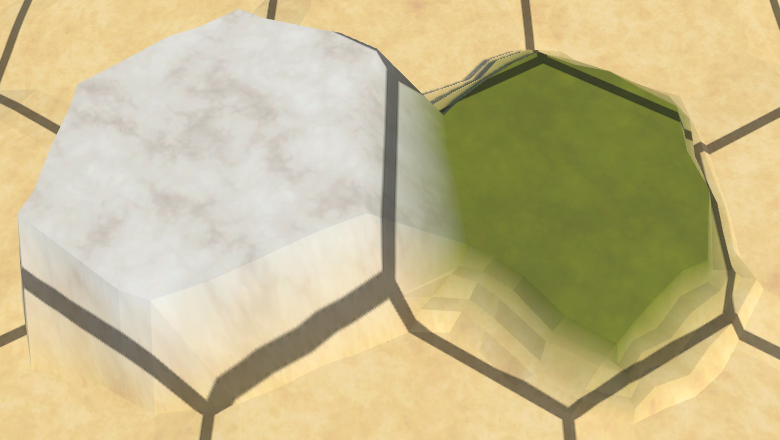
The grid deformation is usually not that bad, especially when looking a the map from a distance.
Toggling the Grid
While seeing the grid is handy, you might not always want it visible. For example, when taking a screenshot. Also, not everyone prefers to see the grid all the time. So let's make it optional. We're going to add a multi-compile directive to our shader to create a variant with and without the grid. We'll use the GRID_ON keyword to control this. Conditional shader compilation is explained in the Rendering 5, Multiple Lights tutorial.
		#pragma surface surf Standard fullforwardshadows vertex:vert
		#pragma target 3.5

		#pragma multi_compile _ GRID_ON
When declaring the grid variable, first set it to 1. That will result in no grid. Then only sample the grid texture for the variant that has the GRID_ON keyword defined.
			fixed4 grid = 1;
			#if defined(GRID_ON)
				float2 gridUV = IN.worldPos.xz;
				gridUV.x *= 1 / (4 * 8.66025404);
				gridUV.y *= 1 / (2 * 15.0);
				grid = tex2D(_GridTex, gridUV);
			#endif

			o.Albedo = c.rgb * grid * _Color;
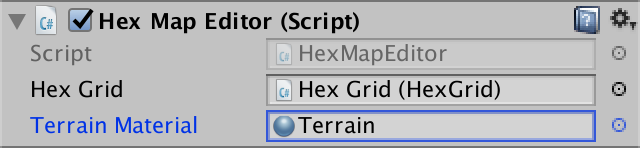
As the GRID_ON keyword is not enabled for our terrain shader, the grid will have disappeared. To enable it again, we'll add a toggle to our map editor UI. To make this possible, HexMapEditor must get a reference to our Terrain material, and a method to either enable or disable the GRID_ON keyword.
	public Material terrainMaterial;

	…

	public void ShowGrid (bool visible) {
		if (visible) {
			terrainMaterial.EnableKeyword("GRID_ON");
		}
		else {
			terrainMaterial.DisableKeyword("GRID_ON");
		}
	}
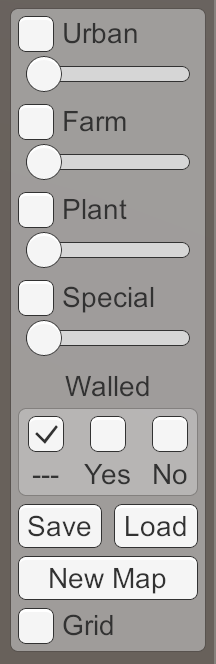
Add a Grid toggle to the UI and connect it with the ShowGrid method.
Staying Consistent
We can now toggle the grid while in play mode. The first time we try this, the grid starts out disable and will become visible once we enable the toggle. Disabling the toggle will make the grid disappear again. However, if we exit play mode while the grid is visible, it will still be visible the next time we enter play mode, even though the toggle is disabled.
This happens because we're adjusting the keyword of the shared Terrain material. We're editing the material asset, so the change persist in the Unity editor. It would not persist in a build.
To make sure that we always begin without the grid, disable the GRID_ON keyword when HexMapEditor awakens.
	void Awake () {
		terrainMaterial.DisableKeyword("GRID_ON");
	}
Edit Mode
If we want to control movement across our map, we have to interact with it. At minimum, we have to select a cell to serve as the starting point of our journey. But clicking a cell will edit it. We could disable all editing options manually, but that's inconvenient. Also, we don't want to trigger movement calculations when editing the map. So let's add a toggle to control whether we're in edit mode or not.
Edit Toggle
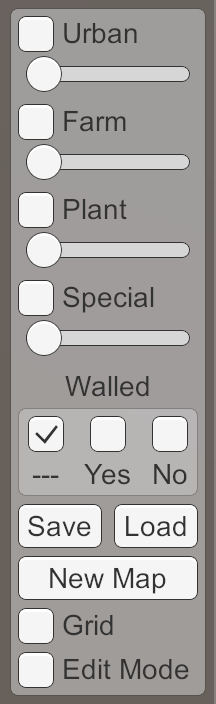
Add a boolean editMode field to HexMapEditor along with a method to set it. Then add another toggle to the UI to control it. Let's start in navigation mode, so edit mode is disabled by default.
	bool editMode;

	…

	public void SetEditMode (bool toggle) {
		editMode = toggle;
	}
To actually disable editing, make the invocation of EditCells dependent on editMode.
	void HandleInput () {
		Ray inputRay = Camera.main.ScreenPointToRay(Input.mousePosition);
		RaycastHit hit;
		if (Physics.Raycast(inputRay, out hit)) {
			HexCell currentCell = hexGrid.GetCell(hit.point);
			if (previousCell && previousCell != currentCell) {
				ValidateDrag(currentCell);
			}
			else {
				isDrag = false;
			}
			if (editMode) {
				EditCells(currentCell);
			}
			previousCell = currentCell;
		}
		else {
			previousCell = null;
		}
	}
Debug Labels
We currently don't have units to move across the map. Instead, we'll visualize movement distances. We can use the already existing cell labels for that. So make them visible when we're not in edit mode.
	public void SetEditMode (bool toggle) {
		editMode = toggle;
		hexGrid.ShowUI(!toggle);
	}
As we start in navigation mode, the labels should be visible by default. Currently, HexGridChunk.Awake disables the them, which it should no longer do.
	void Awake () {
		gridCanvas = GetComponentInChildren<Canvas>();

		cells = new HexCell[HexMetrics.chunkSizeX * HexMetrics.chunkSizeZ];
//		ShowUI(false);
	}
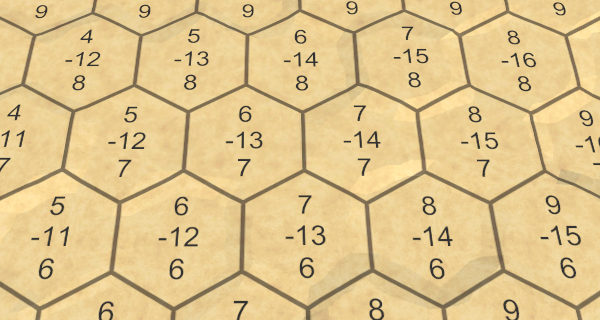
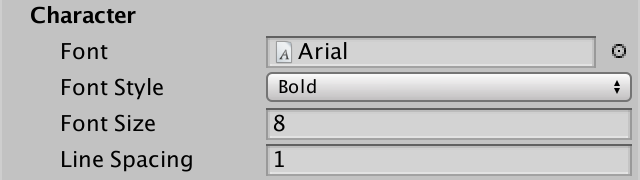
The cell coordinates are now visible directly after entering play mode. But we're not interested in seeing the coordinates. We'll use the labels to display distances. As that's just one number per cell, we can increase the font size to make them easier to read. Adjust the Hex Cell Label prefab so it uses a bold font at size 8.
We'll now see big labels after entering play mode. Only the first coordinate per cell ends up visible, the others no longer fit.
As we don't need the coordinates anymore, remove the assignment to label.text in HexGrid.CreateCell.
	void CreateCell (int x, int z, int i) {
		…

		Text label = Instantiate<Text>(cellLabelPrefab);
		label.rectTransform.anchoredPosition =
			new Vector2(position.x, position.z);
//		label.text = cell.coordinates.ToStringOnSeparateLines();
		cell.uiRect = label.rectTransform;

		…
	}
You can also remove the Labels toggle from the UI, and its accompanying HexMapEditor.ShowUI method.
// public void ShowUI (bool visible) {// hexGrid.ShowUI(visible);// }

Finding Distances
Now that we have a navigation mode with labels, we can start showing distances. What we'll do is select a cell, then display the distance to this cell for all the cells on the map.
Showing Distances
To keep track of a cell's distance, add a integer distance field to HexCell. This represents the distance between that cell and the selected cell. So it will be zero for the selected cell itself, 1 for its direct neighbors, and so on.
int distance;
When the distance is set, we should update the cell's label to show its value. HexCell has a reference to the RectTransform of its UI object. We'll have to invoke GetComponent<Text> on it to get to the label. Note that Text is in the UnityEngine.UI namespace, so use that at the top of the script.
	void UpdateDistanceLabel () {
		Text label = uiRect.GetComponent<Text>();
		label.text = distance.ToString();
	}
Make a public property to get and set the cell's distance and also update its label.
	public int Distance {
		get {
			return distance;
		}
		set {
			distance = value;
			UpdateDistanceLabel();
		}
	}
Add a public FindDistancesTo method to HexGrid with a cell parameter. For now, just set the distance of every cell to zero.
	public void FindDistancesTo (HexCell cell) {
		for (int i = 0; i < cells.Length; i++) {
			cells[i].Distance = 0;
		}
	}
In HexMapEditor.HandleInput, invoke the new method with the current cell, if it's not in edit mode.
			if (editMode) {
				EditCells(currentCell);
			}
			else {
				hexGrid.FindDistancesTo(currentCell);
			}
Distances Between Coordinates
Now all cells will show the number zero when when we touch one, while in navigation mode. But of course they should show their actual distance to the touched cell. We can use the cell coordinates to compute their distance. So let's assume HexCoordinates has a DistanceTo method, and use it in HexGrid.FindDistancesTo.
	public void FindDistancesTo (HexCell cell) {
		for (int i = 0; i < cells.Length; i++) {
			cells[i].Distance =
				cell.coordinates.DistanceTo(cells[i].coordinates);
		}
	}
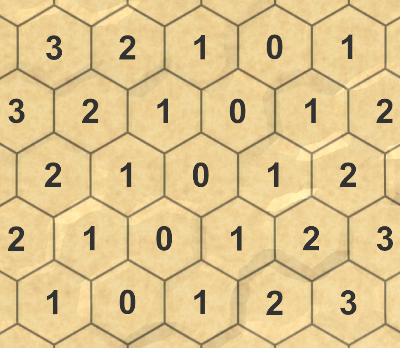
Now add the DistanceTo method to HexCoordinates. It has to compare its own coordinates with that of another set. Let's start with only considering the X dimension, by subtracting the X coordinates from each other.
	public int DistanceTo (HexCoordinates other) {
		return x - other.x;
	}
This will result in an offset along X, relative to the selected cell. But distances cannot be negative, so we have to return the absolute difference between the X coordinates.
return x < other.x ? other.x - x : x - other.x;
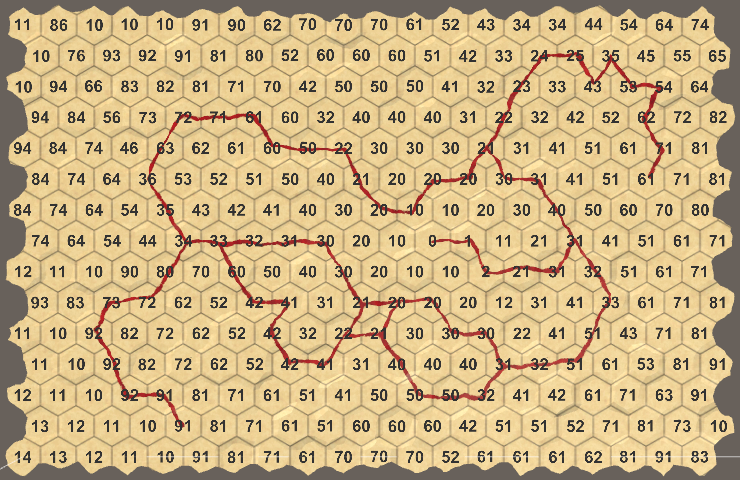
This gives us the correct distances, if we only take one dimension into consideration. But our hex grid has three dimensions. So let's add up the distances in all three dimensions, and see what we get.
		return
			(x < other.x ? other.x - x : x - other.x) +
			(Y < other.Y ? other.Y - Y : Y - other.Y) +
			(z < other.z ? other.z - z : z - other.z);
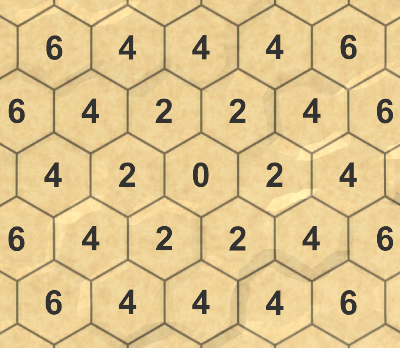
It turns out that we get double the actual distance. So to get the final distance we have to halve the sum.
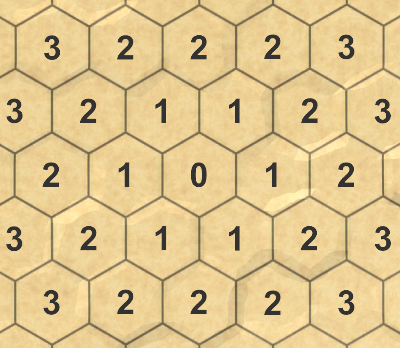
		return
			((x < other.x ? other.x - x : x - other.x) +
			(Y < other.Y ? other.Y - Y : Y - other.Y) +
			(z < other.z ? other.z - z : z - other.z)) / 2;
Dealing with Obstacles
The distances that we compute match the lengths of the shortest paths from the selected cell to every other cell. You cannot find a path with a shorter length. But these paths are only guaranteed to be valid if there's nothing that blocks travel. Cliffs, water, and other obstacles might force us to make a detour. Some cells might not be reachable at all.
To be able to find our way around obstacles, we have to use a different approach than simply computing the distance between coordinates. We can no longer evaluate each cell in isolation. Instead, we have to search our map until we have found every cell that can be reached.
Visualizing the Search
Searching through the map is an iterative process. To understand what we're doing, it's useful to be able to see each step of the search. We can do so by turning our search algorithm into a coroutine, which requires us to use the System.Collections namespace. An update frequency of 60 iterations per second is slow enough that we can see what's happening, without taking too long on a small map.
	public void FindDistancesTo (HexCell cell) {
		StartCoroutine(Search(cell));
	}

	IEnumerator Search (HexCell cell) {
		WaitForSeconds delay = new WaitForSeconds(1 / 60f);
		for (int i = 0; i < cells.Length; i++) {
			yield return delay;
			cells[i].Distance =
				cell.coordinates.DistanceTo(cells[i].coordinates);
		}
	}
We should ensure that only a single search is active at any time. So stop all coroutines before starting a new search.
	public void FindDistancesTo (HexCell cell) {
		StopAllCoroutines();
		StartCoroutine(Search(cell));
	}
Also, we should stop searching when another map is loaded.
	public void Load (BinaryReader reader, int header) {
		StopAllCoroutines();
		…
	}
Breadth-First Search
Before we even begin searching, we know that the distance to the selected cell is zero. And of course the distance of all its neighbors is 1, as long as they can be reached. We can then look at one of these neighbors. This cell likely has neighbors of its own that are reachable and don't have a distance yet. If so, the distance of these neighbors must be 2. We can repeat this for all neighbors at distance 1. After that, we repeat it for all neighbors at distance 2. And so on, until we have reached all cells.
So we first find all the cells at distance 1, then we find all those at distance 2, then those at distance 3, until finished. This guarantees that we find the smallest distance to every reachable cell. This algorithm is known as breadth-first search.
For this to work, we have to know whether we've already determined the distance of a cell. Often, this is done by putting them in a collection known as the finished or closed set. But we can set the cell's distance to int.MaxValue to indicate that we haven't visited it yet. We have to do this for all cells, right before searching.
	IEnumerator Search (HexCell cell) {
		for (int i = 0; i < cells.Length; i++) {
			cells[i].Distance = int.MaxValue;
		}

		…
	}
We can also use this to hide the labels of unvisited cells, by adjusting HexCell.UpdateDistanceLabel. That way, we start each search with a clean map.
	void UpdateDistanceLabel () {
		Text label = uiRect.GetComponent<Text>();
		label.text = distance == int.MaxValue ? "" : distance.ToString();
	}
Next, we have to keep track of which cells we have to visit, and in what order. This collection is often known as the frontier or the open set. We simply have to process cells in the same order that we encountered them. We can use a Queue for that, which is part of the System.Collections.Generic namespace. The selected cell is the first to be put in this queue, at distance zero.
	IEnumerator Search (HexCell cell) {
		for (int i = 0; i < cells.Length; i++) {
			cells[i].Distance = int.MaxValue;
		}

		WaitForSeconds delay = new WaitForSeconds(1 / 60f);
		Queue<HexCell> frontier = new Queue<HexCell>();
		cell.Distance = 0;
		frontier.Enqueue(cell);
//		for (int i = 0; i < cells.Length; i++) {
//			yield return delay;
//			cells[i].Distance =
//				cell.coordinates.DistanceTo(cells[i].coordinates);
//		}
	}
From this point, the algorithm loops as long as there is something in the queue. Each iteration, the front-most cell is taken out of the queue.
		frontier.Enqueue(cell);
		while (frontier.Count > 0) {
			yield return delay;
			HexCell current = frontier.Dequeue();
		}
We now have a current cell, which could be at any distance. Next, we add all its neighbors to the queue, one step further away from the selected cell.
		while (frontier.Count > 0) {
			yield return delay;
			HexCell current = frontier.Dequeue();
			for (HexDirection d = HexDirection.NE; d <= HexDirection.NW; d++) {
				HexCell neighbor = current.GetNeighbor(d);
				if (neighbor != null) {
					neighbor.Distance = current.Distance + 1;
					frontier.Enqueue(neighbor);
				}
			}
		}
But we should only add cells that we haven't given a distance yet.
				if (neighbor != null && neighbor.Distance == int.MaxValue) {
					neighbor.Distance = current.Distance + 1;
					frontier.Enqueue(neighbor);
				}
Avoiding Water
After verifying that breath-first search finds the correct distances on a featureless map, we can begin adding obstacles. We'll do this by refusing to add cells to the queue when various conditions are met.
We're actually already skipping some cells. Those that don't exist, and those that we already gave a distance. Let's rewrite our code so we explicitly skip the neighbor in those cases.
			for (HexDirection d = HexDirection.NE; d <= HexDirection.NW; d++) {
				HexCell neighbor = current.GetNeighbor(d);
				if (neighbor == null || neighbor.Distance != int.MaxValue) {
					continue;
				}
				neighbor.Distance = current.Distance + 1;
				frontier.Enqueue(neighbor);
			}
Let's also skip all cells that are underwater. This means that we're only considering land travel when finding the shortest distances.
				if (neighbor == null || neighbor.Distance != int.MaxValue) {
					continue;
				}
				if (neighbor.IsUnderwater) {
					continue;
				}
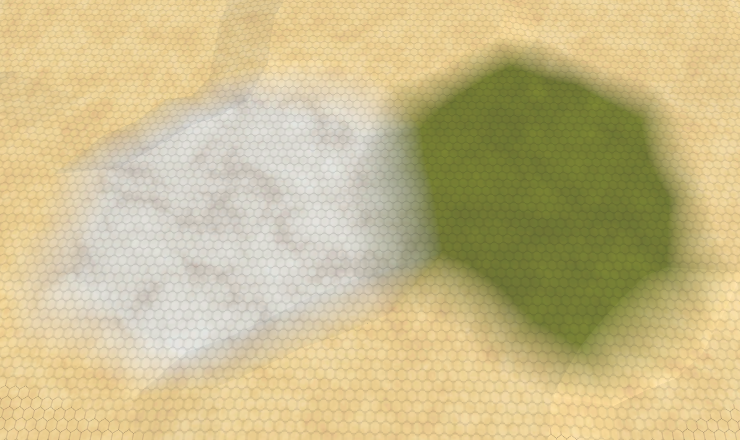
The algorithm still finds the shortest distances, but now avoids all water. As a result, underwater cells never get a distance, and neither do disconnected landmasses. The only time that an underwater cell gets a distance is when it is the selected cell.
Avoiding Cliffs
We can also use the edge type to determine whether we can visit a neighbor. For example, we can let cliffs block travel. By still allowing travel along slopes, cells on opposite sides of a cliff could both be reachable, but via different paths. So they can end up with very different distances.
				if (neighbor.IsUnderwater) {
					continue;
				}
				if (current.GetEdgeType(neighbor) == HexEdgeType.Cliff) {
					continue;
				}
Movement Costs
We can avoid cells and edges, but these choices are binary. Another possibility is that it's easier to travel in some directions than in others. In this case, distance is measured in effort or time requirement.
Fast Roads
It makes sense that it is easy and fast to travel via roads, so let's make edges with roads cheaper to cross. As we're using integers to express movement distance, we'll leave roads at 1 and increase the cost for crossing other edges to 10. That's a big difference, which it makes it easy to see whether we get correct results.
				int distance = current.Distance;
				if (current.HasRoadThroughEdge(d)) {
					distance += 1;
				}
				else {
					distance += 10;
				}
				neighbor.Distance = distance;
Sorting the Frontier
Unfortunately, it turns out that breath-first search cannot cope with varying movement costs. It assumes that cells are added to the frontier in order of ascending distance, which is no longer true. What we need is a priority queue, which is a queue that sorts itself. There is no standard priority queue available, because there is no universal best way to program one.
We could create our own priority queue, but we'll leave that optimization for a later tutorial. Right now, we can simply replace the queue with a list, which has a Sort method.
		List<HexCell> frontier = new List<HexCell>();
		cell.Distance = 0;
		frontier.Add(cell);
		while (frontier.Count > 0) {
			yield return delay;
			HexCell current = frontier[0];
			frontier.RemoveAt(0);
			for (HexDirection d = HexDirection.NE; d <= HexDirection.NW; d++) {
				…
				neighbor.Distance = distance;
				frontier.Add(neighbor);
			}
		}
To keep the frontier valid, we have to sort it after adding a cell to it. Technically, we could delay sorting until all the neighbors of a cell have been added, but again don't worry about optimizations at this point.
We want to sort the cells by their distance. To do so, we have to invoke the list's sort method with a reference to a method that performs this comparison.
				frontier.Add(neighbor);
				frontier.Sort((x, y) => x.Distance.CompareTo(y.Distance));

Updating the Frontier
We get better results now that the frontier is sorted, but there are still mistakes. That's because when a cell is added to the frontier, it's not guaranteed that we've found the shortest distance to this cell. This means that we can no longer skip neighbors that already have a distance. Instead, we have to check whether we found a shorter path. If so, we have to adjust the neighbor's distance instead of adding it to the frontier.
				HexCell neighbor = current.GetNeighbor(d);
				if (neighbor == null) {
					continue;
				}
				if (neighbor.IsUnderwater) {
					continue;
				}
				if (current.GetEdgeType(neighbor) == HexEdgeType.Cliff) {
					continue;
				}
				int distance = current.Distance;
				if (current.HasRoadThroughEdge(d)) {
					distance += 1;
				}
				else {
					distance += 10;
				}
				if (neighbor.Distance == int.MaxValue) {
					neighbor.Distance = distance;
					frontier.Add(neighbor);
				}
				else if (distance < neighbor.Distance) {
					neighbor.Distance = distance;
				}
				frontier.Sort((x, y) => x.Distance.CompareTo(y.Distance));
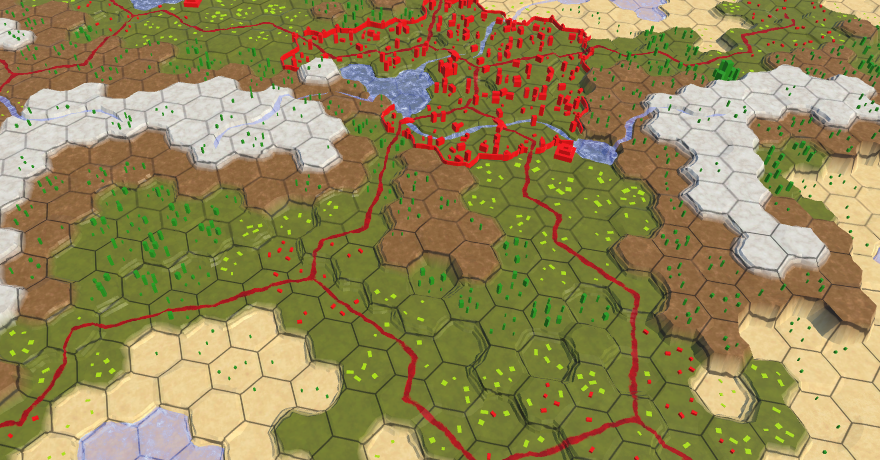
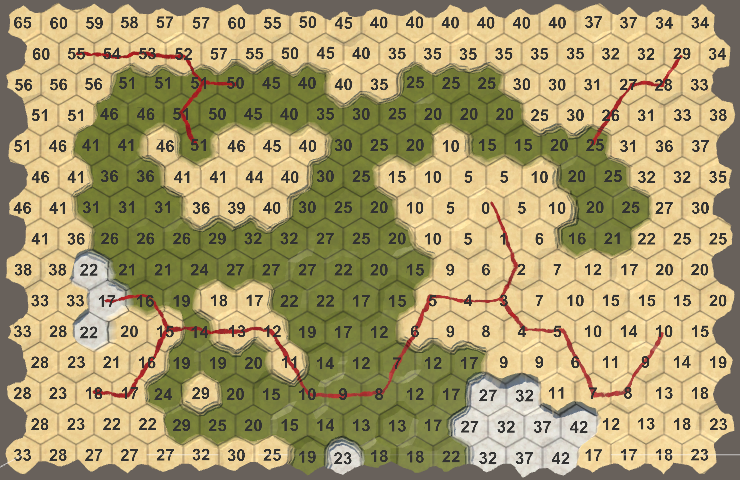
Now we get the correct distances, taking movement costs into account. You can see that the distances of some cells start out too long, but get corrected before they're taken out of the frontier. This approach is known as Dijksta's algorithm, named after Edsger Dijkstra who first came up with it.
Slopes
We don't need to limit ourselves to different costs for roads only. For example, let's reduce the cost for crossing flat edges without a road to 5, leaving slopes without a road at 10.
				HexEdgeType edgeType = current.GetEdgeType(neighbor);
				if (edgeType == HexEdgeType.Cliff) {
					continue;
				}
				int distance = current.Distance;
				if (current.HasRoadThroughEdge(d)) {
					distance += 1;
				}
				else {
					distance += edgeType == HexEdgeType.Flat ? 5 : 10;
				}
Terrain Features
We can add costs for the presence of terrain features as well. For example, many games make it harder to move through forests. In our case, let's just add all feature levels to the distance. Once again, a road makes all this irrelevant.
				if (current.HasRoadThroughEdge(d)) {
					distance += 1;
				}
				else {
					distance += edgeType == HexEdgeType.Flat ? 5 : 10;
					distance += neighbor.UrbanLevel + neighbor.FarmLevel +
						neighbor.PlantLevel;
				}
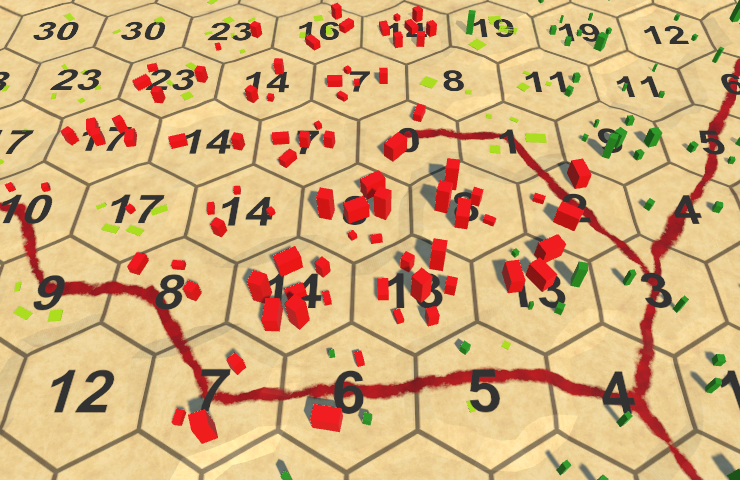
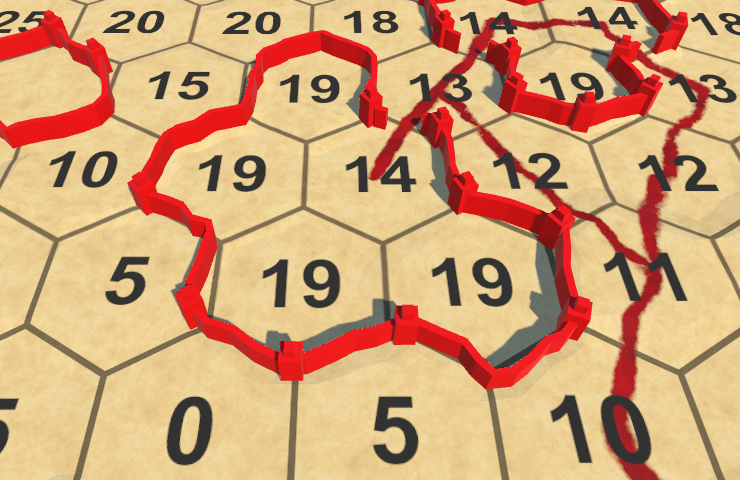
Walls
Finally, let's take walls into consideration as well. Walls should block movement, unless there is a road passing through them.
				if (current.HasRoadThroughEdge(d)) {
					distance += 1;
				}
				else if (current.Walled != neighbor.Walled) {
					continue;
				}
				else {
					distance += edgeType == HexEdgeType.Flat ? 5 : 10;
					distance += neighbor.UrbanLevel + neighbor.FarmLevel +
						neighbor.PlantLevel;
				}
The next tutorial is Pathfinding.