Configuring Shapes
Variety of Randomness
- Make shapes rotate and move.
- Centralize game updates.
- Add configuration per spawn zone.
- Improve the inspector.
This is the seventh tutorial in a series about Object Management. It adds some behavior to shapes and makes it possible to configure them, per spawn zone.
This tutorial is made with Unity 2017.4.12f1.
Shape Rotation
We can create shapes with varied appearance, but they just sit in place until destroyed. Let's spice things up by making them do something. Specifically, we'll make all shapes spin.
The most straightforward way to make an object spin is by invoking the The default time step is 0.02, which means that The next step is to give each shape a random angular velocity. Add a public To randomize the rotation speed as well, replace 50 with a random range, say between 0 and 90 degrees per second. At this point we're not saving the angular velocity yet. Loading a game will produce shapes with arbitrary angular velocities, because recycled shapes keep their old velocity. As saving the angular velocity changes the safe file format, increase the save version to 4. Write the angular velocity after the shape's color. Read the angular velocity when loading as well, when the save version is high enough. Older saved games didn't have an angular velocity, so use the zero vector for those. Before shapes rotated, they didn't need to be updated. But now Unity has to invoke the Instead of leaving the updating of shapes to Unity, we can manage it ourselves. In the Adding Spin
Rotate method of its Transform component, just like we did for RotatingObject. In this case, we have to add a FixedUpdate method to Shape and invoke it there. We begin by using the object's local forward direction as its rotation axis. void FixedUpdate () {
transform.Rotate(Vector3.forward);
}
FixedUpdate gets invoked 50 times per second. Hence, we end up with shapes that rotate 50° per second. But let's make the rotation speed explicit, by multiplying the forward vector by 50 multiplied by the time delta. That makes the rotation independent of the time step. transform.Rotate(Vector3.forward * 50f * Time.deltaTime);
Randomized Rotation
AngularVelocity property to make it possible to configure, then use that to determine the rotation each update.
	public Vector3 AngularVelocity { get; set; }

	…

	void FixedUpdate () {
		transform.Rotate(AngularVelocity * Time.deltaTime);
	}
Game now has to set the shape's angular velocity in CreateShape. We can use Random.onUnitSphere to get a random rotation axis. Multiply it by 50 so we once again end up with a rotation of 50° per second.
	void CreateShape () {
		…
		instance.AngularVelocity = Random.onUnitSphere * 50f;
		shapes.Add(instance);
	}
instance.AngularVelocity = Random.onUnitSphere * Random.Range(0f, 90f);
Saving Angular Velocity
const int saveVersion = 4;
	public override void Save (GameDataWriter writer) {
		base.Save(writer);
		writer.Write(color);
		writer.Write(AngularVelocity);
	}
	public override void Load (GameDataReader reader) {
		base.Load(reader);
		SetColor(reader.Version > 0 ? reader.ReadColor() : Color.white);
		AngularVelocity =
			reader.Version >= 4 ? reader.ReadVector3() : Vector3.zero;
	}
Updating all Shapes Together
FixedUpdate method of all active shapes. While a regular method invocation isn't really a problem, FixedUpdate and other special Unity methods require additional overhead which can slow things down. This isn't an issue when there are only a few active shapes, but can become a performance bottleneck when dealing with lots of shapes. 
FixedUpdate invocations.Game already contains a list of all active shapes, which we can use to update them. But we cannot just invoke FixedUpdate, because Unity will still invoke that method as well. We have to rename it to something else. Let's use GameUpdate, and make it public so that Game can access it.
	//void FixedUpdate () {
	public void GameUpdate () {
		transform.Rotate(AngularVelocity * Time.deltaTime);
}FixedUpdate method of Game, loop through the shapes list and invoke the new GameUpdate of each shape. Do this at the beginning, before new shapes are spawn. That keeps the behavior consistent with earlier versions of our game. void FixedUpdate () {
for (int i = 0; i < shapes.Count; i++) {
shapes[i].GameUpdate();
}
…
}

Shape Movement
Our shapes can now rotate, but they still remain where they were spawned. Let's change that, by giving each shape a random velocity as well.
Adding Velocity
Like we did for the angular velocity, give Shape a Velocity property.
public Vector3 Velocity { get; set; }
Each update, add the velocity multiplied by the time delta to the shape's position. We can use the local position instead of the more costly position property, because the shapes should always be root objects.
	public void GameUpdate () {
		transform.Rotate(AngularVelocity * Time.deltaTime);
		transform.localPosition += Velocity * Time.deltaTime;
	}
Saving Velocity
Save the velocity too, writing it directly after the angular velocity.
	public override void Save (GameDataWriter writer) {
		base.Save(writer);
		writer.Write(color);
		writer.Write(AngularVelocity);
		writer.Write(Velocity);
	}
And load it, once again using the zero vector when reading from old files.
	public override void Load (GameDataReader reader) {
		base.Load(reader);
		SetColor(reader.Version > 0 ? reader.ReadColor() : Color.white);
		AngularVelocity =
			reader.Version >= 4 ? reader.ReadVector3() : Vector3.zero;
		Velocity = reader.Version >= 4 ? reader.ReadVector3() : Vector3.zero;
	}
Randomized Velocity
When a new shape is created in CreateShape, give it a random direction and speed, by multiplying Random.onUnitSphere with Random.Range, for example with speeds between zero and two units per second.
	void CreateShape () {
		…
		instance.AngularVelocity = Random.onUnitSphere * Random.Range(0f, 90f);
		instance.Velocity = Random.onUnitSphere * Random.Range(0f, 2f);
		shapes.Add(instance);
	}
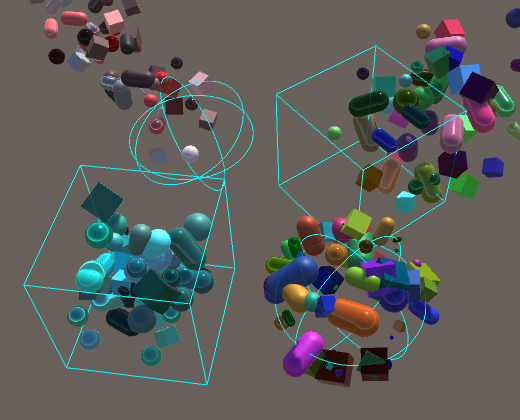
Velocity Per Spawn Zone
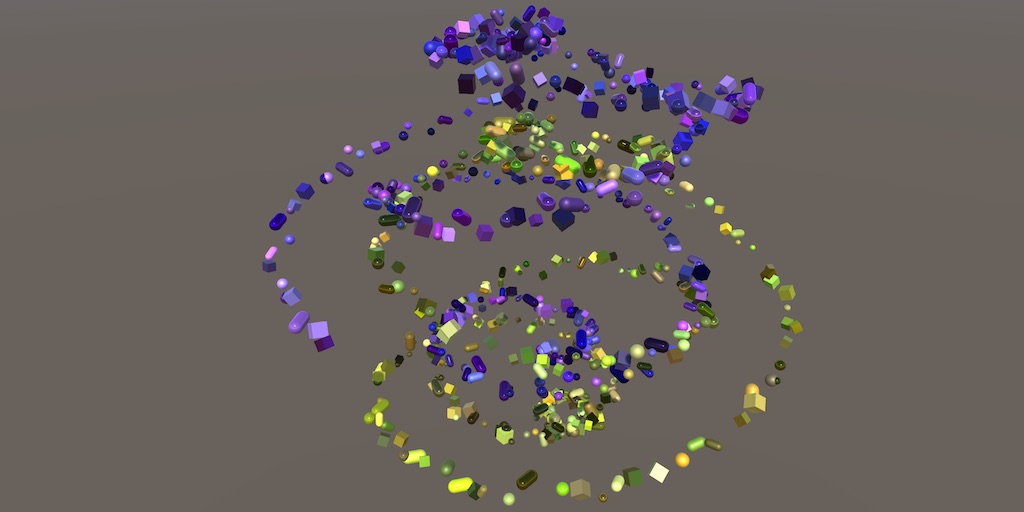
Giving each shape a random movement direction produces a rather chaotic scene. Instead, we could have all shapes move in the same direction. But rather than using a single uniform direction, we could use a unique velocity per spawn zone. That makes it possible to create more elaborate levels.
Currently, Game creates and configures each new shape and asks the level for a spawn point. If we want to make the velocity dependent on the spawn zone as well, then Game must ask for a velocity too. Rather than do that, we'll instead move the entire responsibility for shape configuration from Game to SpawnZone.
Add a public ConfigureSpawn method to SpawnZone, with a shape parameter. Copy the code from Game.CreateShape to this method, except for the first and last lines that create the instance and add it to the list. The method's parameter replaces the instance variable, and SpawnPoint can now be accessed directly, instead of having to go through the level.
	public void ConfigureSpawn (Shape shape) {
		Transform t = shape.transform;
		t.localPosition = SpawnPoint;
		t.localRotation = Random.rotation;
		t.localScale = Vector3.one * Random.Range(0.1f, 1f);
		shape.SetColor(Random.ColorHSV(
			hueMin: 0f, hueMax: 1f,
			saturationMin: 0.5f, saturationMax: 1f,
			valueMin: 0.25f, valueMax: 1f,
			alphaMin: 1f, alphaMax: 1f
		));
		shape.AngularVelocity = Random.onUnitSphere * Random.Range(0f, 90f);
		shape.Velocity = Random.onUnitSphere * Random.Range(0f, 2f);
	}
In GameLevel, remove the SpawnPoint property and add a ConfigureSpawn method, which simply forwards to the method of its spawn zone.
//public Vector3 SpawnPoint {// …//}public void ConfigureSpawn(Shape shape) { spawnZone.ConfigureSpawn(shape); }
Finally, remove all configuration code from CreateShape, instead relying on the ConfigureSpawn method of the level.
	void CreateShape () {
		Shape instance = shapeFactory.GetRandom();
		//Transform t = instance.transform;
		//…
		//instance.Velocity = Random.onUnitSphere * Random.Range(0f, 2f);
		GameLevel.Current.ConfigureSpawn(instance);
		shapes.Add(instance);
	}
At this point everything still works as before, except that it's now SpawnZone that configures the shapes.
Relative Velocity
Now that we configure the shape inside SpawnZone, we have access to the transformation data of the zone. We can use that to make the shape's velocity relative to the zone's orientation, just like the shape's position is also relative. Let's use the zone's local forward direction, multiplied by a random speed.
	public void ConfigureSpawn (Shape shape) {
		…
		shape.Velocity = transform.forward * Random.Range(0f, 2f);
	}
This works as expected for sphere and cube zones, but not when using a composite spawn zone. Right now the forward direction of the composite spawn zone itself is used, instead of those of its sub zones. To make this work, CompositeSpawnZone must override ConfigureSpawn to forward the invocation to one of its sub zones, just like it does for SpawnPoint. The code can be copied from that property, only changing what it does at the end.
	public override Vector3 SpawnPoint {
		…
	}

	public override void ConfigureSpawn (Shape shape) {
		int index;
		if (sequential) {
			index = nextSequentialIndex++;
			if (nextSequentialIndex >= spawnZones.Length) {
				nextSequentialIndex = 0;
			}
		}
		else {
			index = Random.Range(0, spawnZones.Length);
		}
		spawnZones[index].ConfigureSpawn(shape);
	}
To make it possible to override ConfigureSpawn, we have to mark it as virtual in SpawnZone.
	public virtual void ConfigureSpawn (Shape shape) {
		…
	}
Configuration per Spawn Zone
Migrating the responsibility for shape configuration from Game to SpawnZone doesn't just make it easy to set a relative movement direction. It also makes it possible to use different kinds of movement per spawn zone.
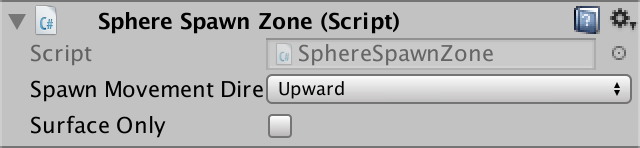
Movement Direction
First, let's make it possible to choose between either a forward or an upward movement direction. To make this choice explicit, create a SpawnMovementDirection enumeration type. Because this type only really makes sense in the context of shape configuration per spawn zone, define it inside the SpawnZone class, instead of putting it in its own script file. Then give SpawnZone a configuration field of this type.
	public enum SpawnMovementDirection {
		Forward,
		Upward
	}

	[SerializeField]
	SpawnMovementDirection spawnMovementDirection;
Now we can check in ConfigureSpawn whether the movement direction is set to upward. If so, use transform.up, otherwise keep using transform.forward.
	public virtual void ConfigureSpawn (Shape shape) {
		…
		shape.AngularVelocity = Random.onUnitSphere * Random.Range(0f, 90f);

		Vector3 direction;
		if (spawnMovementDirection == SpawnMovementDirection.Upward) {
			direction = transform.up;
		}
		else {
			direction = transform.forward;
		}
		shape.Velocity = direction * Random.Range(0f, 2f);
	}
Outward Movement
Besides choosing a uniform movement direction, it is also possible to make the shapes move away from the center of the spawn zone. Add an Outward option to the enumeration for that.
	public enum SpawnMovementDirection {
		Forward,
		Upward,
		Outward
	}
The correct direction for outward movement is found by subtracting the zone's position from the shape's position and normalizing the result. Note that we have to use transform.position and not the local position, because spawn zones need not be root objects. Also, the relation doesn't last after configuration, so the direction doesn't change if the zone happens to move.
		if (spawnMovementDirection == SpawnMovementDirection.Upward) {
			direction = transform.up;
		}
		else if (spawnMovementDirection == SpawnMovementDirection.Outward) {
			direction = (t.localPosition - transform.position).normalized;
		}
		else {
			direction = transform.forward;
		}
Random Movement
Let's also support a random direction, which is what we started with. Add Random€ to the enumeration.
	public enum SpawnMovementDirection {
		Forward,
		Upward,
		Outward,
		Random€
	}
And use Random.onUnitSphere to produce a random direction vector.
		else if (spawnMovementDirection == SpawnMovementDirection.Outward) {
			direction = (t.localPosition - transform.position).normalized;
		}
		else if (spawnMovementDirection == SpawnMovementDirection.Random€) {
			direction = Random.onUnitSphere;
		}
		else {
			direction = transform.forward;
		}
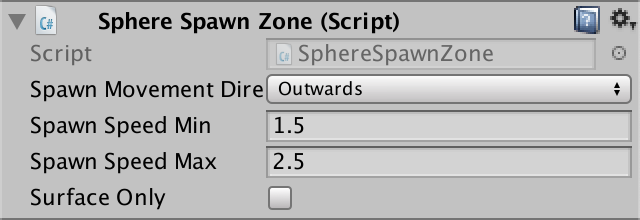
Speed Range
Besides the direction of movement, we can also control the speed range. All we need is configuration fields for both the minimum speed and the maximum speed.
	[SerializeField] float spawnSpeedMin, spawnSpeedMax;

	public virtual void ConfigureSpawn (Shape shape) {
		…
		shape.Velocity = direction * Random.Range(spawnSpeedMin, spawnSpeedMax);
	}
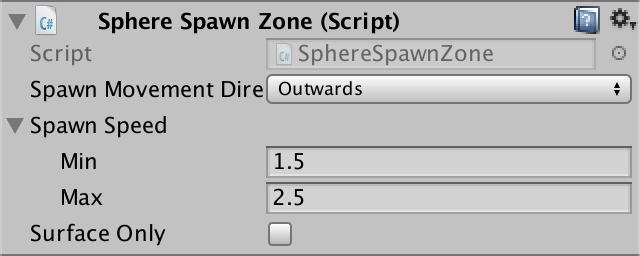
Having to use two fields to control a single range is inconvenient, especially if we want to add more ranges later. Unity doesn't have a range type for floats, so let's make one ourselves. Create a struct type named FloatRange with public min and max float fields. Essentially, it's a Vector2 with appropriately-named fields and without the vector-related functionality. Instead, give it a convenient RandomValueInRange property that takes care of the invocation of Random.Range.
Note that FloatRange is not specific to shape configuration and is defined in its own script file, as usual.
using UnityEngine;

public struct FloatRange {

	public float min, max;

	public float RandomValueInRange {
		get {
			return Random.Range(min, max);
		}
	}
}
To make Unity save float range values, mark the type with the Serializable attribute. The attribute exists in the System namespace, but that namespace also contains a Random type, which clashes with Unity's version. To avoid that, just write System.Serializable instead of using the namespace.
[System.Serializable]
public struct FloatRange {
	…
}
Now we can use one FloatRange field and its convenient property in SpawnZone.
//[SerializeField] float spawnSpeedMin, spawnSpeedMax;[SerializeField] FloatRange spawnSpeed; public virtual void ConfigureSpawn (Shape shape) { … shape.Velocity = direction * spawnSpeed.RandomValueInRange; }
Isolating the Configuration
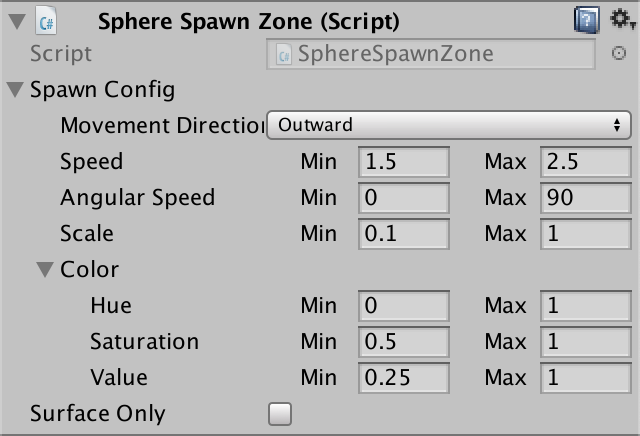
We can also create a type to contain all configuration options for spawning. That neatly groups them together and makes it so we don't have to prefix all fields with spawn. So define a serializable SpawnConfiguration struct type inside SpawnZone and put relevant fields plus the enumeration type in it, with their prefixes removed. Then SpawnZone only needs a single spawn configuration field.
//public enum SpawnMovementDirection {// …//}//[SerializeField]//SpawnMovementDirection spawnMovementDirection;//[SerializeField]//FloatRange spawnSpeed;[System.Serializable] public struct SpawnConfiguration { public enum MovementDirection { Forward, Upward, Outward, Random€ } public MovementDirection movementDirection; public FloatRange speed; } [SerializeField] SpawnConfiguration spawnConfig;
Adjust the references in ConfigureSpawn to match. At this point, because the movement direction names have become very long, it can be convenient to replace the if-else sequence with a switch block.
	public virtual void ConfigureSpawn (Shape shape) {
		…

		Vector3 direction;
		switch (spawnConfig.movementDirection) {
			case SpawnConfiguration.MovementDirection.Upward:
				direction = transform.up;
				break;
			case SpawnConfiguration.MovementDirection.Outward:
				direction = (t.localPosition - transform.position).normalized;
				break;
			case SpawnConfiguration.MovementDirection.Random:
				direction = Random.onUnitSphere;
				break;
			default:
				direction = transform.forward;
				break;
		}
		shape.Velocity = direction * spawnConfig.speed.RandomValueInRange;
	}

Composite Spawn Zone Override
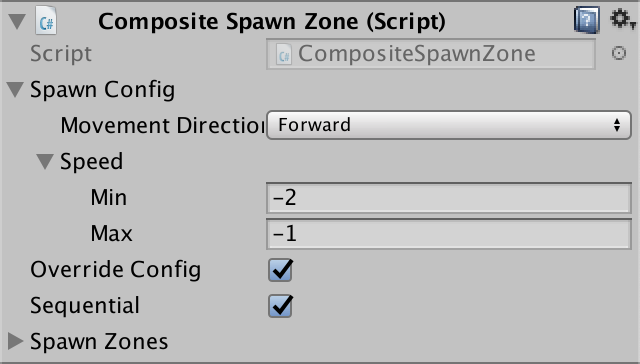
Note that all spawn zone types now have spawn configuration options, thus also the composite spawn zone. We can use that to override the configuration of its sub zones. Add a toggle to CompositeSpawnZone to make that optional. If it should override, then have it invoke the base implementation of ConfigureSpawn instead of forwarding it to one of the sub zones. It will then use its own configuration, while still selecting a spawn point from a sub zone.
	[SerializeField]
	bool overrideConfig;

	…

	public override void ConfigureSpawn (Shape shape) {
		if (overrideConfig) {
			base.ConfigureSpawn(shape);
		}
		else {
			int index;
			if (sequential) {
				index = nextSequentialIndex++;
				if (nextSequentialIndex >= spawnZones.Length) {
					nextSequentialIndex = 0;
				}
			}
			else {
				index = Random.Range(0, spawnZones.Length);
			}
			spawnZones[index].ConfigureSpawn(shape);
		}
	}
Advanced Configuration
Now that we have created a way to configure spawn movement per zone, we can extend this approach. There are more things that we can control, and we can improve the presentation of these options further.
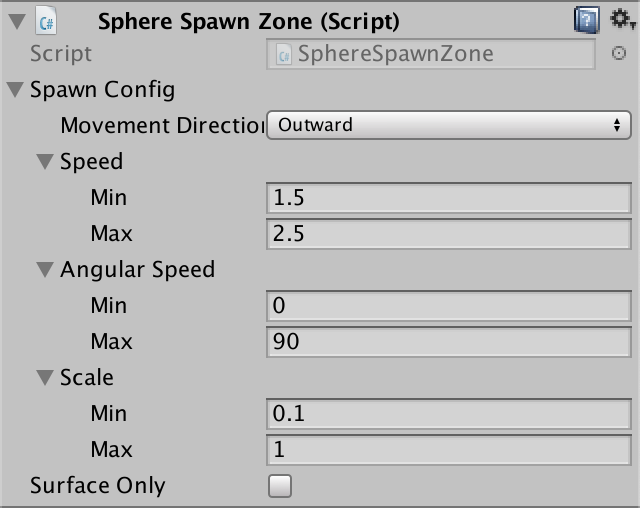
Angular Speed and Scale
Additional candidates for configuration are the rotation speed and scale of the shapes. Add a FloatRange field for both to SpawnConfiguration and use them in ConfigureSpawn.
	public struct SpawnConfiguration {

		…

		public FloatRange angularSpeed;

		public FloatRange scale;
	}

	…

	public virtual void ConfigureSpawn (Shape shape) {
		Transform t = shape.transform;
		t.localPosition = SpawnPoint;
		t.localRotation = Random.rotation;
		t.localScale = Vector3.one * spawnConfig.scale.RandomValueInRange;
		shape.SetColor(Random.ColorHSV(
			hueMin: 0f, hueMax: 1f,
			saturationMin: 0.5f, saturationMax: 1f,
			valueMin: 0.25f, valueMax: 1f,
			alphaMin: 1f, alphaMax: 1f
		));
		shape.AngularVelocity =
			Random.onUnitSphere * spawnConfig.angularSpeed.RandomValueInRange;

		…
	}
We can add even more options—like a way to control the angular rotation axis—but the point is that the inspector of our configuration quickly becomes large and unwieldy. Each float range takes up three lines when expanded, which is a lot. It would be better if each could fit on a single line.
Custom Property Drawer
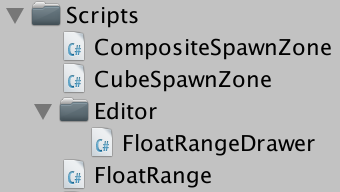
We can override Unity's default way to draw a FloatRange value by creating a custom property drawer for it. Add a FloatRangeDrawer class for this purpose. As it deals with the editor, its file should be placed in an Editor folder. That tells Unity to compile and combine it with all the other editor-related code and keep it out of builds.
Editor classes rely on things from the UnityEditor namespace, so use that in addition to UnityEngine. To make the class a property drawer, it has to extend the PropertyDrawer class.
using UnityEditor;
using UnityEngine;

public class FloatRangeDrawer : PropertyDrawer {}
Besides that, we have to tell Unity what type we want to create a custom property drawer for. That's done by adding the CustomPropertyDrawer attribute to our class. We have to supply it with the relevant type as an argument, which we can specify with the help of typeof.
[CustomPropertyDrawer(typeof(FloatRange))]
public class FloatRangeDrawer : PropertyDrawer {}
Now Unity will invoke the OnGUI method of our property drawer each time it has to show the UI for a FloatRange value. We have to override that method to create our own UI. It has three parameters: a Rect defining a region to draw in, a SerializedProperty representing the float range value, and a GUIContent containing the default label to use for it. Initially, leave the method empty.
	public override void OnGUI (
		Rect position, SerializedProperty property, GUIContent label
	) {}
Because we're not doing anything in OnGUI, nothing gets drawn. But the default property reserves a single line for itself, so the inspector for our spawn configuration has already shrunk to the desired size.
We should start by telling the Unity editor that we're creating the UI for our property, by invoking EditorGUI.BeginProperty with the same arguments as OnGUI, only with the label and property swapped. And once we're done we invoke EditorGUI.EndProperty. We'll create the UI in between these invocations. While it doesn't seem to do anything, this ensures that the editor will be able to deal with prefabs and prefab overrides.
	public override void OnGUI (
		Rect position, SerializedProperty property, GUIContent label
	) {
		EditorGUI.BeginProperty(position, label, property);
		EditorGUI.EndProperty();
	}
Our float range property consists of two sub-properties, its min and max floats. We can access them by invoking FindPropertyRelative on the property, with the appropriate name as a string argument. That once again gives us a SerializedProperty instance. The simplest way to show the UI for such a property is to invoke EditorGUI.PropertyField with the position and the property as arguments. Do this for the min value.
		EditorGUI.BeginProperty(position, label, property);
		EditorGUI.PropertyField(position, property.FindPropertyRelative("min"));
		EditorGUI.EndProperty();
We end up with the min value for each range, fully editable. Let's add the max values as well, using the same approach.
EditorGUI.BeginProperty(position, label, property);
EditorGUI.PropertyField(position, property.FindPropertyRelative("min"));
EditorGUI.PropertyField(position, property.FindPropertyRelative("max"));
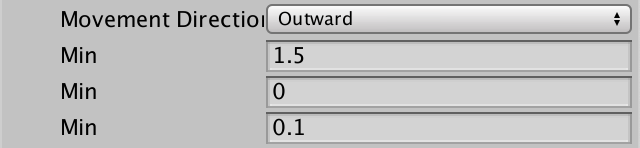
EditorGUI.EndProperty();

The UI for the min and max fields end up drawn on top of each other, because we used the same position settings for both. When drawing properties, Unity gives us a rectangular region to drawn in and we have to take care of layout ourselves. In this case, we can simply halve the width of the region and increase the horizontal coordinate by that width for the second field.
		EditorGUI.BeginProperty(position, label, property);
		position.width = position.width / 2f;
		EditorGUI.PropertyField(position, property.FindPropertyRelative("min"));
		position.x += position.width;
		EditorGUI.PropertyField(position, property.FindPropertyRelative("max"));
		EditorGUI.EndProperty();

Next, we'll have to add the label for the range. That is done by invoking EditorGUI.PrefixLabel with the position and label that was given to us. As the label takes up some space, the method returns a modified region that gives us the remaining space for the rest of our UI.
		EditorGUI.BeginProperty(position, label, property);
		position = EditorGUI.PrefixLabel(position, label);
		position.width = position.width / 2f;

This screws up our layout, because Unity uses a fixed width for the labels, which is too wide for our min and max fields. We can override that width by setting the EditorGUIUtility.labelWidth property. Let's set it to half of the width we use per field.
		position.width = position.width / 2f;
		EditorGUIUtility.labelWidth = position.width / 2f;

That looks good, but only because our range fields end up with an indentation of one step. Unity keeps track of the UI indentation globally, but we can override it by setting the EditorGUI.indentLevel property. Make sure it's set to 1, which pushes the label text one step to the right.
		EditorGUIUtility.labelWidth = position.width / 2f;
		EditorGUI.indentLevel = 1;

Notice that when an input field is selected, the corresponding label turns blue. But when a min fields is selected, the label of its range also turns blue. That's because they end up with the same UI control ID. We can avoid that by adding a specific control ID as an argument when invoking PrefixLabel. Selecting the entire range is pointless, so use GUIUtility.GetControlID(FocusType.Passive). That prevents it from becoming blue and skips it when you use the tab key to step through the UI controls in the editor.
		position = EditorGUI.PrefixLabel(
			position, GUIUtility.GetControlID(FocusType.Passive), label
		);

Finally, we should restore the indent level and label width to their original values when we're done. It doesn't matter in this case, because Unity's default editor restores the values for us, but we cannot rely on that in general.
		int originalIndentLevel = EditorGUI.indentLevel;
		float originalLabelWidth = EditorGUIUtility.labelWidth;
		EditorGUI.BeginProperty(position, label, property);

		…

		EditorGUI.EndProperty();
		EditorGUI.indentLevel = originalIndentLevel;
		EditorGUIUtility.labelWidth = originalLabelWidth;
Configurable Color
Another thing that we can make configurable is the allowed range of random colors. Up to now this was fixed, but we have neat float ranges that we can use to configure it. In fact, we can create a dedicated ColorRangeHSV struct to contain these ranges and provide a convenient property to get a random color out of it. Once again—like FloatRange—this struct stands on its own and is not specific to spawn configuration.
using UnityEngine;

[System.Serializable]
public struct ColorRangeHSV {

	public FloatRange hue, saturation, value;

	public Color RandomInRange {
		get {
			return Random.ColorHSV(
				hue.min, hue.max,
				saturation.min, saturation.max,
				value.min, value.max,
				1f, 1f
			);
		}
	}
}
Adding color configuration to SpawnConfiguration is now simply a matter of adding a ColorRangeHSV field to it.
	public struct SpawnConfiguration {

		…

		public ColorRangeHSV color;
	}
Now ConfigureSpawn can use the new property instead of worrying about the details of creating a random color.
//shape.SetColor(Random.ColorHSV(// hueMin: 0f, hueMax: 1f,// saturationMin: 0.5f, saturationMax: 1f,// valueMin: 0.25f, valueMax: 1f,// alphaMin: 1f, alphaMax: 1f//));shape.SetColor(spawnConfig.color.RandomInRange);
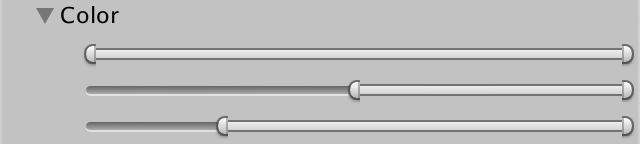
Range Sliders
The hue, saturation, and value must all fall between 0 and 1, so it doesn't make sense to allow any other values. If they were simple float fields, then we could have used the Range attribute to enforce this in the editor, turning the input fields into sliders.
	[Range(0f, 1f)]
	public FloatRange hue, saturation, value;
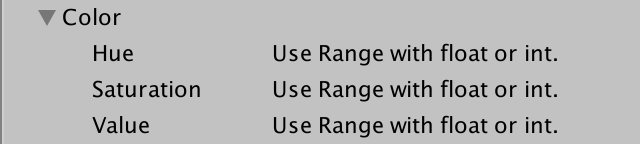
But that doesn't work, because Range only works for a float or int. So let's create our own attribute. That's done by defining a class that extends PropertyAttribute. The convention is to add Attribute as a suffix, so we'll name it FloatRangeSliderAttribute. Although we only use this metadata in the editor, its script file must not be placed in an Editor folder, as we're going to use this type in ColorRangeHSV.
The attribute is just a container for two properties, Min and Max. They should be publicly readable, but only have to be set by the attribute itself.
using UnityEngine;

public class FloatRangeSliderAttribute : PropertyAttribute {

	public float Min { get; private set; }

	public float Max { get; private set; }
}
Add a constructor method that has the minimum and maximum as parameters, to initialize the properties. To keep the range sensible, enforce that the maximum isn't less than the minimum.
	public FloatRangeSliderAttribute (float min, float max) {
		if (max < min) {
			max = min;
		}
		Min = min;
		Max = max;
	}
Now we can use our own attribute instead of Range. As an attribute, we can refer to it as FloatRangeSlider, omitting the Attribute suffix.
	[FloatRangeSlider(0f, 1f)]
	public FloatRange hue, saturation, value;
That by itself doesn't change how the float ranges are drawn, because all we've done is attach some metadata to the field definitions. We have to create another custom property drawer, this time for FloatRangeSliderAttribute instead of for FloatRange. Again begin with a basic drawer that leaves the UI empty.
using UnityEditor;
using UnityEngine;

[CustomPropertyDrawer(typeof(FloatRangeSliderAttribute))]
public class FloatRangeSliderDrawer : PropertyDrawer {

	public override void OnGUI (
		Rect position, SerializedProperty property, GUIContent label
	) {
		EditorGUI.BeginProperty(position, label, property);
		EditorGUI.EndProperty();
	}
}
Before drawing a property, the Unity editor checks whether there is a drawer that applies to an attribute attached to it. If so, it uses that one. Otherwise, it checks whether there is a drawer that applies to the property's type and uses that one. If not, it will use its default drawer. So attributes take precedence, and we once again end up with empty lines.
We still need to access the min and max properties, but this time we want to draw a slider to indicate a range, not two separate float fields. So keep hold of them with variables.
		EditorGUI.BeginProperty(position, label, property);
		SerializedProperty minProperty = property.FindPropertyRelative("min");
		SerializedProperty maxProperty = property.FindPropertyRelative("max");
		EditorGUI.EndProperty();
We can access the float values of min and max via the floatValue property. First we have to get them, then after we've shown the range slider we'll have to set them, in case they were changed. Unity will take care of detecting changes and supporting undo and redo for us.
		EditorGUI.BeginProperty(position, label, property);
		SerializedProperty minProperty = property.FindPropertyRelative("min");
		SerializedProperty maxProperty = property.FindPropertyRelative("max");
		float minValue = minProperty.floatValue;
		float maxValue = maxProperty.floatValue;
		minProperty.floatValue = minValue;
		maxProperty.floatValue = maxValue;
		EditorGUI.EndProperty();
Next, we need to know the limit of the slider that we are about to show, which is stored in our attribute. We can access it via the attribute property of PropertyDrawer. The type of attribute is PropertyAttribute, so we have to cast it to our own type, by writing attribute as FloatRangeSliderAttribute.
		float minValue = minProperty.floatValue;
		float maxValue = maxProperty.floatValue;
		FloatRangeSliderAttribute limit = attribute as FloatRangeSliderAttribute;
		minProperty.floatValue = minValue;
		maxProperty.floatValue = maxValue;
Now we have all that we need to draw a slider range, by invoking EditorGUI.MinMaxSlider. As arguments we'll use the position and label, followed by the min and max values, finishing with the min and max limits. Because the min and max can be changed by the slider, we have to supply them as reference arguments, by putting ref in front of them. That turns them into references to the variables—as if they were objects instead of floats—so MinMaxSlider can alter them. That is necessary because a method cannot return two values.
		FloatRangeSliderAttribute limit = attribute as FloatRangeSliderAttribute;
		EditorGUI.MinMaxSlider(
			position, label, ref minValue, ref maxValue, limit.Min€, limit.Max€
		);
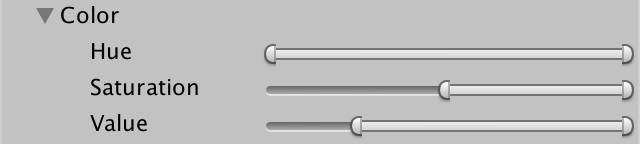
Sliders with Values
While the sliders are nice, it isn't possible to specify exact values, except for the extremes. This might not be a problem as colors don't need to be exact, but it makes it impossible to check the values of one slider to copy for use somewhere else. So let's add regular input fields for the min and max values too.
First, we'll remove the label from the slider, which makes it possible to put it in between two float fields. Simply remove the label argument from the invocation of MinMaxSlider.
EditorGUI.MinMaxSlider(//position, label, ref minValue, ref maxValue, limit.Min, limit.Maxposition, ref minValue, ref maxValue, limit.Min€, limit.Max€ );
Next, we have to draw the label separately, using PrefixLabel as before. Also, we don't want the indent level to mess with our layout, so set it to zero after the label, and reset it when we're done.
		int originalIndentLevel = EditorGUI.indentLevel;
		EditorGUI.BeginProperty(position, label, property);

		position = EditorGUI.PrefixLabel(
			position, GUIUtility.GetControlID(FocusType.Passive), label
		);
		EditorGUI.indentLevel = 0;
		…

		EditorGUI.EndProperty();
		EditorGUI.indentLevel = originalIndentLevel;
We'll begin by dividing the remaining space equally between the three parts. First use EditorGUI.FloatField to draw a float input field for min, without a label. It returns the possibly changed value. After that comes the slider, followed by the max input field.
		float minValue = minProperty.floatValue;
		float maxValue = maxProperty.floatValue;
		position.width /= 3;
		minValue = EditorGUI.FloatField(position, minValue);
		position.x += position.width;
		FloatRangeSliderAttribute limit = attribute as FloatRangeSliderAttribute;
		EditorGUI.MinMaxSlider(
			position, ref minValue, ref maxValue, limit.Min€, limit.Max€
		);
		position.x += position.width;
		maxValue = EditorGUI.FloatField(position, maxValue);
		minProperty.floatValue = minValue;
		maxProperty.floatValue = maxValue;

We can improve the layout by dedicating half of the width to the slider, leaving the float fields with a quarter each. Also, it looks better if we add a little padding between the slider and floats. Do this by subtracting four pixels from the width of the float fields, shifting the horizontal positions to compensate.
		float fieldWidth = position.width / 4f - 4f;
		float sliderWidth = position.width / 2f;
		position.width = fieldWidth;
		minValue = EditorGUI.FloatField(position, minValue);
		position.x += fieldWidth + 4f;
		position.width = sliderWidth;
		FloatRangeSliderAttribute limit = attribute as FloatRangeSliderAttribute;
		EditorGUI.MinMaxSlider(
			position, ref minValue, ref maxValue, limit.Min€, limit.Max€
		);
		position.x += sliderWidth + 4f;
		position.width = fieldWidth;
		maxValue = EditorGUI.FloatField(position, maxValue);

We wrap up by enforcing that the direct input fields cannot go beyond the limits and that max is never less than min.
		maxValue = EditorGUI.FloatField(position, maxValue);
		if (minValue < limit.Min€) {
			minValue = limit.Min€;
		}
		else if (minValue > limit.Max€) {
			minValue = limit.Max€;
		}
		if (maxValue < minValue) {
			maxValue = minValue;
		}
		else if (maxValue > limit.Max€) {
			maxValue = limit.Max;
		}
		minProperty.floatValue = minValue;
		maxProperty.floatValue = maxValue;
The next tutorial is More Factories.