Maze, building your own randomized place
- fill a 2D rectangle with a maze-generating algorithm;
- visualize the algorithm by using a coroutine;
- place walls and doors;
- use object inheritance;
- use extension methods;
- move through the maze;
- combine first-person view and an overlay map;
- determine visible rooms.
This tutorial has been superseded by Maze 2.
You're assumed to know the basics of the Unity editor and scripting. If you've completed the Clock and Fractal tutorials you're good to go.
This tutorial requires at least Unity 4.5. It won't work with earlier versions.
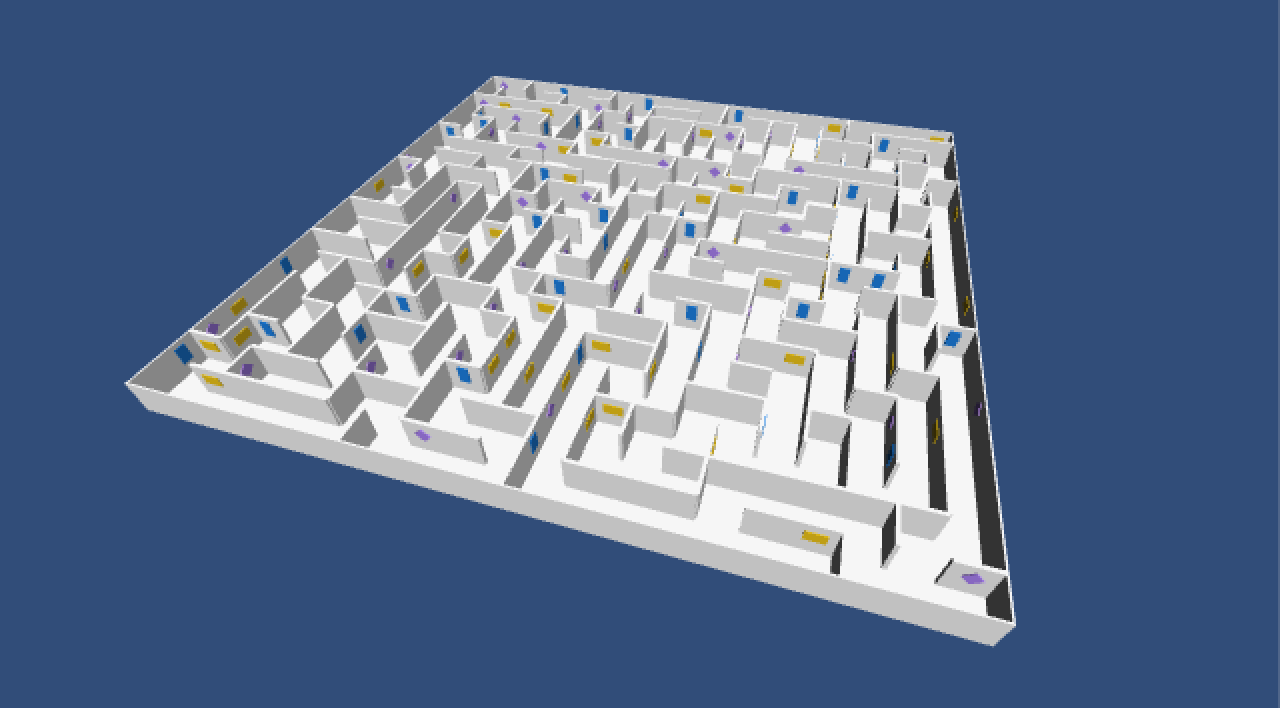
Random Mazes
You've probably seen quite a few randomly generated mazes, either in digital form or in print. There is a huge variety of maze types, but fundamentally they always boil down to the same thing. A maze is a collection or areas linked together such that you can start anywhere and from there be able to visit every other area. The shape and layout of these areas and how exactly they are connected defines the character of the maze.
Game Flow
If we were to make a game, we would first have to generate a maze and then spawn a player avatar that can navigate that maze. Then whenever a new game is started, we have to destroy the current maze, generate a new one, and place the avatar in it again. Let's create a game manager to take care of this.
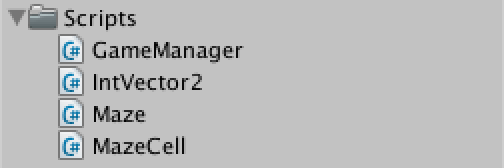
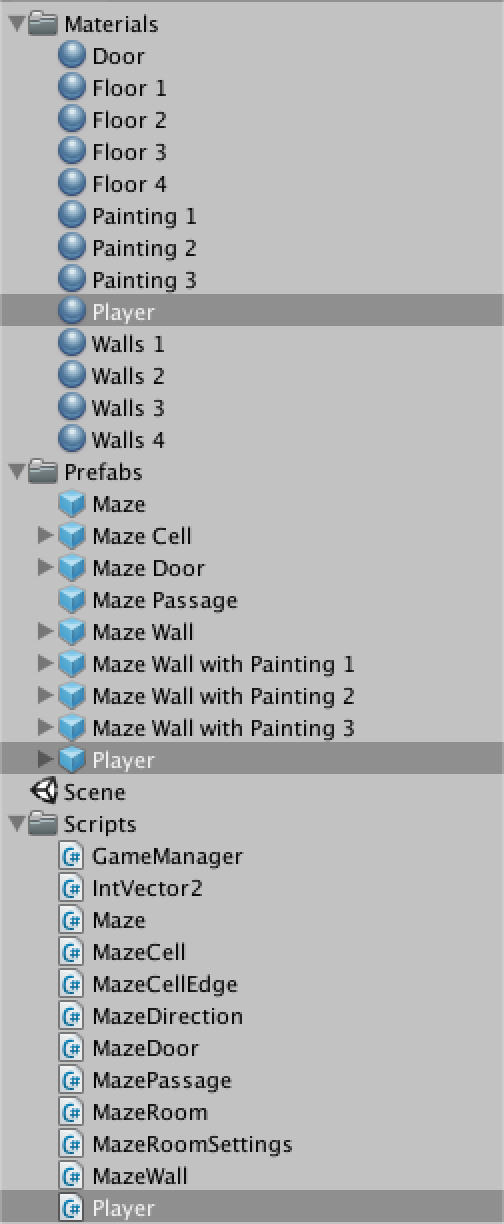
Create a new project and place a default directional light somewhere out of the way for some basic lighting. Then add a new GameManager C# script. Let's arrange the assets by type, so put it in a new Scripts folder. Then create a new empty game object named Game Manager and add our new script component to it.

Our GameManager component simply begins the game when its Start method is called. We also let it restart the game whenever the player presses space. To support that, we need to check each update whether the space key has been pressed.
using UnityEngine;
using System.Collections;

public class GameManager : MonoBehaviour {

	private void Start () {
		BeginGame();
	}

	private void Update () {
		if (Input.GetKeyDown(KeyCode.Space)) {
			RestartGame();
		}
	}

	private void BeginGame () {}

	private void RestartGame () {}
}
To begin a game we need to create a maze. So let's add a Maze script, then create a new empty game object named Maze and attach the script to it. Turn it into a prefab by dragging it into a new Prefabs folder that we also create to hold it. Once that's done, get rid of the instance in the hierarchy.
using UnityEngine;
using System.Collections;

public class Maze : MonoBehaviour {}
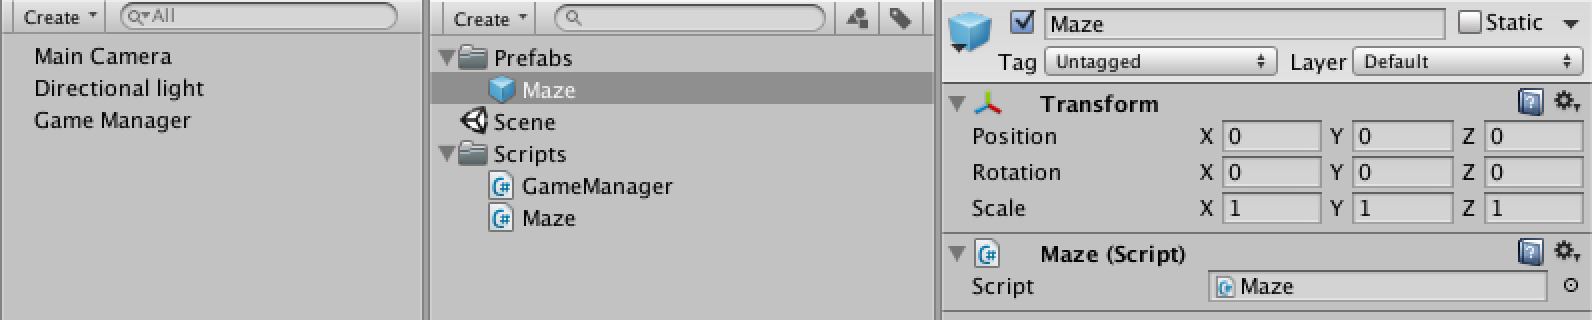
Now we can add a reference to this prefab to GameManager so it can create instances of it. Add a public variable for the prefab reference and a private one to hold the instance. Then we can instantiate a maze in BeginGame and destroy it in RestartGame before we begin a new game.
	public Maze mazePrefab;

	private Maze mazeInstance;

	private void BeginGame () {
		mazeInstance = Instantiate(mazePrefab) as Maze;
	}

	private void RestartGame () {
		Destroy(mazeInstance.gameObject);
		BeginGame();
	}

Maze Fundamentals
Right now the game manager already does its job. When entering play mode, a maze instance is created, while pressing space destroys it and makes a new one. Now it's up to Maze to generate its contents.
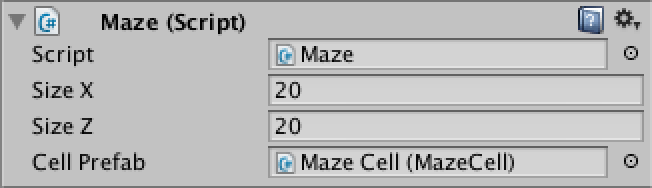
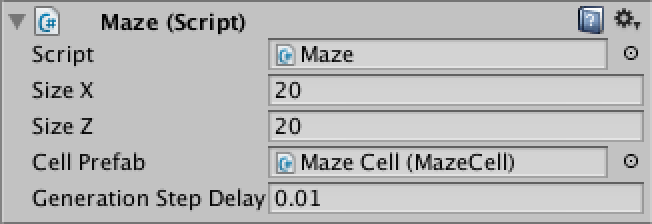
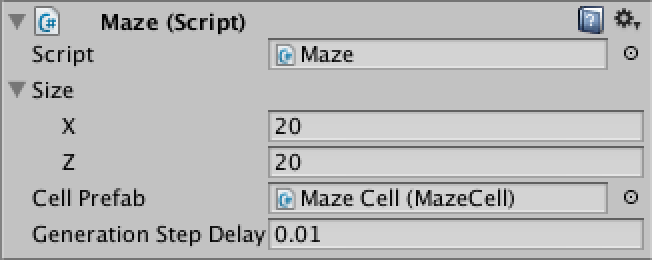
We are going to create a flat maze by filling a rectangular grid of configurable size. I'll make it 20 by 20. We'll store the cells in a 2D array and create a new MazeCell script to represent the cells. We also need a cell prefab to instantiate.
	public int sizeX, sizeZ;

	public MazeCell cellPrefab;

	private MazeCell[,] cells;
using UnityEngine;

public class MazeCell : MonoBehaviour {}
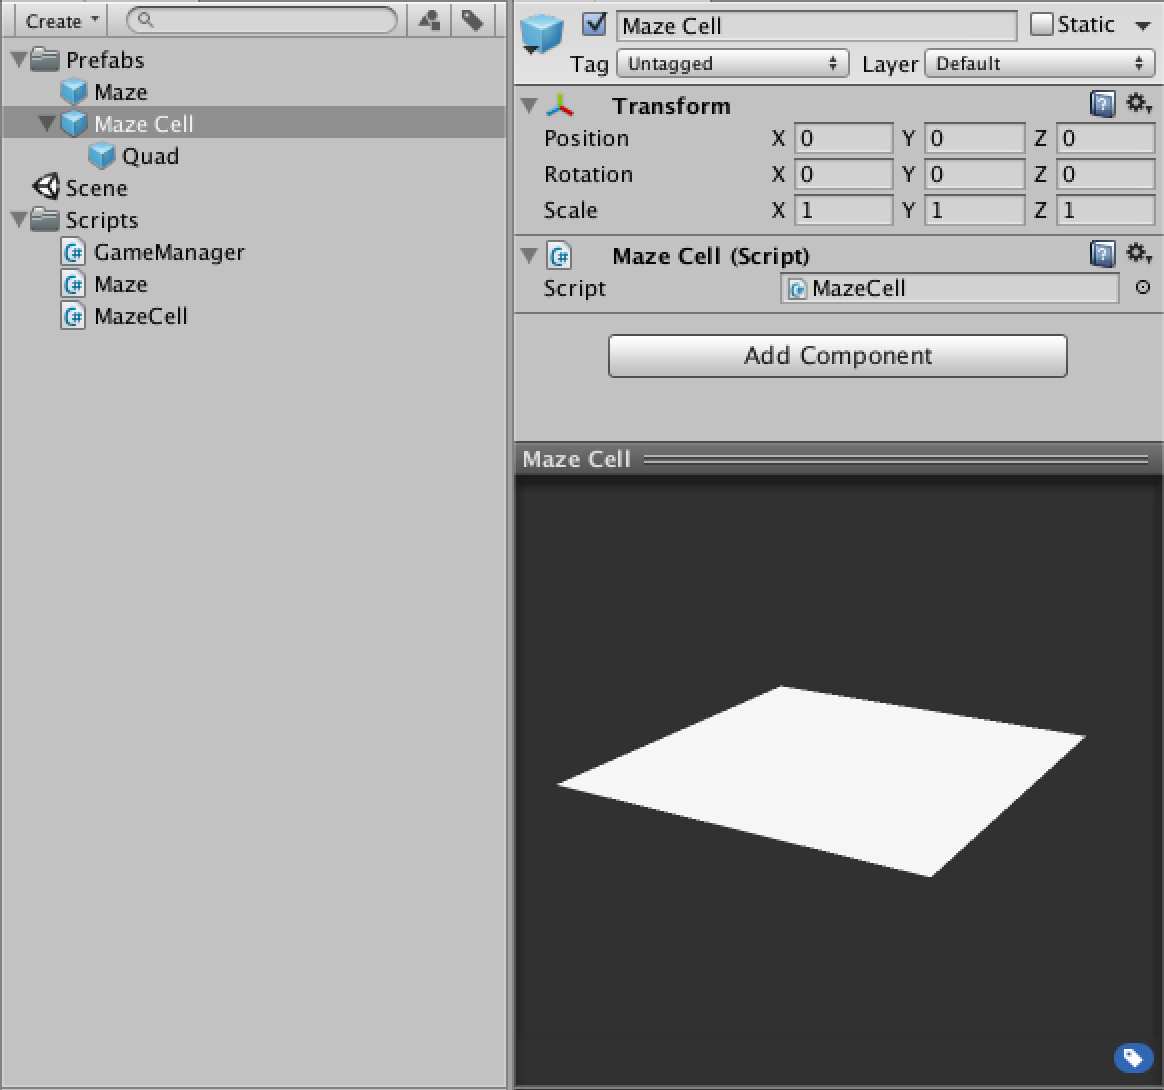
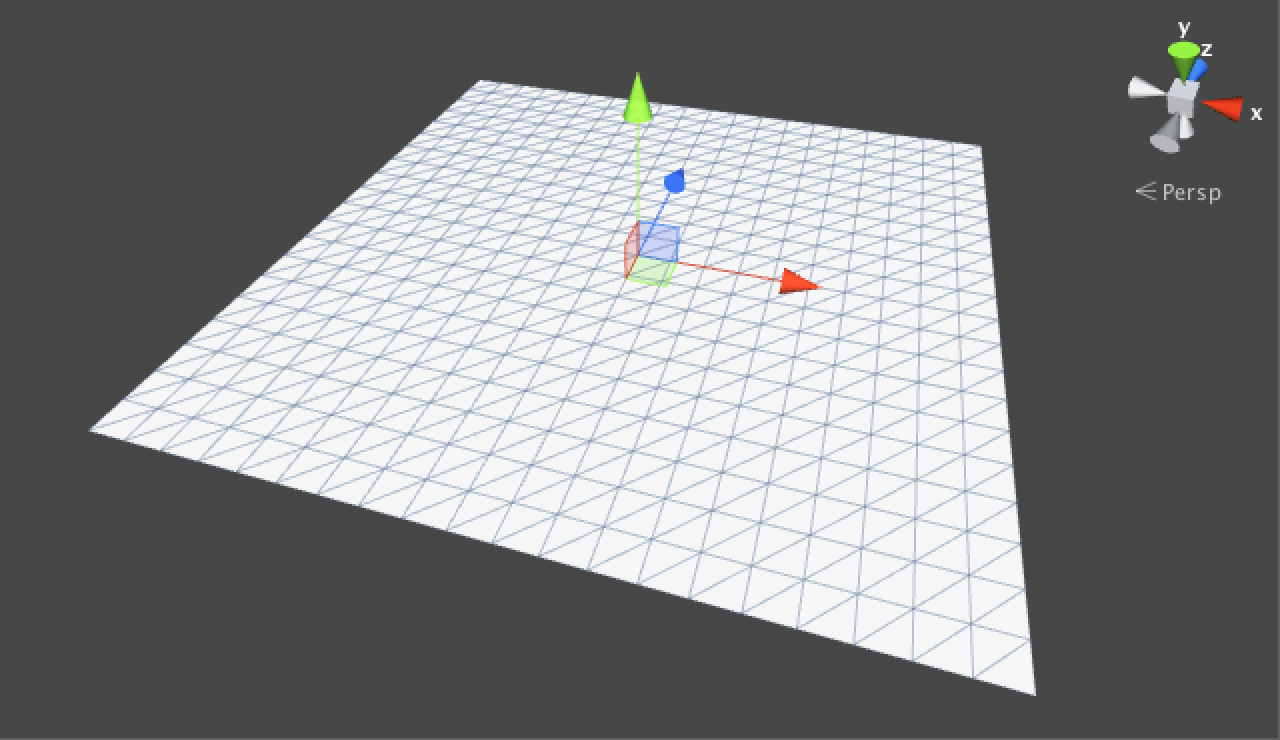
We need a 3D visualization for our cells. Create a new game object named Maze Cell and add the MazeCell component to it. Then create a default quad object, make it a child of the cell and set its rotation to (90,0,0). That gives us a very simple floor tile that fills the cell's area. Turn the whole thing into a prefab, get rid of the instance, and give Maze a reference to it.
We should now add a Generate method to Maze that will take care of constructing the maze contents. We start with creating our 2D array and simply filling the entire grid with new cells by means of a double for-loop. We put the creation of individual cells in its own method. We instantiate a new cell, put it in the array and give it a descriptive name. We also make it a child object of our maze and position it so that the entire grid is centered.
	public void Generate () {
		cells = new MazeCell[sizeX, sizeZ];
		for (int x = 0; x < sizeX; x++) {
			for (int z = 0; z < sizeZ; z++) {
				CreateCell(x, z);
			}
		}
	}

	private void CreateCell (int x, int z) {
		MazeCell newCell = Instantiate(cellPrefab) as MazeCell;
		cells[x, z] = newCell;
		newCell.name = "Maze Cell " + x + ", " + z;
		newCell.transform.parent = transform;
		newCell.transform.localPosition = new Vector3(x - sizeX * 0.5f + 0.5f, 0f, z - sizeZ * 0.5f + 0.5f);
	}
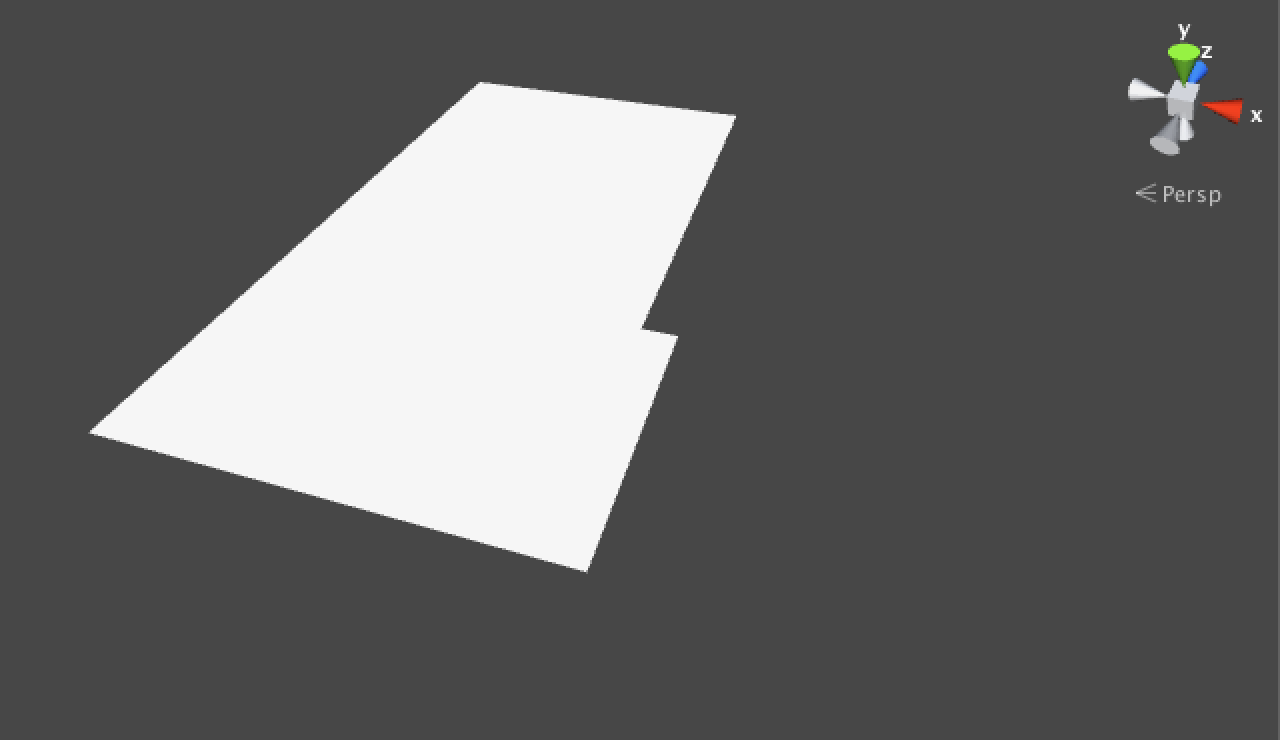
Now let GameManager call Generate and the maze should appear when you enter play mode.
	private void BeginGame () {
		mazeInstance = Instantiate(mazePrefab) as Maze;
		mazeInstance.Generate();
	}
We get a full grid of cells, but we can't immediately see in what order the cells were generated. It would be useful – and even a bit of fun – to slow down the generation process so we could see how it works. We can do this by turning Generate into a coroutine and inserting some delay before each step. I'll set it to 0.01 seconds, which means generating 20 by 20 cells would take roughly four seconds, assuming your frame rate is high enough.
	public float generationStepDelay;

	public IEnumerator Generate () {
		WaitForSeconds delay = new WaitForSeconds(generationStepDelay);
		cells = new MazeCell[sizeX, sizeZ];
		for (int x = 0; x < sizeX; x++) {
			for (int z = 0; z < sizeZ; z++) {
				yield return delay;
				CreateCell(x, z);
			}
		}
	}
We now have to change GameManager so it starts the coroutine properly. Also, it is important to stop the coroutine when the game is restarted, because it might not have finished generating yet. As we only have to worry about one coroutine, we can take care of this by simply calling StopAllCoroutines. So yes, you can press space while a maze is still being generated and it will immediately start generating a new one.
	private void BeginGame () {
		mazeInstance = Instantiate(mazePrefab) as Maze;
		StartCoroutine(mazeInstance.Generate());
	}

	private void RestartGame () {
		StopAllCoroutines();
		Destroy(mazeInstance.gameObject);
		BeginGame();
	}
Cell Coordinates and Integer Vectors
To generate a real maze, we will be adding cells to our maze in a random way instead of using the double loop that we're using at this moment. So we will probably be using maze coordinates to figure out where we are at any given step. As we are operating in a 2D space, we need to use two integers. It would be convenient if we could manipulate the coordinates as a single value, like Vector2 but with ints instead of floats. Unfortunately such a structure does not exist, but we can create one ourselves.
Let's add a new IntVector2 script and make it a struct instead of a class. We give it a public x and z integer. That gives us two integers bundled together as a single value. We'll also add a special constructor method to it, which allows us to define values via new IntVector2(1, 2).
public struct IntVector2 {

	public int x, z;

	public IntVector2 (int x, int z) {
		this.x = x;
		this.z = z;
	}
}
We will most likely be adding these vectors together at some point. We could create a method for that. But it would be even more convenient if we could simply use the + operator. Fortunately, we can do this by creating an operator method, which is how Unity's vectors support operation as well. So yes, adding two vectors means that you're calling a method.
Let's add support for the + operator now. You can define the other operators as well, but addition is all we need here.
	public static IntVector2 operator + (IntVector2 a, IntVector2 b) {
		a.x += b.x;
		a.z += b.z;
		return a;
	}
Now we can use our integer vector type to add coordinates to MazeCell.
public IntVector2 coordinates;
And we can adjust Maze so it uses IntVector2 when creating the cells and for its size as well, instead of using two separate integers.
	public IntVector2 size;

	public IEnumerator Generate () {
		WaitForSeconds delay = new WaitForSeconds(generationStepDelay);
		cells = new MazeCell[size.x, size.z];
		for (int x = 0; x < size.x; x++) {
			for (int z = 0; z < size.z; z++) {
				yield return delay;
				CreateCell(new IntVector2(x, z));
			}
		}
	}

	private void CreateCell (IntVector2 coordinates) {
		MazeCell newCell = Instantiate(cellPrefab) as MazeCell;
		cells[coordinates.x, coordinates.z] = newCell;
		newCell.coordinates = coordinates;
		newCell.name = "Maze Cell " + coordinates.x + ", " + coordinates.z;
		newCell.transform.parent = transform;
		newCell.transform.localPosition =
			new Vector3(coordinates.x - size.x * 0.5f + 0.5f, 0f, coordinates.z - size.z * 0.5f + 0.5f);
	}
Unfortunately there's something wrong now. The maze's size no longer shows up in the inspector. This is because Unity does not save our custom struct. Fortunately, this is easy to solve by adding the Serializable attribute from the System namespace to IntVector2.
[System.Serializable]
public struct IntVector2
Random Cell Generation
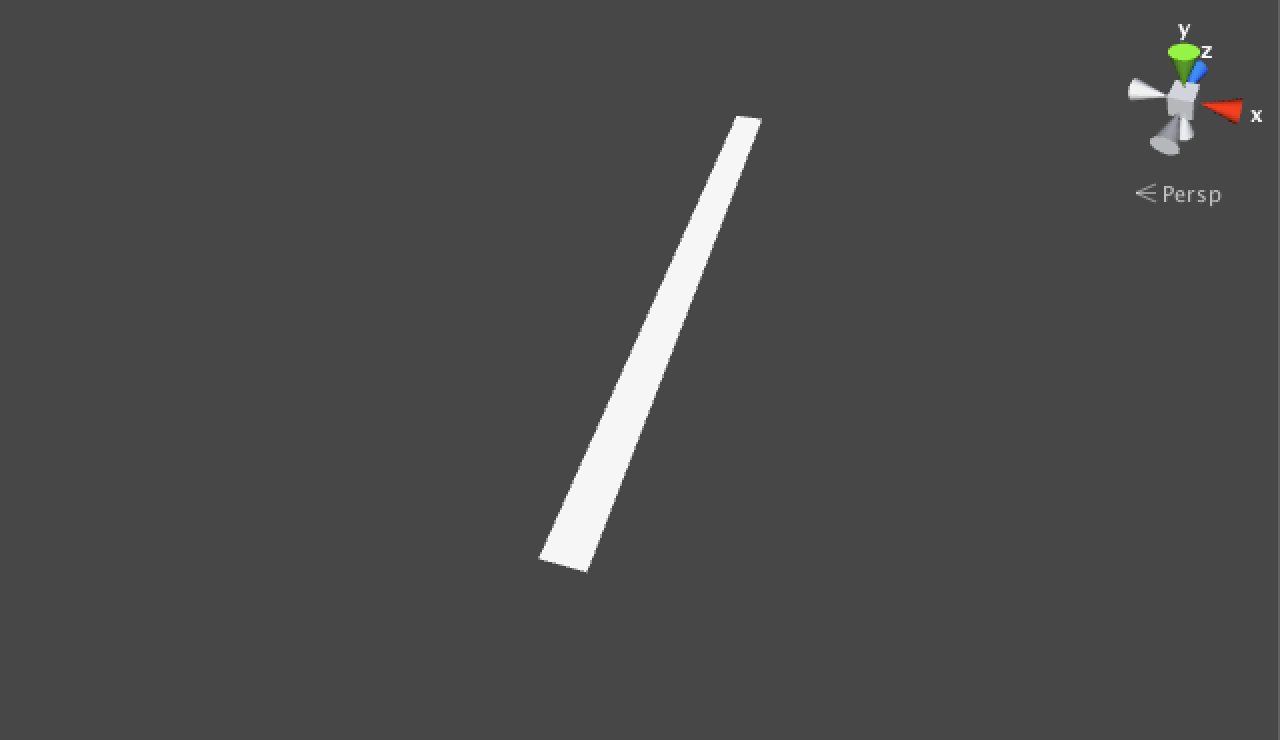
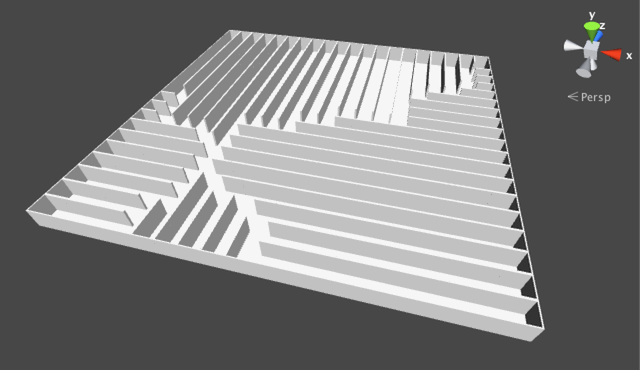
Let's do away with our double loop that Maze uses to generate a regular pattern of cells. Instead we'll pick some random coordinates inside the maze and start generating a line of cells from there, until we run out of the maze.
	public IEnumerator Generate () {
		WaitForSeconds delay = new WaitForSeconds(generationStepDelay);
		cells = new MazeCell[size.x, size.z];
		IntVector2 coordinates = RandomCoordinates;
		while (ContainsCoordinates(coordinates)) {
			yield return delay;
			CreateCell(coordinates);
			coordinates.z += 1;
		}
	}
To make this work we have to also add a RandomCoordinates property to Maze that produces some coordinates inside it, plus a ContainsCoordinates method that checks whether some coordinates fall inside the maze. Let's make them public as they would be useful for anything that deals with mazes.
	public IntVector2 RandomCoordinates {
		get {
			return new IntVector2(Random.Range(0, size.x), Random.Range(0, size.z));
		}
	}

	public bool ContainsCoordinates (IntVector2 coordinate) {
		return coordinate.x >= 0 && coordinate.x < size.x && coordinate.z >= 0 && coordinate.z < size.z;
	}
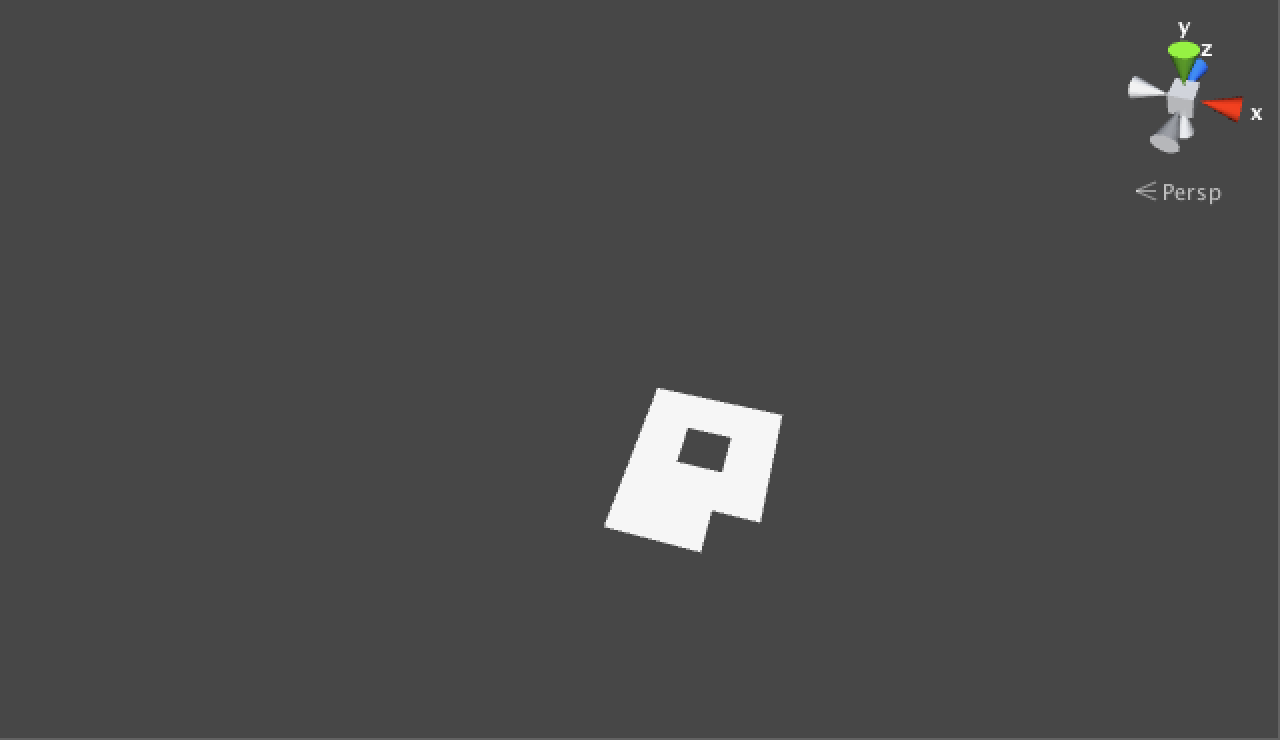
But we don't want to walk in a straight line, we want to move in a random direction each step. But what directions are there to choose from? Let's create a MazeDirection enum type to explicitly define that we have the north, east, south, and west directions. Place it in its own script file.
using UnityEngine;

public enum MazeDirection {
	North,
	East,
	South,
	West
}
Now it would be handy if we could ask for a random direction. Unfortunately an enum is not a class or a struct, so we cannot define methods or properties inside it. What we could do is add another static class and put a random property there. Let's use the plural version as its name and place it in the same file as MazeDirection. We also add a Count constant so we have an official way to know how many directions there are.
public static class MazeDirections {

	public const int Count = 4;

	public static MazeDirection RandomValue {
		get {
			return (MazeDirection)Random.Range(0, Count);
		}
	}
}
Now we can get a random direction, but how do we adjust the current coordinates based on that? It would be convenient if we could convert a direction into an integer vector somehow. Let's add a method to MazeDirections to take care of that. We'll use a private static array of vectors to make this conversion easy.
	private static IntVector2[] vectors = {
		new IntVector2(0, 1),
		new IntVector2(1, 0),
		new IntVector2(0, -1),
		new IntVector2(-1, 0)
	};

	public static IntVector2 ToIntVector2 (MazeDirection direction) {
		return vectors[(int)direction];
	}
This allows us to convert an arbitrary direction into an integer vector via MazeDirections.ToIntVector2(someDirection). While this works, it looks aweful. It would've been convenient if we could do it via someDirection.ToIntVector2() instead. The good news is that we can achieve this by using an extension method. With just a slight change to ToIntVector2 it will behave as if it were an instance method of MazeDirection.
	public static IntVector2 ToIntVector2 (this MazeDirection direction) {
		return vectors[(int)direction];
	}
With these additions it is now easy to have Maze generate a new cell in a random direction each step. We do have to guard against visiting a cell more than once, so let's add a convenient method to retrieve the maze's cell at some coordinates.
	public MazeCell GetCell (IntVector2 coordinates) {
		return cells[coordinates.x, coordinates.z];
	}

	public IEnumerator Generate () {
		WaitForSeconds delay = new WaitForSeconds(generationStepDelay);
		cells = new MazeCell[size.x, size.z];
		IntVector2 coordinates = RandomCoordinates;
		while (ContainsCoordinates(coordinates) && GetCell(coordinates) == null) {
			yield return delay;
			CreateCell(coordinates);
			coordinates += MazeDirections.RandomValue.ToIntVector2();
		}
	}
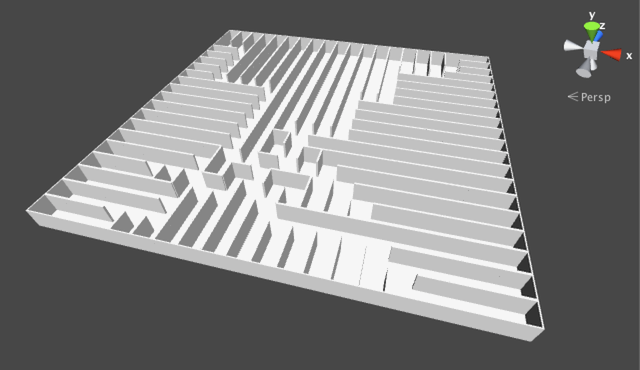
Backtracking
As you will see when entering play mode and pressing space a few times, only a few cells get generated each time. This happens because it is likely that we bump into an already filled cell. One way to improve our approach is to keep track of a list of active cells. Each time we create a cell, we add it to this list. Then the next generation step we try to move one random step from the last cell in this list. If we cannot do this move, instead of immediately stopping, we remove the current cell from the active list. This way we will do a step backward and try again each time we fail, until the list is empty.
We're going to use a list of maze cells, so start by adding the Systems.Collections.Generic namespace to those used by Maze.
using UnityEngine;
using System.Collections;
using System.Collections.Generic;

public class Maze : MonoBehaviour
Then we create a temporary list inside the Generate method. To keep the method simple, let's put the generation steps in their own methods and supply the active list to them as an argument.
	public IEnumerator Generate () {
		WaitForSeconds delay = new WaitForSeconds(generationStepDelay);
		cells = new MazeCell[size.x, size.z];
		List<MazeCell> activeCells = new List<MazeCell>();
		DoFirstGenerationStep(activeCells);
		while (activeCells.Count > 0) {
			yield return delay;
			DoNextGenerationStep(activeCells);
		}
	}
The DoFirstGenerationStep method is very short right now. The DoNextGenerationStep is a bit longer, because it has to retrieve the current cell, check whether the move is possible, and take care of removing cells from the list.
	private void DoFirstGenerationStep (List<MazeCell> activeCells) {
		activeCells.Add(CreateCell(RandomCoordinates));
	}

	private void DoNextGenerationStep (List<MazeCell> activeCells) {
		int currentIndex = activeCells.Count - 1;
		MazeCell currentCell = activeCells[currentIndex];
		MazeDirection direction = MazeDirections.RandomValue;
		IntVector2 coordinates = currentCell.coordinates + direction.ToIntVector2();
		if (ContainsCoordinates(coordinates) && GetCell(coordinates) == null) {
			activeCells.Add(CreateCell(coordinates));
		}
		else {
			activeCells.RemoveAt(currentIndex);
		}
	}
One additional change needed to make this work is to let CreateCell return the new cell that it creates.
	private MazeCell CreateCell (IntVector2 coordinates) {
		MazeCell newCell = Instantiate(cellPrefab) as MazeCell;
		cells[coordinates.x, coordinates.z] = newCell;
		newCell.coordinates = coordinates;
		newCell.name = "Maze Cell " + coordinates.x + ", " + coordinates.z;
		newCell.transform.parent = transform;
		newCell.transform.localPosition =
			new Vector3(coordinates.x - size.x * 0.5f + 0.5f, 0f, coordinates.z - size.z * 0.5f + 0.5f);
		return newCell;
	}
Connecting the Cells
While we now tend to generate longer paths of cells, it's still far from a complete maze. We should really be smart about how we move from cell to cell.
It's time to keep track of the connections between cells. Each cell has four edges, each of which connects to a neighboring cell, unless it would lead outside of the maze. We could either create a a single bidirectional edge between two cells, or give each their own unidirectional edge. We choose the latter approach, because it is more flexible.
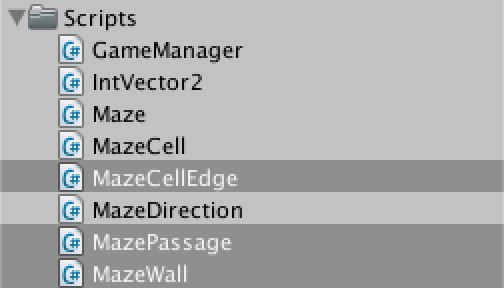
Add a script for the new MazeCellEdge component type. Give it a reference to the cell it belongs to and one to the other cell that it connects with. Also give it a direction so we remember its orientation.
using UnityEngine;

public class MazeCellEdge : MonoBehaviour {

	public MazeCell cell, otherCell;

	public MazeDirection direction;
}
We want to make the edges children of their cells and place them in the same location. Also, once an edge is created its cell should know about it as well. Let's create an Initialize method to take care of this.
	public void Initialize (MazeCell cell, MazeCell otherCell, MazeDirection direction) {
		this.cell = cell;
		this.otherCell = otherCell;
		this.direction = direction;
		cell.SetEdge(direction, this);
		transform.parent = cell.transform;
		transform.localPosition = Vector3.zero;
	}
Now we need to add a SetEdge method to MazeCell. Let's add a GetEdge method as well, because that is bound to be useful later. Our cells will store their edges in an array, but no one else needs to know how that works, so we make it private.
	private MazeCellEdge[] edges = new MazeCellEdge[MazeDirections.Count];

	public MazeCellEdge GetEdge (MazeDirection direction) {
		return edges[(int)direction];
	}

	public void SetEdge (MazeDirection direction, MazeCellEdge edge) {
		edges[(int)direction] = edge;
	}
Whenever we move from one cell to a new one, we should tell both cells that the edges that connect them are now passages. Whenever we move out of the maze or bump into an already created cell, the edges should become walls instead of passages. So we really have two types of cell edges. Let's add a MazePassage and a MazeWall component that both extend MazeCellEdge and place them in their own files. Because we only want to use these types and never create an instance of the generic MazeCellEdge, we mark it as abstract.
public abstract class MazeCellEdge : MonoBehaviour
using UnityEngine;

public class MazePassage : MazeCellEdge {}
using UnityEngine;

public class MazeWall : MazeCellEdge {}
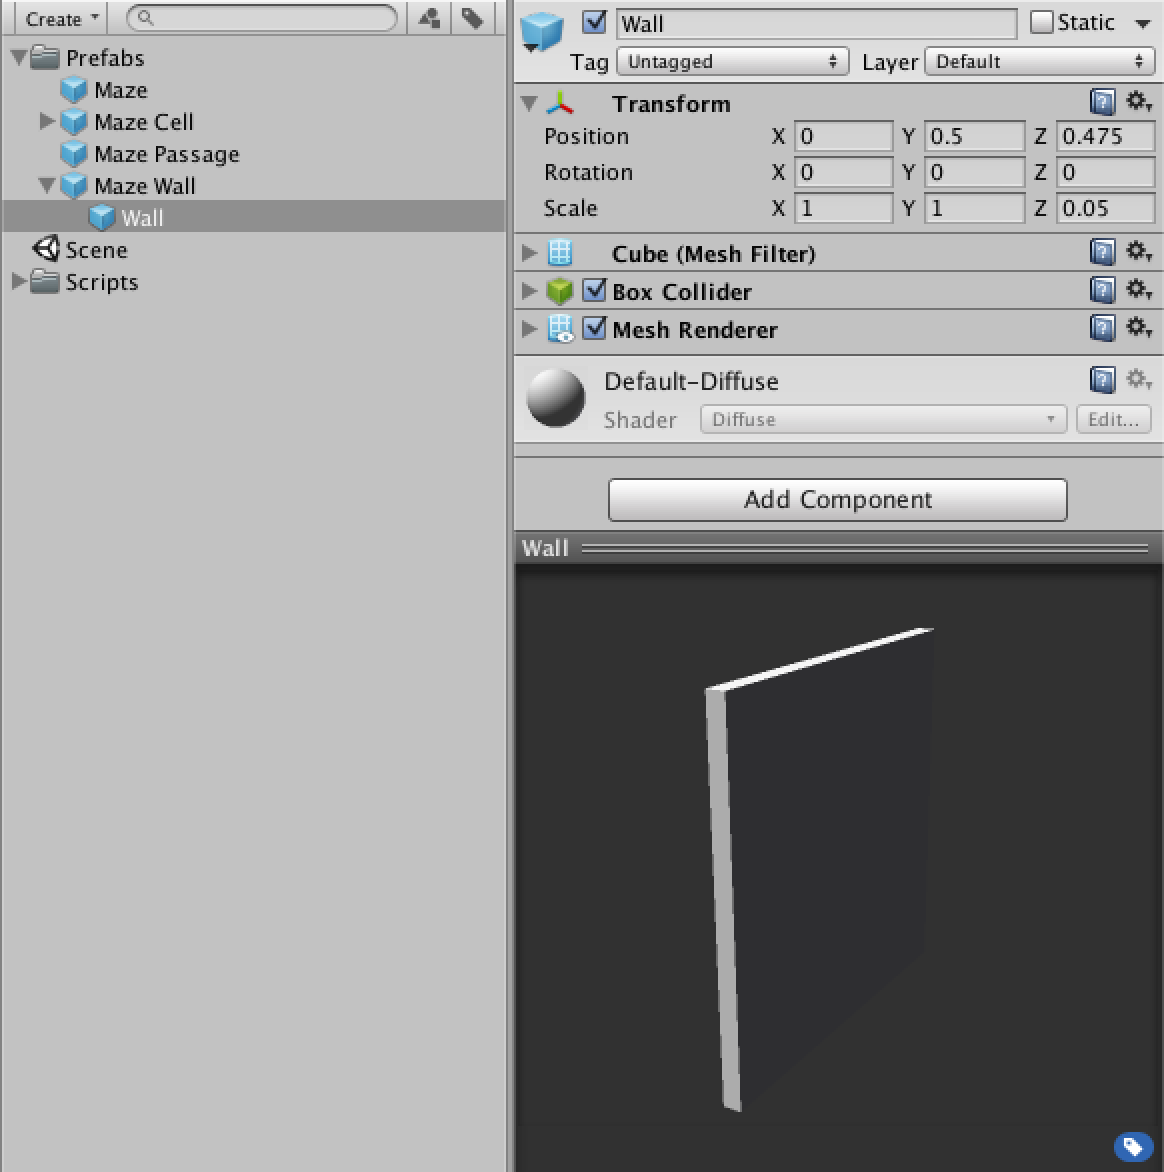
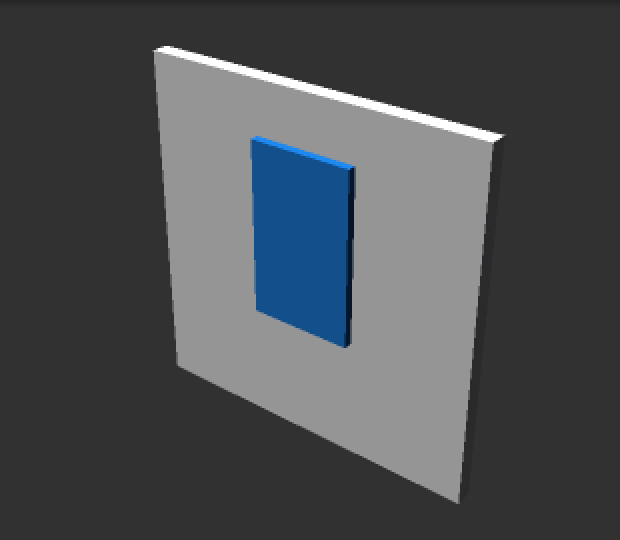
Now we can create a prefab for the passage. It's simply an empty game object with a MazePassage component added to it. A wall prefab can be created the same way, except that we also give it a default cube as a child. This cube is our wall's 3D representation. Let's make it 0.05 units thick and position it so that it will end up flush with the north edge of a cell.
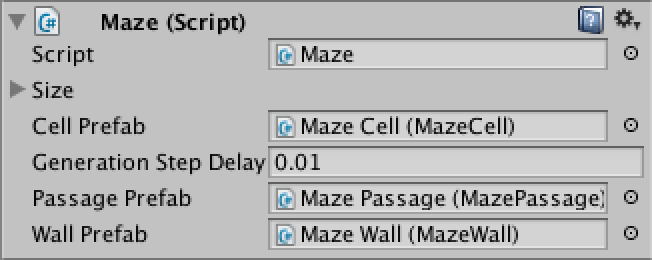
With the prefabs ready, Maze can now get a reference to both, so it can generate instances of them.
	public MazePassage passagePrefab;
	public MazeWall wallPrefab;
Now we can create passages and walls in DoNextGenerationStep. Let's assume we have convenient methods for that. When we would go out of the maze, we add a wall. If we're still inside the maze, we need to check if the current cell's neightbor doesn't exist yet. If so, we create it and place a passage in between them. But if the neighbor already exists, we separate them with a wall.
	private void DoNextGenerationStep (List<MazeCell> activeCells) {
		int currentIndex = activeCells.Count - 1;
		MazeCell currentCell = activeCells[currentIndex];
		MazeDirection direction = MazeDirections.RandomValue;
		IntVector2 coordinates = currentCell.coordinates + direction.ToIntVector2();
		if (ContainsCoordinates(coordinates)) {
			MazeCell neighbor = GetCell(coordinates);
			if (neighbor == null) {
				neighbor = CreateCell(coordinates);
				CreatePassage(currentCell, neighbor, direction);
				activeCells.Add(neighbor);
			}
			else {
				CreateWall(currentCell, neighbor, direction);
				activeCells.RemoveAt(currentIndex);
			}
		}
		else {
			CreateWall(currentCell, null, direction);
			activeCells.RemoveAt(currentIndex);
		}
	}
The CreatePassage and CreateWall methods simply instantiate their respective prefabs and initialize them, once for both cells. The only real difference between them is that CreateWall's second cell won't exist at the edge of the maze.
	private void CreatePassage (MazeCell cell, MazeCell otherCell, MazeDirection direction) {
		MazePassage passage = Instantiate(passagePrefab) as MazePassage;
		passage.Initialize(cell, otherCell, direction);
		passage = Instantiate(passagePrefab) as MazePassage;
		passage.Initialize(otherCell, cell, direction.GetOpposite());
	}

	private void CreateWall (MazeCell cell, MazeCell otherCell, MazeDirection direction) {
		MazeWall wall = Instantiate(wallPrefab) as MazeWall;
		wall.Initialize(cell, otherCell, direction);
		if (otherCell != null) {
			wall = Instantiate(wallPrefab) as MazeWall;
			wall.Initialize(otherCell, cell, direction.GetOpposite());
		}
	}
The code above makes use of a convenient GetOpposite method that doesn't exist yet, so let's quickly add it to MazeDirections.
	private static MazeDirection[] opposites = {
		MazeDirection.South,
		MazeDirection.West,
		MazeDirection.North,
		MazeDirection.East
	};

	public static MazeDirection GetOpposite (this MazeDirection direction) {
		return opposites[(int)direction];
	}
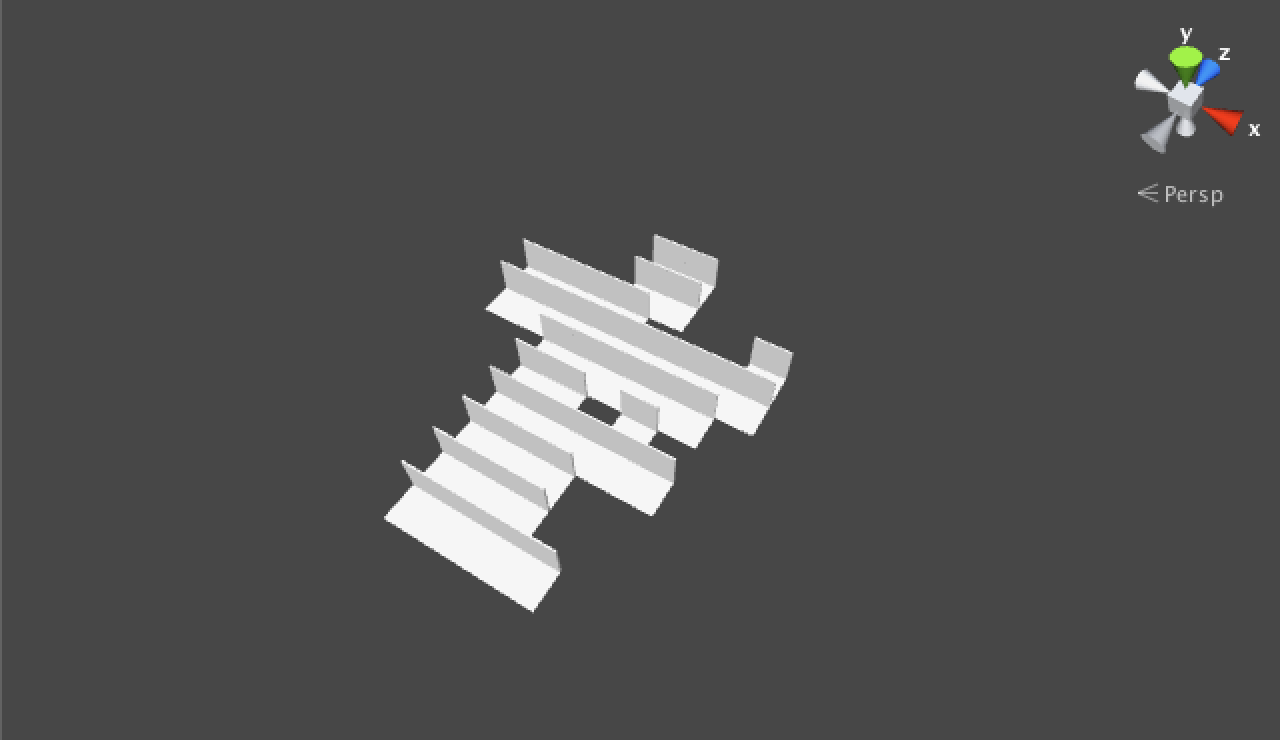
We have now added some invisible passages and visible walls to the maze. So we can see that the walls are always on the north side of cells, which is incorrect. We fix this by rotating in the right direction in MazeCellEdge's Initialize method.
	public void Initialize (MazeCell cell, MazeCell otherCell, MazeDirection direction) {
		this.cell = cell;
		this.otherCell = otherCell;
		this.direction = direction;
		cell.SetEdge(direction, this);
		transform.parent = cell.transform;
		transform.localPosition = Vector3.zero;
		transform.localRotation = direction.ToRotation();
	}
And yes, this means we're going to add yet another convenient method to MazeDirections.
	private static Quaternion[] rotations = {
		Quaternion.identity,
		Quaternion.Euler(0f, 90f, 0f),
		Quaternion.Euler(0f, 180f, 0f),
		Quaternion.Euler(0f, 270f, 0f)
	};

	public static Quaternion ToRotation (this MazeDirection direction) {
		return rotations[(int)direction];
	}
Generating the Entire Maze
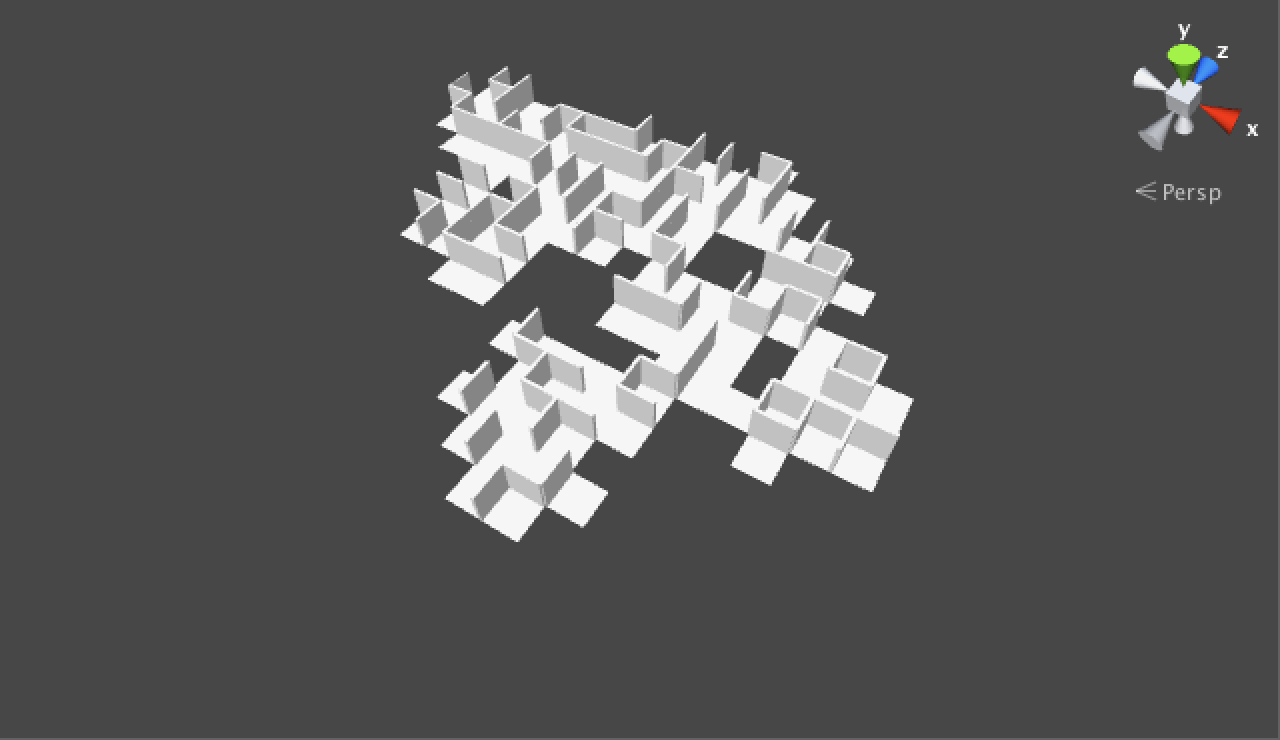
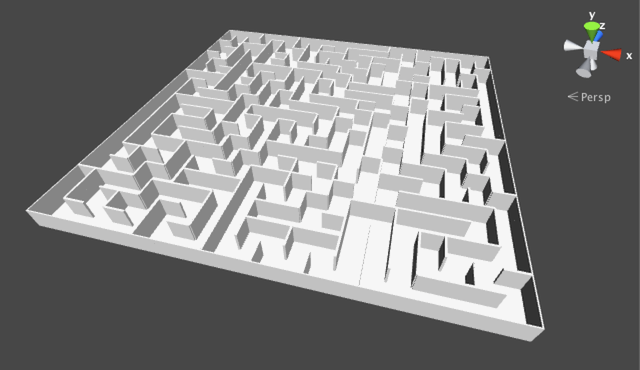
While the walls are now correctly rotated, we still don't fill the entire maze. Even worse, we're also generating completely walled-off sections, making them unreachable from anywhere else in the maze. This can happen because we choose a completely random direction each step, which could lead to us placing a wall where a passage had already been defined.
To completely fill the maze, we should only remove a cell from the active list when all its edges have been initialized. This is the first thing we should check for in DoNextGenerationStep, because a cell in the active list will have become fully initialized when all its neighbors have been visited. And to prevent placing incorrect walls, we should only pick a random direction that is not yet initialized for the current cell.
	private void DoNextGenerationStep (List<MazeCell> activeCells) {
		int currentIndex = activeCells.Count - 1;
		MazeCell currentCell = activeCells[currentIndex];
		if (currentCell.IsFullyInitialized) {
			activeCells.RemoveAt(currentIndex);
			return;
		}
		MazeDirection direction = currentCell.RandomUninitializedDirection;
		IntVector2 coordinates = currentCell.coordinates + direction.ToIntVector2();
		if (ContainsCoordinates(coordinates)) {
			MazeCell neighbor = GetCell(coordinates);
			if (neighbor == null) {
				neighbor = CreateCell(coordinates);
				CreatePassage(currentCell, neighbor, direction);
				activeCells.Add(neighbor);
			}
			else {
				CreateWall(currentCell, neighbor, direction);
				// No longer remove the cell here.
			}
		}
		else {
			CreateWall(currentCell, null, direction);
			// No longer remove the cell here.
		}
	}
We can easily check whether a cell is fully initialized by having MazeCell keep track of how often an edge has been set.
	private int initializedEdgeCount;

	public bool IsFullyInitialized {
		get {
			return initializedEdgeCount == MazeDirections.Count;
		}
	}

	public void SetEdge (MazeDirection direction, MazeCellEdge edge) {
		edges[(int)direction] = edge;
		initializedEdgeCount += 1;
	}
To get an unbiased random uninitialized direction is a little less straightforward. One way is to randomly decide how many uninitialized directions we should skip. Then we loop through our edges array and whenever we find a hole we check whether we are out of skips. If so, this is our direction. Otherwise, we decrease our amount of skips by one.
	public MazeDirection RandomUninitializedDirection {
		get {
			int skips = Random.Range(0, MazeDirections.Count - initializedEdgeCount);
			for (int i = 0; i < MazeDirections.Count; i++) {
				if (edges[i] == null) {
					if (skips == 0) {
						return (MazeDirection)i;
					}
					skips -= 1;
				}
			}
		}
	}
This will work as long as there are uninitialized edges remaining, otherwise we shouldn't call this method. If we did, we would run through the loop without returning and won't have any result. In fact, the compiler will complain that not all code paths return a value. We solve this by throwing an InvalidOperationException at the end of the method, which is the most appropriate exception for this case. This will result in a useful error message in Unity's console if we make a mistake somewhere and call this method when we shouldn't.
	public MazeDirection RandomUninitializedDirection {
		get {
			int skips = Random.Range(0, MazeDirections.Count - initializedEdgeCount);
			for (int i = 0; i < MazeDirections.Count; i++) {
				if (edges[i] == null) {
					if (skips == 0) {
						return (MazeDirection)i;
					}
					skips -= 1;
				}
			}
			throw new System.InvalidOperationException("MazeCell has no uninitialized directions left.");
		}
	}
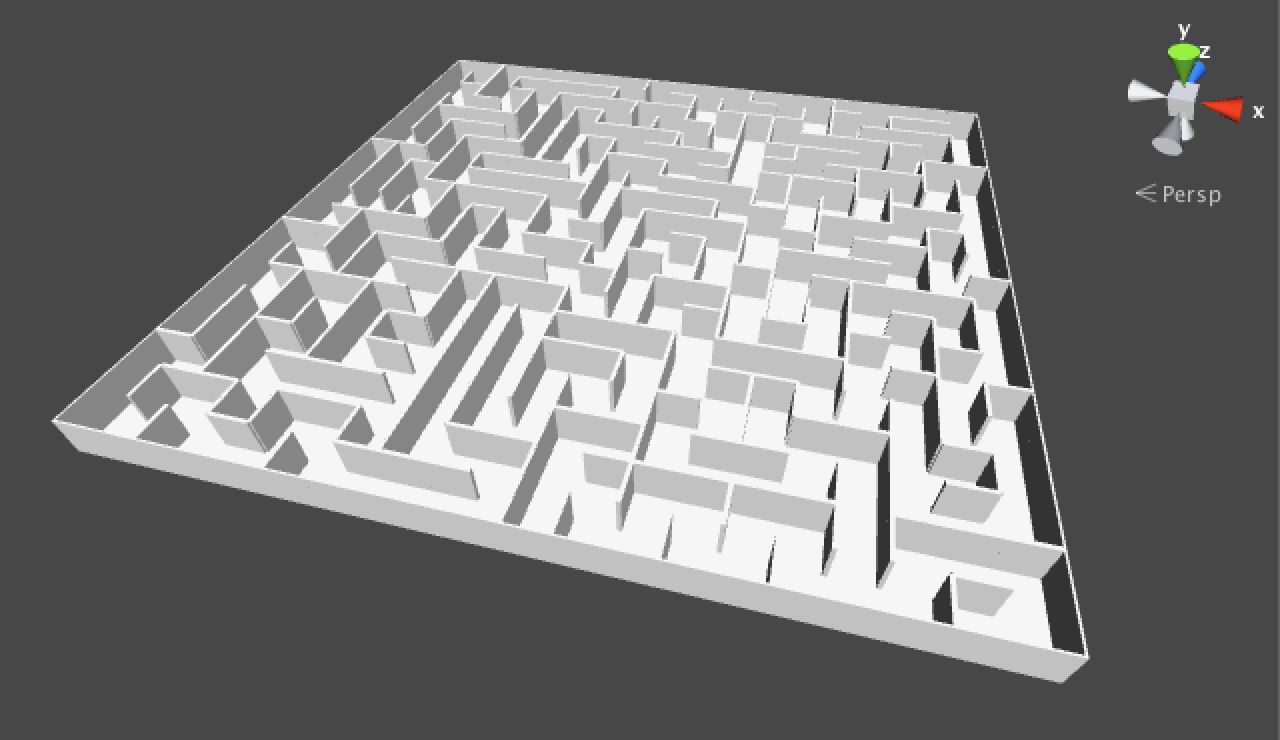
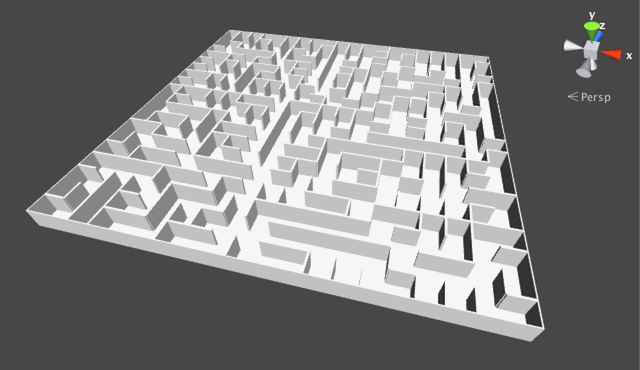
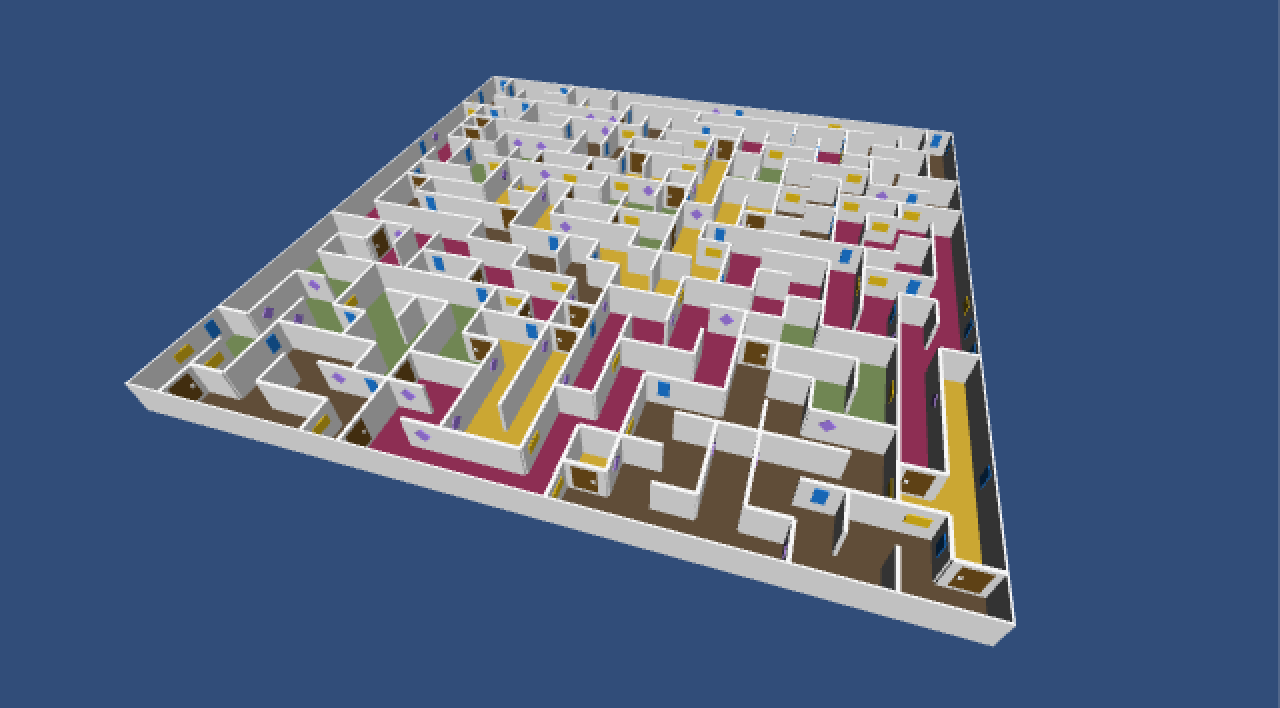
Finally, we can generate a complete maze! We are now using one flavor of the Growing Tree algorithm. In case you're curious, you can change the nature of the maze you generate by using a different method to select the current index in DoNextGenerationStep. I have chosen to always select the last index, which causes the algorithm to dive into narrow paths that run all over the maze. Always selecting the first or the middle index will produce very different behavior. Another option is to just pick a random index. Or to choose between two approaches each step. You could even make this configurable if you like, see the Graphs tutorial for a way to do that.
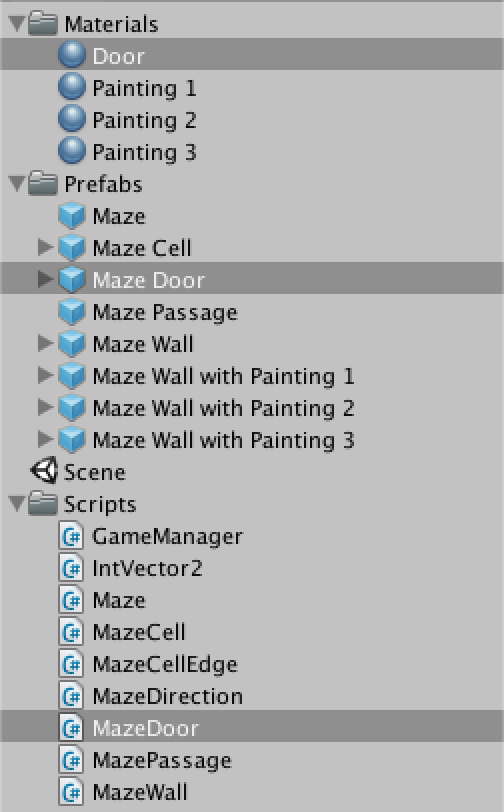
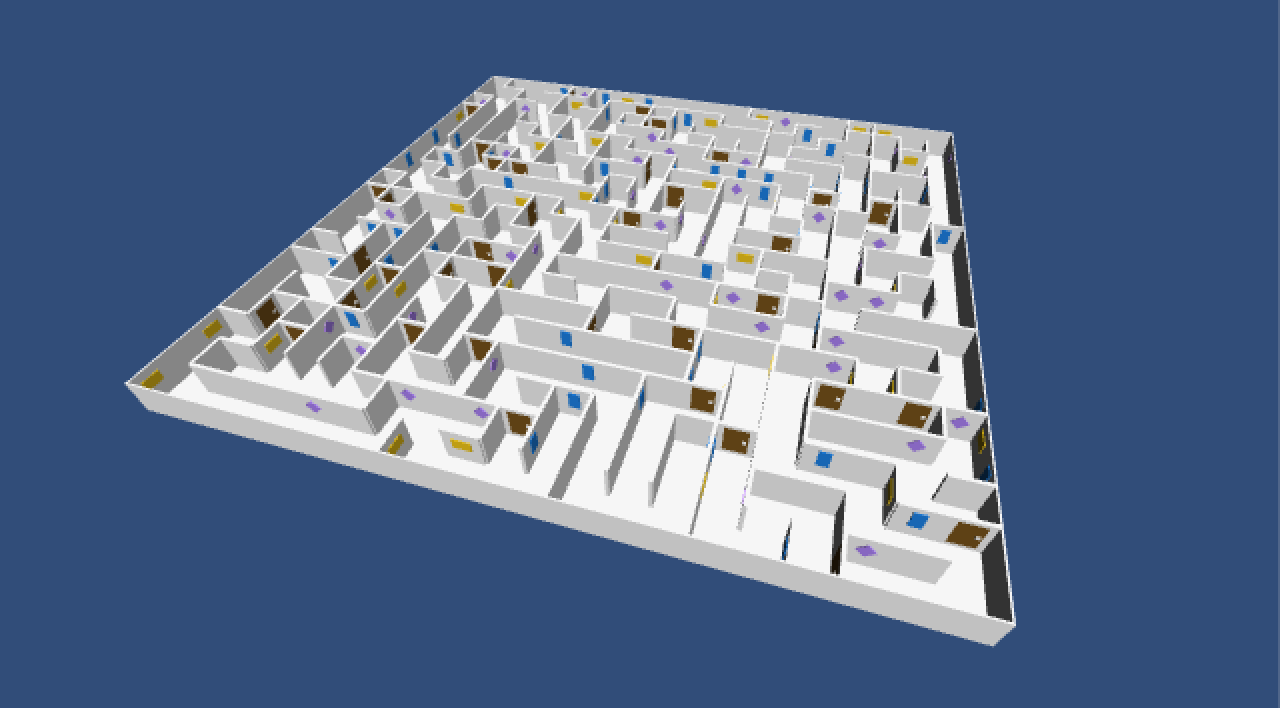
Decorating the Maze
Our maze looks rather dull. Let's add some variety by introducing different wall sections. We can do this by hanging some very simple paintings on the walls.
First, create a few materials for the paintings, just to add some color variety. Put them together in a new Materials folder and give them any color you like. Next, drag the wall prefab into the scene and name it Wall with Painting 1. Add a new default cube named Painting to this instance. Give the cube a material, then scale and position it so it looks like it's hanging on the wall. Then turn the whole thing into a new prefab. Repeat this until you have enough paintings. I made three.

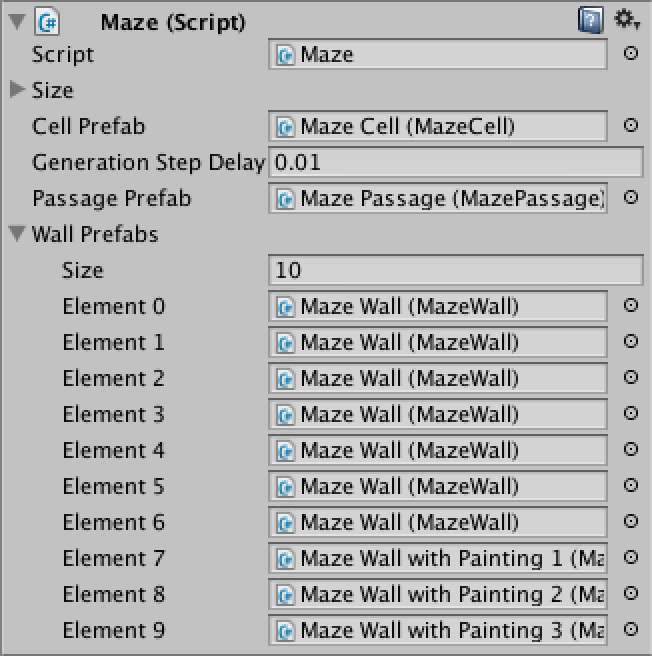
Now change Maze so it has an array of wall prefabs instead of a single one. Then we can pick one at random from the array whenever we need to instantiate a new wall.
	public MazeWall[] wallPrefabs;

	private void CreateWall (MazeCell cell, MazeCell otherCell, MazeDirection direction) {
		MazeWall wall = Instantiate(wallPrefabs[Random.Range(0, wallPrefabs.Length)]) as MazeWall;
		wall.Initialize(cell, otherCell, direction);
		if (otherCell != null) {
			wall = Instantiate(wallPrefabs[Random.Range(0, wallPrefabs.Length)]) as MazeWall;
			wall.Initialize(otherCell, cell, direction.GetOpposite());
		}
	}
Then you can add all your wall prefabs to the array of the maze prefab. I added the empty wall multiple times, so it is more likely to be picked. Otherwise the maze will be brimming with paintings.
Placing Doors
Doors are another interesting element to add to our maze. Let's add a MazeDoor component that extends MazePassage. Because it will have a rotating part, add a public Transform variable to it named hinge.
using UnityEngine;

public class MazeDoor : MazePassage {

	public Transform hinge;
}
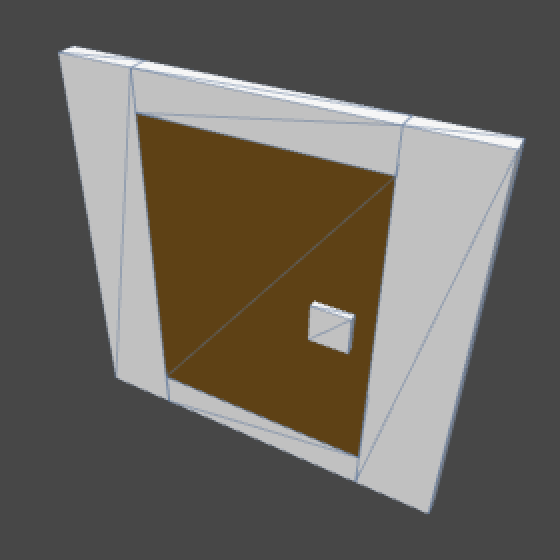
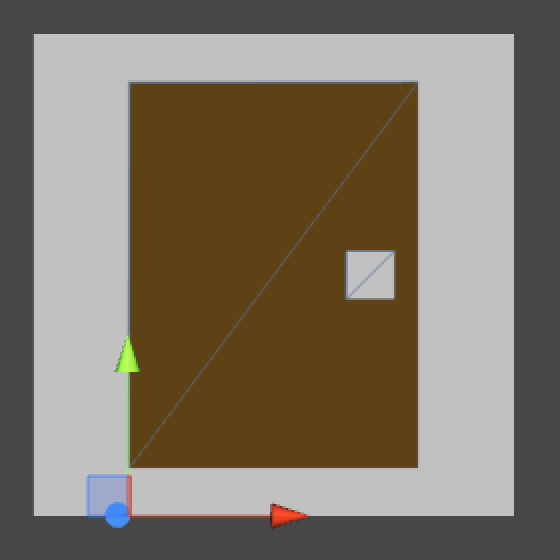
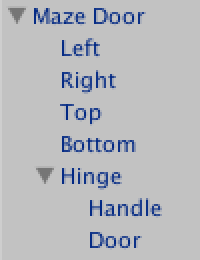
We will build a door frame from four cubes and put another cube in it with a new Door material, plus a door handle on the right side of it. To allow the door to rotate properly, add an empty game object named Hinge on the left side of the door with a Z-position of 0.5. Make the door and handle objects children of it. Add the MazeDoor component to the root object and connect its hinge, then turn it into a prefab.
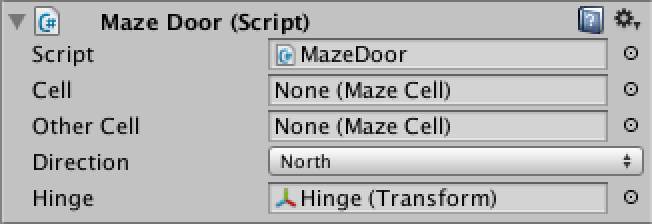
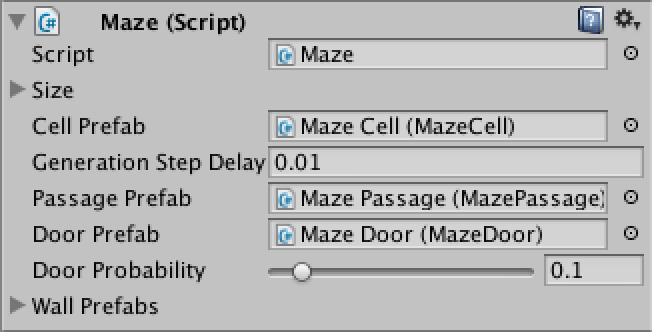
Maze can now get a reference to the door prefab. We want to spawns doors instead of passages some of the time, but really not that often because otherwise the maze will get flooded with doors. So let's add a doorProbabilty configuration option and use that to decide whether we place a door or a passage. I set it to 0.1, which means that one out of ten passage will become a door.
	public MazeDoor doorPrefab;

	[Range(0f, 1f)]
	public float doorProbability;

	private void CreatePassage (MazeCell cell, MazeCell otherCell, MazeDirection direction) {
		MazePassage prefab = Random.value < doorProbability ? doorPrefab : passagePrefab;
		MazePassage passage = Instantiate(prefab) as MazePassage;
		passage.Initialize(cell, otherCell, direction);
		passage = Instantiate(prefab) as MazePassage;
		passage.Initialize(otherCell, cell, direction.GetOpposite());
	}
We now get doors, but there is something wrong. All the doors are have their handle on the right side, even opposite sides of the same door! We need to make sure that the other side of a door swivels in the opposite direction.
We know that the sides of a door are created one after the other. If a door could somehow know that it was created second, it can then mirror itself. What we could do is add a convenient private property to MazeDoor that somehow gives us the opposite side of the door. Then we can mirror and reposition our hinge if the other side already exists. We add this functionality to Initialize by overriding that method with out own version. Inside it, we first call the original version and then do the additional work.
	private MazeDoor OtherSideOfDoor {
		get {
			return otherCell.GetEdge(direction.GetOpposite()) as MazeDoor;
		}
	}

	public override void Initialize (MazeCell primary, MazeCell other, MazeDirection direction) {
		base.Initialize(primary, other, direction);
		if (OtherSideOfDoor != null) {
			hinge.localScale = new Vector3(-1f, 1f, 1f);
			Vector3 p = hinge.localPosition;
			p.x = -p.x;
			hinge.localPosition = p;
		}
	}
However, we can't just override any method of the class that we're extending. The original class must have declared that this is possible by marking the method as virtual. So we add the virtual keyword to the Initialize method of MazeCellEdge.
	public virtual void Initialize (MazeCell cell, MazeCell otherCell, MazeDirection direction) {
		this.cell = cell;
		this.otherCell = otherCell;
		this.direction = direction;
		cell.SetEdge(direction, this);
		transform.parent = cell.transform;
		transform.localPosition = Vector3.zero;
		transform.localRotation = direction.ToRotation();
	}
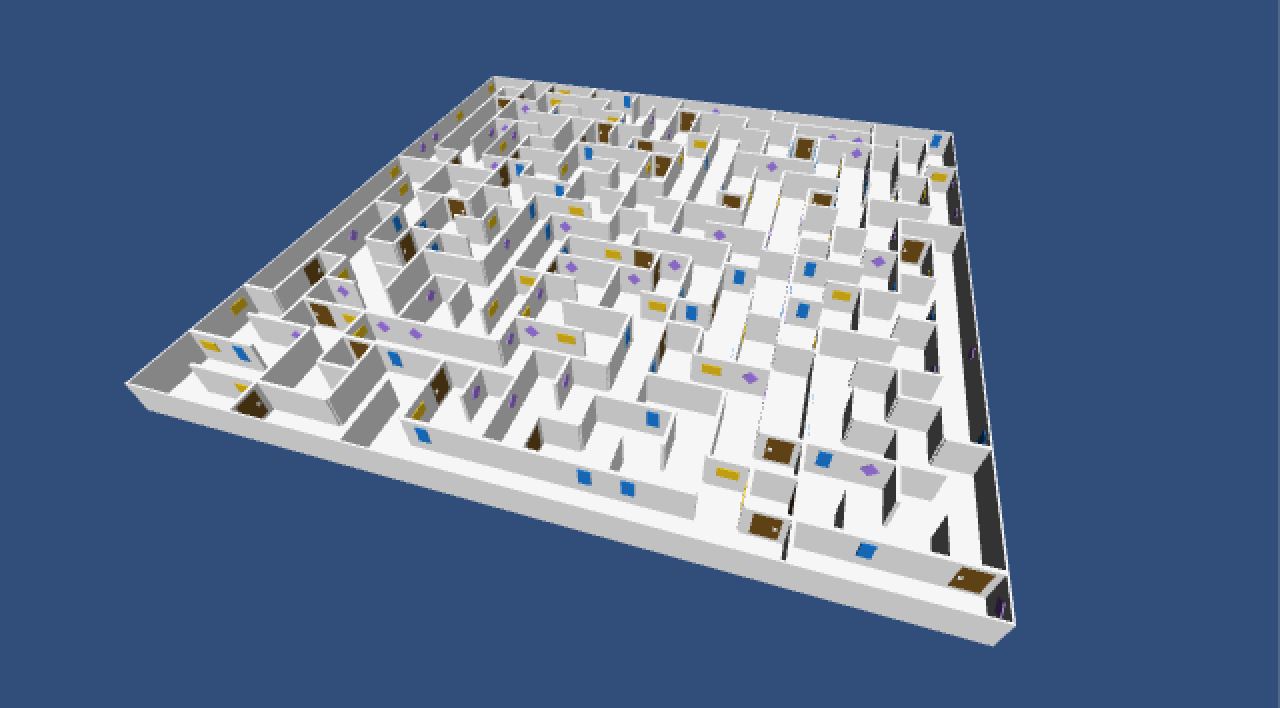
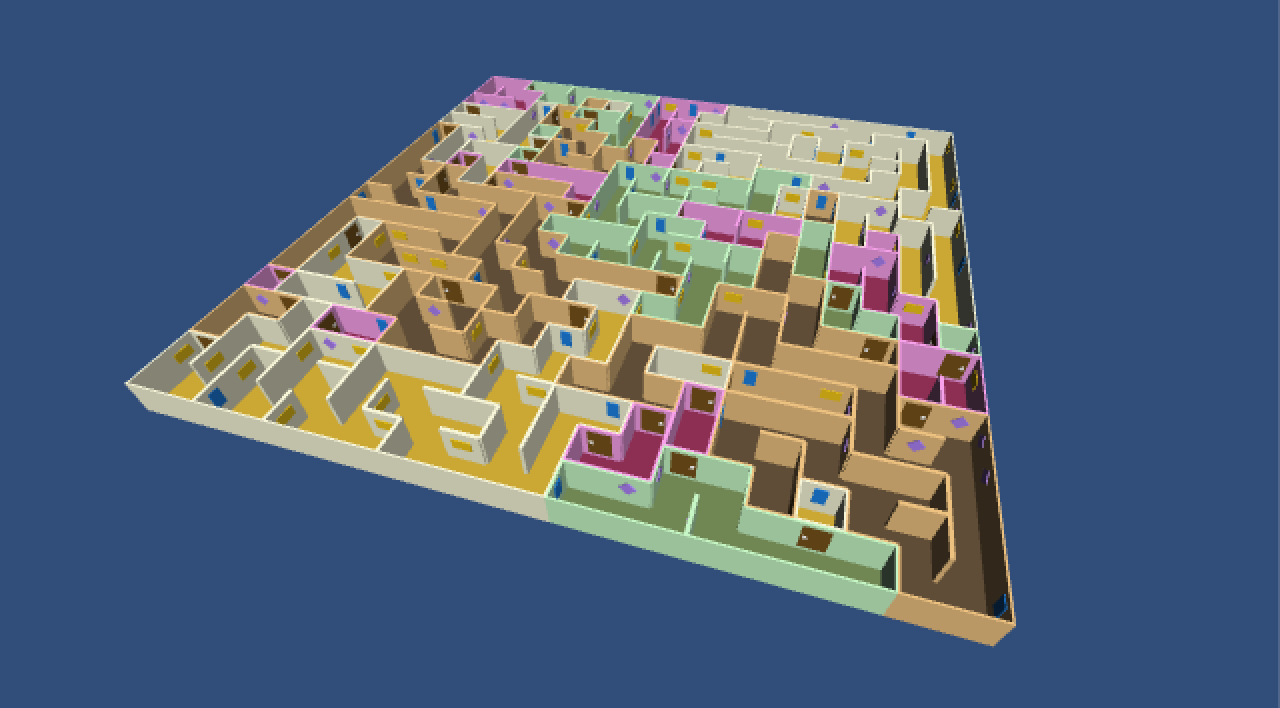
Adding Rooms
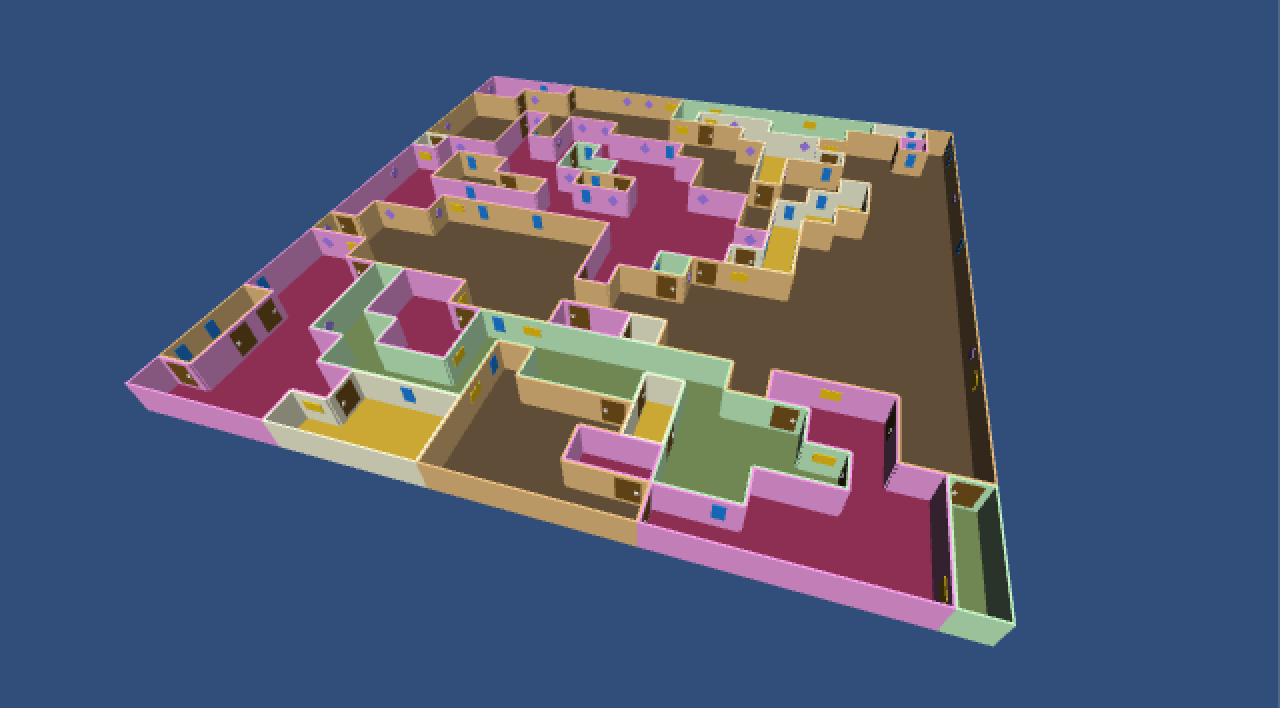
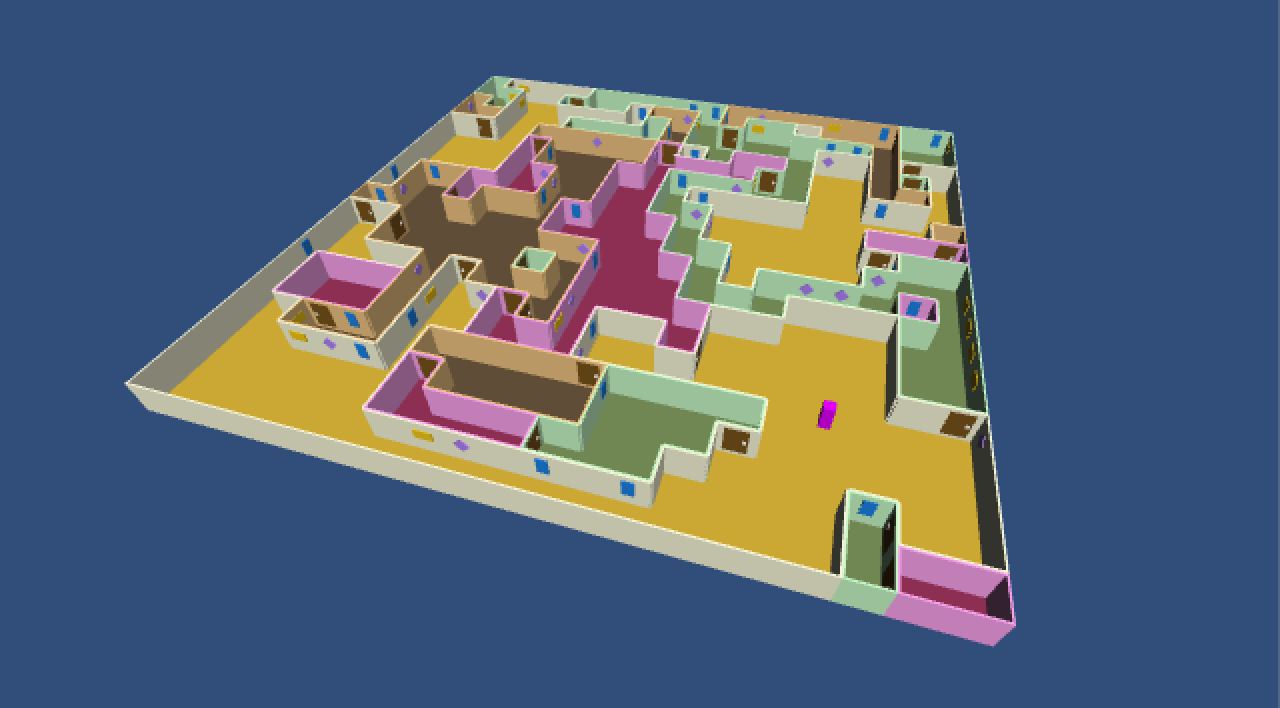
Our maze is uniformly white and that is rather boring. Let's spice things up by breaking the maze into rooms of different types. Then we can adjust the appearance of each room based on its type.
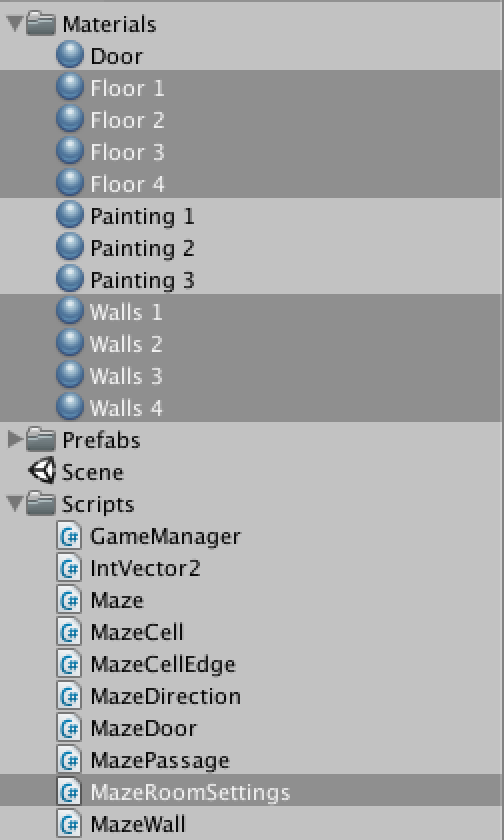
Create a new serialized MazeRoomSettings class with a public material references for floors and walls.
using UnityEngine;
using System;

[Serializable]
public class MazeRoomSettings {

	public Material floorMaterial, wallMaterial;
}
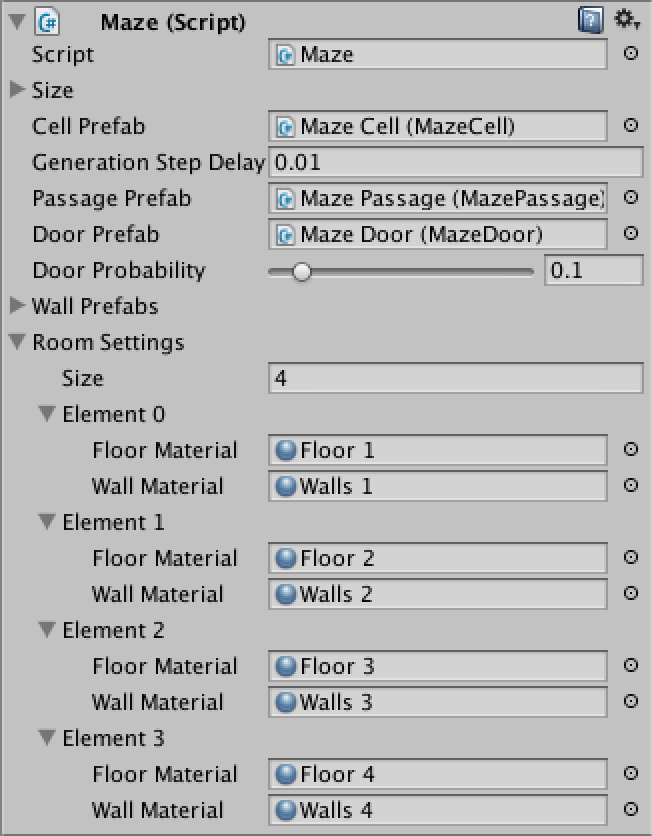
Now we can give Maze an array of these settings, defining the available room types. Then create a few materials with varying colors and populate the array. Four room types is a good amount for a 20 by 20 maze.
public MazeRoomSettings[] roomSettings;
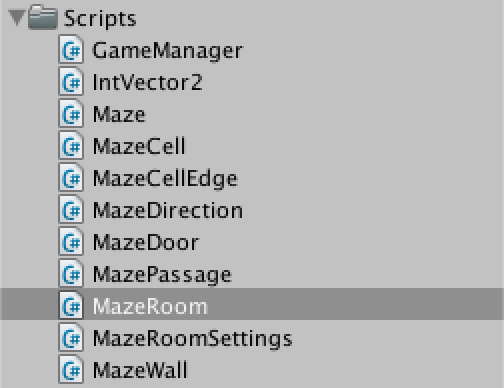
Now we are also going to add a MazeRoom class so we can easily keep track of which cell belongs to which room. For now it simply is a wrapper for a list of cells, and it also has a reference to its settings and settings index. We have it extend ScriptableObject so Unity will keep the references intact if we were to cause a recompile while in play mode.
using UnityEngine;
using System.Collections.Generic;

public class MazeRoom : ScriptableObject {

	public int settingsIndex;

	public MazeRoomSettings settings;

	private List<MazeCell> cells = new List<MazeCell>();

	public void Add (MazeCell cell) {
		cell.room = this;
		cells.Add(cell);
	}
}
We also give MazeCell a reference to its room. While we're at it, let's also give it an Initialize method that takes care of assigning the right materials. As we only have the floor quad to worry about, we just grab the first child and be done with it.
	public MazeRoom room;

	public void Initialize (MazeRoom room) {
		room.Add(this);
		transform.GetChild(0).GetComponent<Renderer>().material = room.settings.floorMaterial;
	}
Now add a room list and a method to create a new room to Maze. We'll use it to create a new room for the first cell and each time we spawn a door.
If we were to just pick a random room type, it would be possible for two adjacent rooms to have the same type. While this is not really a problem, we get more variety by making sure that this won't happen. This can be done by checking whether we picked the same index as the room we came from. If so, we'll just add one to the index and wrap around. It's biased, but that's not a big deal here. Initially we'll pass a negative index so any room is fine.
	private List<MazeRoom> rooms = new List<MazeRoom>();

	private MazeRoom CreateRoom (int indexToExclude) {
		MazeRoom newRoom = ScriptableObject.CreateInstance<MazeRoom>();
		newRoom.settingsIndex = Random.Range(0, roomSettings.Length);
		if (newRoom.settingsIndex == indexToExclude) {
			newRoom.settingsIndex = (newRoom.settingsIndex + 1) % roomSettings.Length;
		}
		newRoom.settings = roomSettings[newRoom.settingsIndex];
		rooms.Add(newRoom);
		return newRoom;
	}
It is now possible to create a new room in DoFirstGenerationStep. That will take care of the first cell. To put all the other cells in a room as well, we modify CreatePassage so it checks whether a door has been placed. If so, the other cell is the first of a new room. If not, it belongs to the same room as the previous cell.
	private void DoFirstGenerationStep (List<MazeCell> activeCells) {
		MazeCell newCell = CreateCell(RandomCoordinates);
		newCell.Initialize(CreateRoom(-1));
		activeCells.Add(newCell);
	}

	private void CreatePassage (MazeCell cell, MazeCell otherCell, MazeDirection direction) {
		MazePassage prefab = Random.value < doorProbability ? doorPrefab : passagePrefab;
		MazePassage passage = Instantiate(prefab) as MazePassage;
		passage.Initialize(cell, otherCell, direction);
		passage = Instantiate(prefab) as MazePassage;
		if (passage is MazeDoor) {
			otherCell.Initialize(CreateRoom(cell.room.settingsIndex));
		}
		else {
			otherCell.Initialize(cell.room);
		}
		passage.Initialize(otherCell, cell, direction.GetOpposite());
	}
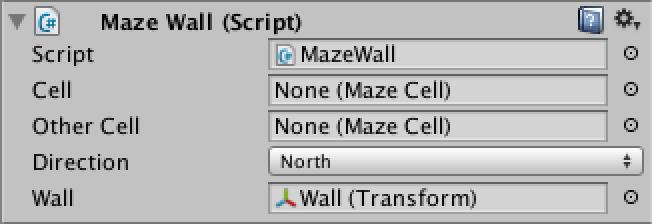
To also color the walls, we need to adjust MazeWall. Give it a reference to its wall child and configure it for all the wall prefabs that you have created. This allows us to set the wall's material in an override of the Initialize method.
	public Transform wall;

	public override void Initialize (MazeCell cell, MazeCell otherCell, MazeDirection direction) {
		base.Initialize(cell, otherCell, direction);
		wall.GetComponent<Renderer>().material = cell.room.settings.wallMaterial;
	}
We have to do the same for MazeDoor, except now we set the material of all its direct children except for the hinge.
	public override void Initialize (MazeCell primary, MazeCell other, MazeDirection direction) {
		base.Initialize(primary, other, direction);
		if (OtherSideOfDoor != null) {
			hinge.localScale = new Vector3(-1f, 1f, 1f);
			Vector3 p = hinge.localPosition;
			p.x = -p.x;
			hinge.localPosition = p;
		}
		for (int i = 0; i < transform.childCount; i++) {
			Transform child = transform.GetChild(i);
			if (child != hinge) {
				child.GetComponent<Renderer>().material = cell.room.settings.wallMaterial;
			}
		}
	}
Expanding Rooms
We've been talking about rooms all this time, but they're really more like winding corridors. If we can prevent walls from being placed between two cell that belong to the same room, then the rooms will become more open areas.
Add a new CreatePassageInSameRoom method that simply creates a passage between two cells, with no chance of a door. Then update DoNextGenerationStep so it calls this method when two cells share a room, instead of placing a wall.
	private void CreatePassageInSameRoom (MazeCell cell, MazeCell otherCell, MazeDirection direction) {
		MazePassage passage = Instantiate(passagePrefab) as MazePassage;
		passage.Initialize(cell, otherCell, direction);
		passage = Instantiate(passagePrefab) as MazePassage;
		passage.Initialize(otherCell, cell, direction.GetOpposite());
	}

	private void DoNextGenerationStep (List activeCells) {
		int currentIndex = activeCells.Count - 1;
		MazeCell currentCell = activeCells[currentIndex];
		if (currentCell.IsFullyInitialized) {
			activeCells.RemoveAt(currentIndex);
			return;
		}
		MazeDirection direction = currentCell.RandomUninitializedDirection;
		IntVector2 coordinates = currentCell.coordinates + direction.ToIntVector2();
		if (ContainsCoordinates(coordinates)) {
			MazeCell neighbor = GetCell(coordinates);
			if (neighbor == null) {
				neighbor = CreateCell(coordinates);
				CreatePassage(currentCell, neighbor, direction);
				activeCells.Add(neighbor);
			}
			else if (currentCell.room == neighbor.room) {
				CreatePassageInSameRoom(currentCell, neighbor, direction);
			}
			else {
				CreateWall(currentCell, neighbor, direction);
			}
		}
		else {
			CreateWall(currentCell, null, direction);
		}
	}
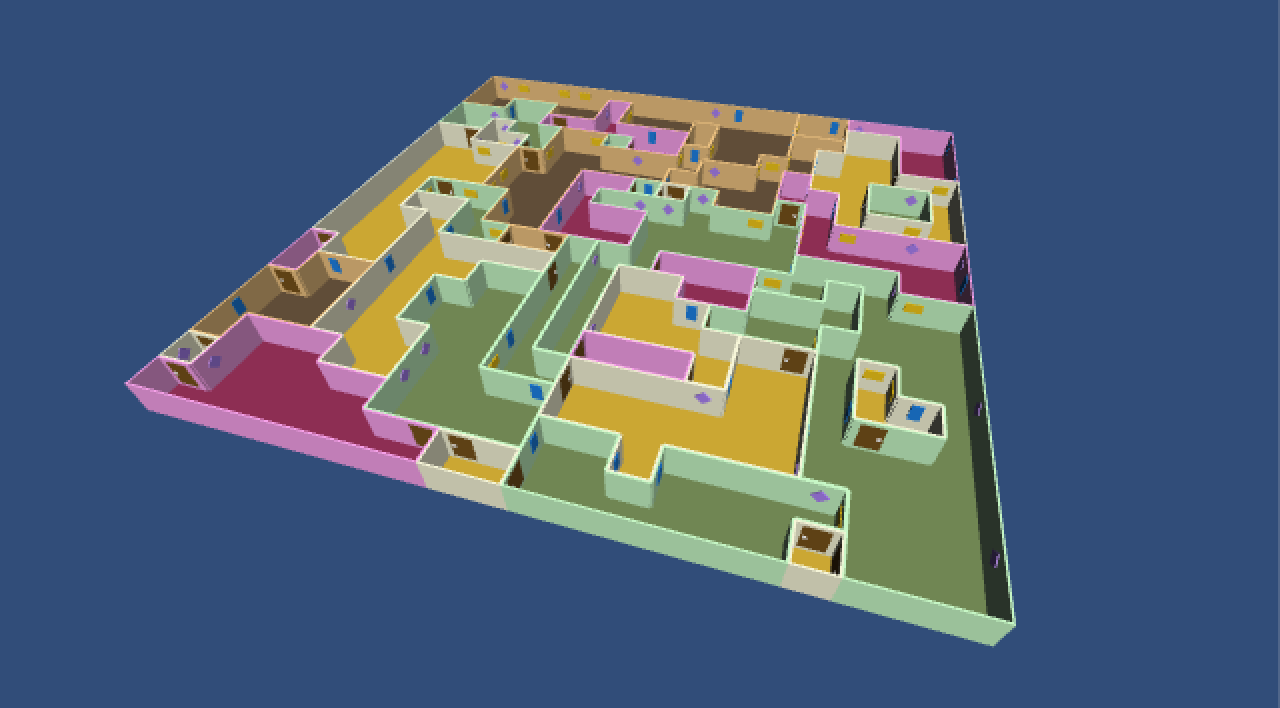
We can go a step further and even join together adjacent rooms if they share the same settings. Besides creating larger rooms that way, fusing rooms from different parts of the maze creates loops. This means that there will be multiple ways to navigate it and you could end up walking in circles.
All that's really needed for this change is to relax our room comparison.
	private void DoNextGenerationStep (List<MazeCell> activeCells) {
		int currentIndex = activeCells.Count - 1;
		MazeCell currentCell = activeCells[currentIndex];
		if (currentCell.IsFullyInitialized) {
			activeCells.RemoveAt(currentIndex);
			return;
		}
		MazeDirection direction = currentCell.RandomUninitializedDirection;
		IntVector2 coordinates = currentCell.coordinates + direction.ToIntVector2();
		if (ContainsCoordinates(coordinates)) {
			MazeCell neighbor = GetCell(coordinates);
			if (neighbor == null) {
				neighbor = CreateCell(coordinates);
				CreatePassage(currentCell, neighbor, direction);
				activeCells.Add(neighbor);
			}
			else if (currentCell.room.settingsIndex == neighbor.room.settingsIndex) {
				CreatePassageInSameRoom(currentCell, neighbor, direction);
			}
			else {
				CreateWall(currentCell, neighbor, direction);
			}
		}
		else {
			CreateWall(currentCell, null, direction);
		}
	}
While this looks correct, we will now have different rooms with open passages connecting them. We should also get rid of one of the room instances as it is assimilated by the other. So let's add an Assimilate method to MazeRoom.
	public void Assimilate (MazeRoom room) {
		for (int i = 0; i < room.cells.Count; i++) {
			Add(room.cells[i]);
		}
	}
Then we have Maze check whether it's connecting different rooms, in which case it assimilates and removes the other room.
	private void CreatePassageInSameRoom (MazeCell cell, MazeCell otherCell, MazeDirection direction) {
		MazePassage passage = Instantiate(passagePrefab) as MazePassage;
		passage.Initialize(cell, otherCell, direction);
		passage = Instantiate(passagePrefab) as MazePassage;
		passage.Initialize(otherCell, cell, direction.GetOpposite());
		if (cell.room != otherCell.room) {
			MazeRoom roomToAssimilate = otherCell.room;
			cell.room.Assimilate(roomToAssimilate);
			rooms.Remove(roomToAssimilate);
			Destroy(roomToAssimilate);
		}
	}
Walking Around
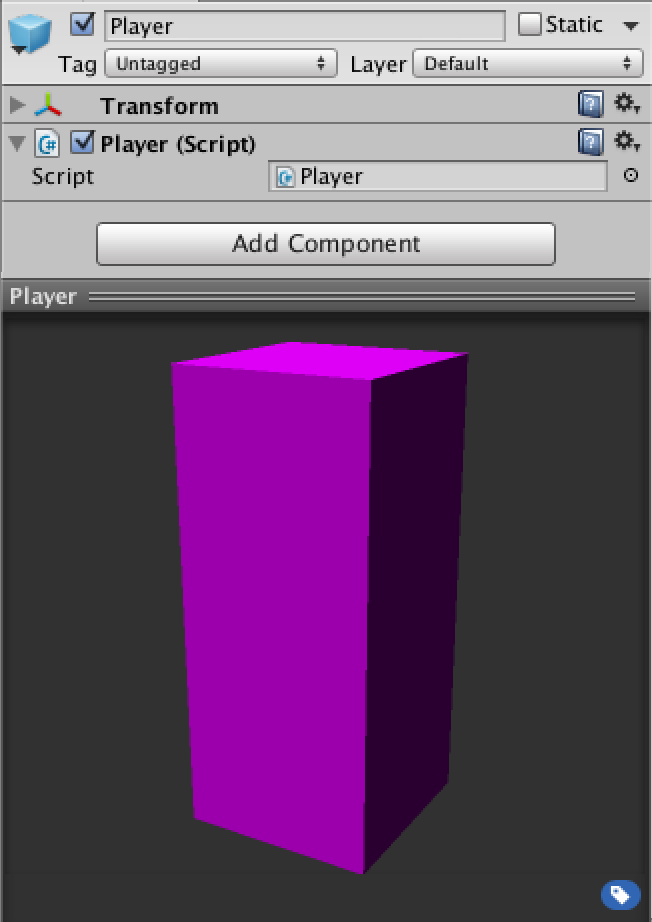
It's high time we walked around in our own maze. Create a simple player model, attach a new Player component that we create as well, and turn it into a prefab.
Give Player a public method so we can tell it what cell it's in. Also give it an Update method that moves the player when an arrow key is pressed. Movement should only happen if the edge we would cross is a passage, otherwise we're blocked.
using UnityEngine;

public class Player : MonoBehaviour {

	private MazeCell currentCell;

	public void SetLocation (MazeCell cell) {
		currentCell = cell;
		transform.localPosition = cell.transform.localPosition;
	}

	private void Move (MazeDirection direction) {
		MazeCellEdge edge = currentCell.GetEdge(direction);
		if (edge is MazePassage) {
			SetLocation(edge.otherCell);
		}
	}

	private void Update () {
		if (Input.GetKeyDown(KeyCode.UpArrow)) {
			Move(MazeDirection.North);
		}
		else if (Input.GetKeyDown(KeyCode.RightArrow)) {
			Move(MazeDirection.East);
		}
		else if (Input.GetKeyDown(KeyCode.DownArrow)) {
			Move(MazeDirection.South);
		}
		else if (Input.GetKeyDown(KeyCode.LeftArrow)) {
			Move(MazeDirection.West);
		}
	}
}
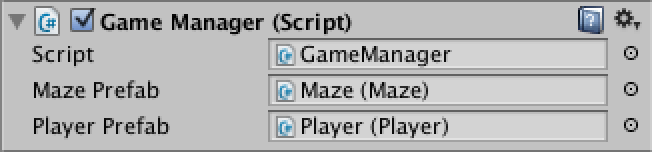
Now give GameManager both a reference to the player prefab and a local reference to a current player.
	public Player playerPrefab;

	private Player playerInstance;
We should instantiate a new player after the maze has finished generating. However, we currently start a coroutine and move on. In order to wait, we turn BeginGame into a coroutine as well. Then we can yield the other coroutine, so it finishes before we continue ourselves and create the player and give it a random location. Also, make sure to destroy the current player in RestartGame, if it has already been created.
	private void Start () {
		StartCoroutine(BeginGame());
	}

	private IEnumerator BeginGame () {
		mazeInstance = Instantiate(mazePrefab) as Maze;
		yield return StartCoroutine(mazeInstance.Generate());
		playerInstance = Instantiate(playerPrefab) as Player;
		playerInstance.SetLocation(mazeInstance.GetCell(mazeInstance.RandomCoordinates));
	}

	private void RestartGame () {
		StopAllCoroutines();
		Destroy(mazeInstance.gameObject);
		if (playerInstance != null) {
			Destroy(playerInstance.gameObject);
		}
		StartCoroutine(BeginGame());
	}
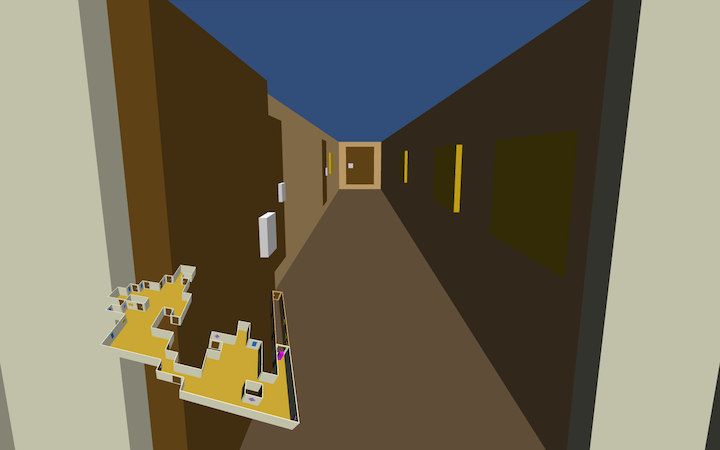
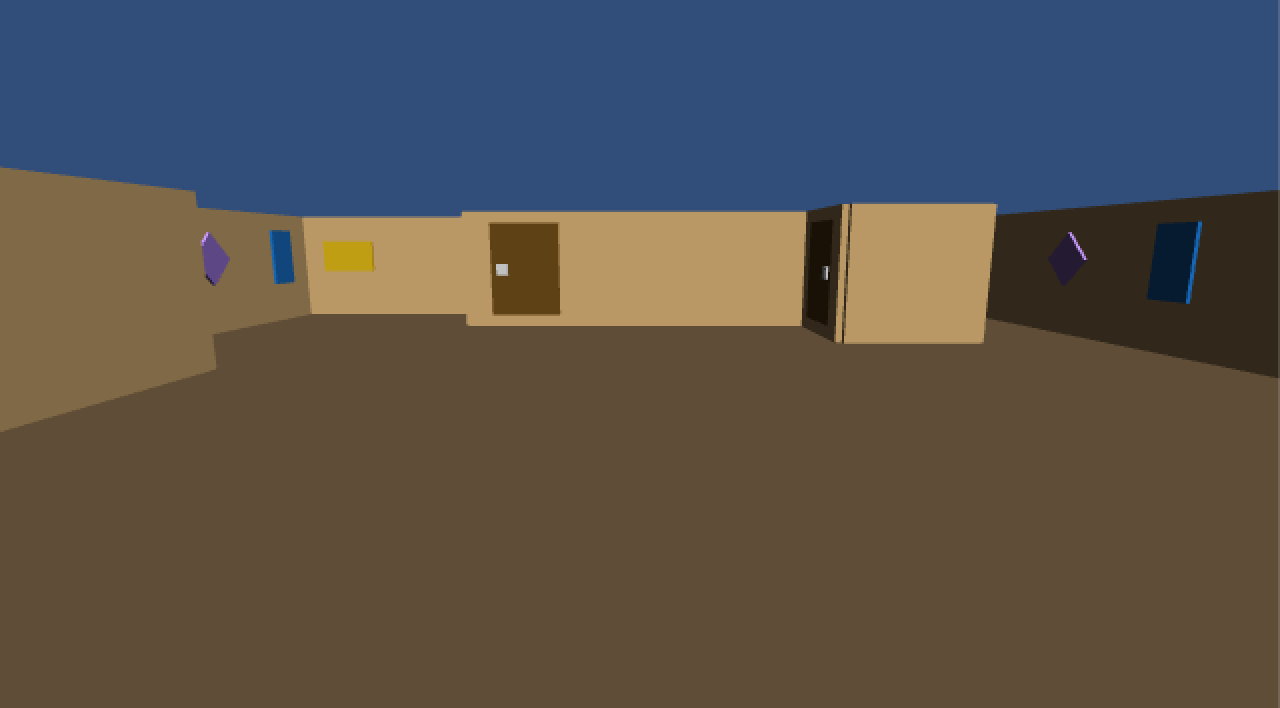
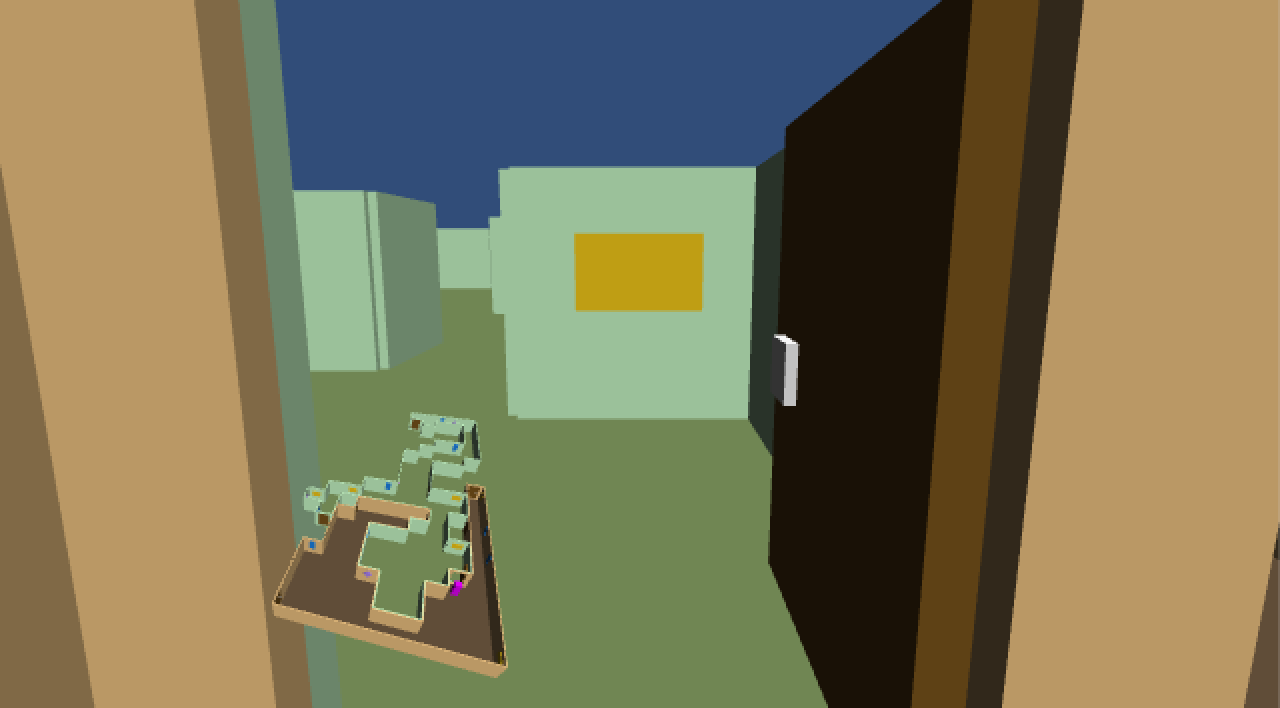
What It Looks Like
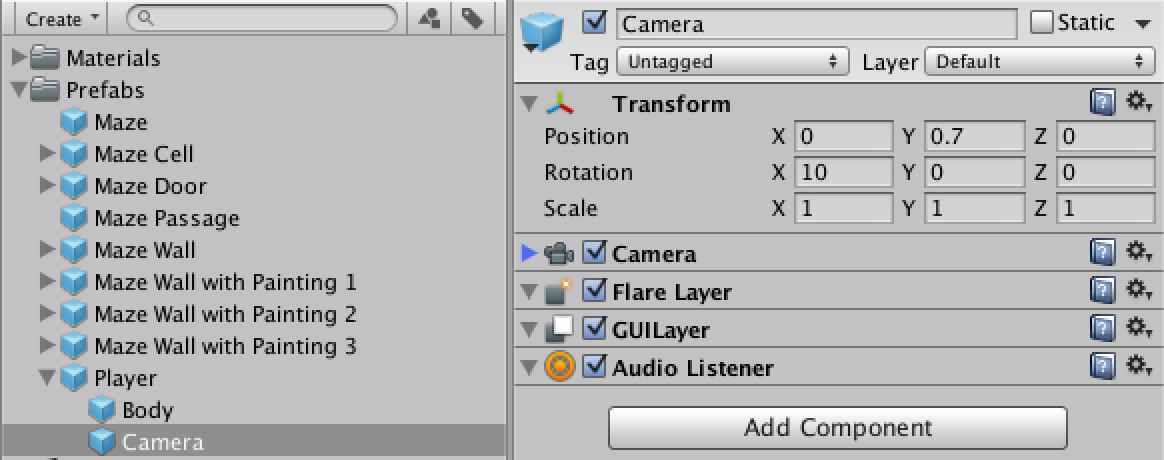
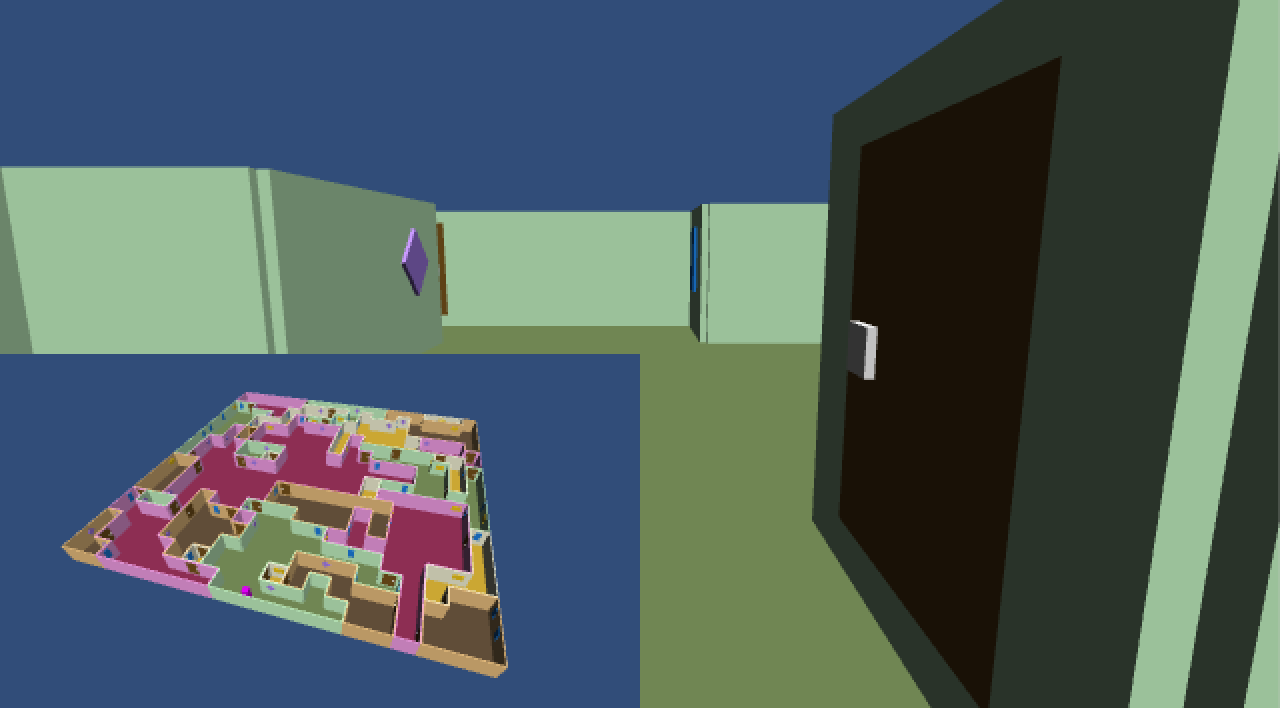
What would our maze look like, when viewing it through the eyes of the player? Let's find out by adding a camera to the player prefab! You can do so by dragging an instance of the player prefab into the scene, creating a default camera, making it a child of the player, and then clicking the prefab Apply button of the player instance. I position the camera at a height of 0.7 and rotate it ten degrees around its X axis so it doesn't stare straight ahead but looks a bit to the floor.
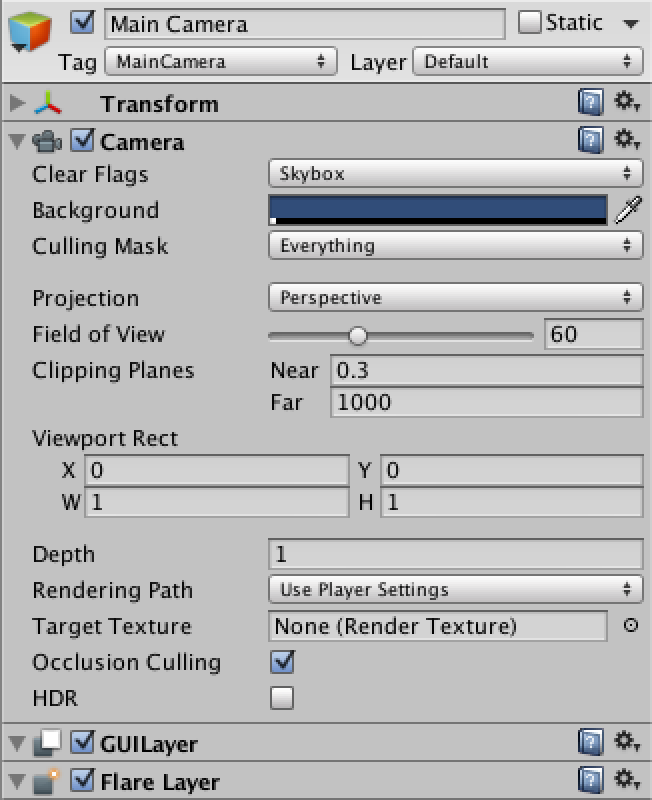
Keep in mind that the main camera is also still being rendered. The player camera is just rendered on top of it, because it has the default depth of zero while the default main camera has a depth of -1. Unity will also complain that there are two audio listeners in the scene at the same time, so we have to do something about that.
What about we keep both cameras, but turn the main camera view into a map overlay? First, remove the audio listener from the main camera and increase its depth value to one. That will make it render after and on top of the player's camera.
Now we again only see the main camera as it's rendering after the player camera. To turn it into a smaller overlay, we reduce its view rectangle after a maze has been generated. We also set it to cover the entire view before we start generating. That ensures that we get a full-size view of the maze while it is being generated.
	private IEnumerator BeginGame () {
		Camera.main.rect = new Rect(0f, 0f, 1f, 1f);
		mazeInstance = Instantiate(mazePrefab) as Maze;
		yield return StartCoroutine(mazeInstance.Generate());
		playerInstance = Instantiate(playerPrefab) as Player;
		playerInstance.SetLocation(mazeInstance.GetCell(mazeInstance.RandomCoordinates));
		Camera.main.rect = new Rect(0f, 0f, 0.5f, 0.5f);
	}
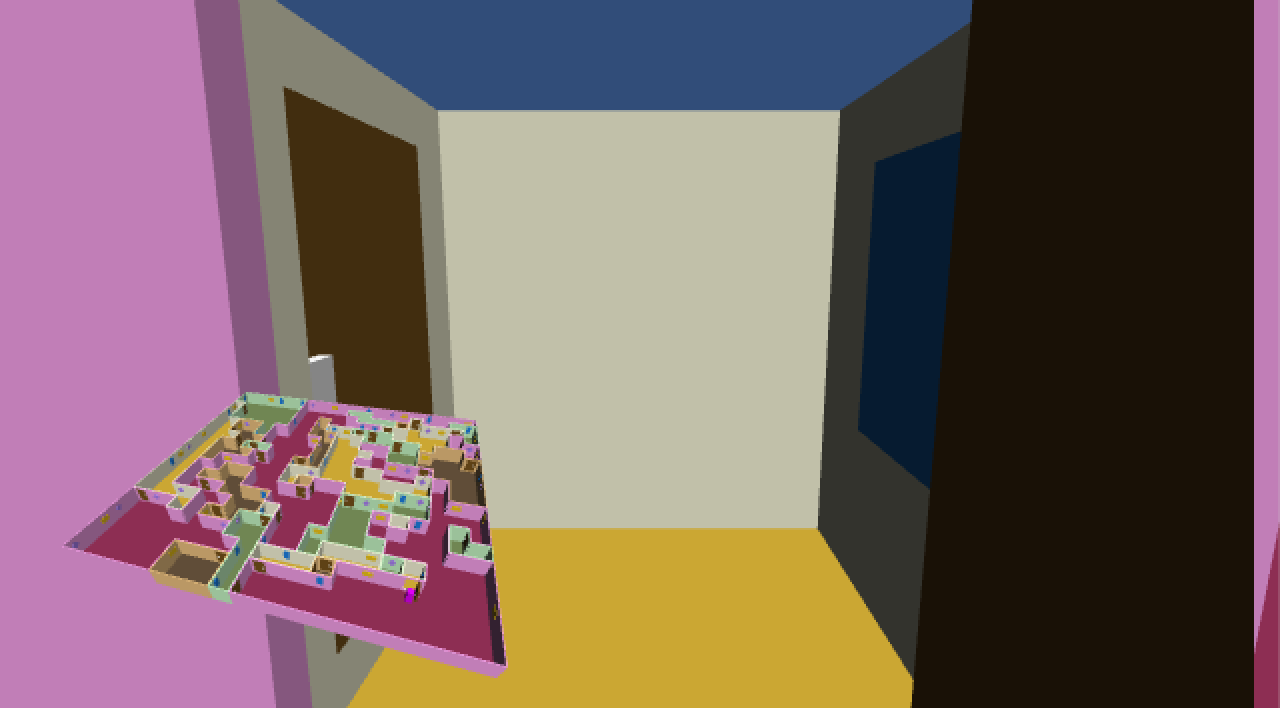
This works, but it would be nicer if the map was rendered on top of the player's view without its own background. Fortunately, we can easily achieve this by changing the camera's clear flags to Depth. When generating the maze, it should use its default flags value, which is SkyBox.
	private IEnumerator BeginGame () {
		Camera.main.clearFlags = CameraClearFlags.Skybox;
		Camera.main.rect = new Rect(0f, 0f, 1f, 1f);
		mazeInstance = Instantiate(mazePrefab) as Maze;
		yield return StartCoroutine(mazeInstance.Generate());
		playerInstance = Instantiate(playerPrefab) as Player;
		playerInstance.SetLocation(mazeInstance.GetCell(mazeInstance.RandomCoordinates));
		Camera.main.clearFlags = CameraClearFlags.Depth;
		Camera.main.rect = new Rect(0f, 0f, 0.5f, 0.5f);
	}
The player can move and have a map, but we are stuck looking to the north all the time. To change this, Player need to keep track of where it's looking and respond to user input to change its rotation. Let's use Q to rotate counterclockwise and E to rotate clockwise. While we're at it, we can also support the common WASD key bindings.
	private MazeDirection currentDirection;

	private void Look (MazeDirection direction) {
		transform.localRotation = direction.ToRotation();
		currentDirection = direction;
	}

	private void Update () {
		if (Input.GetKeyDown(KeyCode.W) || Input.GetKeyDown(KeyCode.UpArrow)) {
			Move(MazeDirection.North);
		}
		else if (Input.GetKeyDown(KeyCode.D) || Input.GetKeyDown(KeyCode.RightArrow)) {
			Move(MazeDirection.East);
		}
		else if (Input.GetKeyDown(KeyCode.S) || Input.GetKeyDown(KeyCode.DownArrow)) {
			Move(MazeDirection.South);
		}
		else if (Input.GetKeyDown(KeyCode.A) || Input.GetKeyDown(KeyCode.LeftArrow)) {
			Move(MazeDirection.West);
		}
		else if (Input.GetKeyDown(KeyCode.Q)) {
			Look(currentDirection.GetNextCounterclockwise());
		}
		else if (Input.GetKeyDown(KeyCode.E)) {
			Look(currentDirection.GetNextClockwise());
		}
	}
We also add two convenient methods to MazeDirections that gives us the next direction in clockwise and counterclockwise order.
	public static MazeDirection GetNextClockwise (this MazeDirection direction) {
		return (MazeDirection)(((int)direction + 1) % Count);
	}

	public static MazeDirection GetNextCounterclockwise (this MazeDirection direction) {
		return (MazeDirection)(((int)direction + Count - 1) % Count);
	}
Now we can both move and rotate, but the movement is absolute instead of relative to our orientation. Let's change that.
	private void Update () {
		if (Input.GetKeyDown(KeyCode.W) || Input.GetKeyDown(KeyCode.UpArrow)) {
			Move(currentDirection);
		}
		else if (Input.GetKeyDown(KeyCode.D) || Input.GetKeyDown(KeyCode.RightArrow)) {
			Move(currentDirection.GetNextClockwise());
		}
		else if (Input.GetKeyDown(KeyCode.S) || Input.GetKeyDown(KeyCode.DownArrow)) {
			Move(currentDirection.GetOpposite());
		}
		else if (Input.GetKeyDown(KeyCode.A) || Input.GetKeyDown(KeyCode.LeftArrow)) {
			Move(currentDirection.GetNextCounterclockwise());
		}
		else if (Input.GetKeyDown(KeyCode.Q)) {
			Look(currentDirection.GetNextCounterclockwise());
		}
		else if (Input.GetKeyDown(KeyCode.E)) {
			Look(currentDirection.GetNextClockwise());
		}
	}
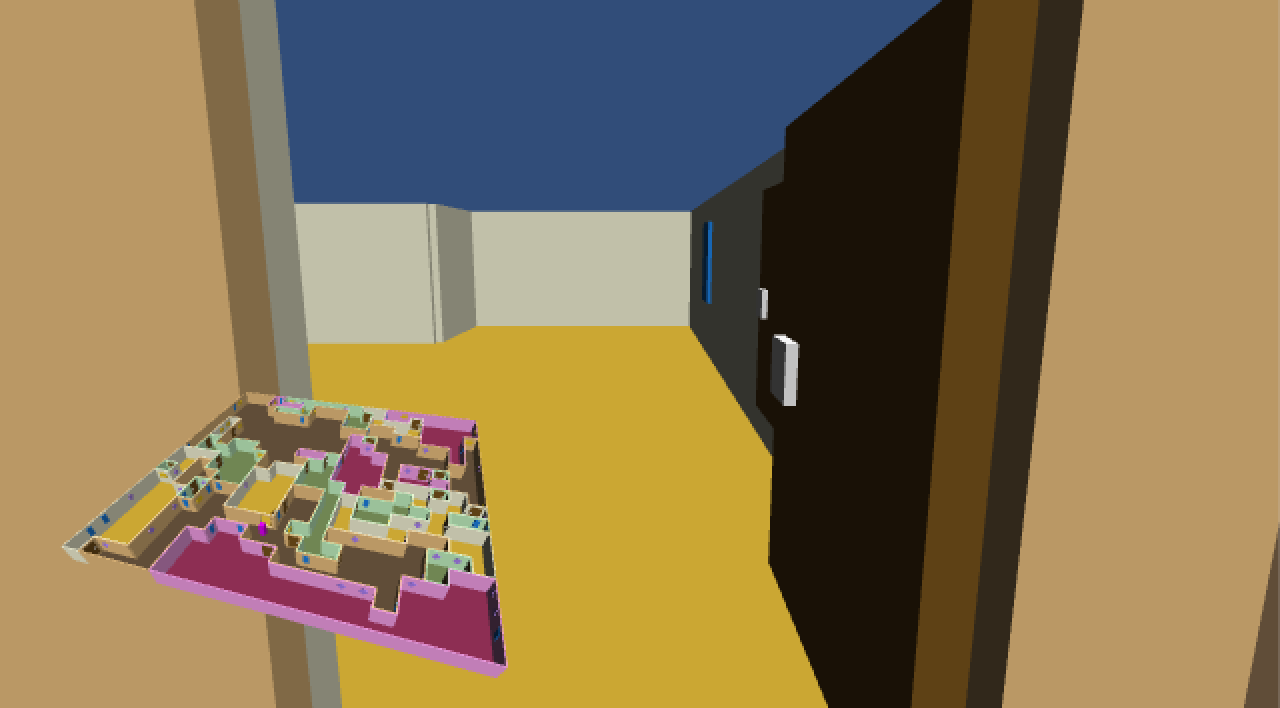
Opening Doors
So far we've been walking straight through doors without opening them. We could use various approaches to opening doors, but a simple one is to just open all doors of a cell after the player enters it, and close them again when the player exited it. In fact, other stuff might happen as well, so we'll use a generic approach.
Have Player notify cells when it enters and exits them in SetLocation, by calling two new methods. Check whether there's a cell to exit, because the first time a location is set this won't be the case.
	public void SetLocation (MazeCell cell) {
		if (currentCell != null) {
			currentCell.OnPlayerExited();
		}
		currentCell = cell;
		transform.localPosition = cell.transform.localPosition;
		currentCell.OnPlayerEntered();
	}
MazeCell doesn't do anything with those events itself, but passes them along to its edges.
	public void OnPlayerEntered () {
		for (int i = 0; i < edges.Length; i++) {
			edges[i].OnPlayerEntered();
		}
	}

	public void OnPlayerExited () {
		for (int i = 0; i < edges.Length; i++) {
			edges[i].OnPlayerExited();
		}
	}
We add those methods to MazeCellEdge as empty and virtual. That way nothing happens by default, but subclasses can override this.
	public virtual void OnPlayerEntered () {}

	public virtual void OnPlayerExited () {}
Now we can add overrides for MazeDoor to rotate its hinge. Because there are two sides of a door, we have to rotate both of them.
	public override void OnPlayerEntered () {
		OtherSideOfDoor.hinge.localRotation = hinge.localRotation = Quaternion.Euler(0f, -90f, 0f);
	}

	public override void OnPlayerExited () {
		OtherSideOfDoor.hinge.localRotation = hinge.localRotation = Quaternion.identity;
	}
It works! Doors are now open when we stand next to them. Unfortunately the doors always rotate in the same direction. This means that about half the time the door will cut through our view in an ugly and obscuring way. We can solve this by always rotating doors away from where the player is currently standing. This can be done by remembering whether a door is mirrored and rotating based on that.
	private static Quaternion
		normalRotation = Quaternion.Euler(0f, -90f, 0f),
		mirroredRotation = Quaternion.Euler(0f, 90f, 0f);

	private bool isMirrored;

	public override void Initialize (MazeCell primary, MazeCell other, MazeDirection direction) {
		base.Initialize(primary, other, direction);
		if (OtherSideOfDoor != null) {
			isMirrored = true;
			hinge.localScale = new Vector3(-1f, 1f, 1f);
			Vector3 p = hinge.localPosition;
			p.x = -p.x;
			hinge.localPosition = p;
		}
		for (int i = 0; i < transform.childCount; i++) {
			Transform child = transform.GetChild(i);
			if (child != hinge) {
				child.GetComponent<Renderer>().material = cell.room.settings.wallMaterial;
			}
		}
	}

	public override void OnPlayerEntered () {
		OtherSideOfDoor.hinge.localRotation = hinge.localRotation =
			isMirrored ? mirroredRotation : normalRotation;
	}
Hiding Rooms
An additional thing we could do is only show the room that the player is currently inside of. Besides reducing what is shown on the map, it can also eliminate lots of unnecessary draw calls for the player camera. As this functionality operates on entire rooms, let's add Show and Hide method to MazeRoom, which call the same methods on all their cells.

	public void Hide () {
		for (int i = 0; i < cells.Count; i++) {
			cells[i].Hide();
		}
	}

	public void Show () {
		for (int i = 0; i < cells.Count; i++) {
			cells[i].Show();
		}
	}
We let MazeCell implement this functionality by simply switching its game object on and off.
	public void Show () {
		gameObject.SetActive(true);
	}

	public void Hide () {
		gameObject.SetActive(false);
	}
And we also let Maze hide all rooms when it's done generating.
	public IEnumerator Generate () {
		WaitForSeconds delay = new WaitForSeconds(generationStepDelay);
		cells = new MazeCell[size.x, size.z];
		List<MazeCell> activeCells = new List<MazeCell>();
		DoFirstGenerationStep(activeCells);
		while (activeCells.Count > 0) {
			yield return delay;
			DoNextGenerationStep(activeCells);
		}
		for (int i = 0; i < rooms.Count; i++) {
			rooms[i].Hide();
		}
	}
This will place the player in an invisible maze. To make the rooms appear and disappear, we let MazeCell show and hide its room when it is entered or exited.
	public void OnPlayerEntered () {
		room.Show();
		for (int i = 0; i < edges.Length; i++) {
			edges[i].OnPlayerEntered();
		}
	}

	public void OnPlayerExited () {
		room.Hide();
		for (int i = 0; i < edges.Length; i++) {
			edges[i].OnPlayerExited();
		}
	}
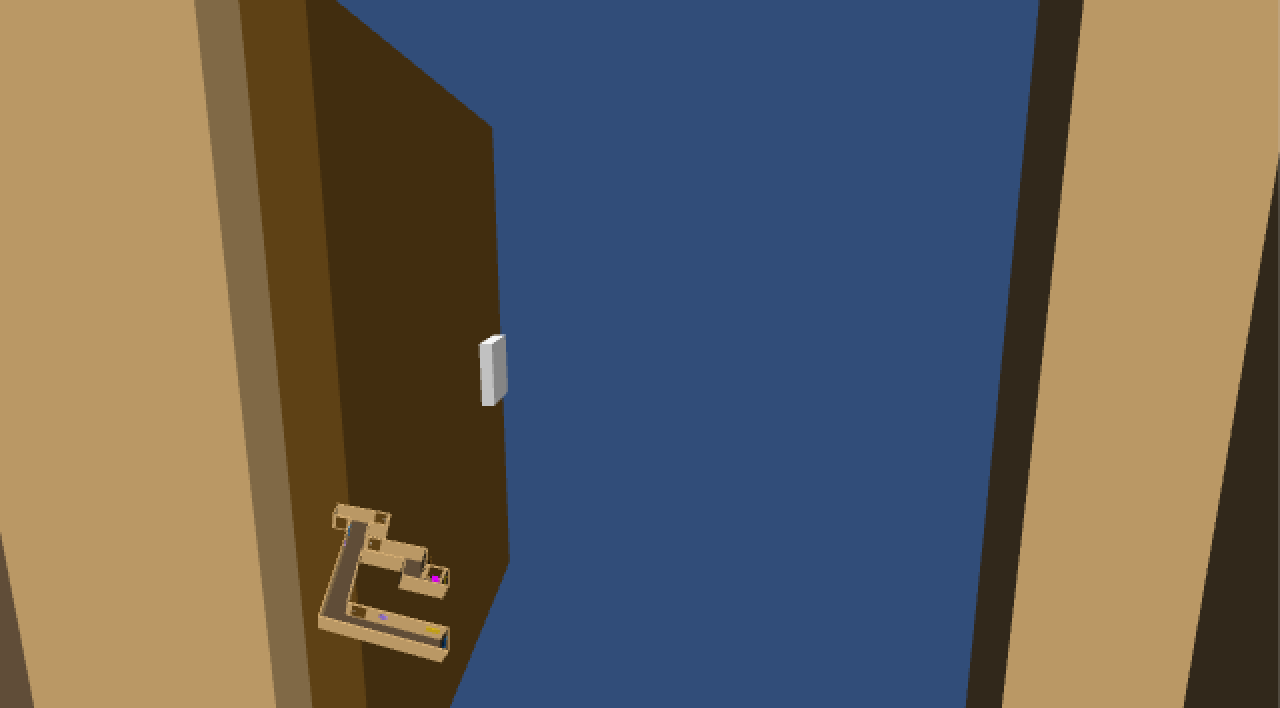
So all rooms except the one that we are currently in are now hidden. Unfortunately, this means that when we open a door we will look into an invisible room. Fortunately this is easy to solve. All we have to do is have MazeDoor show and hide the other cell's room when it is opened and closed.
	public override void OnPlayerEntered () {
		OtherSideOfDoor.hinge.localRotation = hinge.localRotation =
			isMirrored ? mirroredRotation : normalRotation;
		OtherSideOfDoor.cell.room.Show();
	}

	public override void OnPlayerExited () {
		OtherSideOfDoor.hinge.localRotation = hinge.localRotation = Quaternion.identity;
		OtherSideOfDoor.cell.room.Hide();
	}
And indeed now rooms also show up when we could see them through an open door.
We can keep adding and tweaking the maze, but I will end the tutorial here. Have fun giving the maze your own special touch!
Enjoyed the tutorial? Help me make more by becoming a patron!
Downloads
- maze-01.unitypackage
- The project after Game Flow.
- maze-02.unitypackage
- The project after Maze Fundamentals.
- maze-03.unitypackage
- The project after Cell Coordinates and Integer Vectors.
- maze-04.unitypackage
- The project after Random Cell Generation.
- maze-05.unitypackage
- The project after Backtracking.
- maze-06.unitypackage
- The project after Connecting the Cells.
- maze-07.unitypackage
- The project after Generating the Entire Maze.
- maze-08.unitypackage
- The project after Decorating the Maze.
- maze-09.unitypackage
- The project after Placing Doors.
- maze-10.unitypackage
- The project after Adding Rooms.
- maze-11.unitypackage
- The project after Expanding Rooms.
- maze-12.unitypackage
- The project after Walking Around.
- maze-13.unitypackage
- The project after What it Looks Like.
- maze-14.unitypackage
- The project after Opening Doors.
- maze-finished.unitypackage
- The finished project.