Runner, a minimal side-scroller
- generate a layered background;
- reuse objects;
- use simple physics;
- detect input to make the player jump;
- implement a power-up;
- write a small event manager;
- switch stuff on and off on demand;
- make a minimal GUI.
This tutorial has been superseded by Runner 2.
You're assumed to know your way around Unity's editor and know the basics of creating C# scripts. If you've completed the Clock tutorial you're good to go. The Graphs tutorial is useful too, but not necessary.
Note that I will often omit chunks of code that have remained the same, only new code is shown. The context of the new code should be clear.
This tutorial is quite old. I created it for Unity 3 and later updated it to Unity 4, but I won't update it to take advantage of the new featuers of Unity 5. I recommend you go through the Swirly Pipe tutorial instead, which is the spiritual successor of this one. Having said that, this tutorial still contains useful things that aren't mentioned in the new one.
Game Design
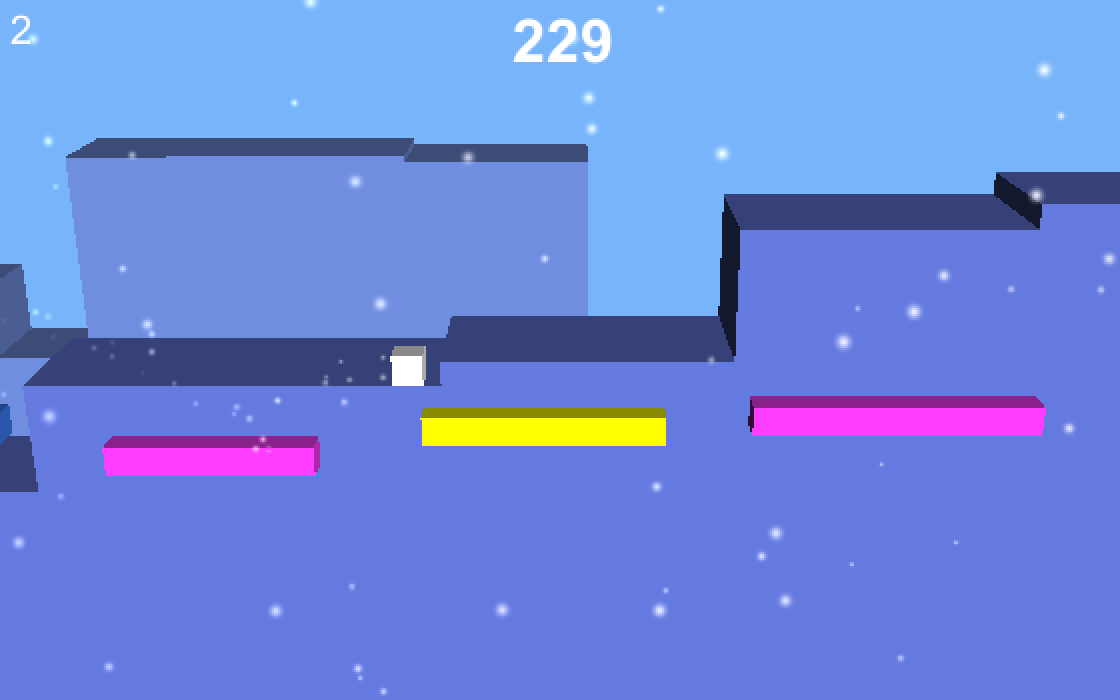
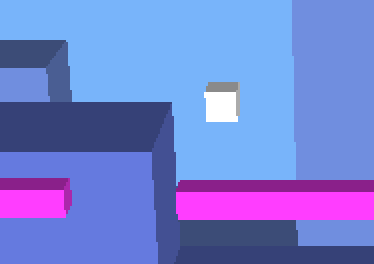
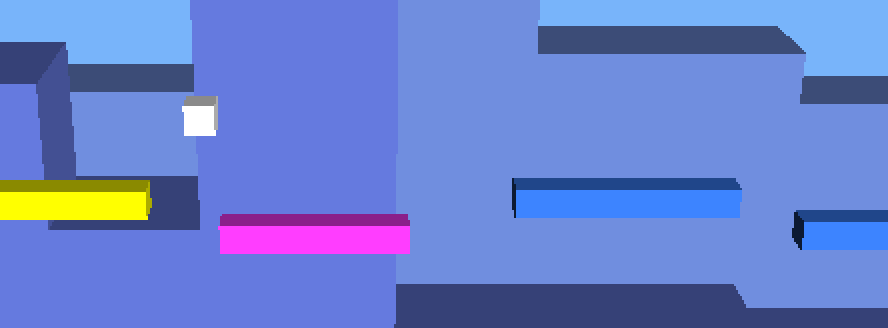
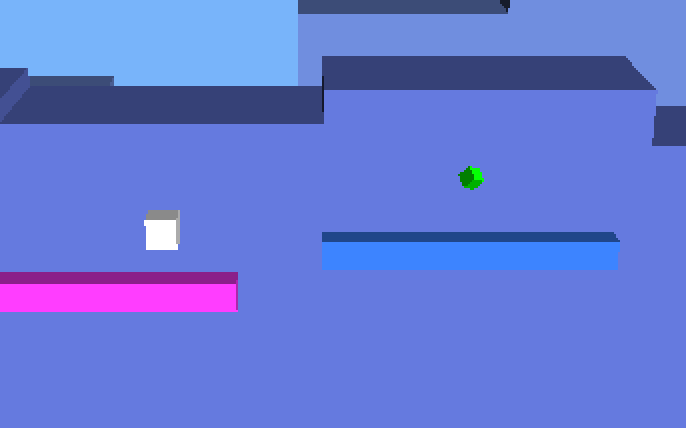
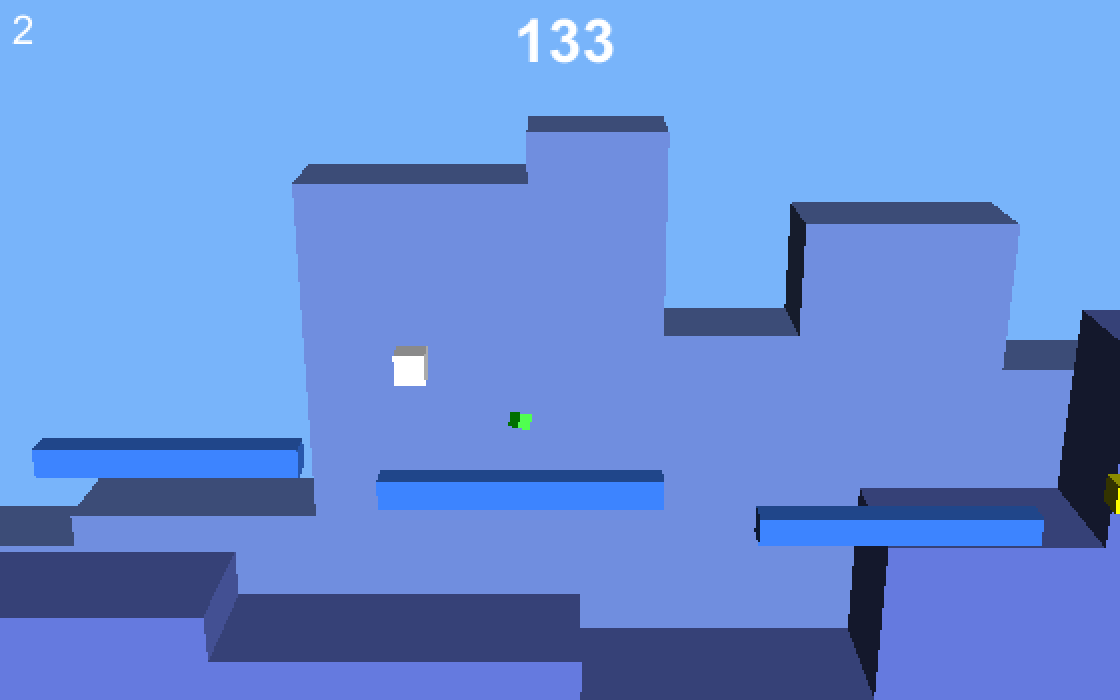
For gameplay, we'll have a runner who dashes towards the right of the screen. The player needs to jump from platform to platform for as long as possible. These platforms can come in different flavors, slowing down or speeding up the runner. We'll also include a single power-up, which is a booster that allows mid-air jumps.
For graphics, we'll simply use cubes and standard particle systems. The cubes will be used for the runner, power-up, platforms, and a skyline background. We'll use particle systems to add a trail effect and lots of floating stuff to give a better sense of speed and depth.
There won't be any sound or music.
Setting the Scene
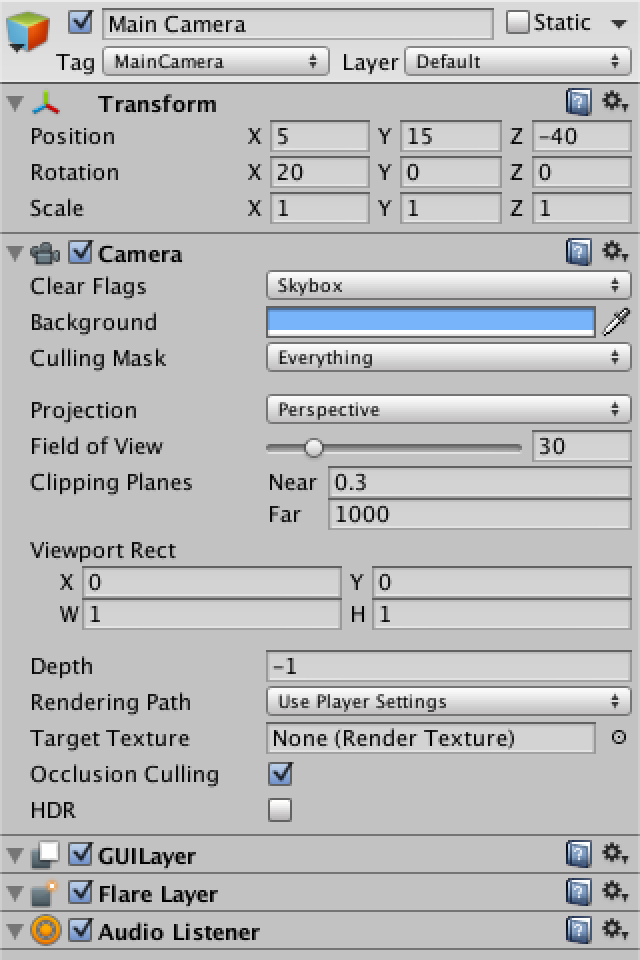
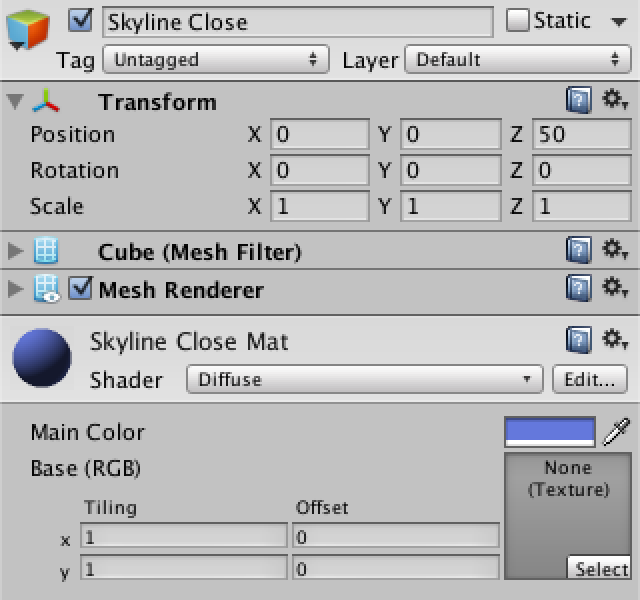
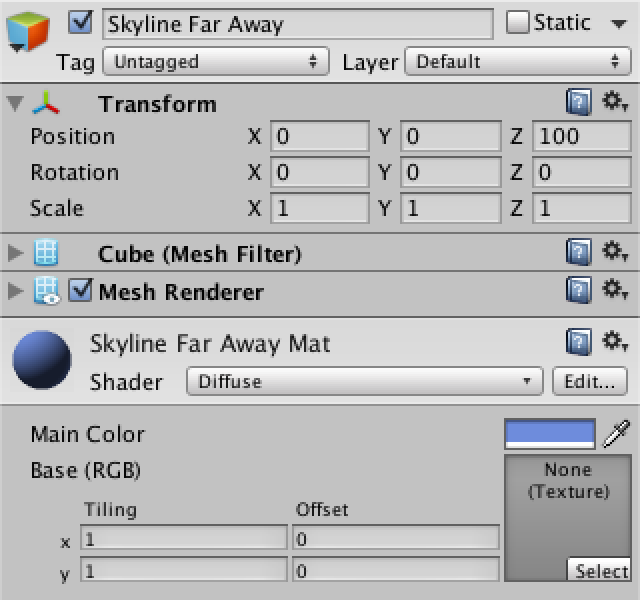
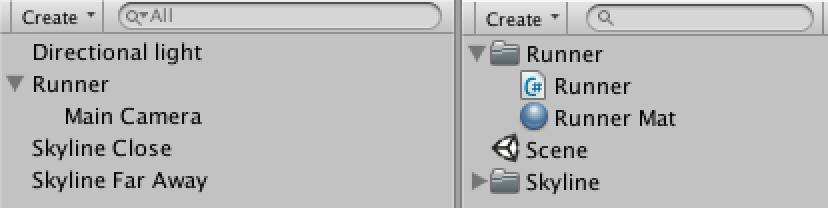
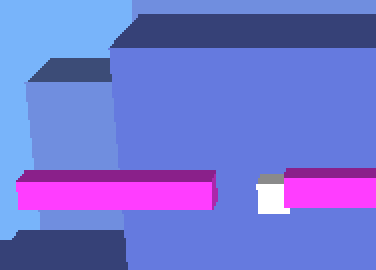
Our game is basically 2D, but we want to keep a little feeling of 3D. An orthographic camera doesn't allow for 3D, so we stick to a perspective camera. This way we can also get a multilayered scrolling background by simply placing stuff at various distances. Let's say the foreground is at depth 0 and we have a background layer at depth 50 and another one at depth 100. Let's place three cubes at these depths and use them as guides to construct the scene. I went ahead and picked a view angle and color setup, but you're free to experiment and choose whatever you like.
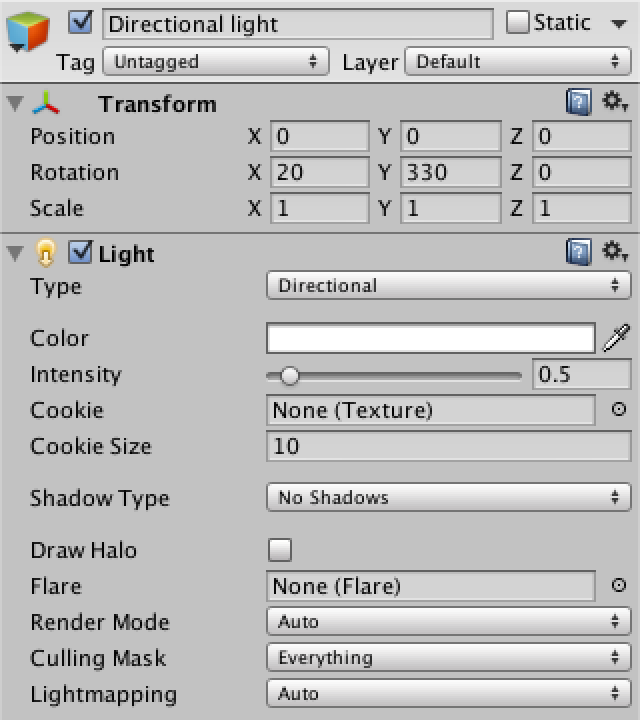
Add a directional light (GameObject / Create Other / Directional Light) with a rotation of (20, 330, 0). This gives us a light source that's shining over our right shoulder. Because it's a directional light its position doesn't matter.
Reduce the Field of View of the Main Camera to 30, position it at (5, 15, -40), and rotate it by (20, 0, 0). Also change its Background color to (120, 180, 250).
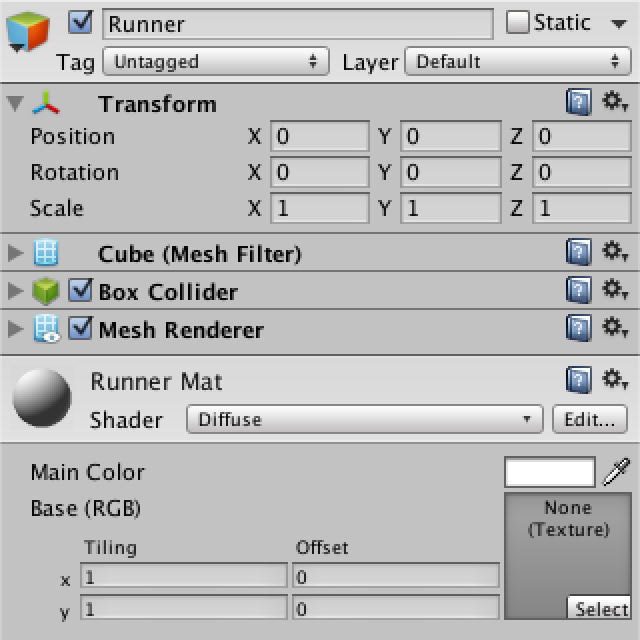
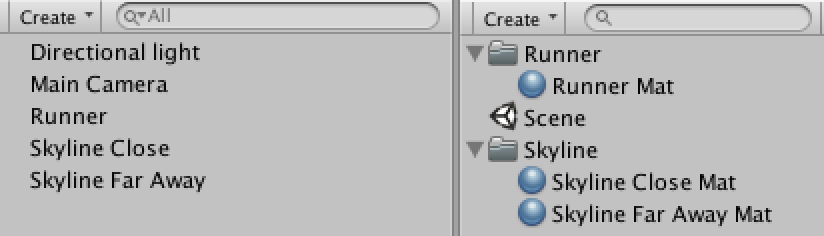
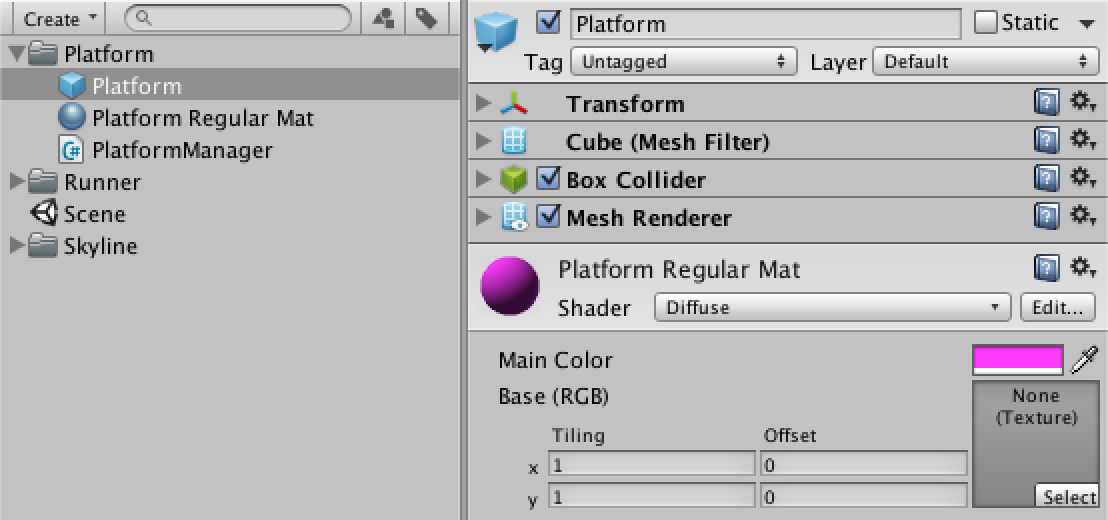
Create a material for each in the Project view via Create / Material, naming them Runner Mat and so on, then assign them to the cubes by dragging. I used default diffuse shaders with the colors white, (100, 120, 220), and (110, 140, 220).
Running
Create a new C# script called Runner inside the Runner folder and attach it to our Runner cube. Write the following code to make it move.
using UnityEngine;

public class Runner : MonoBehaviour {

	void Update () {
		transform.Translate(5f * Time.deltaTime, 0f, 0f);
	}
}
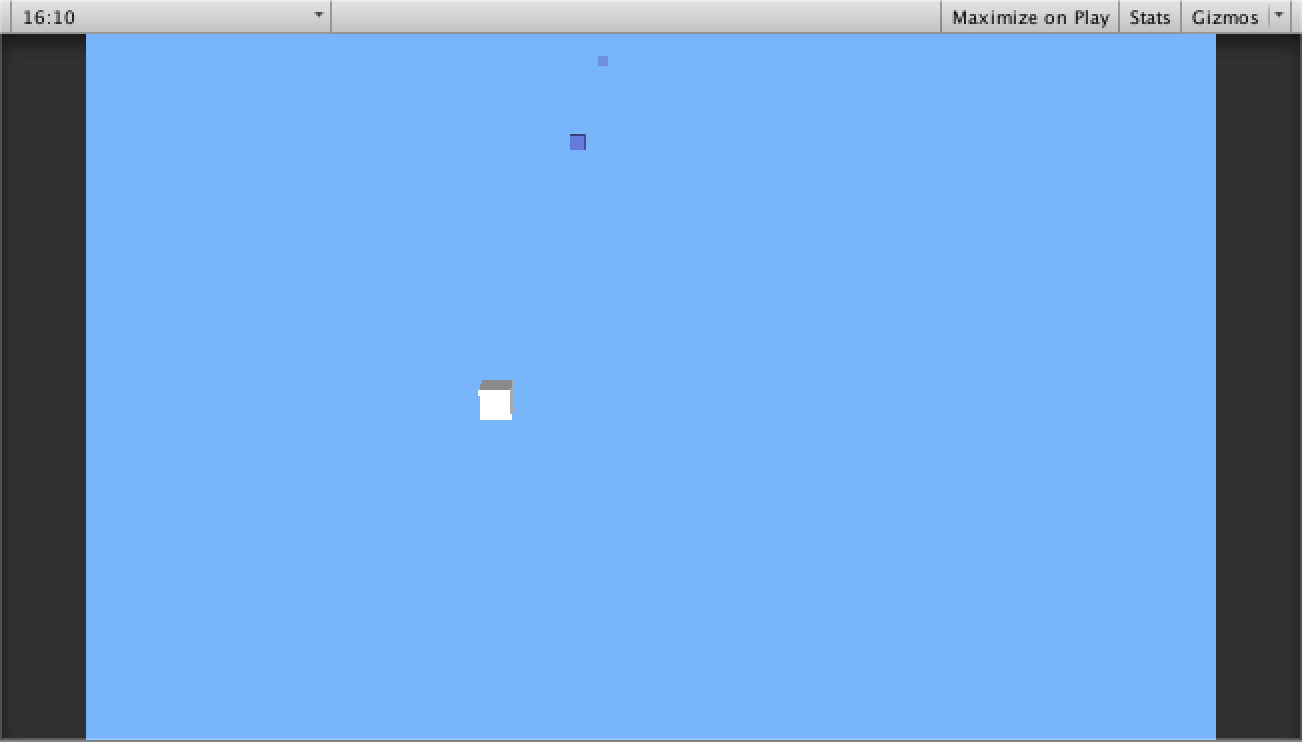
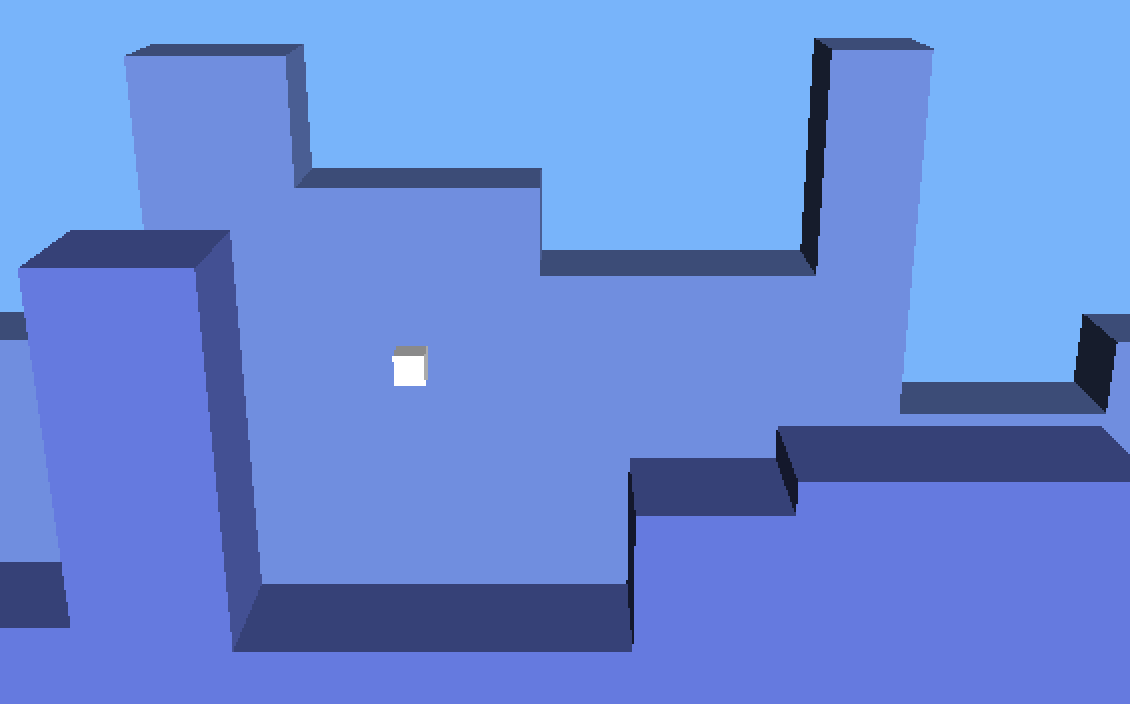
Now Runner remains at a fixed position in our view and we can see that the close skyline cube appears to move faster than the one further away.
Generating a Skyline
Create a new C# script in the Skyline folder and name it SkylineManager. We will use it to create two managers, one for each of the skyline layers. At minimum, it needs to know which prefab to use to generate the skyline, so let's start by adding a public variable for that.
using UnityEngine;

public class SkylineManager : MonoBehaviour {

	public Transform prefab;
}
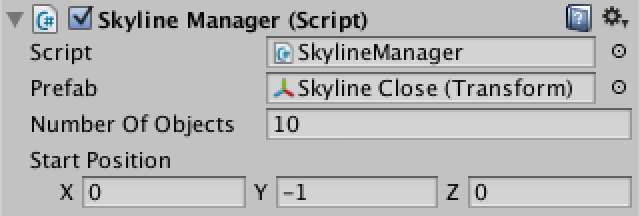
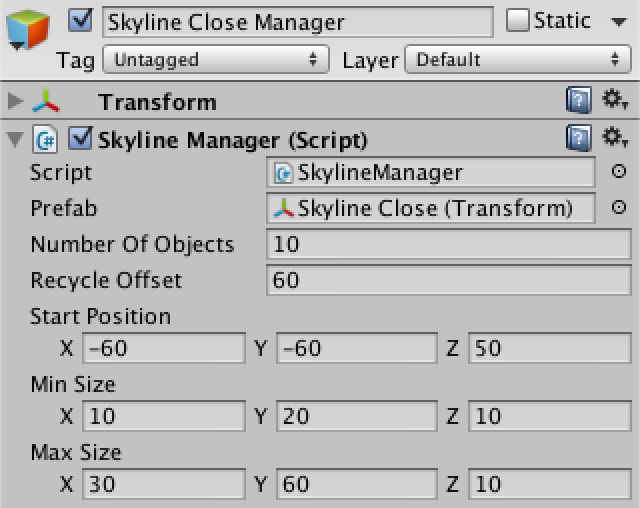
Now turn both skyline cubes into prefabs by dragging them into the Skyline project folder or via Create / Prefab and then dragging onto that. Afterwards, delete both cubes from the Hierarchy. Now drag the Skyline Close prefab onto the Prefab field of our Skyline Close Manager.

	public Transform prefab;
	public int numberOfObjects;
	public Vector3 startPosition;

	private Vector3 nextPosition;

	void Start () {
		nextPosition = startPosition;
	}
localScale.x.
	void Start () {
		nextPosition = startPosition;
		for (int i = 0; i < numberOfObjects; i++) {
			Transform o = (Transform)Instantiate(prefab);
			o.localPosition = nextPosition;
			nextPosition.x += o.localScale.x;
		}
	}

distanceTraveled to
Runner and making sure that it's always up to date.
using UnityEngine;

public class Runner : MonoBehaviour {

	public static float distanceTraveled;

	void Update () {
		transform.Translate(5f * Time.deltaTime, 0f, 0f);
		distanceTraveled = transform.localPosition.x;
	}
}
using UnityEngine;
using System.Collections.Generic;
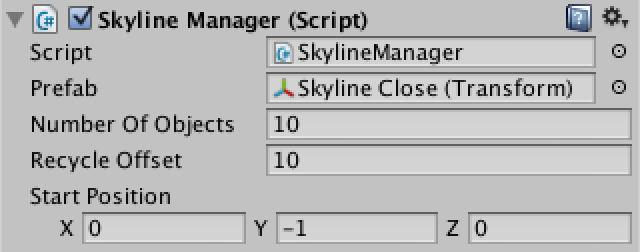
public class SkylineManager : MonoBehaviour {
public Transform prefab;
public int numberOfObjects;
public float recycleOffset;
public Vector3 startPosition;
private Vector3 nextPosition;
private Queue<Transform> objectQueue;
void Start () {
objectQueue = new Queue<Transform>(numberOfObjects);
nextPosition = startPosition;
for (int i = 0; i < numberOfObjects; i++) {
Transform o = (Transform)Instantiate(prefab);
o.localPosition = nextPosition;
nextPosition.x += o.localScale.x;
objectQueue.Enqueue(o);
}
}
void Update () {
if (objectQueue.Peek().localPosition.x + recycleOffset < Runner.distanceTraveled) {
Transform o = objectQueue.Dequeue();
o.localPosition = nextPosition;
nextPosition.x += o.localScale.x;
objectQueue.Enqueue(o);
}
}
}
First, consider that both initially placing and later recycling a cube is basically doing the same
thing. Let's put this code in its own Recycle method and rewrite our Start
and Update methods to both use it.
	void Start () {
		objectQueue = new Queue<Transform>(numberOfObjects);
		for (int i = 0; i < numberOfObjects; i++) {
			objectQueue.Enqueue((Transform)Instantiate(prefab));
		}
		nextPosition = startPosition;
		for (int i = 0; i < numberOfObjects; i++) {
			Recycle();
		}
	}

	void Update () {
		if (objectQueue.Peek().localPosition.x + recycleOffset < Runner.distanceTraveled) {
			Recycle();
		}
	}

	private void Recycle () {
		Transform o = objectQueue.Dequeue();
		o.localPosition = nextPosition;
		nextPosition.x += o.localScale.x;
		objectQueue.Enqueue(o);
	}
	public Vector3 minSize, maxSize;

	private void Recycle () {
		Vector3 scale = new Vector3(
			Random.Range(minSize.x, maxSize.x),
			Random.Range(minSize.y, maxSize.y),
			Random.Range(minSize.z, maxSize.z));

		Vector3 position = nextPosition;
		position.x += scale.x * 0.5f;
		position.y += scale.y * 0.5f;

		Transform o = objectQueue.Dequeue();
		o.localScale = scale;
		o.localPosition = position;
		nextPosition.x += scale.x;
		objectQueue.Enqueue(o);
	}
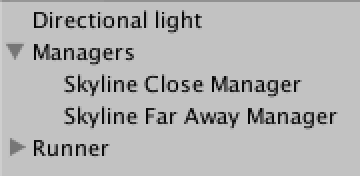
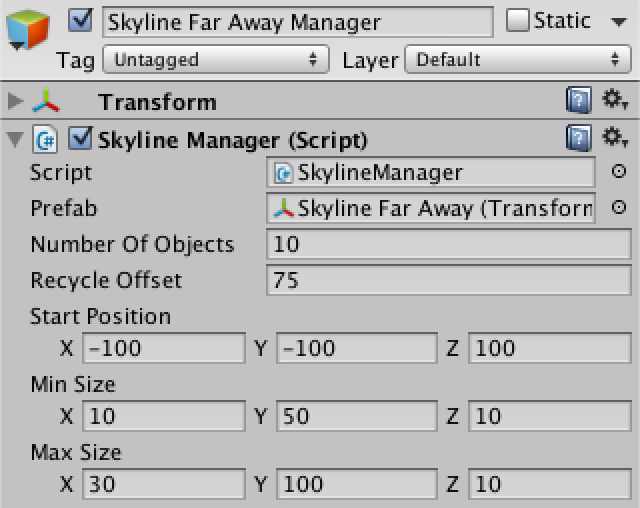
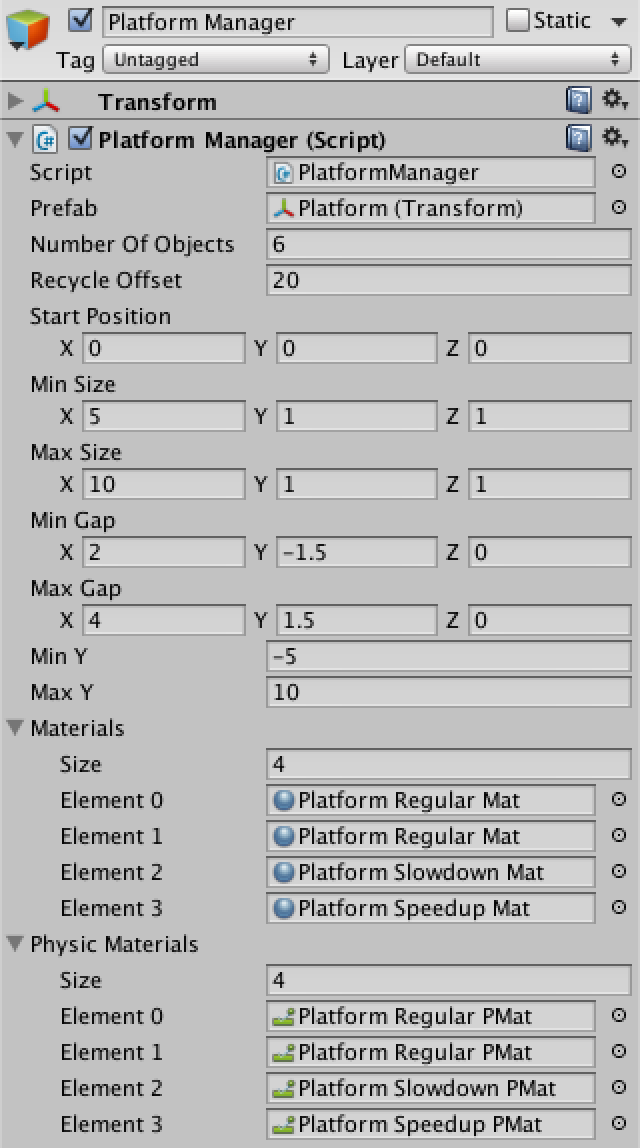
Let's go ahead and add the second skyline layer as well. Duplicate Skyline Close Manager and change its name to Skyline Far Away Manager. Change its Prefab to the Skyline Far Away prefab. Set its Start Position to (-100, -100, 100), its Recycle Offset to 75, its Min Size to (10, 50, 10), and its Max Size to (30, 100, 10). Of course you can use any values you like instead.
Generating Platforms
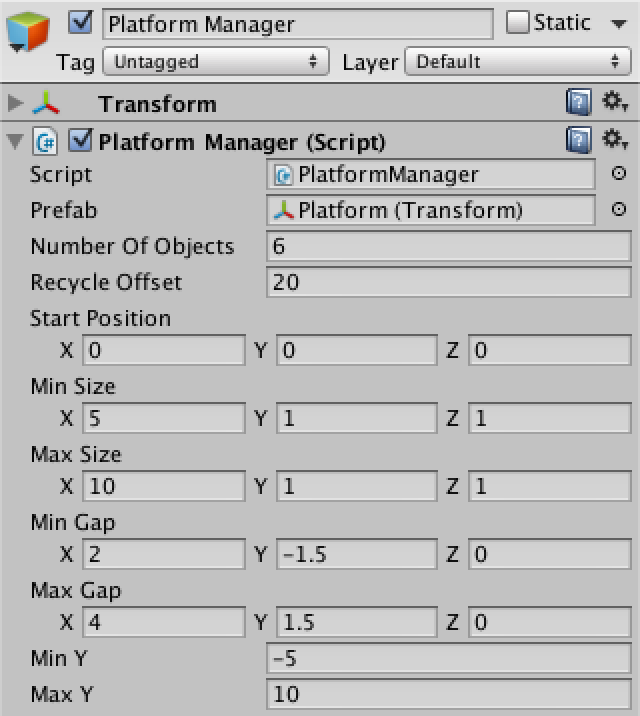
Create a new folder in the Project view named Platform. Create a new C# script in there called PlatformManager and copy the code from SkylineManager into it. Then change the code as shown below to make if conform to our needs.
using UnityEngine;
using System.Collections.Generic;

public class PlatformManager : MonoBehaviour {

	public Transform prefab;
	public int numberOfObjects;
	public float recycleOffset;
	public Vector3 startPosition;
	public Vector3 minSize, maxSize, minGap, maxGap;
	public float minY, maxY;

	private Vector3 nextPosition;
	private Queue<Transform> objectQueue;

	void Start () {
		objectQueue = new Queue<Transform>(numberOfObjects);
		for(int i = 0; i < numberOfObjects; i++){
			objectQueue.Enqueue((Transform)Instantiate(prefab));
		}
		nextPosition = startPosition;
		for(int i = 0; i < numberOfObjects; i++){
			Recycle();
		}
	}

	void Update () {
		if(objectQueue.Peek().localPosition.x + recycleOffset < Runner.distanceTraveled){
			Recycle();
		}
	}

	private void Recycle () {
		Vector3 scale = new Vector3(
			Random.Range(minSize.x, maxSize.x),
			Random.Range(minSize.y, maxSize.y),
			Random.Range(minSize.z, maxSize.z));

		Vector3 position = nextPosition;
		position.x += scale.x * 0.5f;
		position.y += scale.y * 0.5f;

		Transform o = objectQueue.Dequeue();
		o.localScale = scale;
		o.localPosition = position;
		objectQueue.Enqueue(o);

		nextPosition += new Vector3(
			Random.Range(minGap.x, maxGap.x) + scale.x,
			Random.Range(minGap.y, maxGap.y),
			Random.Range(minGap.z, maxGap.z));

		if(nextPosition.y < minY){
			nextPosition.y = minY + maxGap.y;
		}
		else if(nextPosition.y > maxY){
			nextPosition.y = maxY - maxGap.y;
		}
	}
}
Jumping and Falling
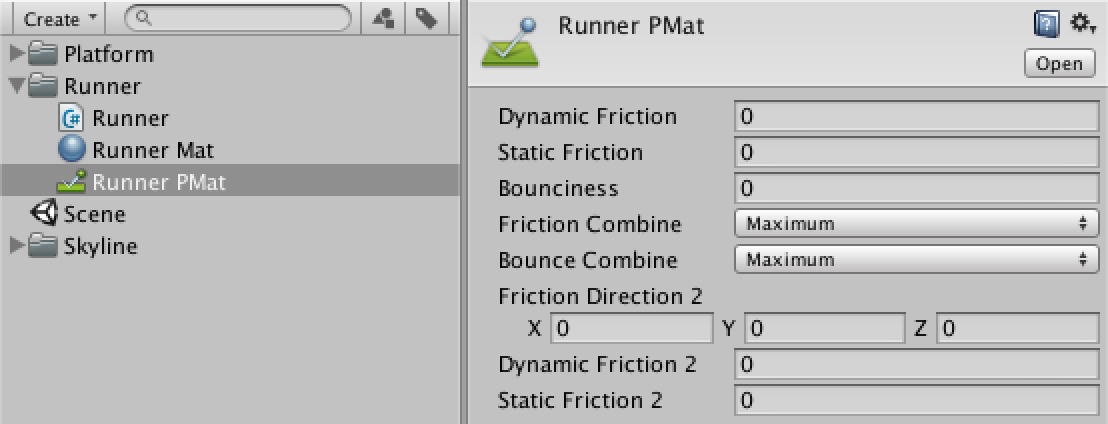
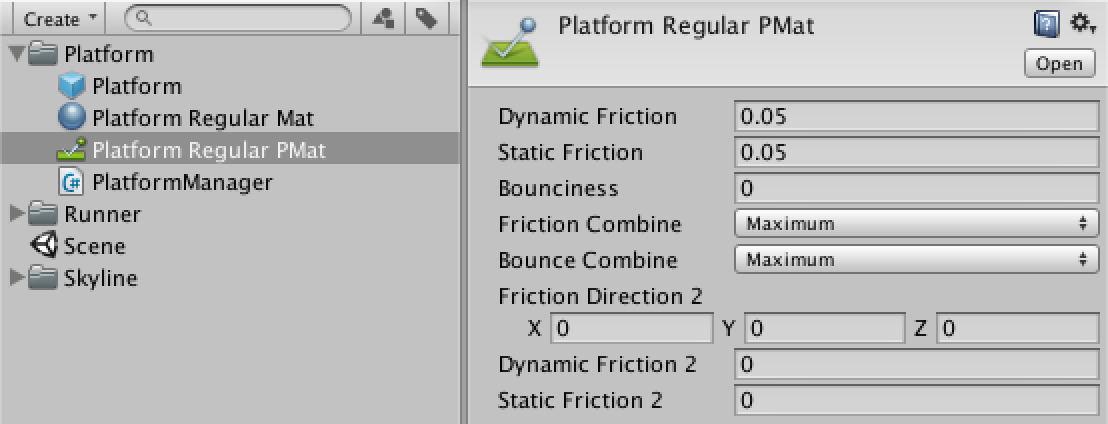
As movement will be accomplished by gliding across the platforms, let's create a physic material (Create / Physic Material) with no friction whatsoever. Set all its fields to zero and both combine options to maximum. This way friction will be determined by whatever it's gliding across.
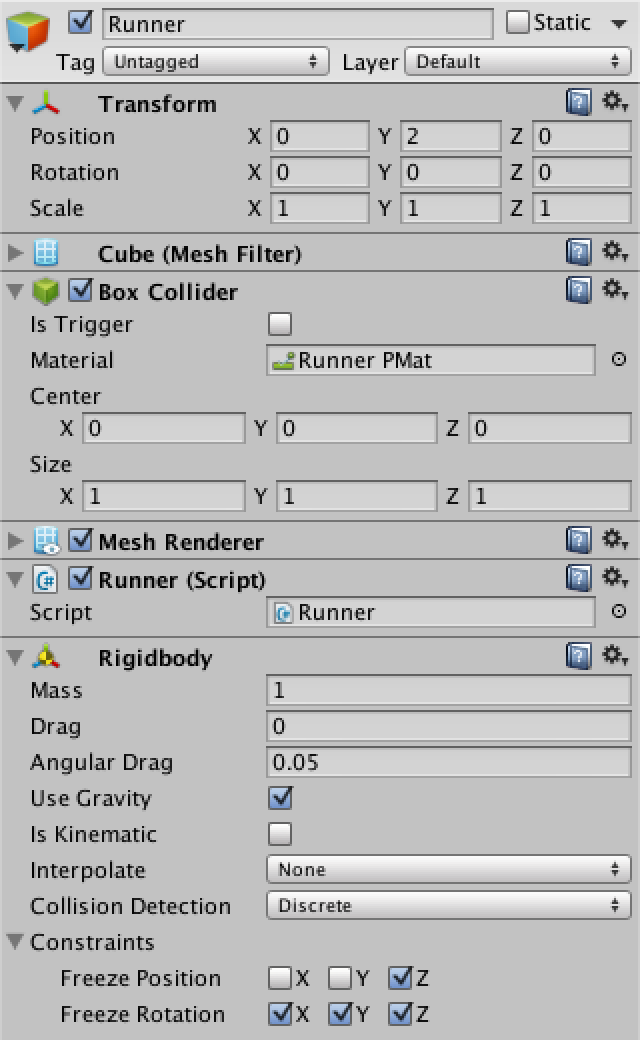
Name the new physic material Runner PMat, put it in the Runner folder, and assign it to the Material field of the Box Collider of Runner.
Reposition Runner to (0, 2, 0) so that it will begin by falling down on the first platform. Then try out play mode to see what happens!
Update
method. We should leave its movement to the physics engine and instead apply forces to it.
Remove the call to Translate from the Update method of Runner.
Instead, we'll use two of Unity's collision event methods – OnCollisionEnter and
OnCollisionExit – to detect when we touch or leave a platform.
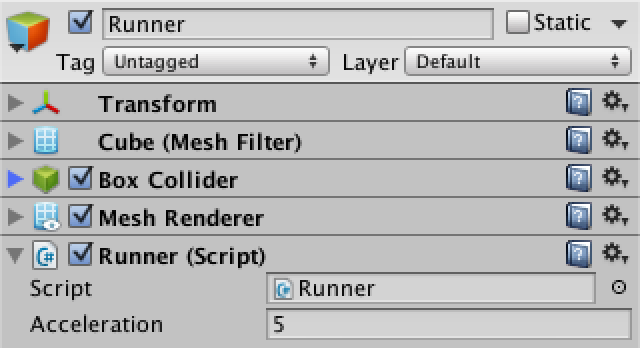
As long as we're touching a platform, we apply an acceleration to make us run faster.
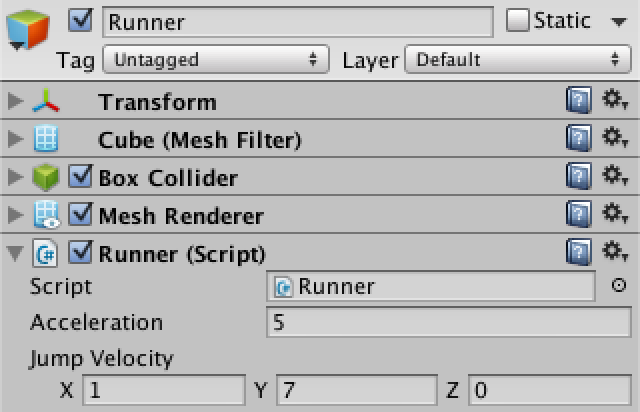
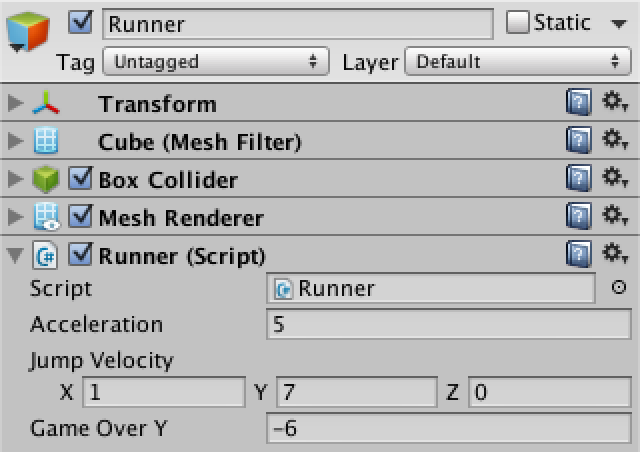
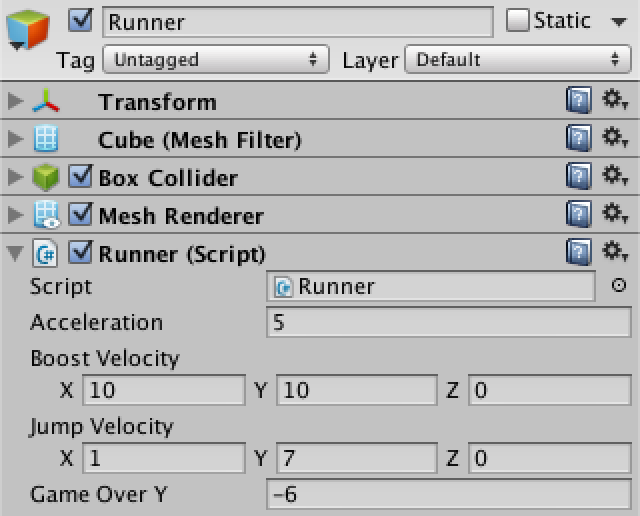
Let's make the acceleration configurable and set it to 5 in the editor.
using UnityEngine;

public class Runner : MonoBehaviour {

	public static float distanceTraveled;

	public float acceleration;

	private bool touchingPlatform;

	void Update () {
		distanceTraveled = transform.localPosition.x;
	}

	void FixedUpdate () {
		if(touchingPlatform){
			rigidbody.AddForce(acceleration, 0f, 0f, ForceMode.Acceleration);
		}
	}

	void OnCollisionEnter () {
		touchingPlatform = true;
	}

	void OnCollisionExit () {
		touchingPlatform = false;
	}
}
Now our platforms provide a little friction, but Runner has a large enough acceleration pick up speed while moving across them.

Runner so we can configure its jump velocity. We'll use a vector
instead of just a float so we can profide both a vertical and horizontal component. Set the
corresponding field in the editor to (1, 7, 0).
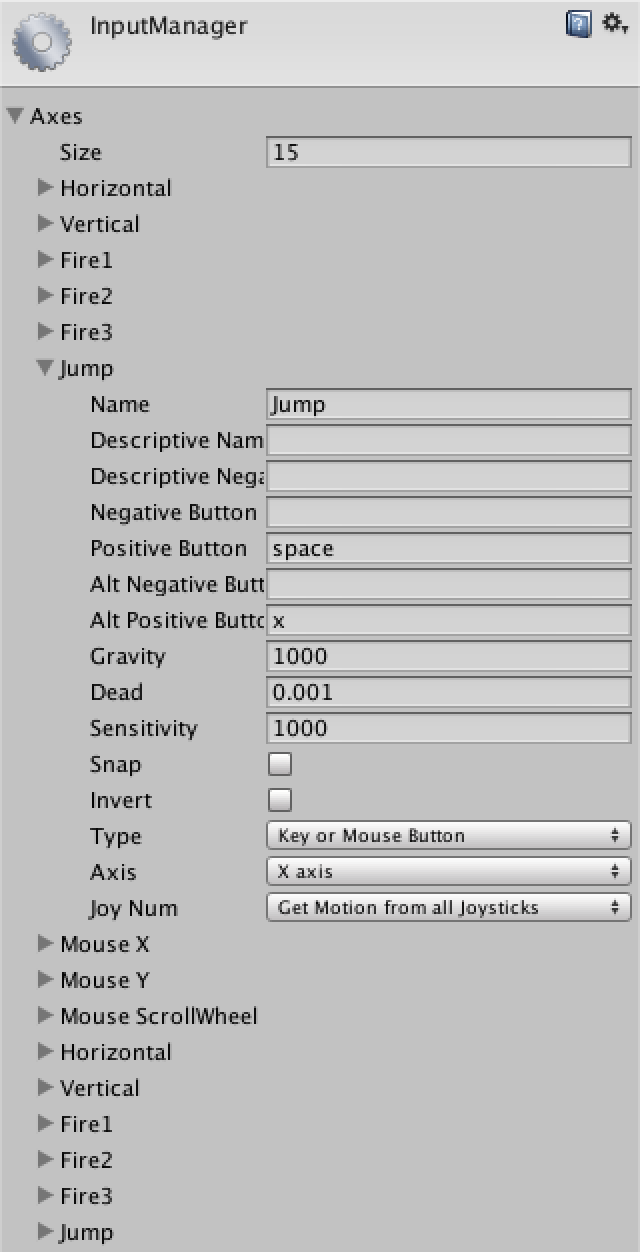
We want Runner to jump only when it's touching a platform while the jump button is
pressed. Let's add code for this to the Update method.
	public Vector3 jumpVelocity;

	void Update () {
		if(touchingPlatform && Input.GetButtonDown("Jump")){
			rigidbody.AddForce(jumpVelocity, ForceMode.VelocityChange);
		}
		distanceTraveled = transform.localPosition.x;
	}
	void Update () {
		if(touchingPlatform && Input.GetButtonDown("Jump")){
			rigidbody.AddForce(jumpVelocity, ForceMode.VelocityChange);
			touchingPlatform = false;
		}
		distanceTraveled = transform.localPosition.x;
	}
Platform Variety
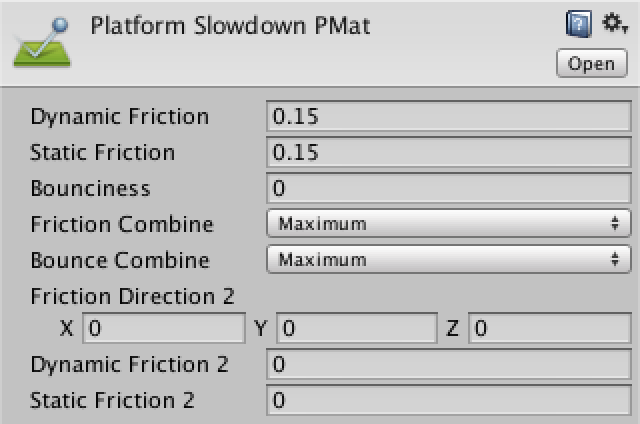
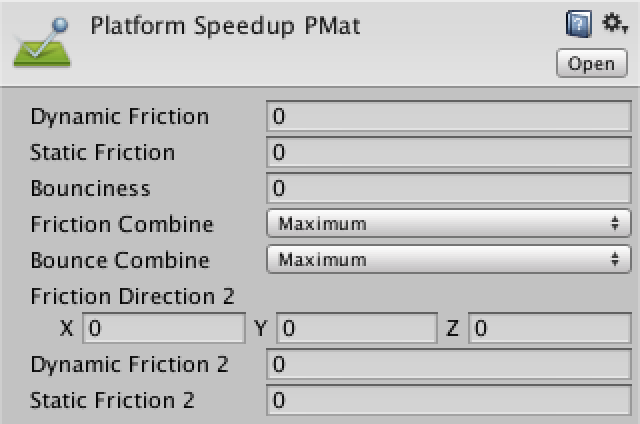
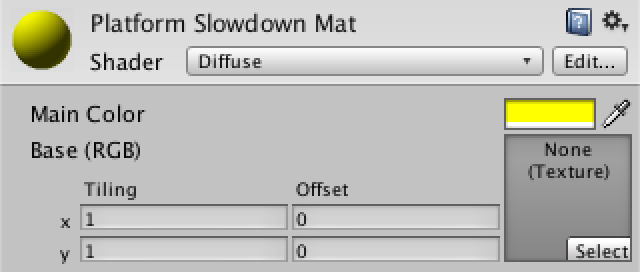
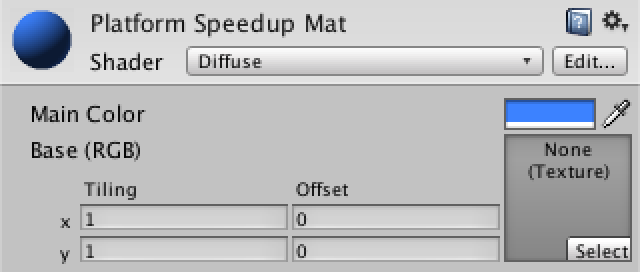
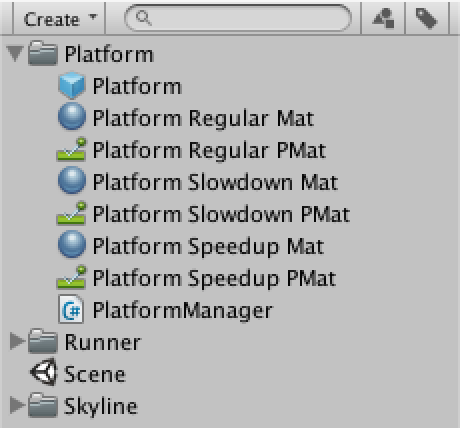
Duplicate Platform Regular PMat twice and name them Platform Slowdown PMat and Platform Speedup PMat. Also duplicate Platform Regular Mat twice and name them in a similar fashion. Set the friction values to 0.15 and 0, and their colors to (255, 255, 0) and (60, 130, 255), respectively.
PlatformManager so it will assign these materials. We'll add two
arrays for the materials and pick from them at random when recycling a platform.
	public Material[] materials;
	public PhysicMaterial[] physicMaterials;

	private void Recycle () {
		Vector3 scale = new Vector3(
			Random.Range(minSize.x, maxSize.x),
			Random.Range(minSize.y, maxSize.y),
			Random.Range(minSize.z, maxSize.z));

		Vector3 position = nextPosition;
		position.x += scale.x * 0.5f;
		position.y += scale.y * 0.5f;

		Transform o = objectQueue.Dequeue();
		o.localScale = scale;
		o.localPosition = position;
		int materialIndex = Random.Range(0, materials.Length);
		o.renderer.material = materials[materialIndex];
		o.collider.material = physicMaterials[materialIndex];
		objectQueue.Enqueue(o);

		nextPosition += new Vector3(
			Random.Range(minGap.x, maxGap.x) + scale.x,
			Random.Range(minGap.y, maxGap.y),
			Random.Range(minGap.z, maxGap.z));

		if(nextPosition.y < minY){
			nextPosition.y = minY + maxGap.y;
		}
		else if(nextPosition.y > maxY){
			nextPosition.y = maxY - maxGap.y;
		}
	}
}
Game Events
For this approach we can identify three events that might require objects to take action. The first,
game launch, is effectively handled by the Start methods. The other two, game start and
game over, require a custom approach. We will create a very simple event manager class to handle them.
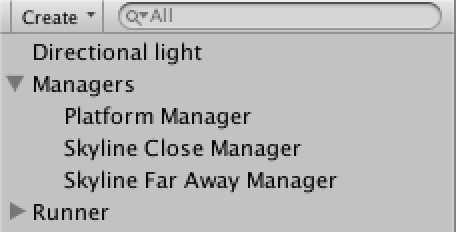
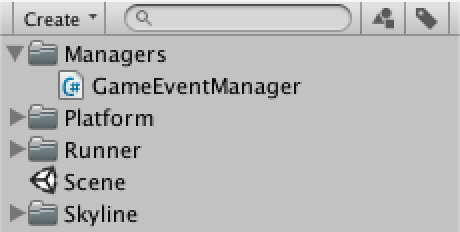
Create a new folder named Managers and put a new C# script named
GameEventManager in it. We make GameEventManager a static class
that defines a GameEvent delegate type inside it. Note that the manager isn't a
MonoBehaviour and won't be attached to any Unity object.
public static class GameEventManager {

	public delegate void GameEvent();
}
gameEvent type to add two events to our manager,
GameStart and GameEnd. Now other scripts can subscribe to these events by
assigning methods to them, which will be called when the events are triggered.
public static class GameEventManager {

	public delegate void GameEvent();

	public static event GameEvent GameStart, GameOver;
}
null and the call will result in an error.
public static class GameEventManager {

	public delegate void GameEvent();

	public static event GameEvent GameStart, GameOver;

	public static void TriggerGameStart(){
		if(GameStart != null){
			GameStart();
		}
	}

	public static void TriggerGameOver(){
		if(GameOver != null){
			GameOver();
		}
	}
}
GUI and Game Start
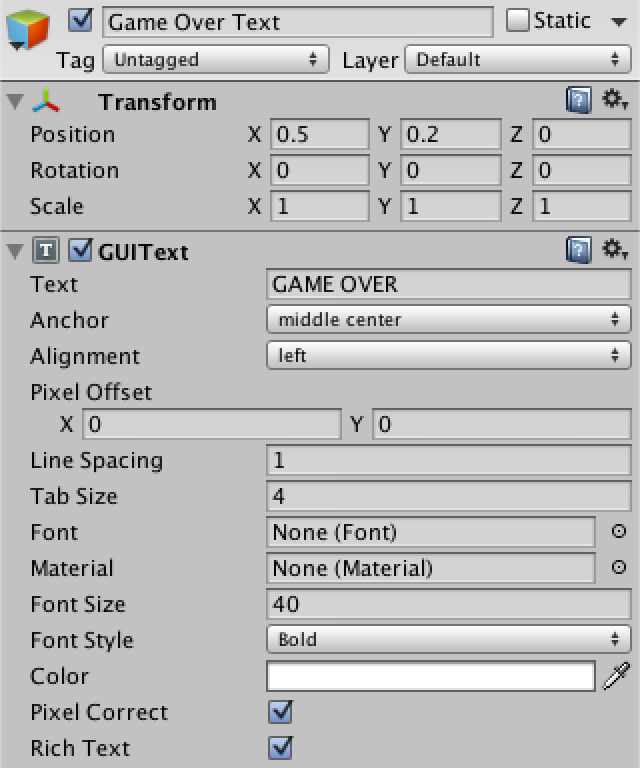
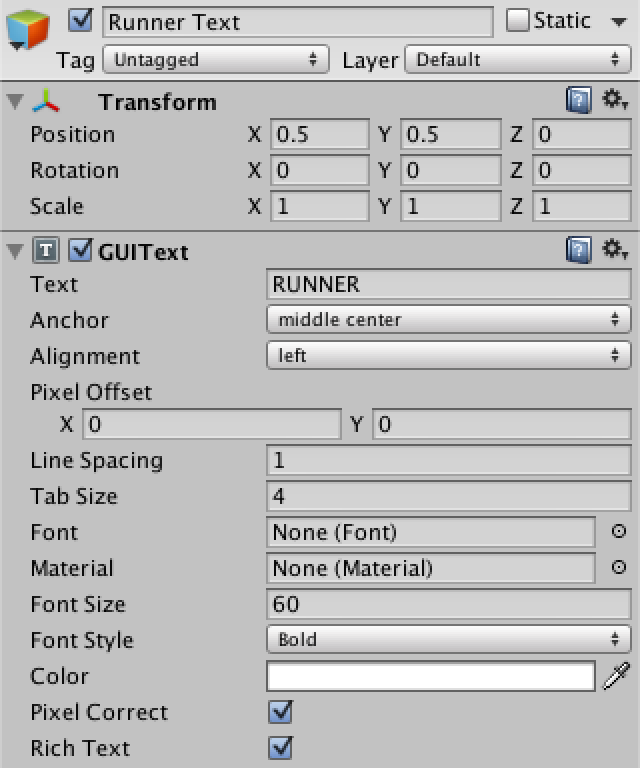
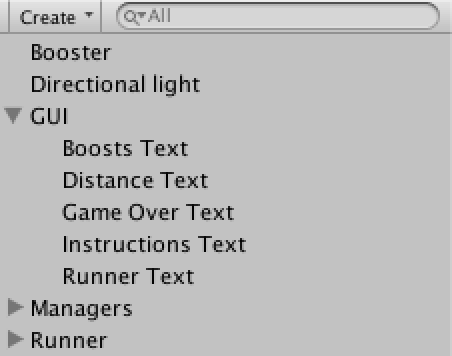
Let's add some text labels to our scene. To keep things organized, we'll use a container object to group them, so create a new empty game object with position (0, 0, 0) and name it GUI. Create three empty child objects for it and give each a GUIText component via Component / Rendering / GUIText. Set their Anchor fields to middle center so their text gets centered on their position.
Name the first object Game Over Text, set its Text field to "GAME OVER", set its Font Size to 40, and set its Font Style to bold. Change its position to (0.5, 0.2, 0) so it ends up near the bottom center of the screen.
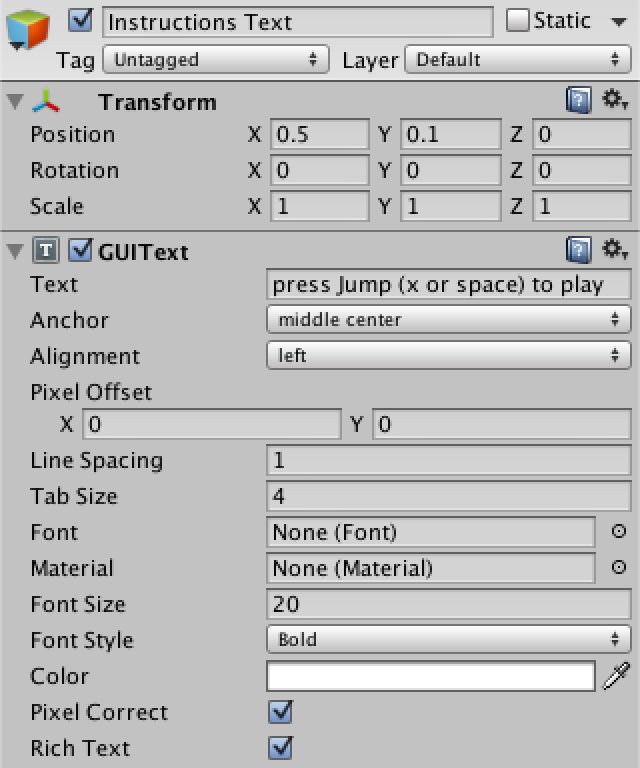
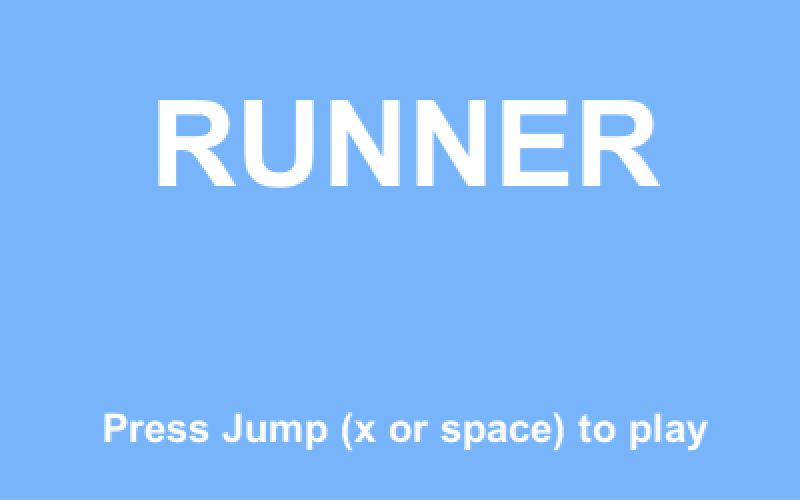
Name the second object Instructions Text, also bold but with a font size of 20, and set its text to "press Jump (x or space) to play". Change its position to (0.5, 0.1, 0), just below the game over text.
Name the third object Runner Text, with text "RUNNER", bold, and a font size of 60. It's position should be (0.5, 0.5, 0), right in the middle of the screen.
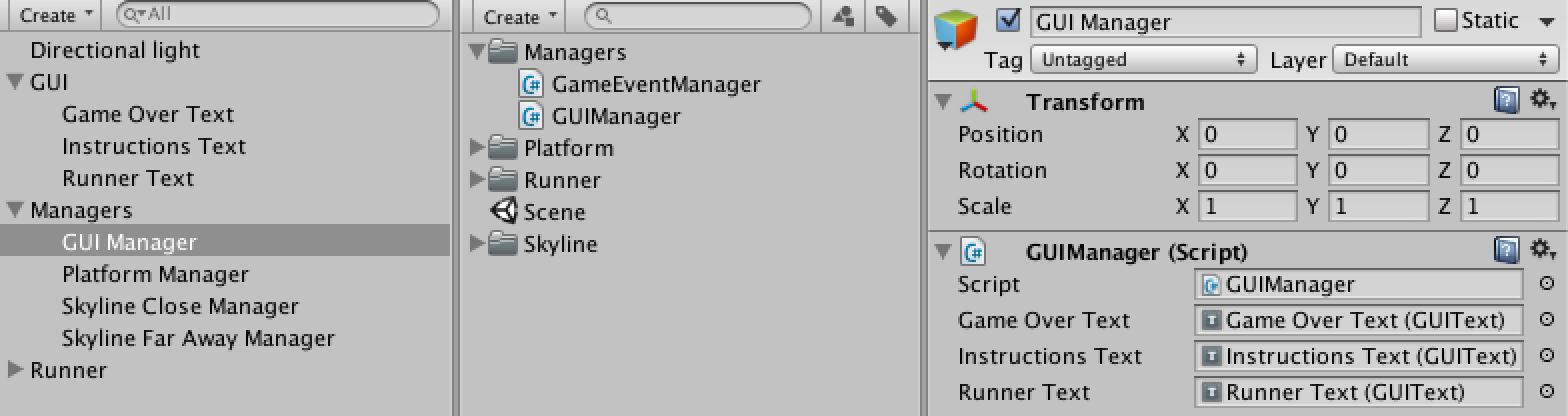
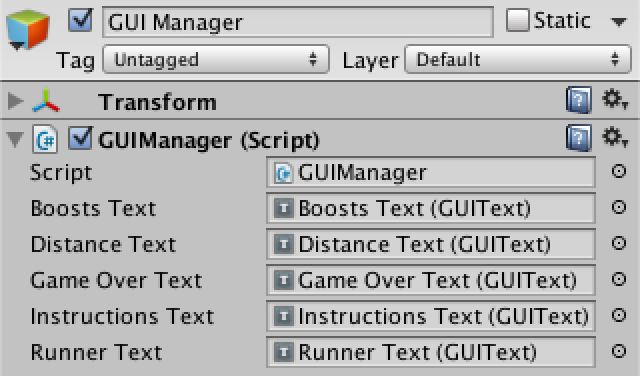
Now create a C# script named GUIManager in the Managers folder
and give it a GUIText variable for each text object we just made. Create a new object
named GUI Manager and assign the script as a component. Make it a child of
Managers. Then assign the text objects to the manager's corresponding fields.
using UnityEngine;

public class GUIManager : MonoBehaviour {

	public GUIText gameOverText, instructionsText, runnerText;
}

Start method to our new manager and use it to disable gameOverText
so it won't be shown anymore. Also add an Update method that checks whether a jump button
was pressed, and if so triggers the game-start event.
	void Start () {
		gameOverText.enabled = false;
	}

	void Update () {
		if(Input.GetButtonDown("Jump")){
			GameEventManager.TriggerGameStart();
		}
	}
GameStart. We use this method to disable all text. We also disable the manager itself,
so its Update method will no longer be called. If we didn't, each time we jump there'd
be a new game-start event.
	private void GameStart () {
		gameOverText.enabled = false;
		instructionsText.enabled = false;
		runnerText.enabled = false;
		enabled = false;
	}
GameStart method of
our manager object, whenever the game-start event is triggered. We do this by adding our method
to the event in the Start method.
	void Start () {
		GameEventManager.GameStart += GameStart;
		gameOverText.enabled = false;
	}
Game Over
	void Start () {
		GameEventManager.GameStart += GameStart;
		GameEventManager.GameOver += GameOver;
		gameOverText.enabled = false;
	}

	private void GameOver () {
		gameOverText.enabled = true;
		instructionsText.enabled = true;
		enabled = true;
	}
Runner with a value of -6,
then check each update whether we dropped below it. If so, we trigger the game over event.
	public float gameOverY;

	void Update () {
		if(touchingPlatform && Input.GetButtonDown("Jump")){
			rigidbody.AddForce(jumpVelocity, ForceMode.VelocityChange);
			touchingPlatform = false;
		}
		distanceTraveled = transform.localPosition.x;

		if(transform.localPosition.y < gameOverY){
			GameEventManager.TriggerGameOver();
		}
	}
Using the Events
We want Runner to be disabled before the first game is started, though we want the camera inside of it to stay active.
Disabling the runner means we have to deactivate its renderer and the runner component itself. We also switch its rigidbody to kinematic mode to freeze it in place.
We can do this in its Start method, then undo this change when the game-start
event is triggered, and then redo it when the game-over event is triggered. We'll also remember its starting position so we can reset it each game start.
Let's reset distanceTraveled too, so it's immediately up to date.
	private Vector3 startPosition;

	void Start () {
		GameEventManager.GameStart += GameStart;
		GameEventManager.GameOver += GameOver;
		startPosition = transform.localPosition;
		renderer.enabled = false;
		rigidbody.isKinematic = true;
		enabled = false;
	}

	private void GameStart () {
		distanceTraveled = 0f;
		transform.localPosition = startPosition;
		renderer.enabled = true;
		rigidbody.isKinematic = false;
		enabled = true;
	}

	private void GameOver () {
		renderer.enabled = false;
		rigidbody.isKinematic = true;
		enabled = false;
	}
We can achieve this by having PlatformManager initially place the platforms somewhere far behind the camera and
relocating its recycle loop to a new GameStart method.
	void Start () {
		GameEventManager.GameStart += GameStart;
		GameEventManager.GameOver += GameOver;
		objectQueue = new Queue<Transform>(numberOfObjects);
		for (int i = 0; i < numberOfObjects; i++) {
			objectQueue.Enqueue((Transform)Instantiate(
				prefab, new Vector3(0f, 0f, -100f), Quaternion.identity));
		}
		enabled = false;
	}

	private void GameStart () {
		nextPosition = startPosition;
		for(int i = 0; i < numberOfObjects; i++){
			Recycle();
		}
		enabled = true;
	}

	private void GameOver () {
		enabled = false;
	}
SkylineManager the exact same treatment, so all parts of the game respond nicely
to our events.
	void Start () {
		GameEventManager.GameStart += GameStart;
		GameEventManager.GameOver += GameOver;
		objectQueue = new Queue<Transform>(numberOfObjects);
		for(int i = 0; i < numberOfObjects; i++){
			objectQueue.Enqueue((Transform)Instantiate(
				prefab, new Vector3(0f, 0f, -100f), Quaternion.identity));
		}
		enabled = false;
	}

	private void GameStart () {
		nextPosition = startPosition;
		for(int i = 0; i < numberOfObjects; i++){
			Recycle();
		}
		enabled = true;
	}

	private void GameOver () {
		enabled = false;
	}

Power-Up
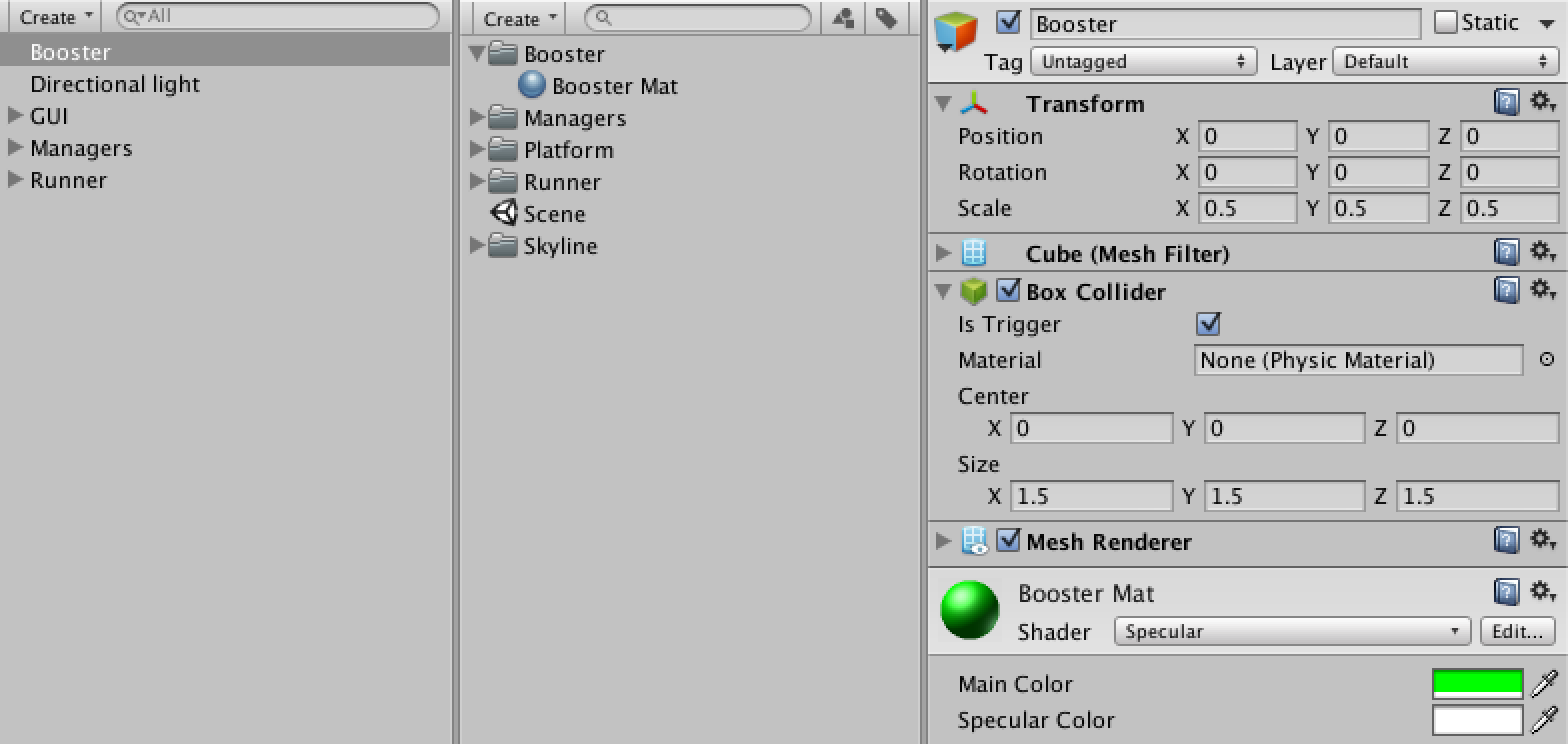
Create a new folder named Booster. In it, create a new material named Booster Mat. Because it's spinning, we'll use the Specular shader for the material, giving it a green (0, 255, 0) color and a white specular color.
Now create a new cube, name is Booster, and set its scale to 0.5 to make it small. To make it a bit easier to hit, increase its collider's size to 1.5, which ends up being 0.75 due to the scale. Then assign its material to it.
Mark the collider as a trigger, by checking its Is Trigger field. We do this because we want Runner to pass right through it, instead of colliding.
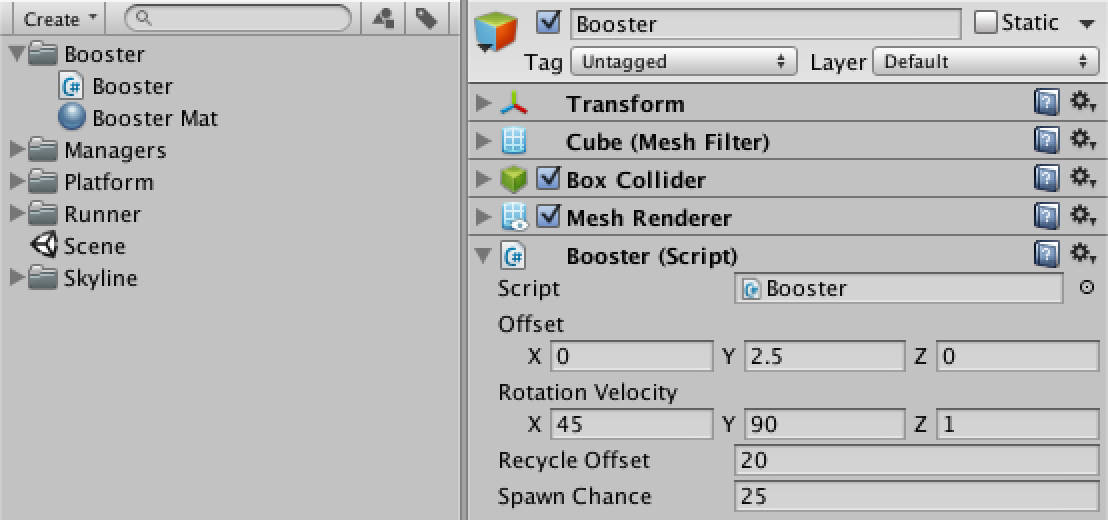
using UnityEngine;

public class Booster : MonoBehaviour {

	public Vector3 offset, rotationVelocity;
	public float recycleOffset, spawnChance;
}
SpawnIfAvailable to Booster for this. It requires a platform position so
we know where to place the booster. We leave it empty for now.
	public void SpawnIfAvailable(Vector3 position){
	}
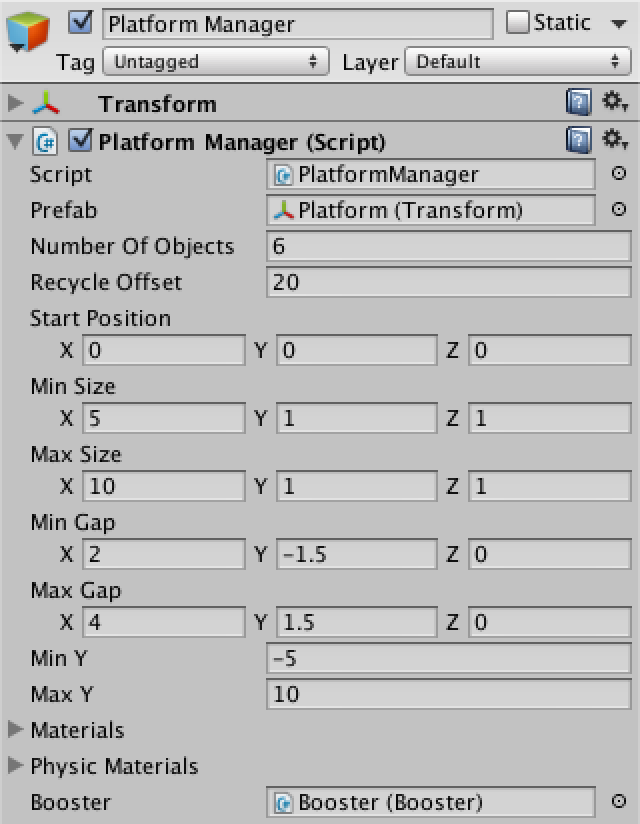
PlatformManager to which we assign Booster.
Inside the Recycle method, we'll call its PlaceIfAvailable method after
we've determined the new platform's position.
	public Booster booster;

	private void Recycle () {
		Vector3 scale = new Vector3(
			Random.Range(minSize.x, maxSize.x),
			Random.Range(minSize.y, maxSize.y),
			Random.Range(minSize.z, maxSize.z));

		Vector3 position = nextPosition;
		position.x += scale.x * 0.5f;
		position.y += scale.y * 0.5f;
		booster.SpawnIfAvailable(position);

		Transform o = objectQueue.Dequeue();
		o.localScale = scale;
		o.localPosition = position;
		int materialIndex = Random.Range(0, materials.Length);
		o.renderer.material = materials[materialIndex];
		o.collider.material = physicMaterials[materialIndex];
		objectQueue.Enqueue(o);

		nextPosition += new Vector3(
			Random.Range(minGap.x, maxGap.x) + scale.x,
			Random.Range(minGap.y, maxGap.y),
			Random.Range(minGap.z, maxGap.z));

		if(nextPosition.y < minY){
			nextPosition.y = minY + maxGap.y;
		}
		else if(nextPosition.y > maxY){
			nextPosition.y = maxY - maxGap.y;
		}
	}
SpawnIfAvailable method so it activates and positions the
booster, but only if it's not already active, and also taking the spawn chance into account. Also,
to make this work Booster must begin deactivated and must also deactivate when the game ends.
	void Start () {
		GameEventManager.GameOver += GameOver;
		gameObject.SetActive(false);
	}

	public void SpawnIfAvailable (Vector3 position) {
		if(gameObject.activeSelf || spawnChance <= Random.Range(0f, 100f)) {
			return;
		}
		transform.localPosition = position + offset;
		gameObject.SetActive(true);
	}

	private void GameOver () {
		gameObject.SetActive(false);
	}
Update method to it. Recycling
is achieved by simple deactivation, as that makes it eligible for a respawn via
SpawnIfAvailable. Rotation is achieved by rotating based on the elapsed time since the
last frame.
	void Update () {
		if(transform.localPosition.x + recycleOffset < Runner.distanceTraveled){
			gameObject.SetActive(false);
			return;
		}
		transform.Rotate(rotationVelocity * Time.deltaTime);
	}
OnTriggerEnter to
Booster, which is called whenever something hits its trigger collider. Because we know
that the only thing that could possibly hit the booster is our runner, we can go ahead and give it
a new booster power-up whenever there's a trigger. Let's assume Runner has a static method
named AddBoost for this purpose, and use that. We also deactivate the booster, because
it's been consumed.
	void OnTriggerEnter () {
		Runner.AddBoost();
		gameObject.SetActive(false);
	}
AddBoost method to Runner. To keep
things simple, let's just add a private static variable to remember how many boosts we have
accumulated.
	private static int boosts;

	private void GameStart () {
		boosts = 0;
		distanceTraveled = 0f;
		transform.localPosition = startPosition;
		renderer.enabled = true;
		rigidbody.isKinematic = false;
		enabled = true;
	}

	public static void AddBoost () {
		boosts += 1;
	}
	public Vector3 boostVelocity, jumpVelocity;

	void Update () {
		if(Input.GetButtonDown("Jump")){
			if(touchingPlatform){
				rigidbody.AddForce(jumpVelocity, ForceMode.VelocityChange);
				touchingPlatform = false;
			}
			else if(boosts > 0){
				rigidbody.AddForce(boostVelocity, ForceMode.VelocityChange);
				boosts -= 1;
			}
		}
		distanceTraveled = transform.localPosition.x;

		if(transform.localPosition.y < gameOverY){
			GameEventManager.TriggerGameOver();
		}
	}
Informative GUI
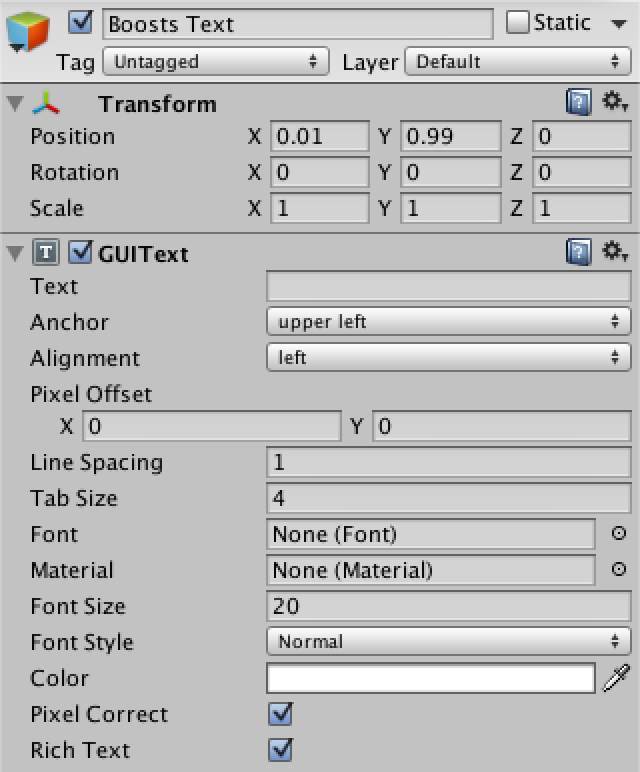
Create a new object with a GUIText component as a child of GUI. Position it at (0.01, 0.99, 0), set its Anchor to upper left, give it font size 20 and a normal style. Name it Boosts Text.
Create another such object, naming it Distance Text. Set its position to (0.5, 0.99, 0), with font size 30 and bold style. Its Anchor should be set to upper center.
Add two variables to GUIManager for these new objects and assign them.
public GUIText boostsText, distanceText, gameOverText, instructionsText, runnerText;

GUIManager which Runner can use to notify
the GUI of changes to its distance traveled and boost count. Because the manager needs to use
nonstatic variables in those methods, we add a static variable that references itself. That way the
static code can get to the component instance which actually has the gui text elements.
	private static GUIManager instance;

	void Start () {
		instance = this;
		GameEventManager.GameStart += GameStart;
		GameEventManager.GameOver += GameOver;
		gameOverText.enabled = false;
	}

	public static void SetBoosts(int boosts){
		instance.boostsText.text = boosts.ToString();
	}

	public static void SetDistance(float distance){
		instance.distanceText.text = distance.ToString("f0");
	}
Runner call those methods whenever its distance or amount
of boosts changes.
	void Update () {
		if(Input.GetButtonDown("Jump")){
			if(touchingPlatform){
				rigidbody.AddForce(jumpVelocity, ForceMode.VelocityChange);
				touchingPlatform = false;
			}
			else if(boosts > 0){
				rigidbody.AddForce(boostVelocity, ForceMode.VelocityChange);
				boosts -= 1;
				GUIManager.SetBoosts(boosts);
			}
		}
		distanceTraveled = transform.localPosition.x;
		GUIManager.SetDistance(distanceTraveled);

		if(transform.localPosition.y < gameOverY){
			GameEventManager.TriggerGameOver();
		}
	}

	private void GameStart () {
		boosts = 0;
		GUIManager.SetBoosts(boosts);
		distanceTraveled = 0f;
		GUIManager.SetDistance(distanceTraveled);
		transform.localPosition = startPosition;
		renderer.enabled = true;
		rigidbody.isKinematic = false;
		enabled = true;
	}

	public static void AddBoost(){
		boosts += 1;
		GUIManager.SetBoosts(boosts);
	}
Particle Effects
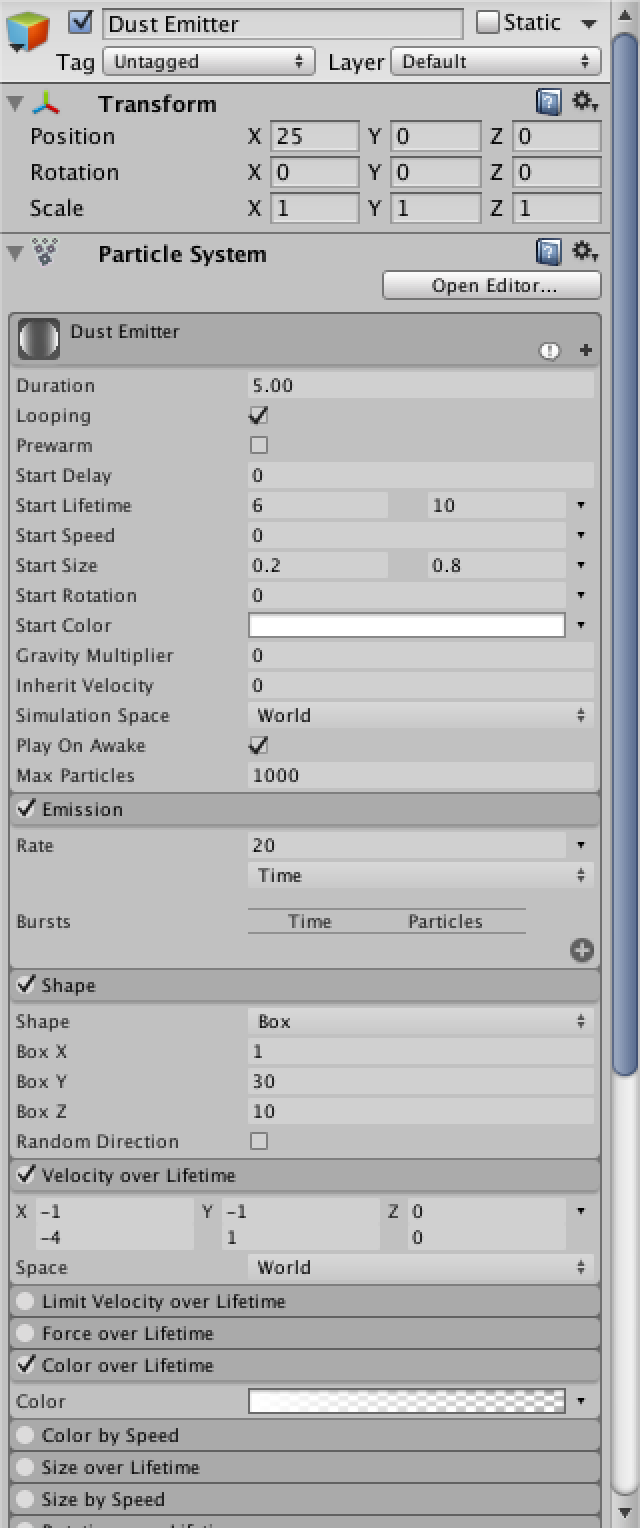
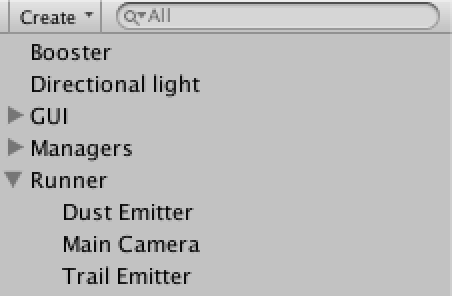
Create a new a new particle system (GameObject / Create Other / Particle System) named Dust Emitter. Make it a child of Runner with a position of (25, 0, 0) and reset its rotation, so it'll always stay to the right of the camera view.
Set Start Lifetime to Random Between Two Constants with values 6 and 10, and set Start Speed to 0 so we get stationary particles with varied lifetimes to start with. Also set Simulation Space to World so the particles don't move with Runner. To increase variety, set Start Size to Random Between Two Constants with values 0.2 and 0.8.
Change the shape to a box with dimensions (1, 30, 10) so we get a large spawning area, and increase the Rate of Emission to 20.
Activate Velocity Over Lifetime, set it to use world space and a random range between two constants, using the vectors (-1, -1, 0) and (-4, 1, 0). This way the particles have some individual movement.
Finally activate Color over Lifetime and change to gradient so it has an alpha value of 0 at 100%. This adds some fading to the particles.
Next, duplicate this particle system, keep it a child of Runner, reset its position, and name it Trail Emitter. We'll use this one for a condensation trail effect left behind by Runner.
Change its Shape to Mesh and set it to a cube (by clicking on the dot), and deactivate Velocity over Lifetime.
Decrease Start Lifetime to between 1 and 2 and Start Size to between 0.2 and 0.4, to keep the trail subtle and short.

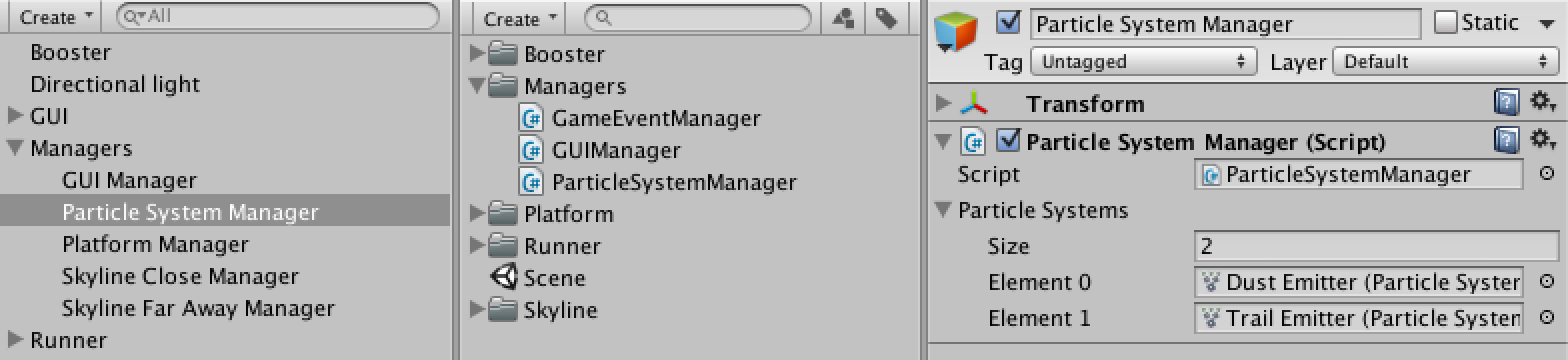
The only thing that ParticleSystemManager has to do is switch the particle systems
on and off at the appropriate time. We'll use an array variable named particleSystems to hold
references to all emitters that need to be managed. In this case, that's the two emitters we just
created, but the manager can deal with any additional emitters you'd like to create.
Assign our two particle emitters by dragging them to the Particle Systems field.
using UnityEngine;

public class ParticleSystemManager : MonoBehaviour {

	public ParticleSystem[] particleSystems;

	void Start () {
		GameEventManager.GameStart += GameStart;
		GameEventManager.GameOver += GameOver;
		GameOver();
	}

	private void GameStart () {
		for(int i = 0; i < particleSystems.Length; i++){
			particleSystems[i].Clear();
			particleSystems[i].enableEmission = true;
		}
	}

	private void GameOver () {
		for(int i = 0; i < particleSystems.Length; i++){
			particleSystems[i].enableEmission = false;
		}
	}
}
Enjoyed the tutorial? Help me make more by becoming a patron!
Downloads
- runner_01.unitypackage
- The project at the start of Generating a Skyline.
- runner_02.unitypackage
- The project at the start of Generating Platforms.
- runner_03.unitypackage
- The project at the start of Jumping and Falling.
- runner_04.unitypackage
- The project at the start of Platform Variety.
- runner_05.unitypackage
- The project at the start of Game Events.
- runner_06.unitypackage
- The project at the start of Power-Up.
- runner_07.unitypackage
- The project at the start of Informative GUI.
- runner_08.unitypackage
- The project at the start of Particle Effects.
- runner.unitypackage
- The finished project.