Runner 2
Side-Scrolling Skyline
- Generate a multi-tiered random side-scrolling skyline.
- Reuse and randomize skyline objects.
- Run and jump across obstacles.
This is the third tutorial in a series about prototypes. In it we will create a side-scrolling endless runner game.
This tutorial is made with Unity 2021.3.20f1 and upgraded to 2022.3.1f1.
Game Scene
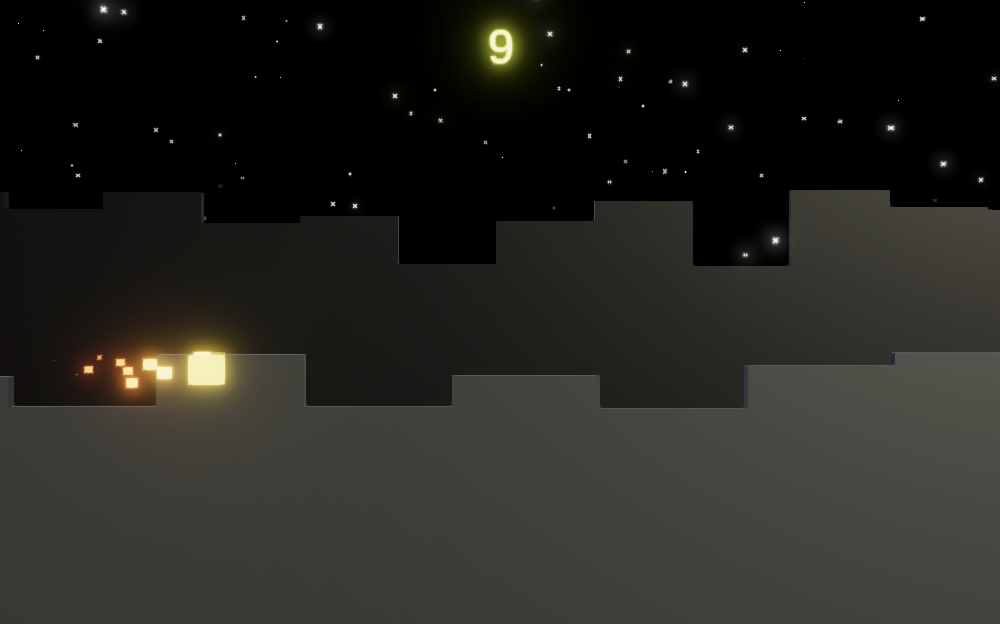
The game that we'll clone in this tutorial is Canabalt, or other side-scrolling endless runner games. It supersedes of the old Runner tutorial, so we'll name it Runner 2.
Visuals
Once again we'll use the same graphics settings as Paddle Square, so we can copy that project and remove all scripts and the components that use them. Also remove everything except the main light and camera from the game scene. We'll reuse some of the materials and particle systems.
The game is essentially 2D but we'll still use a perspective camera, with its vertical field of view reduced to 30°. We'll design our game with that view in mind, so that there is enough horizontal space visible for a 16:10 aspect ratio. Set the camera's position to (10, 2, -40) and give it no rotation.
We'll light the scene from behind with a short shadow range that only affects the foreground. Enable a directional light and set its rotation to (20, 330, 0). Set the URP shadow distance to 60 with one cascade. Soft shadows won't really be noticeable so we can make do with hard shadows.
Keep the Ball game object but rename it to Runner. Reduce it child light's range to 10 and make it cast hard shadows. Enable shadows for additional lights in the URP asset.
Make the trail and explosion particle systems children of Runner.
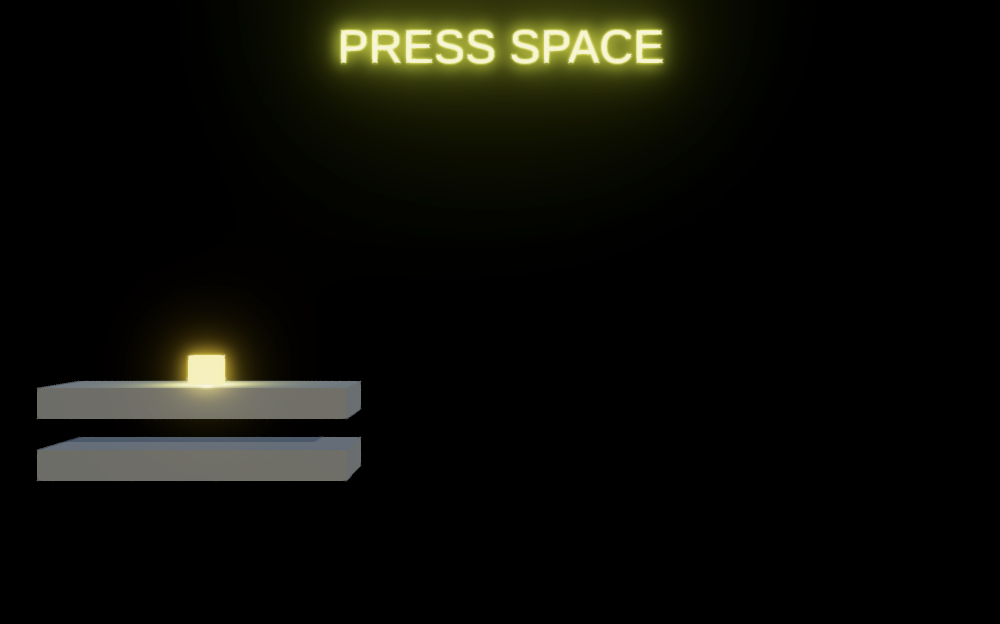
Put a single Text - TextMeshPro object in the scene with PRESS SPACE as its default text. Make it a child of the camera so it remains fixed in view. Set its font size to 8, its position (0, 4.5, -20) with a (0.5, 0.5) pivot, and give it no rotation.
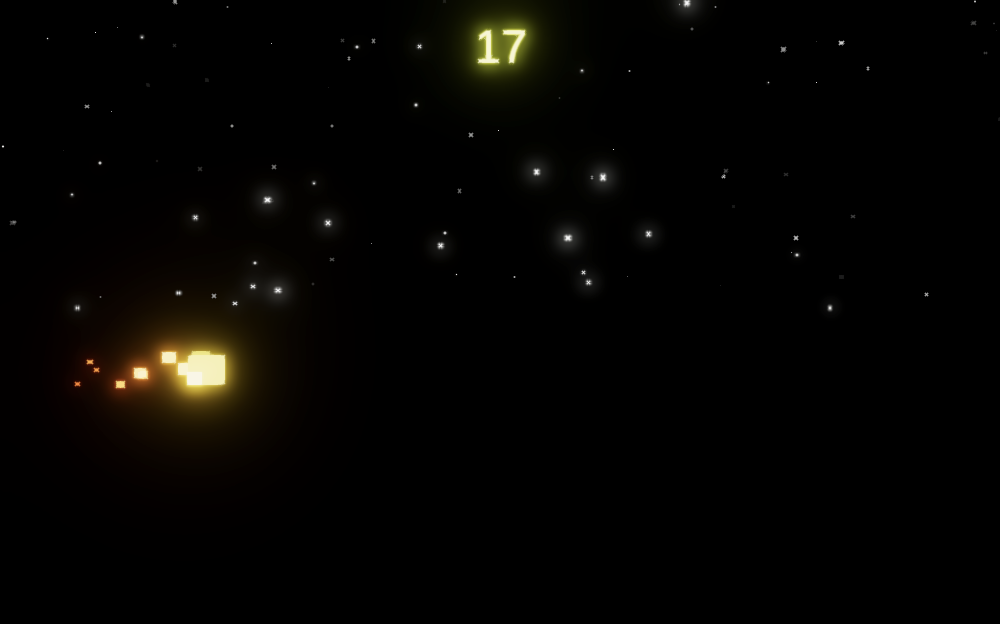
To get an idea of how the minimal game would look, add a cube with (10, 1, 4) scale to the scene and put it directly beneath the runner. Put another one a bit further down to check whether the point light indeed casts shadows.
Components
The functionality of the game will rely on a few custom component types, like the other prototypes. We begin by creating minimal versions of the core ones.
Tracking Camera
The camera needs to track the runner, for which we create a TrackingCamera component type. give it an offset and a position field. We use the camera's starting position as the fixed offset.
using UnityEngine;

public class TrackingCamera : MonoBehaviour
{
	Vector3 offset, position;

	void Awake ()
	{
		offset = transform.localPosition;
	}
}
Create a public Track method that makes the camera track a focus point. Also add a public StartNewGame method that set the camera back to its initial position.
	public void StartNewGame ()
	{
		Track(Vector3.zero);
	}

	public void Track (Vector3 focusPoint)
	{
		position = focusPoint + offset;
		transform.localPosition = position;
	}
Attach this component to the camera.
Runner
We create a component type for the runner as well. It needs references to its light and both particle systems. Also give it a starting speed in the X dimension, set to 5 by default.
using UnityEngine;

public class Runner : MonoBehaviour
{
	[SerializeField]
	Light pointLight;

	[SerializeField]
	ParticleSystem explosionSystem, trailSystem;

	[SerializeField, Min(0f)]
	float startSpeedX = 5f;
}
The runner keeps track of its 2D position, which is also needed to track the distance covered so include a public getter property for it. Besides that it will only turn off its MeshRenderer when the game ends, so its particle systems can continue running. So add a field for the renderer as well. Initially both the renderer and light are disabled.
	MeshRenderer meshRenderer;

	Vector2 position;

	public Vector2 Position => position;

	void Awake ()
	{
		meshRenderer = GetComponent<MeshRenderer>();
		meshRenderer.enabled = false;
		pointLight.enabled = false;
	}
Include a public StartNewGame method that sets the position to zero, enables the renderer and light, clears the explosion system, and finally enables, clears, and plays the trail system.
When the game ends the runner explodes via a private Explode method that disables the renderer, light, and trail emission, updates the game object's position, and triggers the explosion system to emit its maximum amount of particles. Set this maximum to 100.
	public void StartNewGame ()
	{
		position = Vector2.zero;
		transform.localPosition = position;
		meshRenderer.enabled = true;
		pointLight.enabled = true;
		explosionSystem.Clear();
		SetTrailEmission(true);
		trailSystem.Clear();
		trailSystem.Play();
	}

	void Explode ()
	{
		meshRenderer.enabled = false;
		pointLight.enabled = false;
		SetTrailEmission(false);
		transform.localPosition = position;
		explosionSystem.Emit(explosionSystem.main.maxParticles);
	}

	void SetTrailEmission (bool enabled)
	{
		ParticleSystem.EmissionModule emission = trailSystem.emission;
		emission.enabled = enabled;
	}
Add a public Run method that moves the runner by applying the start speed with a given delta time and returns whether the runner is still active. We'll initially make it automatically explode once it has moved more than 25 units.
	public bool Run (float dt)
	{
		if (position.x > 25f)
		{
			Explode();
			return false;
		}
		position.x += startSpeedX * dt;
		return true;
	}
Finally, include a public UpdateVisualization method that synchronizes the game object's position with its 2D position.
	public void UpdateVisualization ()
	{
		transform.localPosition = position;
	}
Attach this component to the runner.
Game
We once again control the entire game via a Game component. In this case it needs a reference to the runner, tracking camera, and also the display text.
using TMPro;
using UnityEngine;

public class Game : MonoBehaviour
{
	[SerializeField]
	Runner runner;

	[SerializeField]
	TrackingCamera trackingCamera;

	[SerializeField]
	TextMeshPro displayText;
}
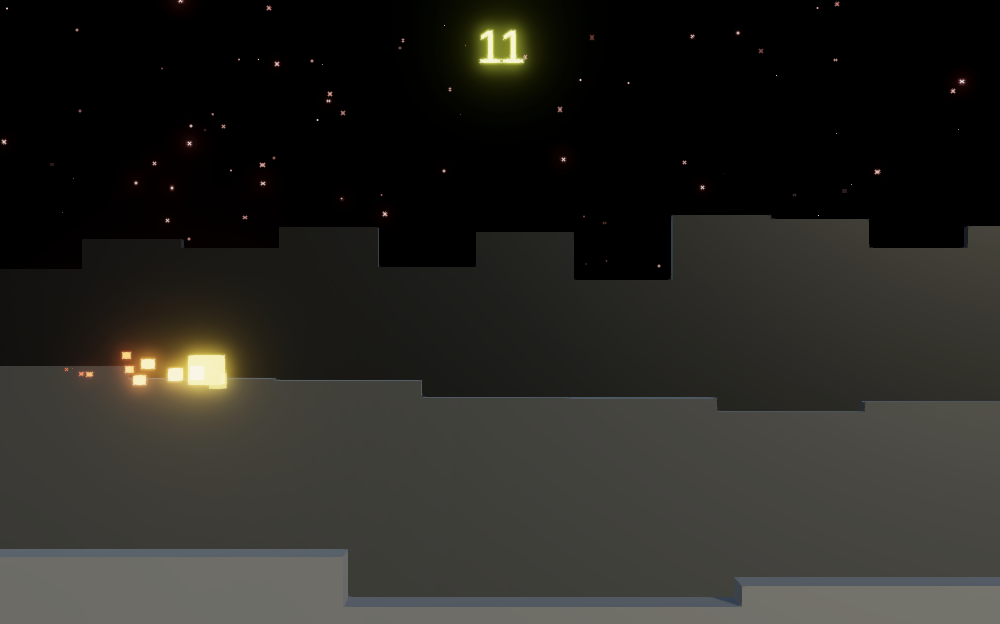
The game keeps track of whether it is playing or not. A new game is started by pressing space, otherwise the game is updated each frame. During an update, first the runner runs based on the delta time, then its visualization is updated, then the camera tracks it, and the text is set to display the current travel distance.
	bool isPlaying;

	void StartNewGame ()
	{
		trackingCamera.StartNewGame();
		runner.StartNewGame();
		isPlaying = true;
	}

	void Update ()
	{
		if (isPlaying)
		{
			UpdateGame();
		}
		else if (Input.GetKeyDown(KeyCode.Space))
		{
			StartNewGame();
		}
	}

	void UpdateGame ()
	{
		isPlaying = runner.Run(Time.deltaTime);
		runner.UpdateVisualization();
		trackingCamera.Track(runner.Position);
		displayText.SetText("{0}", Mathf.Floor(runner.Position.x));
	}
To enforce precise movement we'll implement a maximum delta time like we did for the lively camera of Paddle Square. In this case we set its default to match 120 frames per second and use it for running. We can also immediately stop if the runner is no longer active.
	[SerializeField, Min(0.001f)]
	float maxDeltaTime = 1f / 120f;

	…

	void UpdateGame ()
	{
		float accumulateDeltaTime = Time.deltaTime;
		while (accumulateDeltaTime > maxDeltaTime && isPlaying)
		{
			isPlaying = runner.Run(maxDeltaTime);
			accumulateDeltaTime -= maxDeltaTime;
		}
		isPlaying = isPlaying && runner.Run(accumulateDeltaTime);
		…
	}
Attach this component to an empty game object and hook it up.
Float Range
As we'll be using quite a few value ranges expressed as a minimum and maximum let's introduce a FloatRange struct type with a min and a max, a property to get a random value inside that range, and a constructor method to create a range for a give min and max.
using UnityEngine;

[System.Serializable]
public struct FloatRange
{
	public float min, max;

	public float RandomValue => Random.Range€(min, max);

	public FloatRange (float min, float max)
	{
		this.min = min;
		this.max = max;
	}
}
It's also convenient to include a method to create a new range by growing a range's extents, one to shift the range, and a static method to create a range that extents from a position in both directions.
	public FloatRange GrowExtents (float extents) =>
		new FloatRange(min - extents, max + extents);

	public FloatRange Shift (float shift) => new FloatRange(min + shift, max + shift);

	public static FloatRange PositionExtents (float position, float extents) =>
		new FloatRange(position - extents, position + extents);
Skyline
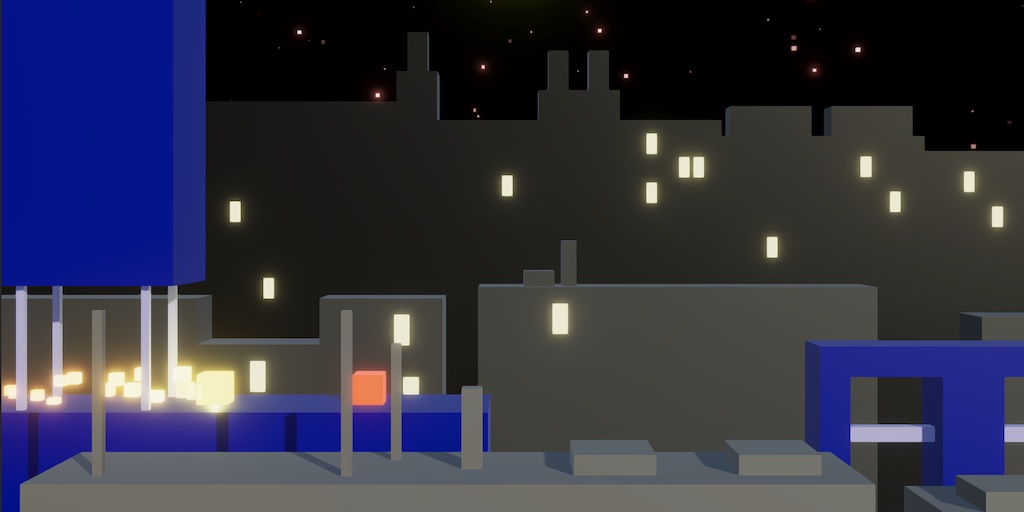
A big part of the game's feel will come from how it looks. Besides showing the runner and the obstacles it traverses we'll also show a multilayered skyline.
Filling the View
To fill the entire view with our skyline we need to know how wide it is in world space. To determine this add a field for the view factor in the X dimension to TrackingCamera. This factor tells us the half-width or extents of the view in the X dimension per unit of distance from the camera. It is found by taking the tangent of half the field of view converted to radians. As the camera's field of view is set to be configured vertically we go from the Y factor to the X factor by multiplying with the camera's aspect ratio.
	float viewFactorX;

	void Awake ()
	{
		offset = transform.localPosition;

		Camera c = GetComponent<Camera>();
		float viewFactorY = Mathf.Tan(c.fieldOfView * 0.5f * Mathf.Deg2Rad);
		viewFactorX = viewFactorY * c.aspect;
	}
Now add a public method to get the visible X range given a Z position, which returns a range made using the camera's X position and the view factor X scaled by the relative Z distance as its extents.
	public FloatRange VisibleX (float z) =>
		FloatRange.PositionExtents(position.x, viewFactorX * (z - position.z));
Stars
We'll set the game at night, so its backdrop will be a starlit sky. We can create the stars via a particle system component that we add to the camera. Make it emit cube particles like the other particle systems. Set its shape to a rectangle positioned at (0, 0, 300). Sets its size to (100, 100, 0) so we can see it while designing the stars. Set max particles to 100. Make sure that its simulation space is set to local so the stars move with the camera.
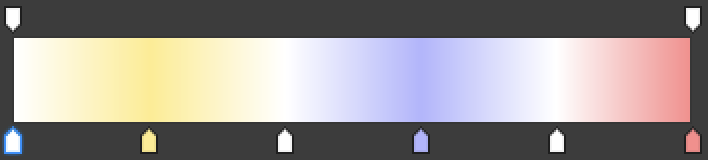
Stars shouldn't move so the start speed should be zero. Set start size to 0.1–1 to get some size variety. The stars can be given varied colors by setting the start color to a gradient. White should be dominant, with some light yellow, blue, and red as well.
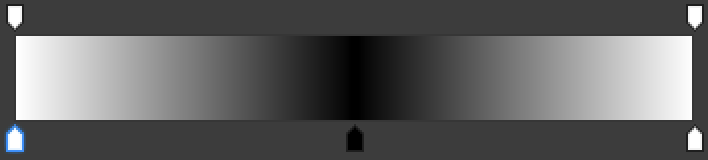
We can make stars twinkle at various speeds by setting their start lifetime to 1–10 and adding a color over lifetime gradient that is white with black halfway.
To keep the stars in place remove the emission module, disable looping and play on awake, and set ring buffer mode to loop until replaced. That will make the stars repeatedly cycle through their color over lifetime gradient.
Add a field for the particle system to TrackingCamera and grab the component when it awakens. Sets its position halfway up the view and set its scale so it covers then entire width and half the height. This will fill with the top half of the view with stars. Then every new game clear the stars and emit new ones.
	ParticleSystem stars;

	void Awake ()
	{
		…

		stars = GetComponent<ParticleSystem>();
		ParticleSystem.ShapeModule shape = stars.shape;
		Vector3 position = shape.position;
		position.y = viewFactorY * position.z * 0.5f;
		shape.position = position;
		shape.scale = new Vector3(2f * viewFactorX, viewFactorY) * position.z;
	}

	public void StartNewGame ()
	{
		Track(Vector3.zero);
		stars.Clear();
		stars.Emit(stars.main.maxParticles);
	}
Skyline Object
The skyline can be filled with all manner of objects, for which we'll create a basic SkylineObject component type. To be able to place them one after the other along the X dimension, give it a configurable extents, a public MaxX property to get the rightmost X position filled by the object, and a public PlaceAfter method that positions its directly after a give position and returns the position directly after itself.
using System.Collections.Generic;
using UnityEngine;

public class SkylineObject : MonoBehaviour
{
	[SerializeField, Min(1f)]
	float extents;

	public float MaxX => transform.localPosition.x + extents;

	public Vector3 PlaceAfter (Vector3 position)
	{
		position.x += extents;
		transform.localPosition = position;
		position.x += extents;
		return position;
	}
}
We'll create chains of these objects, which we'll keep track of by having each object contain a reference to the next one, via a public Next property.
	public SkylineObject Next
	{ get; set; }
As we'll be creating and removing these objects to fill the skyline while the camera moves, let's include a simple object-pooling system to reuse these objects. We do this by adding a private Stack field to act as a pool. We'll have prefabs create and keep track of these pools, so they'll contain runtime state. Unity doesn't serialize stacks, but I explicitly marked it as non-serialized anyway to make clear that this is intended.
	[System.NonSerialized]
	Stack<SkylineObject> pool;
Rather than directly instantiating a prefab, we'll introduce a public GetInstance method that should be invoked on a prefab instead. It creates a new pool for itself if needed, then tries to pop an instance from the pool and activate it. If an instance isn't available a new one is created and its pool it set.
	public SkylineObject GetInstance ()
	{
		if (pool == null)
		{
			pool = new();
		}
		if (pool.TryPop(out SkylineObject instance))
		{
			instance.gameObject.SetActive(true);
		}
		else
		{
			instance = Instantiate(this);
			instance.pool = pool;
		}
		return instance;
	}
This will work when playing after a domain reload, but if you have those disabled the pools will persist across plays and contain references to destroyed game objects. To avoid that we can keep track of the pools via a static list and clear them before the scene is loaded, which is only needed in the editor.
#if UNITY_EDITOR
	static List<Stack<SkylineObject>> pools;

	[RuntimeInitializeOnLoadMethod(RuntimeInitializeLoadType.BeforeSceneLoad)]
	static void ClearPools ()
	{
		if (pools == null)
		{
			pools = new();
		}
		else
		{
			for (int i = 0; i < pools.Count; i++)
			{
				pools[i].Clear();
			}
		}
	}
#endif

…

	public SkylineObject GetInstance ()
	{
		if (pool == null)
		{
			pool = new();
#if UNITY_EDITOR
			pools.Add(pool);
#endif
		}
		…
	}
Instead of destroying instances they should be recycled, for which we include a public Recycle method. It pushes the instance onto the pool, deactivates it, and clears its next reference. Also have it return the original next reference as that will always be needed when an instance gets recycled.
	public SkylineObject Recycle ()
	{
		pool.Push(this);
		gameObject.SetActive(false);
		SkylineObject n = Next;
		Next = null;
		return n;
	}
Let's create a prototype background skyline object by creating a new empty game object and giving it the SkylineObject component and turning it into a prefab. Set its extents to 5 so it covers ten units in the X dimension. Give it a child cube without collider to visualize it, with a white material. We'll design it so its vertical top is at zero, which is convenient for positioning the skylines. It needs to be quite tall to make sure it fills the view and doesn't appear to float, so set the cube's scale to (10, 50, 4) as its local position to (0, −25, 0).
Skyline Generator
To generate a skyline we introduce a SkylineGenerator component type. For configuration it needs an array of SkylineObject prefabs, a distance along the Z dimension where it should place instances, and an altitude range along the Y dimension to control the height of the skyline. Give it a GetInstance method that returns a random prefab instance and makes it a child of the generator. The latter isn't required but keeps the hierarchy window clean and makes it easy to try different altitudes by moving the generator while paused in play move.
using UnityEngine;

public class SkylineGenerator : MonoBehaviour
{
	[SerializeField]
	SkylineObject[] prefabs;

	[SerializeField]
	float distance;

	[SerializeField]
	FloatRange altitude;

	SkylineObject GetInstance ()
	{
		SkylineObject instance = prefabs[Random.Range€(0, prefabs.Length)].GetInstance();
		instance.transform.SetParent(transform, false);
		return instance;
	}
}
We only need to keep a reference to the current leftmost and rightmost skyline objects. We also have to remember the current end position of the generated skyline. Add a public FillView method that fills the current view based on the tracking camera.
Begin by recycling the leftmost objects as long as they are out of view and aren't the rightmost object. Then add new rightmost objects as long as the view isn't filled yet. To determine the visible X range take the camera's range and add a 10-unit border to it.
	const float border = 10f;

	…

	Vector3 endPosition;

	SkylineObject leftmost, rightmost;

	public void FillView (TrackingCamera view)
	{
		FloatRange visibleX = view.VisibleX(distance).GrowExtents(border);
		while (leftmost != rightmost && leftmost.MaxX < visibleX.min)
		{
			leftmost = leftmost.Recycle();
		}

		while (endPosition.x < visibleX.max)
		{
			endPosition.y = altitude.RandomValue;
			rightmost = rightmost.Next = GetInstance();
			endPosition = rightmost.PlaceAfter(endPosition);
		}
	}
When starting a new game the generator should recycle all its objects, determine the start position, place an initial object, and then fill the view.
	public void StartNewGame (TrackingCamera view)
	{
		while (leftmost != null)
		{
			leftmost = leftmost.Recycle();
		}

		FloatRange visibleX = view.VisibleX(distance).GrowExtents(border);
		endPosition = new Vector3(visibleX.min, altitude.RandomValue, distance);

		leftmost = rightmost = GetInstance();
		endPosition = rightmost.PlaceAfter(endPosition);
		FillView(view);
	}
To generate the skylines add a configurable array of generators to Game. Have it invoke StartNewGame on them at the end of StartNewGame and FillView at the end of a game update.
	[SerializeField]
	SkylineGenerator[] skylineGenerators;

	…

	void StartNewGame ()
	{
		trackingCamera.StartNewGame();
		runner.StartNewGame();
		for (int i = 0; i < skylineGenerators.Length; i++)
		{
			skylineGenerators[i].StartNewGame(trackingCamera);
		}
		isPlaying = true;
	}

	…

	void UpdateGame ()
	{
		…

		for (int i = 0; i < skylineGenerators.Length; i++)
		{
			skylineGenerators[i].FillView(trackingCamera);
		}
	}
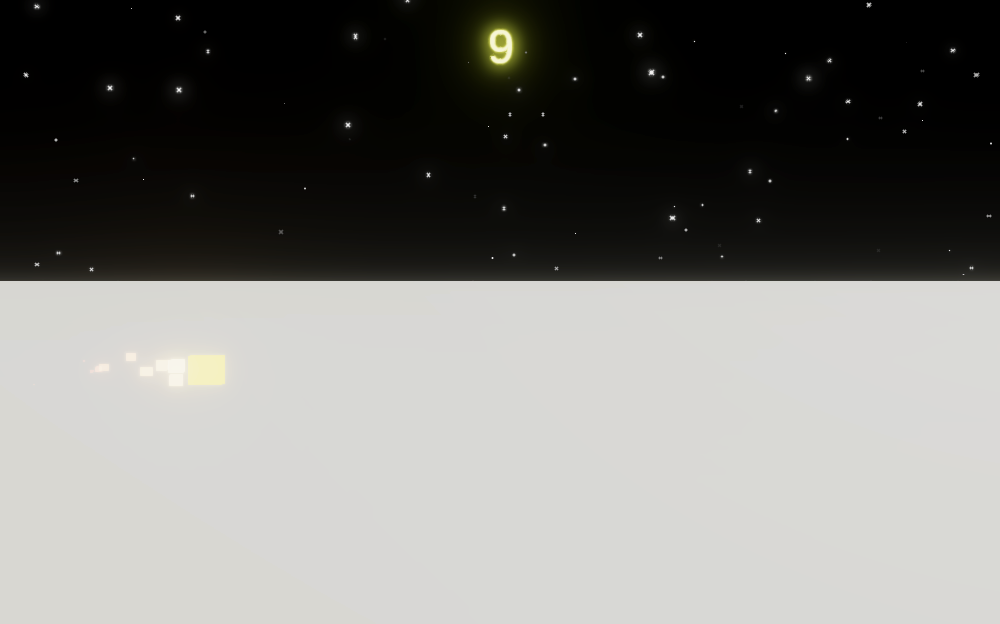
Create a background generator game object at the origin that uses the single prefab, set its distance to 80 and its altitude to 5–15. Then add it to the game's array. The mimumum and maximum altitude can be tested by temporarily setting min and max to the same value.
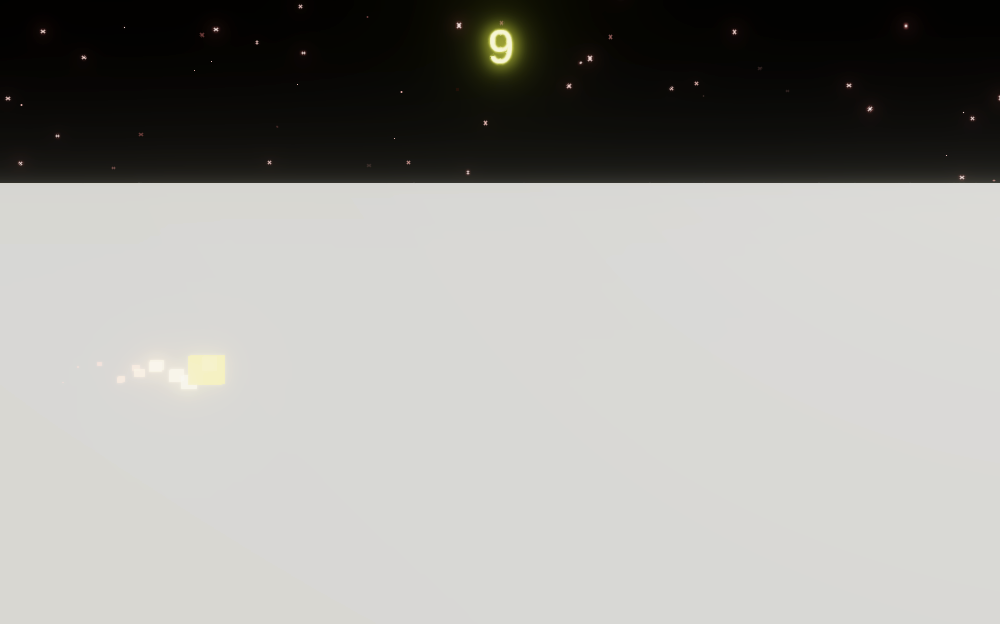
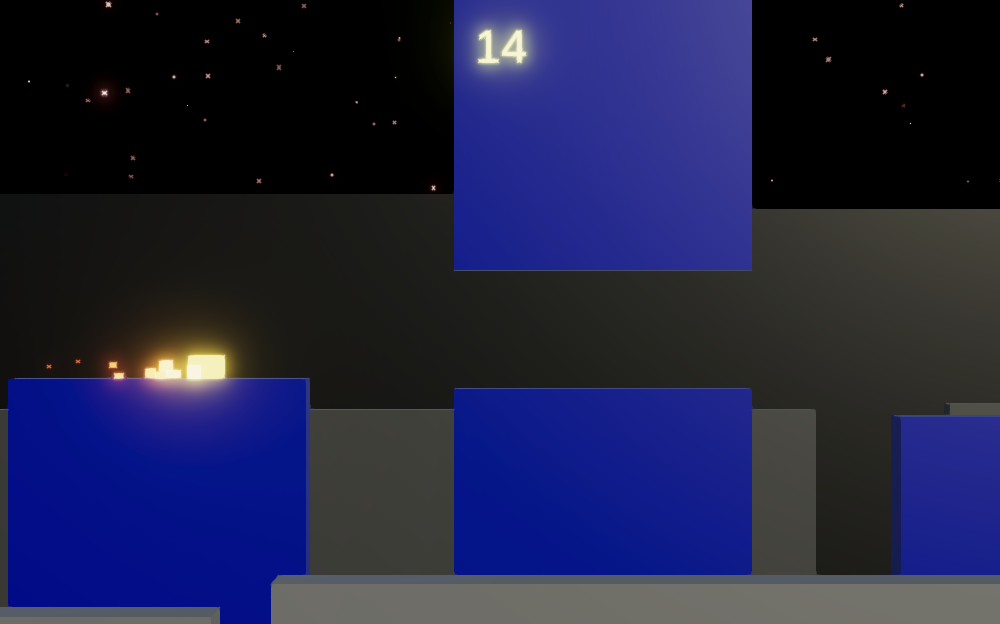
Let's add a second skyline, naming it the midground, with distance 40 and altitude −5–1. Create a skyline object prefab for it by duplicating the existing one and reducing its height to 25. To distinguish them add some color perspective, giving the background prefab a black material and the midground prefab a dark gray material.
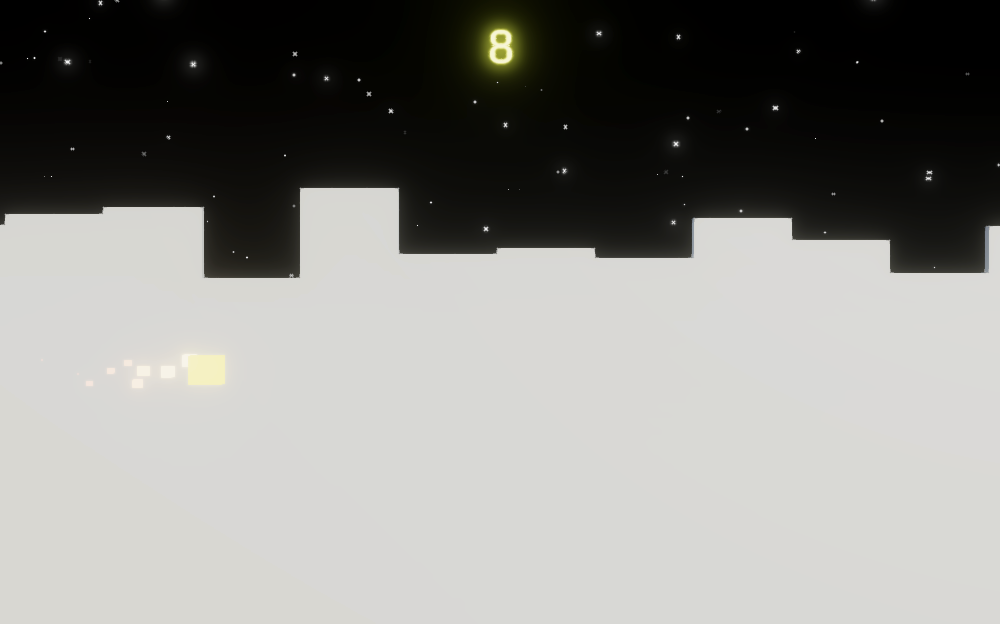
Let's add a foreground as well, which is placed in front of the runner, at distance −10 and altitude −6–−4. Create a neutral gray prefab for it with height 3.
Obstacles
The runner needs a sequence of obstacles to navigate across. These essentially also form a skyline, so we can use SkylineObject for them as well.
To move across an object we need to know the vertical position of its floor. And let's also include a ceiling, so the passageway could be covered. We can support this by adding a configurable range for a vertical gap to SkylineObject, along with a property to get it shifted to match the object's vertical position.
	[SerializeField]
	FloatRange gapY;

	…

	public FloatRange GapY => gapY.Shift(transform.localPosition.y);
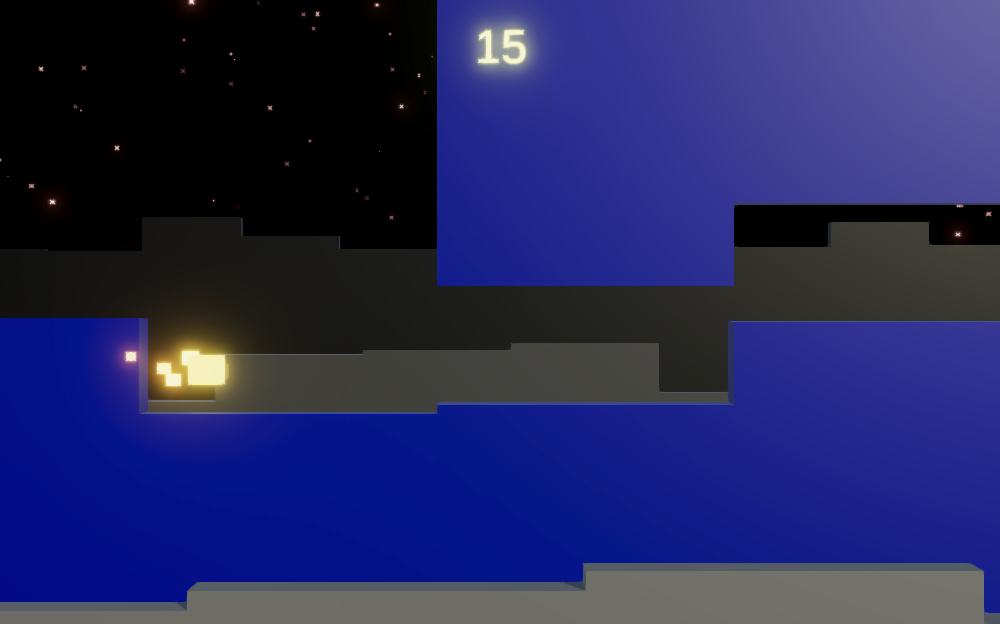
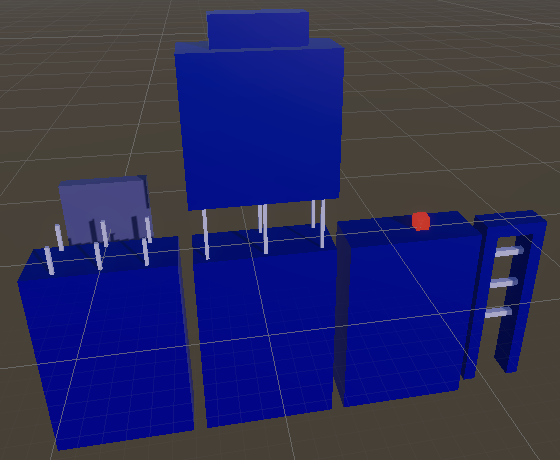
Create two obstacle prefabs, one without ceiling, with gap 0–100 and one with a ceiling, with gap 0–4. Visualize them with child cubes with height 15 and a blue material. Create an obstacle skyline generator with distance zero and altitude −2–2 that uses these prefabs.
The obstacles will need a bit more attention than the regular skylines and aren't optional, so give Game a separate configuration field for an obstacle generator. Start and fill it before the other generators.
	[SerializeField]
	SkylineGenerator obstacleGenerator;

	…

	void StartNewGame ()
	{
		trackingCamera.StartNewGame();
		runner.StartNewGame();
		obstacleGenerator.StartNewGame(trackingCamera);
		for (int i = 0; i < skylineGenerators.Length; i++)
		{
			skylineGenerators[i].StartNewGame(trackingCamera);
		}
		isPlaying = true;
	}

	…

	void UpdateGame ()
	{
		…

		obstacleGenerator.FillView(trackingCamera);
		for (int i = 0; i < skylineGenerators.Length; i++)
		{
			skylineGenerators[i].FillView(trackingCamera);
		}
	}
Gaps
Obstacles that are directly adjacent to each other should have the same elevation. We'll make room for elevation changes that can be navigated by including gaps in the skylines. And the other skylines can be made more varied by the inclusion of gaps as well. So add configuration ranges for both gaps and continuous sequences to SkylineGenerator.
	[SerializeField]
	FloatRange gapLength, sequenceLength;
The background skyline should be continuous. Set its gap to zero and sequence to 0–30. Give the midground gap 2–10 and sequence 20–60, the foreground gap 1–30 and sequence 0–30, and the obstacles both gap and sequence 0–5.
Add a field to SkylineGenerator to keep track of the end of the current sequence in the X dimension. Start with a random sequence length and add a method that starts a new sequence at an arbitrary moment, given a gap and sequence length. The gap is made by moving the end position forward. Then a new altitude can be chosen and the sequence end determined.
	float sequenceEndX;

	…

	public void StartNewGame (TrackingCamera view)
	{
		…

		FloatRange visibleX = view.VisibleX(distance).GrowExtents(border);
		endPosition = new Vector3(visibleX.min, altitude.RandomValue, distance);
		sequenceEndX = sequenceLength.RandomValue;

		…
	}

	void StartNewSequence (float gap, float sequence)
	{
		endPosition.x += gap;
		endPosition.y = altitude.RandomValue;
		sequenceEndX = endPosition.x + sequence;
	}
Now each time FillView places a new object it should first check whether the current sequence end has been passed. If so start a new sequence with a random gap and sequence length.
		while (endPosition.x < visibleX.max)
		{
			if (endPosition.x > sequenceEndX)
			{
				StartNewSequence(gapLength.RandomValue, sequenceLength.RandomValue);
			}
			//endPosition.y = altitude.RandomValue;
			rightmost = rightmost.Next = GetInstance();
			endPosition = rightmost.PlaceAfter(endPosition);
		}
Note that because the prefabs have a fixed width the sequence range determines a minimum and the actual sequences can be longer, which is fine. As our current prefabs all have a width of 10 all sequences end up as a multiple of that.
Movement
Our skyline is now functional enough to implement gameplay, which means giving the player control over the runner and having it navigate the obstacles.
Tracking the Current Obstacle
We'll make the runner keep track of which skyline object it is currently traversing. To make this easy and ensure that an objects never gets recycled while the runner is using it we'll introduce extra gap objects. Add a public FillGap method to SkylineObject that uses a position and gap length to set its own extents and then positions itself.
	public void FillGap (Vector3 position, float gap)
	{
		extents = gap * 0.5f;
		position.x += extents;
		transform.localPosition = position;
	}
Then add a configuration field for a gap prefab to SkylineManager, which it uses to fill the gaps it creates, but only if a prefab is provided.
	[SerializeField]
	SkylineObject gapPrefab;

	…

	void StartNewSequence (float gap, float sequence)
	{
		if (gapPrefab != null)
		{
			rightmost = rightmost.Next = gapPrefab.GetInstance();
			rightmost.transform.SetParent(transform, false);
			rightmost.FillGap(endPosition, gap);
		}
		endPosition.x += gap;
		endPosition.y = altitude.RandomValue;
		sequenceEndX = endPosition.x + sequence;
	}
Create a prefab from an empty game object with a SkylineObject component that has its vertical gap set to −100–100. Then only give the obstacle generator a reference to it, as the other skylines don't need it.
We can now be sure that Runner is always traveling through a SkylineObject instance. Give it a configurable extents set to 0.5 by default to match its visual size. Then add a SkylineObject obstacle parameter to StartNewGame and loop through the obstacle sequence until one is found that entirely contains the runner at its starting position, which is zero. Store a reference to this current obstacle in a field. Then adjust the runner's vertical position so it sits on top of the obstacle's floor.
	[SerializeField, Min(0f)]
	float extents = 0.5f;

	…

	SkylineObject currentObstacle;

	…

	public void StartNewGame (SkylineObject obstacle)
	{
		currentObstacle = obstacle;
		while (currentObstacle.MaxX < extents)
		{
			currentObstacle = currentObstacle.Next;
		}

		position = new Vector2(0f, currentObstacle.GapY.min + extents);
		…
	}
To provide the initial obstacle adjust SkylineGenerator.StartNewGame so it returns a reference to its leftmost instance.
	public SkylineObject StartNewGame (TrackingCamera view)
	{
		…
		return leftmost;
	}
Then Game.StartNewGame can pass the first obstacle to runner.
	void StartNewGame ()
	{
		trackingCamera.StartNewGame();
		runner.StartNewGame(obstacleGenerator.StartNewGame(trackingCamera));
		trackingCamera.Track(runner.Position);
		//obstacleGenerator.StartNewGame(trackingCamera);
		…
	}
Constraining Y
At this point Runner always stays at the floor level of the first obstacle. Give it a ConstrainY method that clamps its Y position so it stays inside the vertical gap of a given obstacle. Perform the adjustments also if runner exactly matches the extremes, as we'll do some extra works later that also needs to be done while remaining in contact with the floor or ceiling.
	void ConstrainY (SkylineObject obstacle)
	{
		FloatRange openY = obstacle.GapY;
		if (position.y - extents <= openY.min)
		{
			position.y = openY.min + extents;
		}
		else if (position.y + extents >= openY.max)
		{
			position.y = openY.max - extents;
		}
	}
Remove the automatic explosion code from Run. Instead, check whether we're still entirely contained inside the current obstacle. If so, constrain Y using this obstacle. Otherwise, if we're still partially inside it also constrain Y the same way, then constrain Y based on the next obstacle, and finally move on to the next obstacle if we're completely outside the current.
	public bool Run (float dt)
	{
		position.x += startSpeedX * dt;
		//if (position.x > 25f)
		//{
		//	Explode();
		//	return false;
		//}

		if (position.x + extents < currentObstacle.MaxX)
		{
			ConstrainY(currentObstacle);
		}
		else
		{
			bool stillInsideCurrent = position.x - extents < currentObstacle.MaxX;
			if (stillInsideCurrent)
			{
				ConstrainY(currentObstacle);
			}

			ConstrainY(currentObstacle.Next);

			if (!stillInsideCurrent)
			{
				currentObstacle = currentObstacle.Next;
			}
		}
		return true;
	}
Collisions
The runner will now always align itself with the floor of the current obstacle. Instead of teleporting like this we have to check whether a collision happened when entering the next obstacle. Add a CheckCollision method that checks whether the runner fits inside the vertical gap of the next obstacle at the transition point. If not move it back to the transition point and explode. Make it return whether this happened. Also, shrink the extents by 0.01 when performing the check. Besides adding a tiny bit of leniency it also prevents incorrect collisions due to floating-point precision limitations.
	bool CheckCollision ()
	{
		Vector2 transitionPoint;
		transitionPoint.x = currentObstacle.MaxX - extents;
		transitionPoint.y = position.y;
		float shrunkExtents = extents - 0.01f;
		FloatRange gapY = currentObstacle.Next.GapY;
		if (
			transitionPoint.y - shrunkExtents < gapY.min ||
			transitionPoint.y + shrunkExtents > gapY.max
		)
		{
			position = transitionPoint;
			Explode();
			return true;
		}
		return false;
	}
Now Run should check for a collision before constraining based on the next obstacle. But this should only be done once per transition, so keep track of whether we're currently in a transition between two obstables.
	bool transitioning;

	…

	public void StartNewGame (SkylineObject obstacle)
	{
		…
		transitioning = false;
	}

	public bool Run (float dt)
	{
		position.x += startSpeedX * dt;

		if (position.x + extents < currentObstacle.MaxX)
		{
			ConstrainY(currentObstacle);
		}
		else
		{
			bool stillInsideCurrent = position.x - extents < currentObstacle.MaxX;
			if (stillInsideCurrent)
			{
				ConstrainY(currentObstacle);
			}

			if (!transitioning)
			{
				if (CheckCollision())
				{
					return false;
				}
				transitioning = true;
			}

			ConstrainY(currentObstacle.Next);

			if (!stillInsideCurrent)
			{
				currentObstacle = currentObstacle.Next;
				transitioning = false;
			}
		}
		return true;
	}
Jumping and Falling
The runner will now explode when it hits an obstacle sideways. To allow for vertical movement we have to add the ability to jump as well as the pull of gravity. Add a configurable jump acceleration set to 100 by default and gravity set to 40 by default, which are values to facilitate fast jumping and falling. Also add a jump duration range to support variable jump heights, set to 0.1–0.2 seconds by default.
	[SerializeField, Min(0f)]
	float startSpeedX = 5f, jumpAcceleration = 100f, gravity = 40f;

	[SerializeField]
	FloatRange jumpDuration = new FloatRange(0.1f, 0.2f);
To make this work we need to keep track of the current velocity, whether we are grounded, and how much jump time is still remaining.
	Vector2 position, velocity;

	bool grounded, transitioning;

	float jumpTimeRemaining;

	…

	public void StartNewGame (SkylineObject obstacle)
	{
		…
		grounded = true;
		jumpTimeRemaining = 0f;
		velocity = new Vector2(startSpeedX, 0f);
	}
Jumping will be controlled via public StartJumping and EndJumping methods. A jump is only started for real if we're grounded, which sets the remaining jump time to its maximum. When the end of a jump is requested we add the minimum and subtract the maximum from the remaining time. This ensures that the minimum is always reached, unless the player mashes buttons inhumanly fast, but there is no benefit to that.
	public void StartJumping ()
	{
		if (grounded)
		{
			jumpTimeRemaining = jumpDuration.max;
		}
	}

	public void EndJumping () => jumpTimeRemaining += jumpDuration.min - jumpDuration.max;
Moving is becoming more complicated, so replace the simple position adjustment at the start of Run with the invocation of a new Move method, passing it the delta time. If there is still jump time remaining decrease it and apply the jump acceleration, using the minimum of the delta time and remaining jump time. Otherwise we apply gravity, so gravity won't affect the jump acceleration. We end by clearing the grounded state and applying the velocity.
	public bool Run (float dt)
	{
		Move(dt);
		//position.x += startSpeedX * dt;

		…
	}

	…

	void Move (float dt)
	{
		if (jumpTimeRemaining > 0f)
		{
			jumpTimeRemaining -= dt;
			velocity.y += jumpAcceleration * Mathf.Min€(dt, jumpTimeRemaining);
		}
		else
		{
			velocity.y -= gravity * dt;
		}

		grounded = false;
		position += velocity * dt;
	}
Now we have some extra work to do in ConstrainY. The vertical velocity has to be clamped and the jump canceled when either the floor or ceiling are touched. Besides that when touching the floor the grounded state has to be set.
	void ConstrainY (SkylineObject obstacle)
	{
		FloatRange openY = obstacle.GapY;
		if (position.y - extents <= openY.min)
		{
			position.y = openY.min + extents;
			velocity.y = Mathf.Max(velocity.y, 0f);
			jumpTimeRemaining = 0f;
			grounded = true;
		}
		else if (position.y + extents >= openY.max)
		{
			position.y = openY.max - extents;
			velocity.y = Mathf.Min€(velocity.y, 0f);
			jumpTimeRemaining = 0f;
		}
	}
Also, in CheckCollision the vertical component of the transition point depends on the now variable vertical speed, so we have to rewind it.
		transitionPoint.y =
			position.y - velocity.y * (position.x - transitionPoint.x) / velocity.x;
To make the runner jump we start and end jumping at the beginning of Game.UpdateGame based on whether the space key was pressed or released. Thus the height of the jump can be controlled by how long the space key is held down.
	void UpdateGame ()
	{
		if (Input.GetKeyDown(KeyCode.Space))
		{
			runner.StartJumping();
		}
		if (Input.GetKeyUp(KeyCode.Space))
		{
			runner.EndJumping();
		}

		…
	}
Speeding Up
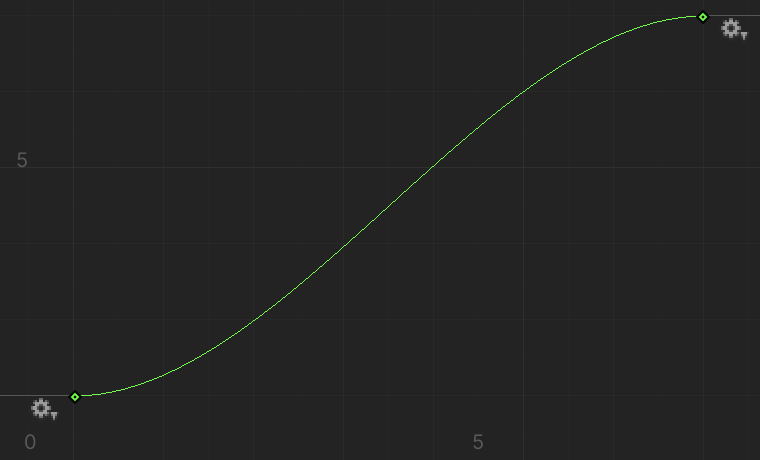
Now that we support jumping let's also support horizontal acceleration. Add a configuration field for the max X speed to Runner set to 40 by default. Instead of a constant acceleration we'll use a configurable AnimationCurve to define the run acceleration curve.
	[SerializeField, Min(0f)]
	float startSpeedX = 5f, maxSpeedX = 40f, jumpAcceleration = 100f, gravity = 40f;

	[SerializeField]
	AnimationCurve runAccelerationCurve;
The curve maps X velocity to acceleration. Give the curve two keys with flat tangents, at (0, 2) and (1, 0.2). This will make acceleration start at 2 while at a full stop and smoothly decline to 0.2 at max speed. Thus the faster we run the slower we speed up.
We'll speed up in Move only while grounded. Apply acceleration by evaluating the curve based on the current X speed divided by its max, adding that scaled by the delta time to the X velocity, and limiting that to the max.
	void Move (float dt)
	{
		…

		if (grounded)
		{
			velocity.x = Mathf.Min€(
				velocity.x + runAccelerationCurve.Evaluate(velocity.x / maxSpeedX) * dt,
				maxSpeedX
			);
			grounded = false;
		}

		position += velocity * dt;
	}
Better Obstacles
Now that our runner is fully functional let's make the obstacles more interesting. First, grow their generator's altitude range to −4–7. This can cause vertical differences up to 11 units, which is too much for our runner. So let's add a configurable max Y difference to SkylineGenerator. Set it to 5 for the obstacle generator and leave it at zero for the other generators. Have StartNewSequence apply this maximum by using a constrained range for the Y coordinate of the new end position, but only if the max is greater than zero.
	[SerializeField, Min(0f)]
	float maxYDifference;

	…

	void StartNewSequence (float gap, float sequence)
	{
		…
		endPosition.x += gap;
		//endPosition.y = altitude.RandomValue;
		sequenceEndX = endPosition.x + sequence;

		if (maxYDifference > 0f)
		{
			endPosition.y = new FloatRange(
				Mathf.Max(endPosition.y - maxYDifference, altitude.min),
				Mathf.Min€(endPosition.y + maxYDifference, altitude.max)
			).RandomValue;
		}
		else
		{
			endPosition.y = altitude.RandomValue;
		}
	}
Let's also add parameters for extra gap and sequence lengths to SkylineGenerator.FillView, both with zero as default values. These are added to the random gap and sequence lengths.
	public void FillView (
		TrackingCamera view, float extraGapLength = 0f, float extraSequenceLength = 0f
	)
	{
		…

		while (endPosition.x < visibleX.max)
		{
			if (endPosition.x > sequenceEndX)
			{
				StartNewSequence(
					gapLength.RandomValue + extraGapLength,
					sequenceLength.RandomValue + extraSequenceLength
				);
			}
			rightmost = rightmost.Next = GetInstance();
			endPosition = rightmost.PlaceAfter(endPosition);
		}
	}
We can use this to ensure minimum lengths based on the runner's speed so the obstacles are guaranteed to be navigable. Add a public property to get the X speed of Runner to make this possible.
public float SpeedX => velocity.x;
Then give Game configurable factors for extra gap and sequence length, set to 0.5 and 1 by default. Use them to increase the gap and sequence length when invoking FillView on the obstacle generator when the game is updated.
	[SerializeField]
	float extraGapFactor = 0.5f, extraSequenceFactor = 1f;

	…

	void UpdateGame ()
	{
		…

		obstacleGenerator.FillView(
			trackingCamera,
			runner.SpeedX * extraGapFactor,
			runner.SpeedX * extraSequenceFactor
		);
		…
	}
Finally, let's ensure that the view is filled with a continuous platform when a new game begins. Add a toggle option to SkylineGenerator to control this and enable it for the obstacle generator. This is done by setting the sequence end to the maximum in StartNewGame.
	[SerializeField]
	bool singleSequenceStart;

	…

	public SkylineObject StartNewGame (TrackingCamera view)
	{
		…
		sequenceEndX =
			singleSequenceStart ? visibleX.max : endPosition.x + sequenceLength.RandomValue;

		…
	}
Constrained Camera Elevation
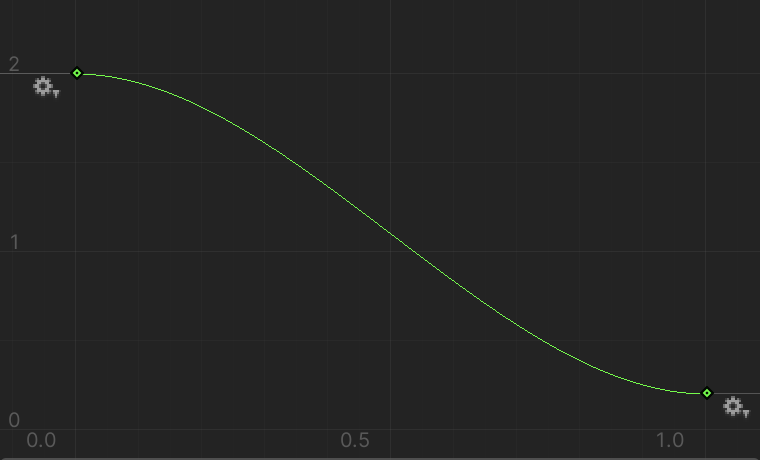
Now that obstacles can end up at low elevation the camera can also go lower that the elevation that we used when designing the skylines. To keep TrackingCamera at an acceptable elevation let's give it a configurable AnimationCurve for an Y curve. Evaluate it to adjust the Y position based on itself in Track.
	[SerializeField]
	AnimationCurve yCurve;

	…

	public void Track (Vector3 focusPoint)
	{
		position = focusPoint + offset;
		position.y = yCurve.Evaluate(position.y);
		transform.localPosition = position;
	}
We designed the skyline with a camera Y of 2, so that's the minimum. Give the curve two keys with flat tangents, the first at (0, 2) and the second at (7, 7). This keeps the camera inside the 2–7 range while it smoothly deviates from exactly tracking the runner's vertical position.
Slowdown Block
Let's add one more gameplay element: a block that will slow down the runner when it collides with it. Add a setter to the X speed property of Runner to make this possible.
	public float SpeedX
	{
		get => velocity.x;
		set => velocity.x = value;
	}
We'll support arbitrary extra functionality for SkylineObject by adding a public virtual Check method with a Runner parameter to it, which does nothing.
public virtual void Check (Runner runner) { }
Invoke this method on the obstacle at the end of Runner.ConstrainY.
	void ConstrainY (SkylineObject obstacle)
	{
		…
		obstacle.Check(this);
	}
Next, introduce a SlowdownObject component type that extends SkylineObject and overrides the Check method. Give it configuration fields for an item's Transform, an explosion particle system, a radius to check collision set to 1 by default, a speed factor set to 0.75 by default, and a spawn probability set to 0.5 by default.
using UnityEngine;

public class SlowdownObject : SkylineObject
{
	[SerializeField]
	Transform item;

	[SerializeField]
	ParticleSystem explosionSystem;

	[SerializeField]
	float radius = 1f;

	[SerializeField]
	float speedFactor = 0.75f;

	[SerializeField]
	float spawnProbability = 0.5f;

	public override void Check (Runner runner) { }
}
When the object enables activate the item based on the spawn probability, so not all objects have the item. Also clear the explosion system.
	void OnEnable ()
	{
		item.gameObject.SetActive(Random.value < spawnProbability);
		explosionSystem.Clear();
	}
Inside Check, if the item is active and the runner is close enough to it, deactivate the item, trigger an explosion, and adjust the runner's speed.
	public override void Check (Runner runner)
	{
		if (
			item.gameObject.activeSelf &&
			((Vector2)item.position - runner.Position).sqrMagnitude < radius * radius
		)
		{
			item.gameObject.SetActive(false);
			explosionSystem.Emit(explosionSystem.main.maxParticles);
			runner.SpeedX *= speedFactor;
		}
	}
Create a slowdown obstacle by duplicating the obstacle prefab without a roof and adding a red glowing cube to it with an explosion system that is also red, with its shape changed to a hemisphere. I placed the item on the floor one unit to the right of the center. Replace its SkylineObject with a SlowdownObject component, configure it, and add this prefab to the obstacle generator.
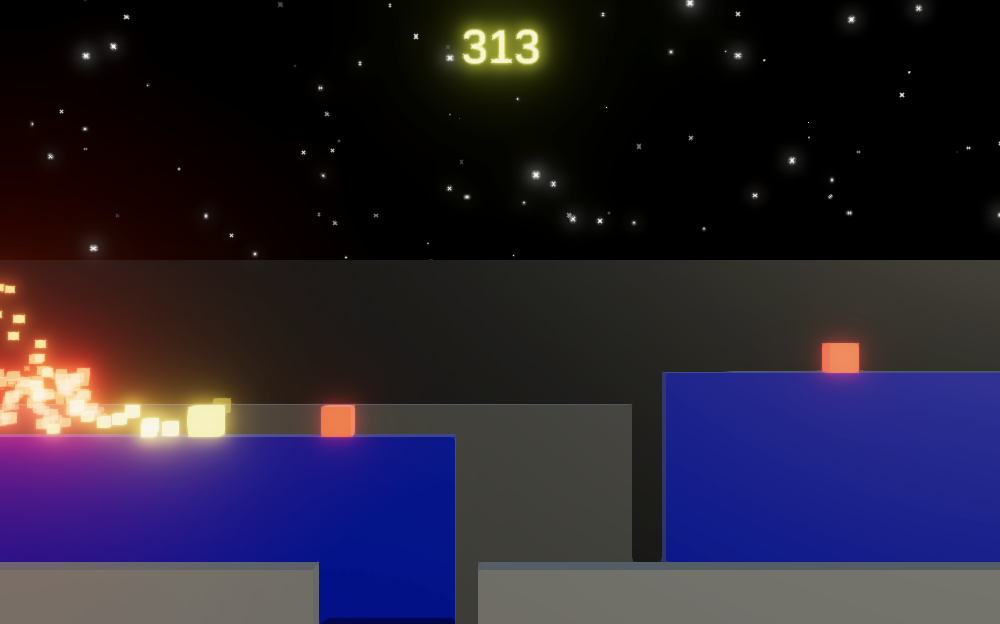
Note that slowing down isn't that bad and might even be beneficial sometimes. The trick is to not reflexively jump to avoid the item only to fall in the gap behind it.
Visual Variety
Our game prototype can be considered complete at this point, but we can add a bit more visual variety to make it look more interesting.
Spinning Jump
Let's make Runner perform a random spin each time it jumps. Give it a configurable spin duration set to 0.75 seconds by default. It should keep track of both the remaining spin time and a 3D spin rotation vector. Set the time remaining to zero and clear the rotation in StartNewGame.
	[SerializeField, Min(0f)]
	float spinDuration = 0.75f;

	float spinTimeRemaining;

	Vector3 spinRotation;

	…

	public void StartNewGame (SkylineObject obstacle)
	{
		…
		//transform.localPosition = position;
		transform.SetPositionAndRotation(position, Quaternion.identity);
		…
		jumpTimeRemaining = 0f;
		spinTimeRemaining = 0f;
		velocity = new Vector2(startSpeedX, 0f);
	}
When a jump is initiated, unless we're still spinning, set the spin time remaining to the full duration and set the spin rotation to a random axis-aligned vector represening 90°.
	public void StartJumping ()
	{
		if (grounded)
		{
			jumpTimeRemaining = jumpDuration.max;
			if (spinTimeRemaining <= 0f)
			{
				spinTimeRemaining = spinDuration;
				spinRotation = Vector3.zero;
				spinRotation[Random.Range€(0, 3)] = Random.value < 0.5f ? -90f : 90f;
			}
		}
	}
When updating the visualization, if still spinning, reduce the time remaining to a minimum of zero and then set the rotation by interpolating from the spin rotation to zero based on the time progression, using Quaternion.Euler.
	public void UpdateVisualization ()
	{
		transform.localPosition = position;
		if (spinTimeRemaining > 0f)
		{
			spinTimeRemaining = Mathf.Max€(spinTimeRemaining - Time.deltaTime, 0f);
			transform.localRotation = Quaternion.Euler(
				Vector3.Lerp(spinRotation, Vector3.zero, spinTimeRemaining / spinDuration)
			);
		}
	}
Random Skyline Features
We can increase skyline variety by creating more prefabs, but we can go a step further by making it random whether some parts of them are enabled or not. Create a RandomizedObject component type that extends SkylineObject for this. Give it a configuration array of GameObject references, which it each activates in OnEnable based on a configurable spawn probability set to 0.5 by default.
using UnityEngine;

public class RandomizedObject : SkylineObject
{
	[SerializeField]
	GameObject[] items;

	[SerializeField]
	float spawnProbability = 0.5f;

	void OnEnable ()
	{
		for (int i = 0; i < items.Length; i++)
		{
			items[i].SetActive(Random.value < spawnProbability);
		}
	}
}
With this component and a few modular prefabs you can create quite varied skylines.
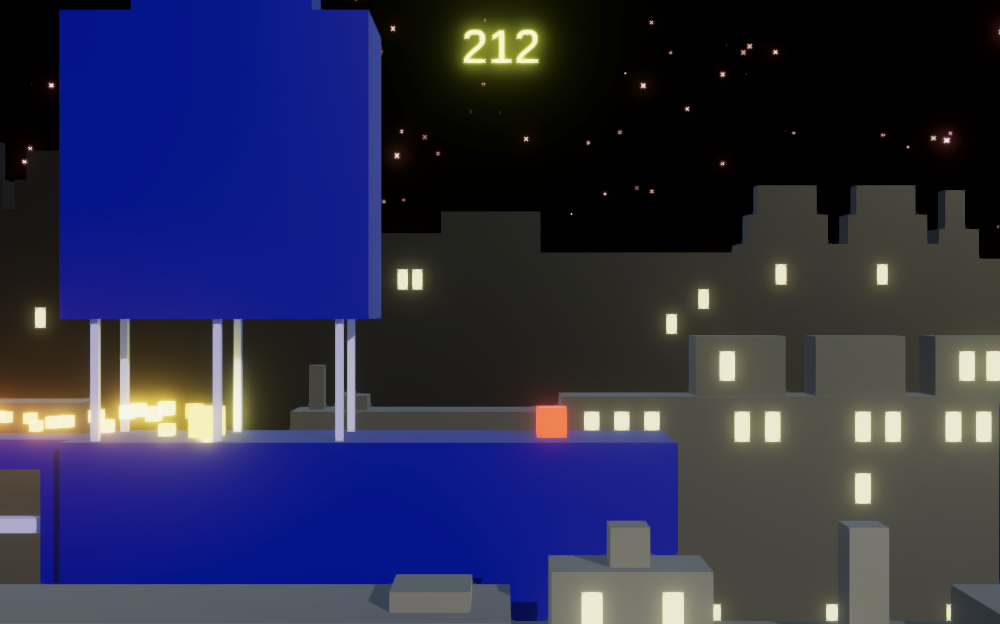
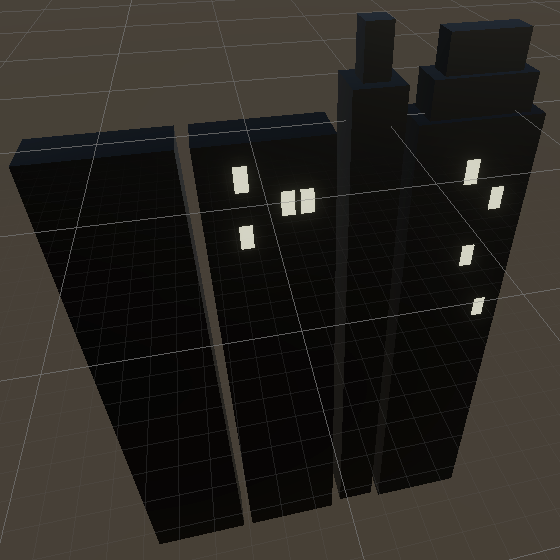
To give you an idea of what is possible I created four prefabs for each generator. To make designing them easier I used showcase scenes where I put all prefabs for each skyline in a row with one-unit gaps in between them. For the obstacles, I added a fourth short one with an open bottom and also included a few optional details.
Two of the background prefabs contain optional windows and two roof extensions, of which one is optional.
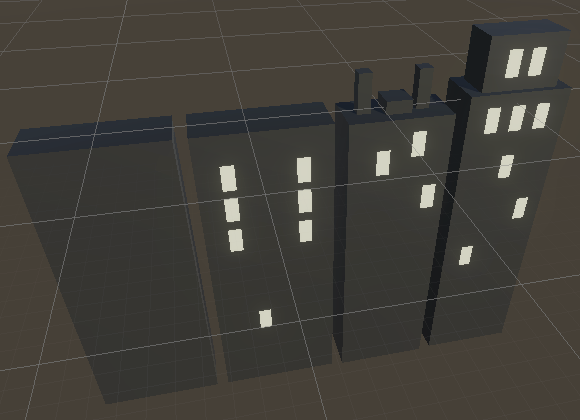
The midground got the same treatment, everything extra being optional, including nested optional objects. For example, the tallest prefab can have either one or two extra floors.
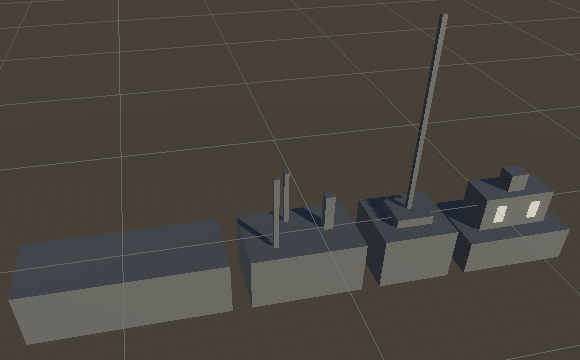
The foreground got some antenna and chimney props and a few windows as well, all optional.
You can take this further, including animations, lights, and particle systems. But the scenery shouldn't become too distracting so the player can stay focused on navigating obstacles.
The next tutorial is Maze 2.