Jobs
Animating a Fractal
- Build a fractal with an object hierarchy.
- Flatten the hierarchy.
- Get rid of game objects and draw procedurally.
- Use jobs to update the fractal.
- Update parts of the fractal in parallel.
This is the sixth tutorial in a series about learning the basics of working with Unity. This time we'll create an animating fractal. We begin with a regular game object hierarchy and then slowly transition to the jobs system, measuring performance along the way.
This tutorial is made with Unity 2020.3.6f1.
Fractal
In general a fractal is something that has self-similarity, which in simple terms means that smaller parts of it look similar to larger parts. Examples are coastlines and lots of plants. For example a tree's branches can look like the tree's trunk, only smaller. Likewise its twigs can look like smaller versions of its branches. There are also mathematical and geometrical fractals. Some examples are the Mandelbrot and Julia sets, the Koch snowflake, the Menger sponge, and the Sierpiński triangle.
A geometric fractal can be constructed by starting with an initial shape and then attaching smaller duplicates of it to itself, which then also spawn smaller versions of themselves, and so on. This could theoretically go on forever, creating an infinite amount of shapes that nonetheless occupy a finite space. We can create something like this in Unity, but only up to a few levels deep before performance degrades too much.
We'll create the fractal in the same project as the last tutorial, just without the graph.
Creating a Fractal
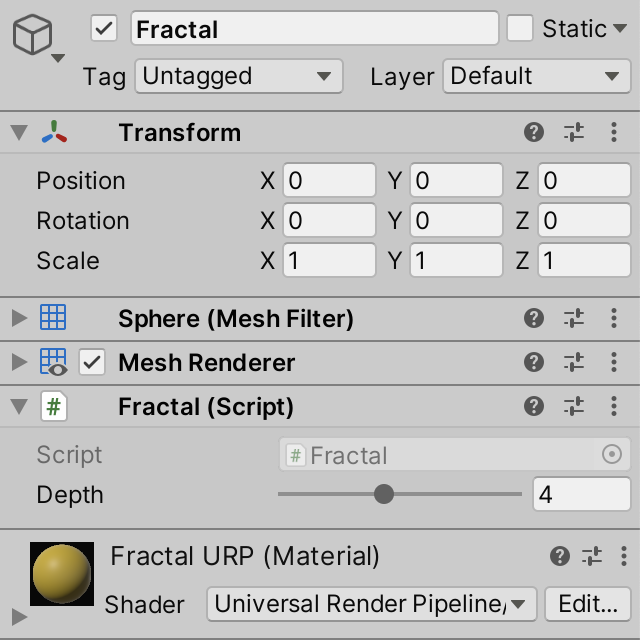
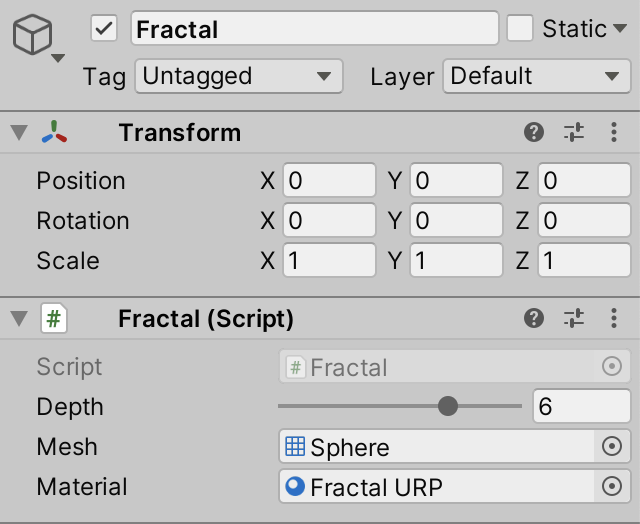
Begin by creating a Fractal component type to represent our fractal. Give it a configurable depth integer to control the maximum depth of the fractal. The minimum depth is one, which would only consist of the initial shape. We'll use eight for the maximum, which is quite high but shouldn't be so much that it would accidentally make your machine unresponsive. A depth of four is a reasonable default.
using UnityEngine;

public class Fractal : MonoBehaviour {

	[SerializeField, Range(1, 8)]
	int depth = 4;
}
We'll use a sphere for the initial shape, which can be created via GameObject / 3D Object / Sphere. Position it at the world origin, attach our fractal component to it, and give it a simple material. I made it yellow, initially using URP. Remove the SphereCollider component from it, to keep the game object as simple as possible.
To turn the sphere into a fractal we'll have to spawn clones of it. This can be done by invoking the Instantiate method with itself as an argument. To pass a reference to the Fractal instance itself we can use the this keyword, so we will be invoking Instantiate(this), which we'll do to generate the fractal after entering play mode.
We could clone the fractal in an Awake method, but then the clone's Awake method will immediately get invoked as well, which immediately creates another instance, and so on. This would keep going until Unity crashes because it's invoking too many methods recursively, which will happen very quickly.
To avoid immediate recursion we can instead add a Start method and invoke Instantiate in there. Start is another Unity event method, which like Awake also gets invoked once after a component is created. The difference is that Start doesn't get invoked immediately, but right before the first time an Update method would get invoked on the component, whether it has one or not. New components that get created at that point get their first update in the next frame. This means that instantiations will happen only once per frame.
	void Start () {
		Instantiate(this);
	}
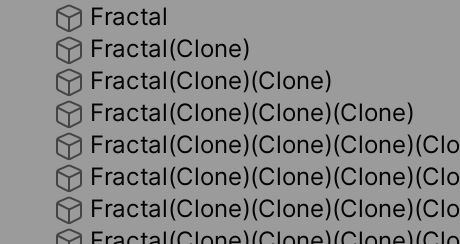
If you enter play mode now you'll see that a new clone gets created every frame. First a clone of the original fractal, then a clone of the first clone, then a clone of the second clone, and so on. This process will only stop when your machine will run out of memory, so you should exit play mode before that happens.
To enforce the maximum depth we'll have to abort the instantiation once the maximum is reached. The most straightforward way to do this is to decrement the configured depth for the generated child fractal.
	void Start () {
		Fractal child = Instantiate(this);
		child.depth = depth - 1;
	}
Then we can check at the beginning of Start whether the depth is 1 or less. If so, we shouldn't go any deeper and abort the method. We can do this by returning from it, using the return statement in isolation because this is a void method, which return nothing.
	void Start () {
		if (depth <= 1) {
			return;
		}

		Fractal child = Instantiate(this);
		child.depth = depth - 1;
	}
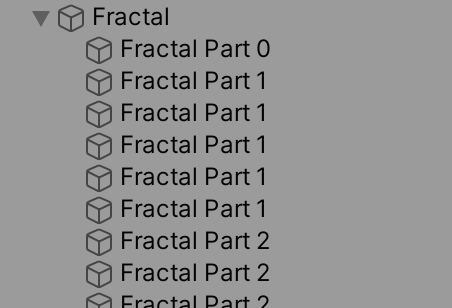
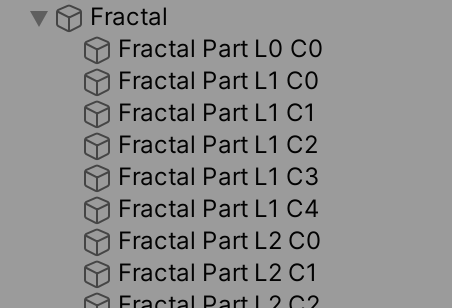
To make it easy to see that the configured depth indeed decreases for every new child fractal let's set their name property to Fractal followed by a space and the depth. An integer can be appended to a text string via the addition operator. This generates a text representation of the number and then a new concatenated string.
	void Start () {
		name = "Fractal " + depth;

		…
	}

The depth indeed decreases per level and the process stops once we have created the correct amount of clones. To make the new fractals true children of their direct parent fractal we have to set their parent to the one that generated them.
		Fractal child = Instantiate(this);
		child.depth = depth - 1;
		child.transform.SetParent(transform, false);

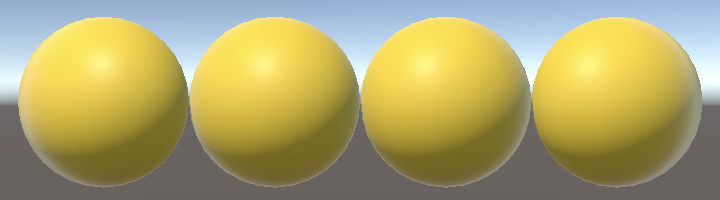
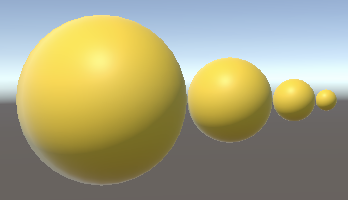
This gives us a simple game object hierarchy, but it still looks like a single sphere because they all overlap. To change this set the local position of the child's transformation to Vector3.right. This positions it one unit to the right of its parent, so all our spheres end up touching in a row along the X axis.
		child.transform.SetParent(transform, false);
		child.transform.localPosition = Vector3.right;
The idea of self-similarity is that smaller portions look like larger portions, so each child should be smaller than its parent. We'll simply halve its size, by setting its local scale to uniform 0.5. As scale also applies to children this means that each step down the hierarchy the size halves.
		child.transform.localPosition = Vector3.right;
		child.transform.localScale = 0.5f * Vector3.one;
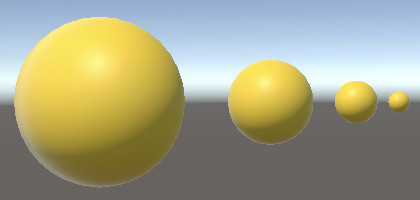
To make the spheres touch again we have to decrease their offset. The local radius of both parent and child used to be 0.5, so an offset of 1 made them touch. As the child's size has been halved its local radius is now 0.25, so the offset should be reduced to 0.75.
		child.transform.localPosition = 0.75f * Vector3.right;
		child.transform.localScale = 0.5f * Vector3.one;
Multiple Children
Spawning only a single child per level produces a line of spheres with decreasing size, which isn't an interesting fractal. So let's add a second child per step, by duplicating the child-creating code, reusing the child variable. The only difference is that we'll use Vector3.up for the extra child, which positions it child above the parent, instead of to the right.
		Fractal child = Instantiate(this);
		child.depth = depth - 1;
		child.transform.SetParent(transform, false);
		child.transform.localPosition = 0.75f * Vector3.right;
		child.transform.localScale = 0.5f * Vector3.one;

		child = Instantiate(this);
		child.depth = depth - 1;
		child.transform.SetParent(transform, false);
		child.transform.localPosition = 0.75f * Vector3.up;
		child.transform.localScale = 0.5f* Vector3.one;
The expectation is that every fractal part will now have two children, up to four levels deep.

This doesn't appear to be the case. We end up with far too many levels at the top of the fractal. This happens because by the time we clone a fractal to create its second child we've already given it a first child. This child now gets cloned as well, because Instantiate duplicates the entire game object hierarchy that was passed to it.
The solution is to establish the parent-child relationship only after both children have been created. To make this easier let's move the child-creation code to a separate CreateChild method that returns the child fractal. It does everything the same, except that it doesn't set the parent and the offset direction becomes a parameter.
	Fractal CreateChild (Vector3 direction) {
		Fractal child = Instantiate(this);
		child.depth = depth - 1;
		child.transform.localPosition = 0.75f * direction;
		child.transform.localScale = 0.5f * Vector3.one;
		return child;
	}
Remove the child-creation code from Start and instead invoke CreateChild twice, with the up and right vectors as arguments. Keep track of the children via variables and use those to set their parent afterwards.
	void Start () {
		name = "Fractal " + depth;

		if (depth <= 1) {
			return;
		}

		Fractal childA = CreateChild(Vector3.up);
		Fractal childB = CreateChild(Vector3.right);

		childA.transform.SetParent(transform, false);
		childB.transform.SetParent(transform, false);
	}
Reorientation
We now get a fractal with exactly two children per part, except for the smallest parts at maximum depth that don't have any children. These children are always positioned the same way: one on top and one to the right. However, fractal children are attached to their parent and can be considered to grow out of it. It makes sense that their orientation is thus also relative to their parent. To a child its parent is the ground, which makes the direction of its offset equal to its local up axis.
We can support a different orientation per part by adding a Quaternion, which we assign to the child's local rotation so it's relative to its parent's orientation.
	Fractal CreateChild (Vector3 direction, Quaternion rotation) {
		Fractal child = Instantiate(this);
		child.depth = depth - 1;
		child.transform.localPosition = 0.75f * direction;
		child.transform.localRotation = rotation;
		child.transform.localScale = 0.5f * Vector3.one;
		return child;
	}
In Start the first child is positioned above its parent, so its orientation doesn't change. We can represent this with Quaternion.identity, which is the identity quaternion that represents no rotation. The second child is to the right, so we have to rotate it 90° clockwise around the Z axis. We can do this via the static Quaternion.Euler method, which creates a rotation given Euler angles along the X, Y, and Z axes. Pass it zero for the first two axes and −90° for Z.
		Fractal childA = CreateChild(Vector3.up, Quaternion.identity);
		Fractal childB = CreateChild(Vector3.right, Quaternion.Euler(0f, 0f, -90f));
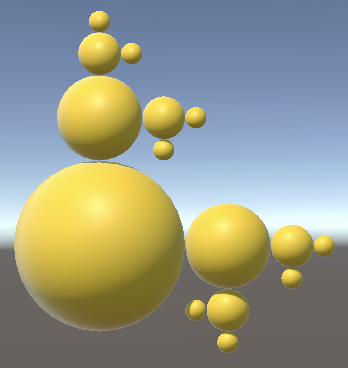
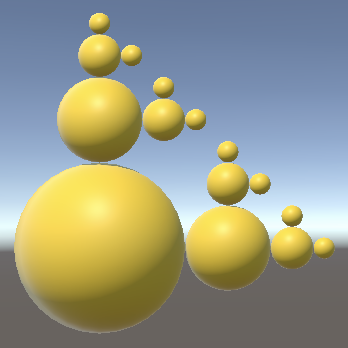
Completing the Fractal
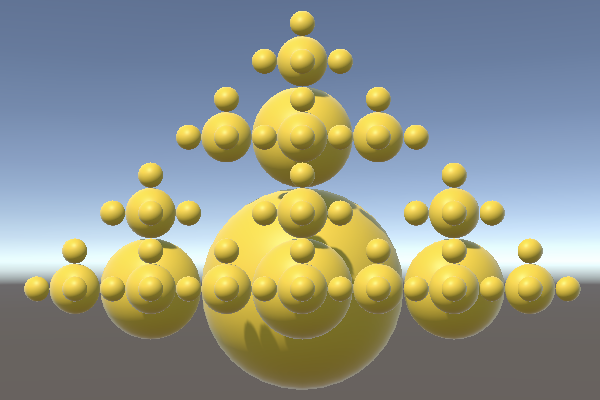
Let's continue to grow the fractal by adding a third child, this time offset to the left, rotated 90° around the Z axis. This completes our fractal in the XY plane.
		Fractal childA = CreateChild(Vector3.up, Quaternion.identity);
		Fractal childB = CreateChild(Vector3.right, Quaternion.Euler(0f, 0f, -90f));
		Fractal childC = CreateChild(Vector3.left, Quaternion.Euler(0f, 0f, 90f));

		childA.transform.SetParent(transform, false);
		childB.transform.SetParent(transform, false);
		childC.transform.SetParent(transform, false);
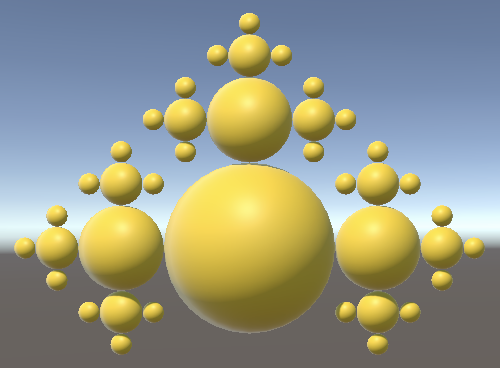
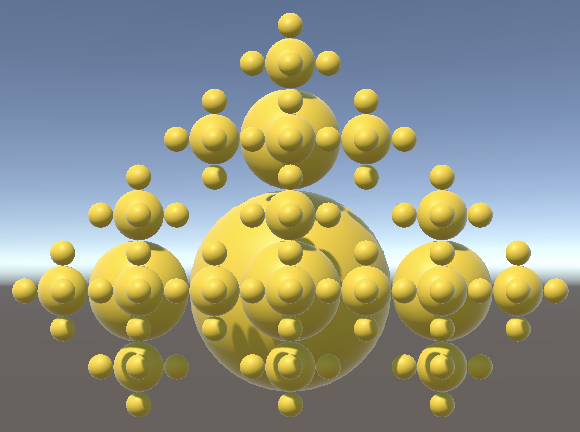
And we bring our fractal into the third dimension by adding two more children, with forward and back offsets, along with 90° and −90° rotations around the X axis.
		Fractal childA = CreateChild(Vector3.up, Quaternion.identity);
		Fractal childB = CreateChild(Vector3.right, Quaternion.Euler(0f, 0f, -90f));
		Fractal childC = CreateChild(Vector3.left, Quaternion.Euler(0f, 0f, 90f));
		Fractal childD = CreateChild(Vector3.forward, Quaternion.Euler(90f, 0f, 0f));
		Fractal childE = CreateChild(Vector3.back, Quaternion.Euler(-90f, 0f, 0f));

		childA.transform.SetParent(transform, false);
		childB.transform.SetParent(transform, false);
		childC.transform.SetParent(transform, false);
		childD.transform.SetParent(transform, false);
		childE.transform.SetParent(transform, false);
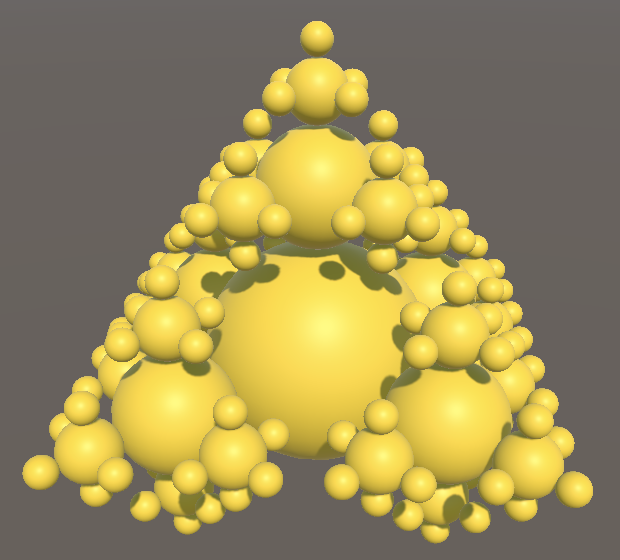
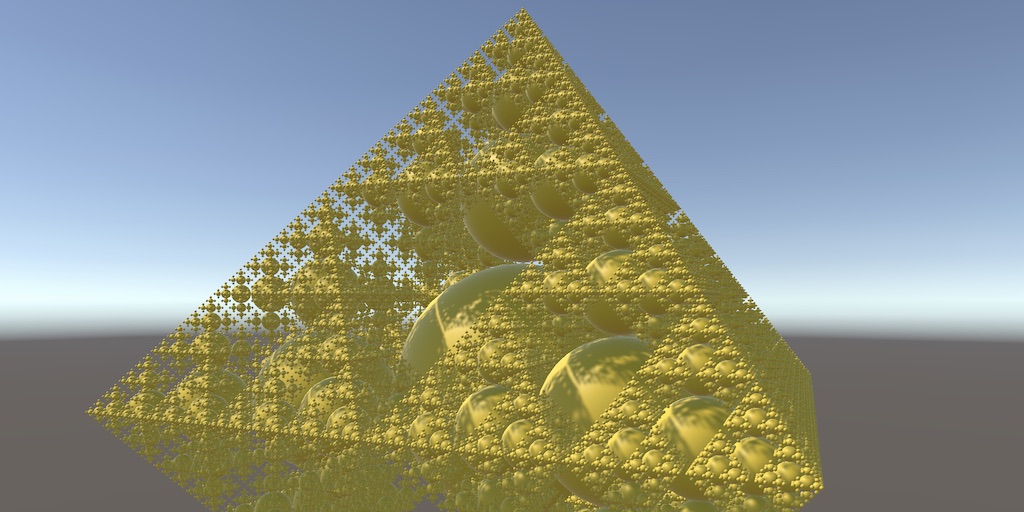
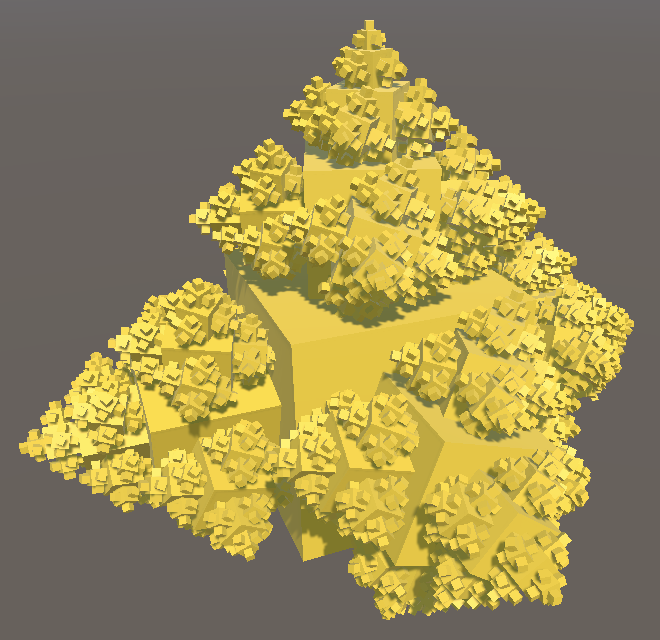
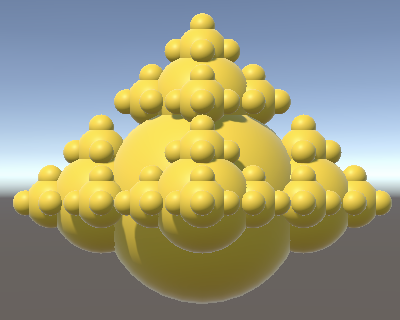
Once you're sure that the fractal is correct you can try it with a greater depth configured, for example six.
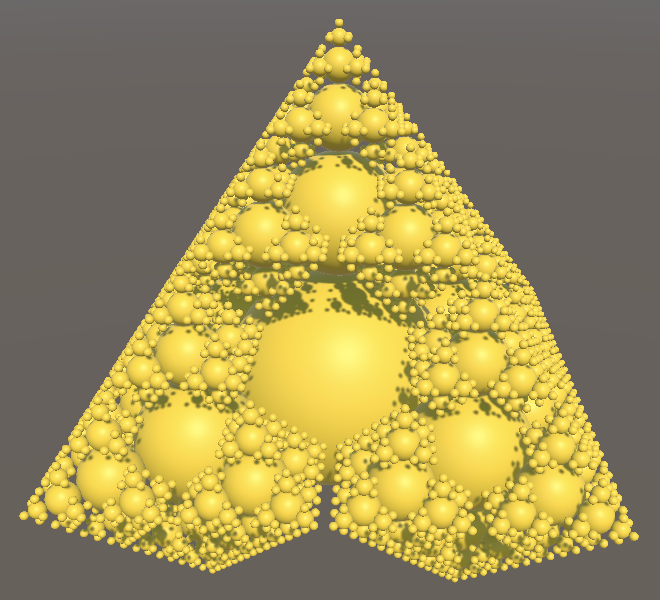
At this depth you can notice that the sides of the pyramid described by the fractal display the pattern of a Sierpiński triangle. This is easiest to see when using an othrographic projection.
Animation
We can bring our fractal to life by animating it. The easiest way to create endless motion is to rotate every part along its local up axis, in a new Update method. This can be done by invoking Rotate on the fractal's Transform component. This applies a cumulative rotation over time, which will make it spin. If we use Time.deltaTime for the second argument and zero for the other two then we end up with a rotation speed of a single degree per second. Let's scale that up to 22.5° per second so a complete 360° rotation is achieved in 16 seconds. Because of the fractal's four-sided symmetry this animation will appear to loop every four seconds.
	void Update () {
		transform.Rotate(0f, 22.5f * Time.deltaTime, 0f);
	}
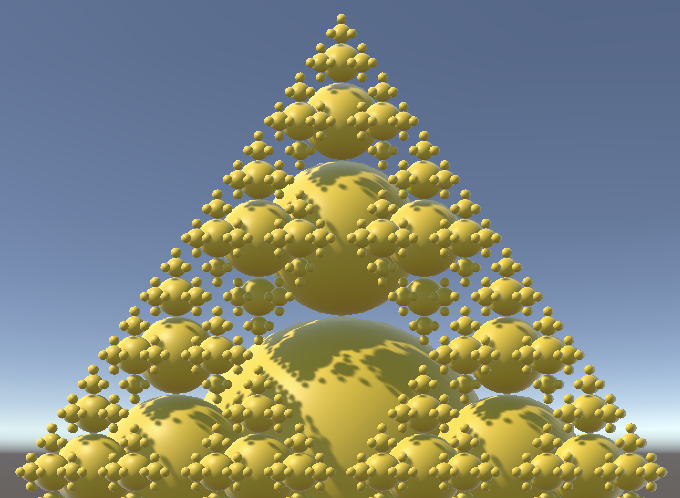
Every part of the fractal spins the exact same way, but because of the recursive nature of the entire fractal this produces motion that gets more complex the deeper the fractal goes.
Performance
Our animating fractal might be a nice idea, but it should also run fast enough. Fractals with a depth less than six should be no problem, but higher than that can become problematic. So I profiled some builds.
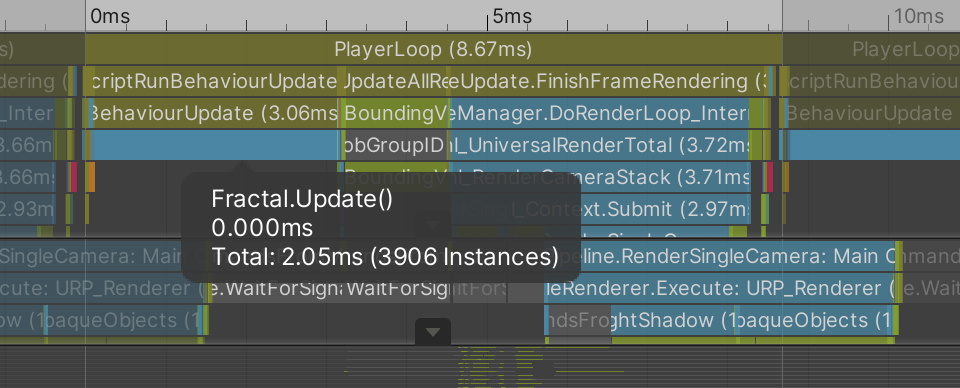
I profiled separate builds for fractals with depths 6, 7, and 8. I got a rough estimate of the average time in milliseconds spent invoking Update methods per frame, along with average frames per second for URP and BRP. I turned off VSync to get the best sense of how fast it could possibly run on my machine. I also used IL2CPP instead of Mono for the Scripting Backend, found under Other Settings / Configuration of the player project settings.
| Depth | MS | URP | BRP |
|---|---|---|---|
| 6 | 2 | 125 | 80 |
| 7 | 8 | 24 | 15 |
| 8 | 40 | 4 | 3 |
It turns out that depth 6 is no problem, but my machine struggles with depth 7 while depth 8 is a disaster. Far too much time is spent invoking Update methods. That alone would limit the frame rate to at most 25FPS, but it ends up far worse at 4 for URP and 3 for BRP.
Unity's default sphere has a lot of vertices, so it makes sense to try the same experiment but with the fractal's mesh replaced with a cube, which is much cheaper to render. After doing that it turns out that I get the same results, which indicates that the CPU is the bottleneck, not the GPU.
Note that when using cubes the fractal self-intersects, because the cubes stick out much farther than spheres. Some parts at depth 4 end up touching the level 1 root. The upward children of those parts thus end up penetrating the root, while some of the others at that level touch the level 2 parts, and so on.
Flat Hierarchy
The recursive hierarchy of our fractal with all of its independently-moving parts is something that Unity struggles with. It has to update the parts in isolation, calculate their object-to-world conversion matrices, then cull them, and finally render them either with GPU instancing or with the SRP batcher. As we know exactly how our fractal works we could use a more efficient strategy than Unity's general-purpose approach. We might be able to improve performance by simplifying the hierarchy, getting rid of its recursive nature.
Cleaning Up
The first step of restructuring out fractal's hierarchy is removing the current approach. Delete the Start, CreateChild, and Update methods.
//void Start () { … }//Fractal CreateChild (Vector3 direction, Quaternion rotation) { … }//void Update () { … }
Instead of duplicating the root game object we'll use it as the root container for all fractal parts. So remove the MeshFilter and MeshRenderer components from our fractal game object. Then add configuration fields for a mesh and a material to Fractal. Set them to the sphere and material we used earlier, via the inspector.
	[SerializeField]
	Mesh mesh;

	[SerializeField]
	Material material;
We're going to use the same directions and rotations for our fractal parts. This time we'll store these in static arrays, for easy access later.
	static Vector3[] directions = {
		Vector3.up, Vector3.right, Vector3.left, Vector3.forward, Vector3.back
	};

	static Quaternion[] rotations = {
		Quaternion.identity,
		Quaternion.Euler(0f, 0f, -90f), Quaternion.Euler(0f, 0f, 90f),
		Quaternion.Euler(90f, 0f, 0f), Quaternion.Euler(-90f, 0f, 0f)
	};
Creating Parts
Now we're going to revisit how we create a part. Add a new CreatePart method for this, initially a void method without parameters.
void CreatePart () {}
Invoke it in an Awake method. We won't need to guard against infinite recursions this time, so don't need to wait until Start.
	void Awake () {
		CreatePart();
	}
We'll manually construct a new game object in CreatePart. This is done by invoking the GameObject constructor method. Give it the Fractal Part name by providing that string as an argument. Keep track of it with a variable, then make the fractal root its parent.
	void CreatePart () {
		var go = new GameObject("Fractal Part");
		go.transform.SetParent(transform, false);
	}

This gives us a game object that only has a Transform component and nothing else. To make it visible we have to add more components to this, by invoking AddComponent on the game object. Do this once.
		var go = new GameObject("Fractal Part");
		go.transform.SetParent(transform, false);
		go.AddComponent();
AddComponent is a generic method, which can add any kind of component. It's like a template for methods, with a specific version for each needed component type. We specify which type we want by appending it to the method's name, within angle brackets. Do this for MeshFilter.
go.AddComponent<MeshFilter>();
This adds a MeshFilter to the game object, which is also returned. We need to assign our mesh to its mesh property, which we can do directly on the result of the method invocation.
go.AddComponent<MeshFilter>().mesh = mesh;
Do the same for a MeshRenderer component, settings its material.
		go.AddComponent<MeshFilter>().mesh = mesh;
		go.AddComponent<MeshRenderer>().material = material;
Our fractal part now gets rendered, so a single sphere appears after entering play mode.
Storing Information
Rather than have each part update itself we'll instead control the entire fractal from the single root object that has the Fractal component. This is much easier for Unity because it only has to manage a single updating game object instead of potentially thousands. But to do this we'll need to keep track of the data for all parts in a single Fractal component.
At minimum we need to know the direction and rotation of a part. We could keep track of those by storing them in arrays. But instead of using separate arrays for vectors and quaternions we'll group them together, by creating a new FractalPart struct type. This is done like defining a class, but with the struct keyword instead of class. As we'll only need this type inside Fractal define it inside that class, along with its fields. Don't make it public, for the same reason.
public class Fractal : MonoBehaviour {

	struct FractalPart {
		Vector3 direction;
		Quaternion rotation;
	}

	…
}
This type will function as a simple container for data that's bundled together and treated like a single value, not an object. To make it possible for other code in Fractal to access fields inside this nested type they need to be made public. Note that this only exposes the fields inside Fractal, because the struct itself is private inside Fractal.
	struct FractalPart {
		public Vector3 direction;
		public Quaternion rotation;
	}
In order to correctly position, rotate, and scale a fractal part we'll need to access its Transform component, so add a field for a reference to it to the struct as well.
	struct FractalPart {
		public Vector3 direction;
		public Quaternion rotation;
		public Transform transform;
	}
Now we can define a field for an array of fractal parts inside Fractal.
FractalPart[] parts;
Although it's possible to put all parts in a single large array let's instead give all parts of the same level their own array. This makes it easier work with the hierarchy later. We keep track of all those arrays by turning our parts field into an array of arrays. The element type of such an array is FractalPart[], so its own type is defined as that followed by an empty pair of square brackets, like any other array.
FractalPart[][] parts;
Create this new top-level array at the beginning of Awake, with its size equal to the fractal depth. In this case the size is declared inside the first pair of square brackets, the second pair should be left empty.
	void Awake () {
		parts = new FractalPart[depth][];

		CreatePart();
	}
Each level gets its own array, also the root level of the fractal that has only a single part. So begin by creating a new FractalPart array for a single element and assign it to the first level.
		parts = new FractalPart[depth][];
		parts[0] = new FractalPart[1];
After that we have to create an array for the other levels. Each level is five times as large as the previous level, because we give parts five children. Turn the level array creation into a loop, keep track of the array length, and multiply it by five at the end of each iteration.
		parts = new FractalPart[depth][];
		int length = 1;
		for (int i = 0; i < parts.Length; i++) {
			parts[i] = new FractalPart[length];
			length *= 5;
		}
Because the length is an integer and we only use it inside the loop, we can merge it into the for statement, turning the initializer and adjustment parts into comma-separated lists.
parts = new FractalPart[depth][];//int length = 1;for (int i = 0, length = 1; i < parts.Length; i++, length *= 5) { parts[i] = new FractalPart[length];//length *= 5;}
| Level | Parts | Cumulative |
|---|---|---|
| 1 | 1 | 1 |
| 2 | 5 | 6 |
| 3 | 25 | 31 |
| 4 | 125 | 156 |
| 5 | 625 | 781 |
| 6 | 3,125 | 3,906 |
| 7 | 15,625 | 19,531 |
| 8 | 78,125 | 97,656 |
Creating All Parts
To check whether we create parts correctly, add a parameter for the level index to CreatePart and append it to the part's name. Note that the level index starts at zero and increases, while we decreased the configured depth of children in the previous approach.
	void CreatePart (int levelIndex) {
		var go = new GameObject("Fractal Part " + levelIndex);
		…
	}
Pass zero for the level index of the first part. Then follow that with a loop over all levels, starting at index 1 because we explicitly did the single part of the top level first. We're going to nest loops, so use a more specific name for the level iterator variable, like li.
	void Awake () {
		…

		CreatePart(0);
		for (int li = 1; li < parts.Length; li++) {}
	}
Each level iteration, begin by storing a reference to the parts array for that level. Then loop over all parts of that level and create them, this time using a name like fpi for the fractal part iterator variable.
		for (int li = 1; li < parts.Length; li++) {
			FractalPart[] levelParts = parts[li];
			for (int fpi = 0; fpi < levelParts.Length; fpi++) {
				CreatePart(li);
			}
		}
As children have varying directions and rotations we need to distinguish them. We do this by adding a child index to CreatePart, which we can also add to the game object's name.
	void CreatePart (int levelIndex, int childIndex) {
		var go = new GameObject("Fractal Part L" + levelIndex + " C" + childIndex);
		…
	}
The root part isn't a child of another part, so we use index zero as it can be considered an upward child of the ground.
CreatePart(0, 0);
Inside the loop per level we have to cycle through the five child indices. We could do this by incrementing a child index every iteration and resetting it to zero when appropriate. Alternatively, we can explicitly create five children in another nested loop. This requires that we increase the fractal part index by five every iteration, instead of only incrementing it.
		for (int li = 1; li < parts.Length; li++) {
			FractalPart[] levelParts = parts[li];
			for (int fpi = 0; fpi < levelParts.Length; fpi += 5) {
				for (int ci = 0; ci < 5; ci++) {
					CreatePart(li, ci);
				}
			}
		}
We also have to make sure that the parts have the correct size. All parts of the same level have the same scale, which doesn't change. So we only need to set it once when creating each part. Add a parameter for it to CreatePart and use it o set the uniform scale.
	void CreatePart (int levelIndex, int childIndex, float scale) {
		var go = new GameObject("Fractal Part L" + levelIndex + " C" + childIndex);
		go.transform.localScale = scale * Vector3.one;
		…
	}
The scale of the root part is 1. After that the scale halves each level.
		float scale = 1f;
		CreatePart(0, 0, scale);
		for (int li = 1; li < parts.Length; li++) {
			scale *= 0.5f;
			FractalPart[] levelParts = parts[li];
			for (int fpi = 0; fpi < levelParts.Length; fpi += 5) {
				for (int ci = 0; ci < 5; ci++) {
					CreatePart(li, ci, scale);
				}
			}
		}
Rebuilding the Fractal
To rebuild the structure of the fractal we have to position all parts directly, this time in world space. As we're not using a transformation hierarchy the positions will change as the fractal animates, so we'll continually set them in Update instead of in Awake. But first we need to store the data of the parts.
Begin by changing CreatePart so it returns a new FractalPart struct value.
	FractalPart CreatePart (int levelIndex, int childIndex, float scale) {
		…

		return new FractalPart();
	}
Then set the part's direction and rotation using its child index and the static arrays, along with a reference to its game object's Transform component. We could do this by storing the new part in a variable, settings its fields, and then returning it. An alternative way of doing the same is by using an object or struct initializer. This is a list within curly brackets that follows the parameter list of the constructor invocation.
return new FractalPart() {};
We can put assignments to the fields or properties of whatever is created in there, as a comma-separated list.
		return new FractalPart() {
			direction = directions[childIndex],
			rotation = rotations[childIndex],
			transform = go.transform
		};
And if the constructor method invocation has no arguments we're allowed to skip the empty parameter list if we include an initializer.
//return new FractalPart() {return new FractalPart { … };
Copy the returned parts to the correct array elements in Awake. That's the first element of the first array for the root part. For other parts it's the element of the current level array with the index equal to the fractal part index. As we increase that index in steps of five the child index has to be added to it as well.
		parts[0][0] = CreatePart(0, 0, scale);
		for (int li = 1; li < parts.Length; li++) {
			scale *= 0.5f;
			FractalPart[] levelParts = parts[li];
			for (int fpi = 0; fpi < levelParts.Length; fpi += 5) {
				for (int ci = 0; ci < 5; ci++) {
					levelParts[fpi + ci] = CreatePart(li, ci, scale);
				}
			}
		}
Follow this by creating a new Update method that iterates over all levels and all their parts, storing the relevant fractal part data in a variable. We again start the loop at the second level, because the root part doesn't move and always sits at the origin.
	void Update () {
		for (int li = 1; li < parts.Length; li++) {
			FractalPart[] levelParts = parts[li];
			for (int fpi = 0; fpi < levelParts.Length; fpi++) {
				FractalPart part = levelParts[fpi];
			}
		}
	}
To position a part relative to its parent we also need to access the parent's Transform component. To do this keep track of the parent parts array as well. The parent is the element from that array with an index equal to the current part's index divided by five. This works because we perform an integer division, so there is no remainder. Thus parts with indices 0–4 get parent index 0, parts with indices 5–9 get parent index 1, and so on.
		for (int li = 1; li < parts.Length; li++) {
			FractalPart[] parentParts = parts[li - 1];
			FractalPart[] levelParts = parts[li];
			for (int fpi = 0; fpi < levelParts.Length; fpi++) {
				Transform parentTransform = parentParts[fpi / 5].transform;
				FractalPart part = levelParts[fpi];
			}
		}
Now we can set the part's position relative to its designated parent. Begin by making its local position equal to its parent's, plus the part's direction multiplied by its local scale. As the scale is uniform we can suffice with the scale's X component.
				Transform parentTransform = parentParts[fpi / 5].transform;
				FractalPart part = levelParts[fpi];
				part.transform.localPosition =
					parentTransform.localPosition +
					part.transform.localScale.x * part.direction;
This puts the parts too close to their parent, as we're scaling the distance by the part's own scale. As the scale is halved each level we have to increase the final offset to 150%.
				part.transform.localPosition =
					parentTransform.localPosition +
					1.5f * part.transform.localScale.x * part.direction;
We also have to apply the part's rotation. This is done by assigning it to its object's local rotation. Let's do this before setting its position.
				part.transform.localRotation = part.rotation;
				part.transform.localPosition =
					parentTransform.localPosition +
					1.5f * part.transform.localScale.x * part.direction;
But we also have to propagate the rotation of the parent. Rotations can be stacked via multiplication of quaternions. Unlike regular multiplication of numbers order matters in this case. The resulting quaternion represents a rotation obtained by performing the rotation of the second quaternion, followed by applying the rotation of the first quaternion. Thus in a transformation hierarchy the child's rotation is performed first, followed by the parent's rotation. So the correct quaternion multiplication order is parent-child.
				part.transform.localRotation =
					parentTransform.localRotation * part.rotation;
Finally, the parent's rotation should also affect the direction of its offset. We can apply a quaternion rotation to a vector by performing a quaternion–vector multiplication.
				part.transform.localPosition =
					parentTransform.localPosition +
					parentTransform.localRotation *
						(1.5f * part.transform.localScale.x * part.direction);
Animating Again
To make the fractal animate again we have to reintroduce another rotation. This time we'll create a quaternion to represent the rotation for the current delta time, with the same angular velocity as before. Do this at the beginning of Update.
	void Update () {
		Quaternion deltaRotation = Quaternion.Euler(0f, 22.5f * Time.deltaTime, 0f);

		…
	}
Let's begin with the root part. Retrieve it before the loop and multiply its rotation with the delta rotation.
		Quaternion deltaRotation = Quaternion.Euler(0f, 22.5f * Time.deltaTime, 0f);

		FractalPart rootPart = parts[0][0];
		rootPart.rotation *= deltaRotation;
FractalPart is a struct, which is a value type, so changing a local variable of it doesn't change anything else. We have to copy it back to its array element—replacing the old data—in order to remember that its rotation has changed.
		FractalPart rootPart = parts[0][0];
		rootPart.rotation *= deltaRotation;
		parts[0][0] = rootPart;
And we also have to adjust the rotation of the root's Transform component. This will make the fractal spin again, but only around its root.
		FractalPart rootPart = parts[0][0];
		rootPart.rotation *= deltaRotation;
		rootPart.transform.localRotation = rootPart.rotation;
		parts[0][0] = rootPart;
To spin all other parts we have to factor the same delta rotation into their rotation as well. As everything spins around its local up axis the delta rotation is the rightmost operand. Do this before applying the final rotation of the part's game object. Also copy the adjusted part data back to the array at the end.
			for (int fpi = 0; fpi < levelParts.Length; fpi++) {
				Transform parentTransform = parentParts[fpi / 5].transform;
				FractalPart part = levelParts[fpi];
				part.rotation *= deltaRotation;
				part.transform.localRotation =
					parentTransform.localRotation * part.rotation;
				part.transform.localPosition =
					parentTransform.localPosition +
					parentTransform.localRotation *
						(1.5f * part.transform.localScale.x * part.direction);
				levelParts[fpi] = part;
			}
Performance Again
At this point our fractal appears and animates exactly as before, but with a new flat object hierarchy and a single component that is responsible for updating the entire thing. Let's profile again to see if this new approach performs better, using the same build settings.
| Depth | MS | URP | BRP |
|---|---|---|---|
| 6 | 2 | 150 | 95 |
| 7 | 8 | 32 | 17 |
| 8 | 43 | 5 | 3 |
Compared to the recursive approach, the average frame rate has increased everywhere. Depth 7 with URP now reaches 30FPS for me. Time spent during Update hasn't decreased noticeably and even appeared to increase a bit at depth 8, but this is compensated for during rendering by the simpler hierarchy. Using cubes results in roughly the same performance.
We can conclude that our new approach is definitely an improvement, but on its own is still not sufficient to support fractals with depths 7 or 8.
Procedural Drawing
Because our fractal currently has a flat object hierarchy it has the same structural design as the graphs of our previous tutorials: a single object with lots of almost identical children. By rendering the graph's points procedurally instead of using a separate game object per point we managed to dramatically increase its performance. This suggests that we can apply the same approach to our fractal.
Even though the object hierarchy is flat the fractal parts do still have a recursive hierarchical relationship. This makes it fundamentally different than the graph, which has independent points. This hierarchical dependency makes it unsuitable for migration to a compute shader. But it's still possible to draw all parts of the same level via a single procedural command, avoiding the overhead of thousands of game objects.
Removing Game Objects
We begin by removing the game objects. This also means that we no longer have Transform components to store world positions and rotations in. Instead we'll store these in additional fields of FractalPart.
	struct FractalPart {
		public Vector3 direction, worldPosition;
		public Quaternion rotation, worldRotation;
		//public Transform transform;
	}
Remove all the game object code from CreatePart. We only need to keep its child index parameter, as the other parameters were only used when creating the game object.
	FractalPart CreatePart (int childIndex) {
		//var go = new GameObject("Fractal Part L" + levelIndex + " C" + childIndex);
		//go.transform.localScale = scale * Vector3.one;
		//go.transform.SetParent(transform, false);
		//go.AddComponent<MeshFilter>().mesh = mesh;
		//go.AddComponent<MeshRenderer>().material = material;

		return new FractalPart {
			direction = directions[childIndex],
			rotation = rotations[childIndex] //,
			//transform = go.transform
		};
	}
We can now also reduce the method to a single expression.
	FractalPart CreatePart (int childIndex) => new FractalPart {
		direction = directions[childIndex],
		rotation = rotations[childIndex]
	};
Adjust the code in Awake accordingly. We no longer deal with the scale here from now on.
//float scale = 1f;parts[0][0] = CreatePart(0); for (int li = 1; li < parts.Length; li++) {//scale *= 0.5f;FractalPart[] levelParts = parts[li]; for (int fpi = 0; fpi < levelParts.Length; fpi += 5) { for (int ci = 0; ci < 5; ci++) { levelParts[fpi + ci] = CreatePart(ci); } } }
In Update we now have to assign the root's rotation to its world rotation field instead of to a Transform component rotation.
		FractalPart rootPart = parts[0][0];
		rootPart.rotation *= deltaRotation;
		rootPart.worldRotation = rootPart.rotation;
		parts[0][0] = rootPart;
The same adjustments need to be made for all other parts, both for their rotation and their position. We also reintroduce the decreasing scale here.
		float scale = 1f;
		for (int li = 1; li < parts.Length; li++) {
			scale *= 0.5f;
			FractalPart[] parentParts = parts[li - 1];
			FractalPart[] levelParts = parts[li];
			for (int fpi = 0; fpi < levelParts.Length; fpi++) {
				//Transform parentTransform = parentParts[fpi / 5].transform;
				FractalPart parent = parentParts[fpi / 5];
				FractalPart part = levelParts[fpi];
				part.rotation *= deltaRotation;
				part.worldRotation = parent.worldRotation * part.rotation;
				part.worldPosition =
					parent.worldPosition +
					parent.worldRotation * (1.5f * scale * part.direction);
				levelParts[fpi] = part;
			}
		}
Transformation Matrices
The Transform components provide transformation matrices that are used for rendering. As our parts no longer have these components we need to create the matrices ourselves. We'll store them in an array per level, just like we store the parts. Add a Matrix4x4[][] field for this and create all its arrays in Awake along with the other ones.
	FractalPart[][] parts;

	Matrix4x4[][] matrices;

	void Awake () {
		parts = new FractalPart[depth][];
		matrices = new Matrix4x4[depth][];
		for (int i = 0, length = 1; i < parts.Length; i++, length *= 5) {
			parts[i] = new FractalPart[length];
			matrices[i] = new Matrix4x4[length];
		}

		…
	}
The simplest way to create a transformation matrix is to invoke the static Matrix4x4.TRS method with a position, rotation, and scale as arguments. It returns a Matrix4x4 struct that we can copy into our arrays. The first is the root matrix in Update, created from its world position, world rotation, and a scale of one.
		parts[0][0] = rootPart;
		matrices[0][0] = Matrix4x4.TRS(
			rootPart.worldPosition, rootPart.worldRotation, Vector3.one
		);
Create all other matrices the same way in the loop, this time using the variable scale.
			scale *= 0.5f;
			FractalPart[] parentParts = parts[li - 1];
			FractalPart[] levelParts = parts[li];
			Matrix4x4[] levelMatrices = matrices[li];
			for (int fpi = 0; fpi < levelParts.Length; fpi++) {
				…

				levelMatrices[fpi] = Matrix4x4.TRS(
					part.worldPosition, part.worldRotation, scale * Vector3.one
				);
			}
Entering play mode at this time doesn't show us a fractal, because we don't yet visualize the parts. But we do calculate their transformation matrices. If we let play mode run for a while with a fractal of depth 6 or greater, at some point Unity will begin logging errors. The errors tell use that quaternion-to-matrix conversions failed, because the input quaternion is invalid.
The conversion fails because of floating point precision limitations. Successive tiny inaccuracies compound as we keep multiplying quaternions with each other, until the result is no longer recognized as a valid rotation. It is caused by the many very small rotations that we accumulate each update.
The solution is to start with fresh quaternions each update. We can do this by storing the spin angle as a separate float field in FractalPart, instead of adjusting its local rotation.
	struct FractalPart {
		public Vector3 direction, worldPosition;
		public Quaternion rotation, worldRotation;
		public float spinAngle;
	}
In Update we revert to the older approach of using a spin delta angle, which we then add to the root's spin angle. The root's world rotation becomes equal to its configured rotation applied on top of a new rotation around the Y axis equal to its current spin angle.
//Quaternion deltaRotation = Quaternion.Euler(0f, 22.5f * Time.deltaTime, 0f);float spinAngleDelta = 22.5f * Time.deltaTime; FractalPart rootPart = parts[0][0];//rootPart.rotation *= deltaRotation;rootPart.spinAngle += spinAngleDelta; rootPart.worldRotation = rootPart.rotation * Quaternion.Euler(0f, rootPart.spinAngle, 0f); parts[0][0] = rootPart;
The same goes for all other parts, with their parent's world rotation applied on top.
//part.rotation *= deltaRotation;part.spinAngle += spinAngleDelta; part.worldRotation = parent.worldRotation * (part.rotation * Quaternion.Euler(0f, part.spinAngle, 0f));
Compute Buffers
To render the parts we need to send their matrices to the GPU. We'll use compute buffers for this, like we did for the graph. The difference is that the CPU will fill the buffer this time, instead of the GPU and we use a separate buffer per level. Add a field for an array of buffers and create them in Awake. A 4×4 matrix has sixteen float values, so the stride of the buffers is sixteen times four bytes.
	ComputeBuffer[] matricesBuffers;

	void Awake () {
		parts = new FractalPart[depth][];
		matrices = new Matrix4x4[depth][];
		matricesBuffers = new ComputeBuffer[depth];
		int stride = 16 * 4;
		for (int i = 0, length = 1; i < parts.Length; i++, length *= 5) {
			parts[i] = new FractalPart[length];
			matrices[i] = new Matrix4x4[length];
			matricesBuffers[i] = new ComputeBuffer(length, stride);
		}

		…
	}
We also have to release the buffer in a new OnDisable method. To make this work with hot reloads change Awake into OnEnable as well.
	void OnEnable () {
		parts = new FractalPart[depth][];
		matrices = new Matrix4x4[depth][];
		matricesBuffers = new ComputeBuffer[depth];
		…
	}

	void OnDisable () {
		for (int i = 0; i < matricesBuffers.Length; i++) {
			matricesBuffers[i].Release();
		}
	}
To keep things tidy also get rid of all array references at the end of OnDisable. We create new ones in OnEnable anyway.
	void OnDisable () {
		for (int i = 0; i < matricesBuffers.Length; i++) {
			matricesBuffers[i].Release();
		}
		parts = null;
		matrices = null;
		matricesBuffers = null;
	}
This also makes it possible to easily support changing the fractal depth via the inspector while in play mode, by adding an OnValidate method that simply invokes OnDisable and OnEnable after each other, resetting the fractal. The OnValidate method gets invoked after a change has been made to the component via the inspector or an undo/redo action.
	void OnValidate () {
		OnDisable();
		OnEnable();
	}
However, this can only work when we're in play mode and the fractal is currently active. We can verify this by checking whether one of the arrays isn't null, via the != not-equal operator.
	void OnValidate () {
		if (parts != null) {
			OnDisable();
			OnEnable();
		}
	}
Besides that OnValidate also gets invoked if we disable the component via the inspector. This would trigger a reset of the fractal followed by it getting disabled again. We can avoid that by also checking whether the Fractal component is enabled, via its enabled property. Only if both conditions are true we reset the fractal. We combine the checks to form a single conditional expression with the boolean && AND operator.
		if (parts != null && enabled) {
			OnDisable();
			OnEnable();
		}
Finally, to upload the matrices to the GPU invoke SetData on all buffers at the end of Update, with the corresponding matrices array as an argument.
	void Update () {
		…

		for (int i = 0; i < matricesBuffers.Length; i++) {
			matricesBuffers[i].SetData(matrices[i]);
		}
	}
Shaders
We now have to again create a shader that supports procedural drawing. To set the object-to-world matrix we can take the code from PointGPU.hlsl of the graph, copy it to a new FractalGPU.hlsl file and adapt it to our fractal. This means that instead of a float3 positions buffer it uses a float4x4 matrices buffer. And we can directly copy the matrix, instead of having to construct it in the shader.
#if defined(UNITY_PROCEDURAL_INSTANCING_ENABLED) StructuredBuffer<float4x4> _Matrices; #endif//float _Step;void ConfigureProcedural () { #if defined(UNITY_PROCEDURAL_INSTANCING_ENABLED) unity_ObjectToWorld = _Matrices[unity_InstanceID]; #endif } void ShaderGraphFunction_float (float3 In, out float3 Out) { Out = In; } void ShaderGraphFunction_half (half3 In, out half3 Out) { Out = In; }
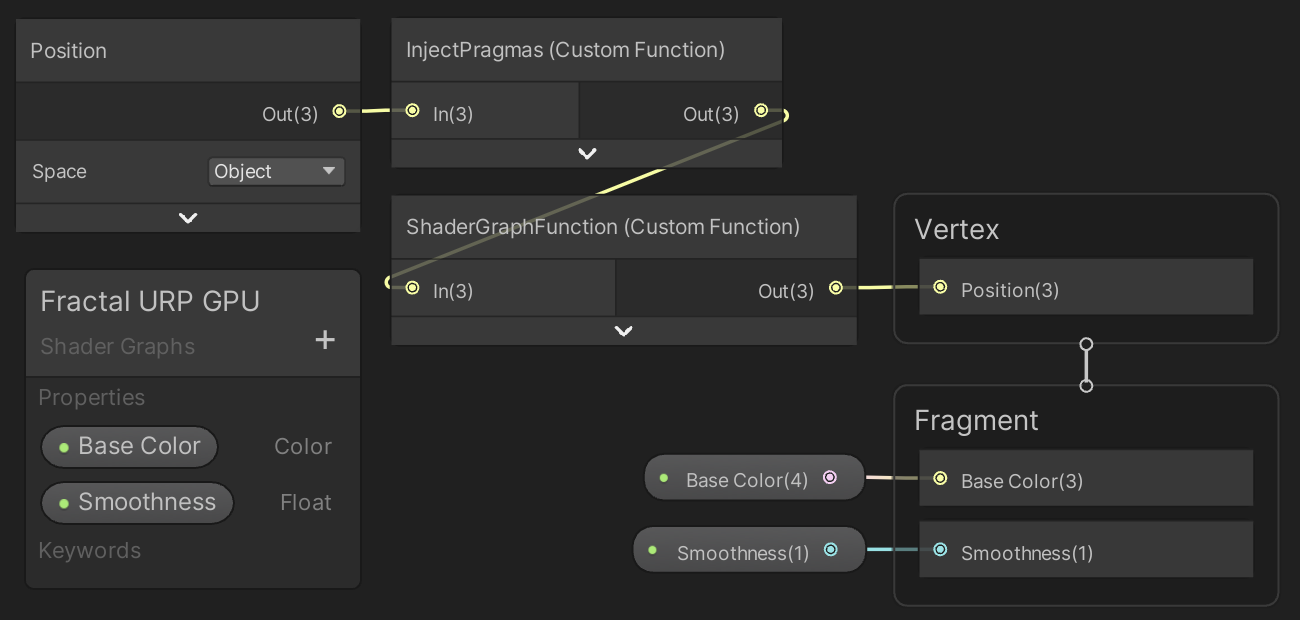
The URP shader graph for our fractal is also a simplified copy of the Point URP GPU shader graph. The vertex position nodes are exactly the same, except that we now have to rely on the FractalGPU HLSL file. And instead of coloring based on the world position a single Base Color color property suffices.
The BRP surface shader is also simpler than its graph equivalent. It needs a different name, include the correct file, and a BaseColor color property for its albedo. The color property works like smoothness, except with Color instead of a range and a four-component default value. I kept the world position in the Input struct even through it's no longer needed, because an empty struct doesn't compile.
Shader "Fractal/Fractal Surface GPU" {

	Properties {
		_BaseColor ("Base Color", Color) = (1.0, 1.0, 1.0, 1.0)
		_Smoothness ("Smoothness", Range(0,1)) = 0.5
	}

	SubShader {
		CGPROGRAM
		#pragma surface ConfigureSurface Standard fullforwardshadows addshadow
		#pragma instancing_options assumeuniformscaling procedural:ConfigureProcedural
		#pragma editor_sync_compilation

		#pragma target 4.5

		#include "FractalGPU.hlsl"

		struct Input {
			float3 worldPos;
		};

		float4 _BaseColor;
		float _Smoothness;

		void ConfigureSurface (Input input, inout SurfaceOutputStandard surface) {
			surface.Albedo = _BaseColor.rgb;
			surface.Smoothness = _Smoothness;
		}
		ENDCG
	}

	FallBack "Diffuse"
}
Drawing
Finally, to draw the fractal again we have to keep track of the identifier for the matrices buffer in Fractal.
static readonly int matricesId = Shader.PropertyToID("_Matrices");
Then at the end of Update invoke Graphics.DrawMeshInstancedProcedural, once for each level, with the correct buffer. We'll simply use the same bounds for all levels: a cube with an edge length of three.
		var bounds = new Bounds(Vector3.zero, 3f * Vector3.one);
		for (int i = 0; i < matricesBuffers.Length; i++) {
			ComputeBuffer buffer = matricesBuffers[i];
			buffer.SetData(matrices[i]);
			material.SetBuffer(matricesId, buffer);
			Graphics.DrawMeshInstancedProcedural(mesh, 0, material, bounds, buffer.count);
		}
Our fractal appears again, but it looks like only the deepest levels get rendered. The frame debugger will show that all levels do get rendered, but they all incorrectly use the matrices from the last level. This happens because the draw commands get queued to be executed later. So whichever buffer we set last is the one that get used by all of them.
The solution is to link each buffer to a specific draw command. We can do this via a MaterialPropertyBlock object. Add a static field for it and create a new instance of it in OnEnable, if one doesn't exist yet.
	static MaterialPropertyBlock propertyBlock;

	…

	void OnEnable () {
		…

		if (propertyBlock == null) {
			propertyBlock = new MaterialPropertyBlock();
		}
	}
Assigning something only when the current value is null can be simplified to a single expression by using the ??= null-coalescing assignment.
//if (propertyBlock == null) {propertyBlock ??= new MaterialPropertyBlock();//}
In Update set the buffer on the property block instead of directly on the material. Then pass the block as additional argument to Graphics.DrawMeshInstancedProcedural. This will make Unity copy the configuration that the block has at that time and use it for that specific draw command, overruling what was set for the material.
			ComputeBuffer buffer = matricesBuffers[i];
			buffer.SetData(matrices[i]);
			propertyBlock.SetBuffer(matricesId, buffer);
			Graphics.DrawMeshInstancedProcedural(
				mesh, 0, material, bounds, buffer.count, propertyBlock
			);
		}
Performance
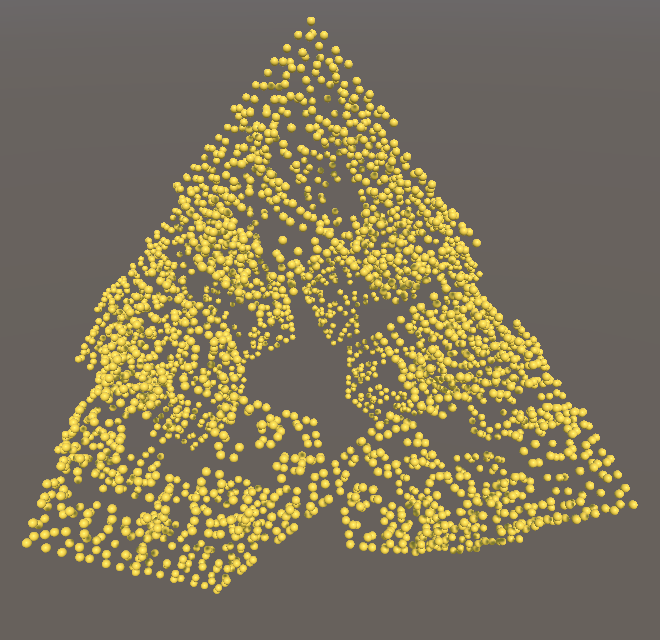
Now that our fractal is complete again let's measure its performance once more, initially while rendering spheres.
| Depth | MS | URP | BRP |
|---|---|---|---|
| 6 | 0.7 | 160 | 96 |
| 7 | 3 | 54 | 35 |
| 8 | 13 | 11 | 7 |
Update now takes a lot less time. In terms of FPS there's been a slight improvement for depths 6 and 8, while depth 7 renders almost twice as fast as before. URP is getting close to 60FPS. And when we try cubes we see a significant improvement.
| Depth | MS | URP | BRP |
|---|---|---|---|
| 6 | 0.4 | 470 | 175 |
| 7 | 2 | 365 | 155 |
| 8 | 11 | 86 | 85 |
There is a massive frame rate increase, which makes it clear that the GPU is now the bottleneck. The Update time has also decreased a bit. This might be because setting the buffer data stalled more when rendering spheres, as the CPU is forced to wait until the GPU is finished reading from the buffers.
Moving with the Game Object
A side effect of creating our own transformation matrices is that our fractal now ignores the transformation of its game object. We can fix this by incorporating the game object's rotation and position into the root object matrix in Update.
		rootPart.worldRotation =
			transform.rotation *
			(rootPart.rotation * Quaternion.Euler(0f, rootPart.spinAngle, 0f));
		rootPart.worldPosition = transform.position;
We can also apply the game object's scale. However, if a game object is part of a complex hierarchy that includes nonuniform scales along with rotations it could be subject to a non-affine transformation that causes it to shear. In this case it doesn't have a well-defined scale. For this reason Transform components do not have a simple world-space scale property. They have a lossyScale property instead, to indicate that it might not be an exact affine scale. We'll simple use the X component of that scale, ignoring any nonuniform scales.
		float objectScale = transform.lossyScale.x;
		matrices[0][0] = Matrix4x4.TRS(
			rootPart.worldPosition, rootPart.worldRotation, objectScale * Vector3.one
		);

		float scale = objectScale;
Also apply the adjusted world position and scale to the bounds.
var bounds = new Bounds(rootPart.worldPosition, 3f * objectScale * Vector3.one);
Job System
Our C# code is about as fast as it can be at this point, but we can switch to a different approach, taking advantage of Unity's job system. This should be able to reduce our Update time further, improving performance or making room for more code to run without slowing things down.
The idea of the job system is to leverage the parallel processing power of the CPU as efficiently as possible, taking advantage of its multiple cores and special SIMD instructions, which stands for single-instruction-multiple-data. This is achieved by defining pieces of work as separate jobs. These jobs are written like regular C# code, but then get compiled with Unity's Burst compiler, which performs aggressive optimization and parallelization, made possible by enforcing a few structural constraints that regular C# doesn't have.
Burst Package
Burst exists as a separate package, so install the latest version for your Unity version via the package manager. In my case that's Burst version 1.4.8. It has a dependency on the Mathematics package version 1.2.1, so that package will be installed as well or upgraded to version 1.2.1.
To create a job for Fractal we have to use code from the Unity.Burst, Unity.Collections, and Unity.Jobs namespaces.
using Unity.Burst;
using Unity.Collections;
using Unity.Jobs;
using UnityEngine;
Native Arrays
Jobs cannot work with objects, only simple values and struct types are allowed. It's still possible to use arrays, but we have to convert them to the generic NativeArray type. This is a struct that contains a pointer to native machine memory, which exists outside the regular managed memory heap used by our C# code. So it is sidestepping the default memory management overhead.
To create a native array of fractal parts we need to use the NativeArray<FractalPart> type. As we use multiple such arrays what we really need is an array of that. The same goes for the multiple arrays of matrices.
	NativeArray<FractalPart>[] parts;

	NativeArray<Matrix4x4>[] matrices;
We now have to create new arrays of native arrays at the beginning of OnEnable.
		parts = new NativeArray<FractalPart>[depth];
		matrices = new NativeArray<Matrix4x4>[depth];
And create new native arrays for each level, using the constructor method of the appropriate NativeArray types, which require two arguments. The first argument is the size of the array. The second argument indicates how long the native array is expected to exist. As we keep using the same arrays every frame we'll have to use Allocator.Persistent.
		for (int i = 0, length = 1; i < parts.Length; i++, length *= 5) {
			parts[i] = new NativeArray<FractalPart>(length, Allocator.Persistent);
			matrices[i] = new NativeArray<Matrix4x4>(length, Allocator.Persistent);
			matricesBuffers[i] = new ComputeBuffer(length, stride);
		}
We also have to change the variable type in the part creation loop to match.
		parts[0][0] = CreatePart(0);
		for (int li = 1; li < parts.Length; li++) {
			NativeArray<FractalPart> levelParts = parts[li];
			…
		}
And in the loop inside Update as well.
			NativeArray<FractalPart> parentParts = parts[li - 1];
			NativeArray<FractalPart> levelParts = parts[li];
			NativeArray<Matrix4x4> levelMatrices = matrices[li];
Finally, just like for compute buffers we have to explicitly free their memory when we're done with them, in OnDisable. We do this by invoking Dispose on the native arrays.
		for (int i = 0; i < matricesBuffers.Length; i++) {
			matricesBuffers[i].Release();
			parts[i].Dispose();
			matrices[i].Dispose();
		}
At this point the fractal still works the same. The only difference is that we're now using native arrays instead of managed C# arrays. This might perform worse, because accessing native arrays from managed C# code has a little extra overhead. This overhead won't exist once we use a Burst-compiled job.
Job Struct
To define a job we have to create a struct type that implements a job interface. Implementing an interface is like extending a class, except that instead of inheriting existing functionality the interface demands that you include specific functionality yourself. We'll create an UpdateFractalLevelJob struct inside Fractal that implements IJobFor, which is the most flexible job interface type.
public class Fractal : MonoBehaviour {

	struct UpdateFractalLevelJob : IJobFor {}

	…
}
The IJobFor interface requires that we add an Execute method that has an integer parameter and returns nothing. The parameter represents the iterator variable of a for loop. Everything that an interface enforces must be public, so this method must be public.
	struct UpdateFractalLevelJob : IJobFor {

		public void Execute (int i) {}
	}
The idea is that the Execute method replaces the code of the innermost loop of our Update method. To make this work all variables that are required for that code must be added as fields to UpdateFractalLevelJob. Make them public so we can set them later.
	struct UpdateFractalLevelJob : IJobFor {

		public float spinAngleDelta;
		public float scale;

		public NativeArray<FractalPart> parents;
		public NativeArray<FractalPart> parts;

		public NativeArray<Matrix4x4> matrices;

		public void Execute (int i) {}
	}
We can go a step further and use the ReadOnly and WriteOnly attributes to indicate that we only need partial access to some of the native arrays. The innermost loop only reads from the parents array and only writes to the matrices array. It both reads from and writes to the parts array, which is the default assumption so doesn't have a corresponding attribute.
		[ReadOnly]
		public NativeArray<FractalPart> parents;

		public NativeArray<FractalPart> parts;

		[WriteOnly]
		public NativeArray<Matrix4x4> matrices;
If multiple processes are modifying the same data in parallel then it becomes arbitrary which does what first. If two processes set the same array element the last one wins. If one process gets the same element that another sets, it either gets the old or the new value. The final result depends on the exact timing, over which we have no control, which can lead to inconsistent behavior that is very hard to detect and fix. These phenomena are known as race conditions. The ReadOnly attribute indicates that this data remains constant during the execution of the job, which means that processes can safely read from it in parallel because the result will always be the same.
The compiler enforces that the job doesn't write to ReadOnly data and doesn't read from WriteOnly data. If we accidentally do so anyway the compiler will let us know that we made a semantic mistake.
Executing Jobs
The Execute method will replace the innermost loop of our Update method. Copy the relevant code into the method and adjust it where needed so it uses the job's fields and parameter.
		public void Execute (int i) {
			FractalPart parent = parents[i / 5];
			FractalPart part = parts[i];
			part.spinAngle += spinAngleDelta;
			part.worldRotation =
				parent.worldRotation *
				(part.rotation * Quaternion.Euler(0f, part.spinAngle, 0f));
			part.worldPosition =
				parent.worldPosition +
				parent.worldRotation * (1.5f * scale * part.direction);
			parts[i] = part;

			matrices[i] = Matrix4x4.TRS(
				part.worldPosition, part.worldRotation, scale * Vector3.one
			);
		}
Change Update so we create a new UpdateFractalLevelJob value and set all its fields in the level loop. Then change the innermost loop so it invokes the job's Execute method. This way we keep the exact same functionality, but with the code migrated to the job.
		for (int li = 1; li < parts.Length; li++) {
			scale *= 0.5f;
			var job = new UpdateFractalLevelJob {
				spinAngleDelta = spinAngleDelta,
				scale = scale,
				parents = parts[li - 1],
				parts = parts[li],
				matrices = matrices[li]
			};
			//NativeArray<FractalPart> parentParts = parts[li - 1];
			//NativeArray<FractalPart> levelParts = parts[li];
			//NativeArray<Matrix4x4> levelMatrices = matrices[li];
			for (int fpi = 0; fpi < parts[li].Length; fpi++) {
				job.Execute(fpi);
			}
		}
But we don't have to explicitly invoke the Execute method for every iteration. The idea is that we schedule the job so it performs the loop on its own. This is done by invoking Schedule on it, with two arguments. The first is how many iterations we want, which is equal to the length of the parts array that we're processing. The second is a JobHandle struct value, which is used to enforce a sequential dependency between jobs. We'll initially use the default value for this struct—via the default keyword—which enforces no constraints.
			var job = new UpdateFractalLevelJob {
				…
			};
			job.Schedule(parts[li].Length, default);
			//for (int fpi = 0; fpi < parts[li].Length; fpi++) {
			//	job.Execute(fpi);
			//}
Schedule doesn't immediately run the job, it only schedules it for later processing. It returns a JobHandle value that can be used to track the job's progress. We can delay further execution of our code until the job is finished by invoking Complete on the handle.
job.Schedule(parts[li].Length, default).Complete();
Scheduling
At this point we're scheduling and immediately waiting until the completion of a job per level. The result is that our fractal still gets updated like before, in a sequential manner, even though we've switched to using jobs. We can relax this somewhat by delaying completion until after we've scheduled all jobs. We do this by making jobs depend on one another, passing the last job handle along to the next when we schedule. Then we invoke Complete after we finish the loop, which triggers execution of the entire job sequence.
		JobHandle jobHandle = default;
		for (int li = 1; li < parts.Length; li++) {
			scale *= 0.5f;
			var job = new UpdateFractalLevelJob {
				…
			};
			//job.Schedule(parts[li].Length, default).Complete();
			jobHandle = job.Schedule(parts[li].Length, jobHandle);
		}
		jobHandle.Complete();
We no longer need to store individual jobs in a variable at this point, we only need to keep track of the last handle.
			jobHandle = new UpdateFractalLevelJob {
				…
			}.Schedule(parts[li].Length, jobHandle);
			//jobHandle = job.Schedule(parts[li].Length, jobHandle);
The profiler will show us that the jobs can end up running on a worker thread instead of the main thread. But they might run on the main thread as well, because the main thread needs to wait for the jobs to finish anyway, so at this moment where the jobs run doesn't make a difference. Scheduled jobs can also end up running on different threads, though they still have a sequential dependency.
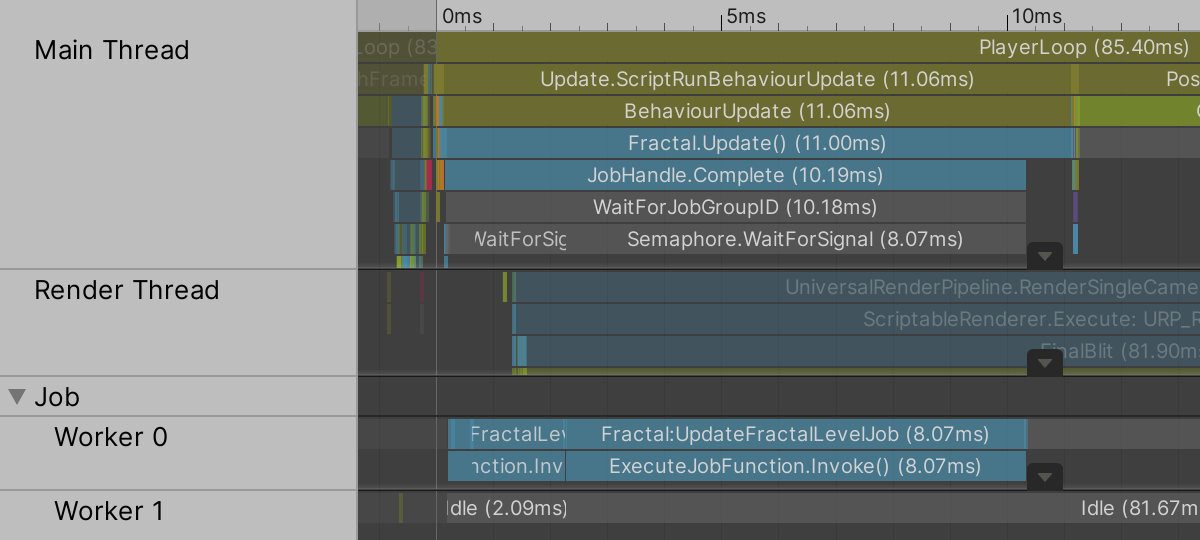
The benefit of bundling all jobs to run together and only waiting for the completion of the last one is that this makes it possible to delay waiting for completion. A common example is to schedule all jobs in Update, do some other stuff, and delay invoking Complete by doing so in a LateUpdate method, which gets invoking after all regular Update methods have finished. It's also possible to delay completion until the next frame, or even later. But we won't be doing that, as we need the jobs to complete every frame and have nothing else to do except upload the matrices to the GPU afterwards.
Burst Compilation
After all these changes we haven't seen any performance improvement yet. That's because we're currently not using the Burst compiler. We have to explicitly instruct Unity to compile our job struct with Burst, by attaching the BurstCompile attribute to it.
	[BurstCompile]
	struct UpdateFractalLevelJob : IJobFor { … }
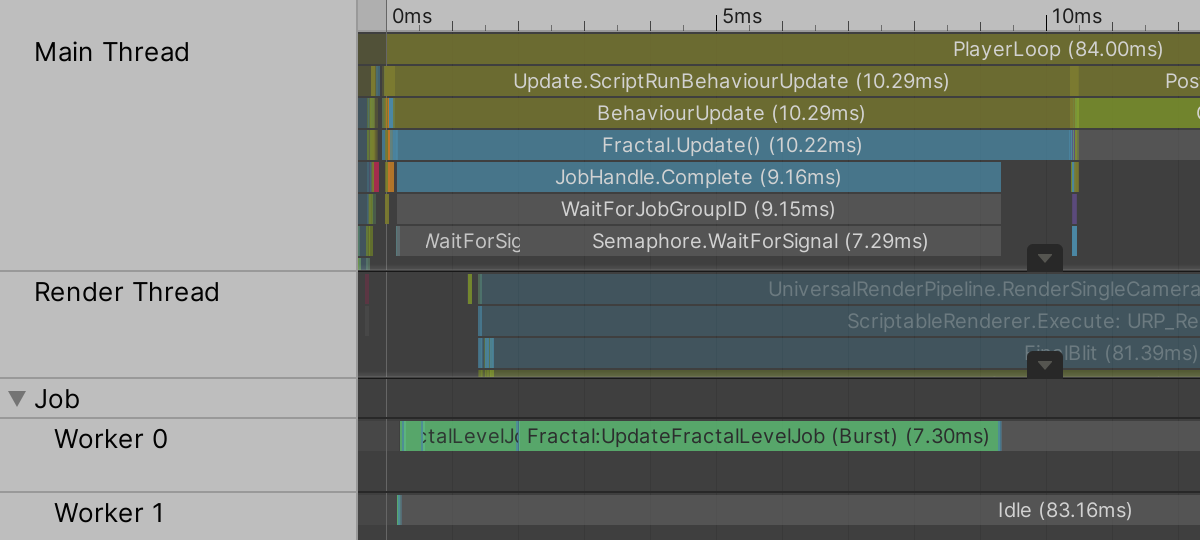
The frame debugger now indicates that we're using the Burst-compiled versions of our jobs. They run a bit faster due to optimizations applied by Burst, but there isn't much gain yet at this point.
You might notice that just after entering play mode in the editor performance is much worse. This happens because Burst compilation is on-demand in the editor, just like shader compilation is. When a job is first run it will be compiled by Burst while at the same time the regular C# compiled version is used to run the job. Once Burst compilation is finished the editor will switch to running the Burst version. We can enforce the editor to immediately compile the Burst version of a job when needed—stalling Unity until compilation is finished—by setting the CompileSynchronously property of the BurstCompile attribute to true. Properties of attributes can be set by including their assignment in their argument list.
[BurstCompile(CompileSynchronously = true)]
Just like for shader compilation this doesn't influence builds because everything is compiled during the build process.
Burst Inspector
You can inspect the assembly code generated by Burst via the Burst Inspector window, opened via Jobs / Burst / Open Inspector.... This shows you the low-level instructions generated by Burst for all jobs in the project. Our job will be included in the Compile Targets list as Fractal.UpdateFractalLevelJob - (IForJob).
I won't analyze the generated code in detail, the performance improvements have to speak for themselves. But it's useful to switch to the rightmost display mode, which is .LVM IR Optimization Diagnostic to get an idea of what Burst does. It currently contains these remarks for me:
Remark: IJobFor.cs:43:0: loop not vectorized: loop control flow is€ not understood by vectorizer
Remark: NativeArray.cs:162:0: Stores SLP vectorized with cost -3 and with tree size 2
The first remark means that Burst couldn't rewrite the code to merge multiple iterations by using SIMD instructions. The simplest example is a job that does something like data[i] = 2f * data[i]. Using SIMD instructions, Burst can change that so this operation could be performed for multiple indices at once, up to eight at the same time in the ideal case. Merging operations this way is known as vectorization, because instructions on single values are replaced with instructions on vectors.
When Burst indicates that the control flow is not understood it means that there are complex conditional blocks. We don't have those, but by default Burst safety checks are enabled, which enforce read/write attributes and detect other dependency problems between jobs, like trying to run two in parallel that write to the same arrays. These checks are for development and are removed from builds. We can also deactivate them for the Burst inspector to see the final result by disabling the Safety Checks toggle. You can also disable them per job, or for the entire project via the Jobs / Burst / Safety Checks menu. You typically keep safety checks enabled in the editor and test performance in builds, unless you want to maximize editor performance.
Remark: IJobFor.cs:43:0: loop not vectorized: call instruction cannot be vectorized
Remark: NativeArray.cs:148:0: Stores SLP vectorized with cost -3 and with tree size 2
Without safely checks Burst still cannot vectorise the loop, this time because a call instruction gets in the way. This means that there is a method invocation that Burst cannot optimize away, which can never be vectorized.
The second remark indicates that Burst found a way to vectorize multiple independent operations into a single SIMD instruction. For example, multiple additions of independent values got merged into a single vector addition. The cost of −3 indicates that this effectively eliminated three instructions.
Mathematics Library
The code that we're currently using isn't optimized for Burst. The call instructions that Burst couldn't optimize away correspond to static Quaternion methods that we invoke. Burst is specifically optimized to work with Unity's Mathematics library, which is designed with vectorization in mind.
The Mathematics library code is contained in the Unity.Mathematics namespace.
using Unity.Jobs;
using Unity.Mathematics;
using UnityEngine;
The library is designed to resembles shader mathematics code. The idea is to statically use the Unity.Mathematics.math type, just like we statically used UnityEngine.Mathf in the function library for our graph.
using Unity.Mathematics;
using UnityEngine;

using static Unity.Mathematics.math;
However, this will cause a conflict when trying to invoke some methods on the float4x4 and quaternion types, as math has methods with the exact same name as those types. This will make the compiler complain that we're trying to invoke a method on a method, which is impossible. To avoid that add using statements to indicate that when we write those words they should be interpreted as the types by default. That's done by writing using followed by a label, an assignment, and a fully-qualified type. We simply use the type names for the labels, though it is possible to use different labels.
using static Unity.Mathematics.math;
using float4x4 = Unity.Mathematics.float4x4;
using quaternion = Unity.Mathematics.quaternion;
Now replace all usage of Vector3 with float3, except for the vector that we use to scale the bounds in Update. I won't list all these changes and we'll fix the errors in a moment. Then also replace all usage of Quaternion with quaternion. Note that the only difference is that the Mathematics type isn't capitalized. After that replace all usage of Matrix4x4 with float4x4.
After that's done replace the vector direction properties of the directions array with the corresponding methods from math.
	static float3[] directions = {
		up(), right(), left(), forward(), back()
	};
We also have to adjust the initialization of the rotations array. The Mathematics library works with radians instead of degrees, so change all instances of 90f with 0.5f * PI. Besides that quaternion has separate methods for creating rotations around either the X, Y, or Z axis, which are more efficient than the general-purpose Euler method.
	static quaternion[] rotations = {
		quaternion.identity,
		quaternion.RotateZ(-0.5f * PI), quaternion.RotateZ(0.5f * PI),
		quaternion.RotateX(0.5f * PI), quaternion.RotateX(-0.5f * PI)
	};
We have to convert the spin angle delta in Update to radians as well.
float spinAngleDelta = 0.125f * PI * Time.deltaTime;
The next step is to adjust UpdateFractalLevelJob.Execute. First replace the Euler method invocation with the faster RotateY variant. Then replace all multiplications involving quaternions with invocations of the mul method. Finally, we can create a uniform scale vector by invoking the math.float3€ method with the scale as a single argument.
			part.worldRotation = mul(parent.worldRotation,
				mul(part.rotation, quaternion.RotateY(part.spinAngle))
			);
			part.worldPosition =
				parent.worldPosition +
				mul(parent.worldRotation, 1.5f * scale * part.direction);
			parts[i] = part;

			matrices[i] = float4x4.TRS(
				part.worldPosition, part.worldRotation, float3€(scale)
			);
Adjust the update code for the root part in Update i in the same way.
		rootPart.worldRotation = mul(transform.rotation,
			mul(rootPart.rotation, quaternion.RotateY(rootPart.spinAngle))
		);
		rootPart.worldPosition = transform.position;
		parts[0][0] = rootPart;
		float objectScale = transform.lossyScale.x;
		matrices[0][0] = float4x4.TRS(
			rootPart.worldPosition, rootPart.worldRotation, float3€(objectScale)
		);
At this point the Burst inspector will no longer complain about the call instruction (note: it might still complain in more recent Unity versions, but this isn't a big issue). It still cannot vectorize the loop, because a return type cannot be vectorized. This is the case because our data is too large to vectorize multiple iterations of our loop. This is fine, Burst can still vectorize lots of operations of a single iteration because we use the Mathematics library, although the Burst inspector won't mention this.
Remark: quaternion.cs:330:0: loop not vectorized: instruction return type cannot be vectorized
Remark: NativeArray.cs:162:0: Stores SLP vectorized with cost -6 and with tree size 2
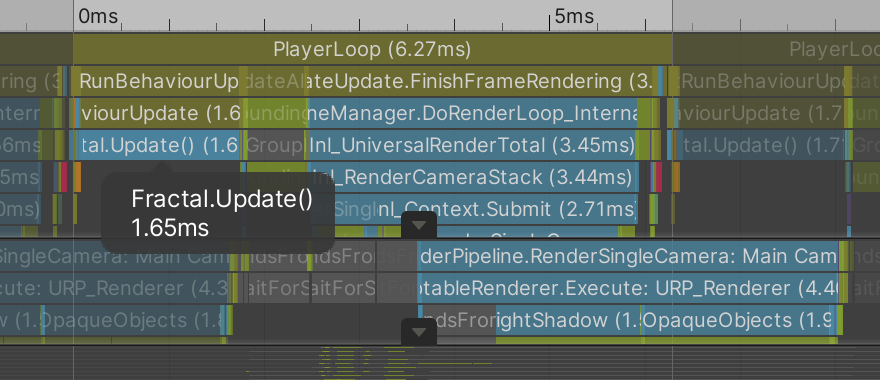
At this point Update only takes 5.5ms on average in a build, for a depth 8 fractal. So we've roughly doubled our update speed compared to the non-job approach. We can go even faster by enabling more Burst optimizations, by passing two arguments to the BurstCompile constructor method. These are regular constructor arguments and must be written before the property assignment.
We'll use FloatPrecision.Standard for the first argument and FloatMode.Fast for the second argument. The fast mode allows Burst to reorder mathematical operations, for example rewriting a + b * c to b * c + a. This can improve performance because there are madd—multiply-add—instructions, which are faster to use than a separate add instruction followed by a multiplication. The shader compiler does this by default. Often reordering operations makes no logical difference, but because of floating-point limitations changing the order will produce slightly different results. You can assume that these differences don't matter, so always enable this optimization unless you have a good reason not to.
[BurstCompile(FloatPrecision.Standard, FloatMode.Fast, CompileSynchronously = true)]
The result is a further decrease of the update duration, down to roughly 4.5ms on average.
Sending Less Data
The bottom row of our transformation matrices always contains the same vector: (0, 0, 0, 1). As it's always the same we can discard it, reducing the size of our matrices data by 25%. This means both less memory usage and less data transfer from CPU to GPU.
Begin by replacing all usage of float4x4 with float3x4, which represents a matrix with three rows and four columns. Then decrease the stride of the compute buffer from sixteen to twelve floats in OnEnable.
int stride = 12 * 4;
There is no TRS method for float3x4, we have to assemble the matrix ourselves in Execute. This is done by first creating a 3×3 matrix for rotation and scale, by invoking float3x3€ with the rotation, then factoring the scale into it. The final matrix is created by invoking float3x4€ with four column vectors, which are the three columns of the 3×3 matrix—stored in its c0, c1, and c2 fields—followed by the part's position.
			float3x3 r = float3x3€(part.worldRotation) * scale;
			matrices[i] = float3x4€(r.c0, r.c1, r.c2, part.worldPosition);
Do the same for the root part in Update.
		float3x3 r = float3x3€(rootPart.worldRotation) * objectScale;
		matrices[0][0] = float3x4€(r.c0, r.c1, r.c2, rootPart.worldPosition);
As we're not invoking a method on the float3x4 type there is no conflict with the math.float3x4€ method, so we don't need a using statement for it, nor for float4x4.
//using float3x4 = Unity.Mathematics.float3x4;
Finally, adjust ConfigureProcedural so we copy the matrix row by row, adding the missing one.
#if defined(UNITY_PROCEDURAL_INSTANCING_ENABLED)
	StructuredBuffer<float3x4> _Matrices;
#endif

void ConfigureProcedural () {
	#if defined(UNITY_PROCEDURAL_INSTANCING_ENABLED)
		float3x4 m = _Matrices[unity_InstanceID];
		unity_ObjectToWorld._m00_m01_m02_m03 = m._m00_m01_m02_m03;
		unity_ObjectToWorld._m10_m11_m12_m13 = m._m10_m11_m12_m13;
		unity_ObjectToWorld._m20_m21_m22_m23 = m._m20_m21_m22_m23;
		unity_ObjectToWorld._m30_m31_m32_m33 = float4(0.0, 0.0, 0.0, 1.0);
	#endif
}
After this change my average Update duration is down to 4ms. So I gained half a millisecond by only storing and transferring the minimum amount of data.
Using Multiple Cores
We've reached the endpoint of optimization for a single CPU core, but we can go further. When updating the graph all parent parts have to be updated before their child parts are updated, so we cannot get rid of the sequential dependency between our jobs. But all parts of the same level are independent and can be updated in any order, even in parallel. This means that we could spread the work of a single job over multiple CPU cores. That is done by invoking ScheduleParallel on a job instead of Schedule. This method requires a new second argument, which indicates the batch count. Let's initially set it to 1 and see what happens.
			jobHandle = new UpdateFractalLevelJob {
				…
			}.ScheduleParallel(parts[li].Length, 1, jobHandle);
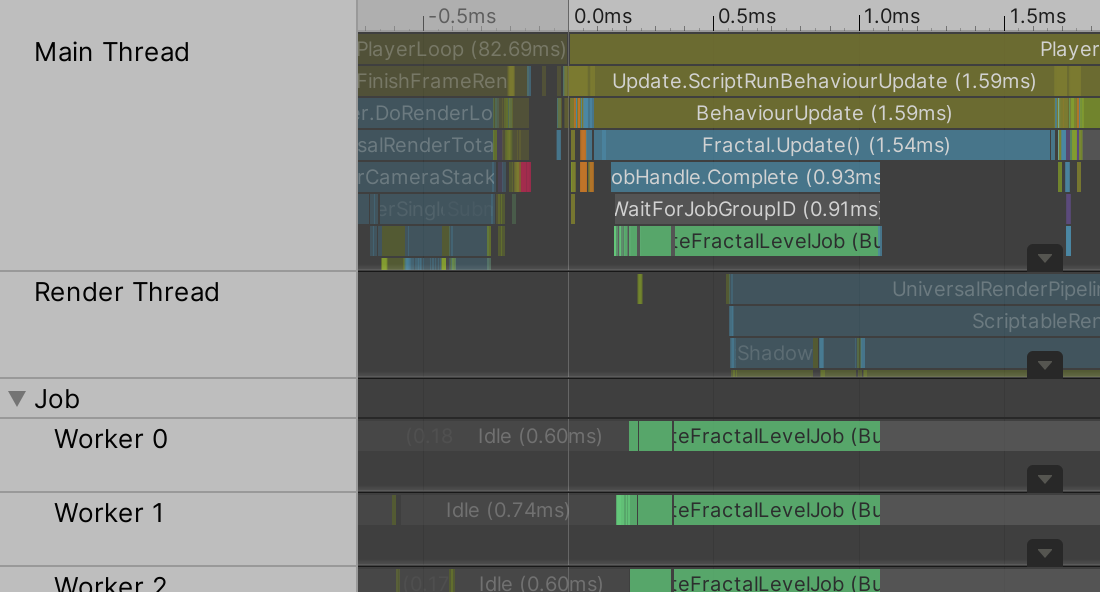
Our jobs now get broken up and run on multiple CPU cores that update our fractal parts in parallel. In my case that reduces the total Update time to 1.9ms on average. How much of a reduction you get depends on how many CPU cores are available, which is limited by your hardware and how many other processes have claimed a thread.
The batch count controls how the iterations get allocated to threads. Each thread loops through a batch, performs a little bookkeeping, and then loops through another batch, until the work is finished. The rule of thumb is that when Execute does little work you should try a large batch count and when Execute does a lot of work you should try a small batch count. In our case Execute does quite a bit of work, so a batch count of 1 is a reasonable default. But as we give each part five children let's try a batch count of 5.
			jobHandle = new UpdateFractalLevelJob {
				…
			}.ScheduleParallel(parts[li].Length, 5, jobHandle);
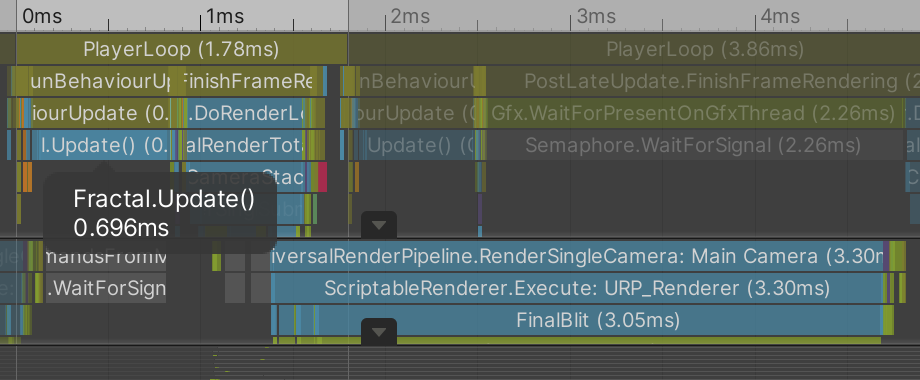
This further reduced my average Update time to 1.7ms. Using a larger batch count didn't improve things further and even made it a little slower, so I left it at 5.
Final Performance
If we evaluate the performance of our fully Burst-optimized fractal now we find that the update duration has become insignificant. The GPU is always the bottleneck. When rendering spheres we get no higher frame rates than before. But when rendering cubes we now exceed 100FPS with both RPs for depth 8 fractal.
| Depth | MS | URP | BRP |
|---|---|---|---|
| 6 | 0.1 | 480 | 180 |
| 7 | 0.26 | 360 | 160 |
| 8 | 1.7 | 160 | 110 |
The next tutorial is Organic Variety.