More Complex Levels
Spawn, Kill, and Life Zones
- Make spawning automatic.
- Create zones antithetical to or essential for life.
- Control which zones affect which shapes.
- Centralize level object updates and add editor support.
- Use partial classes.
This is the twelfth and final tutorial in a series about Object Management. It covers the addition of kill zones and more strict management of level objects.
This tutorial is made with Unity 2017.4.12f1.
Automatic Spawn Zones
To kill shapes they must first be spawned. We already have spawn zones, but they are inert by default. The player has to increase the creation speed or spawn shapes manually. To show off the interaction between spawn and kill zones it would be convenient if the spawn zones could activate on their own.
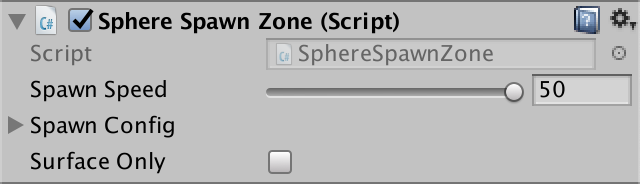
Spawn Speed
Not all spawn zones need to be always active. There can be a distinction between automatic and manual zones. So let's add a spawn speed configuration option to SpawnZone. Give it a slider with a pretty big range, like 0–50.
	[SerializeField, Range(0f, 50f)]
	float spawnSpeed;
To make this work SpawnZone now needs to keep track of its spawn progress and update it in a FixedUpdate method, just like Game does.
	float spawnProgress;

	…

	void FixedUpdate () {
		spawnProgress += Time.deltaTime * spawnSpeed;
		while (spawnProgress >= 1f) {
			spawnProgress -= 1f;
			SpawnShapes();
		}
	}
Saving Progress
From now on, spawn zones must also keep track of their spawn progress when saving the game. Add the required Save and Load methods for that.
	public override void Save (GameDataWriter writer) {
		writer.Write(spawnProgress);
	}

	public override void Load (GameDataReader reader) {
		spawnProgress = reader.ReadFloat();
	}
Every spawn zone that has a positive spawn speed must be included in the persistent object list of its level, otherwise it won't be saved and loaded.
Note that a zone can be both automatic and controlled by the player. The two don't interfere.
Composite Spawn Zones
CompositeSpawnZone already had its own Save and Load methods, because it has to keep track of its next sequential index. We have to make sure that these methods invoke their base versions, so the spawn progress of a composite zone also gets saved.
	public override void Save (GameDataWriter writer) {
		base.Save(writer);
		writer.Write(nextSequentialIndex);
	}

	public override void Load (GameDataReader reader) {
		base.Load(reader);
		nextSequentialIndex = reader.ReadInt();
	}
But old save files don't include the spawn progress, so we should only do this for new save games, which will be version 7.
	public override void Load (GameDataReader reader) {
		if (reader.Version >= 7) {
			base.Load(reader);
		}
		nextSequentialIndex = reader.ReadInt();
	}
Increment the save version in Game to match.
const int saveVersion = 7;
Kill Zones
A kill zone is a space that kills all shapes that enter it. This means that we have to figure out whether a shape entered a zone. We can use collider triggers and Unity's 3D physics engine for game objects to detect this.
Physics Trigger
Create a new KillZone component type and give it an OnTriggerEnter method with a Collider parameter. That method will get invoked when something enters the trigger attached to the game object that has this component, with the entering collider as an argument.
using UnityEngine;

public class KillZone : MonoBehaviour {

	void OnTriggerEnter (Collider other) {}
}
In this method, retrieve the Shape component from the collider. If it exists, make it die.
	void OnTriggerEnter (Collider other) {
		var shape = other.GetComponent<Shape>();
		if (shape) {
			shape.Die();
		}
	}
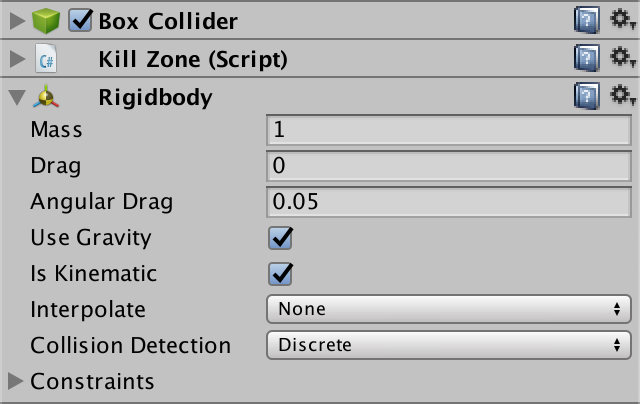
Now we can create a kill zone by adding an empty game object to a level and giving it a collider and a kill zone component. It has to be a specific kind of collider, for example a box or sphere collider. Make sure that you enable its Is Trigger option.
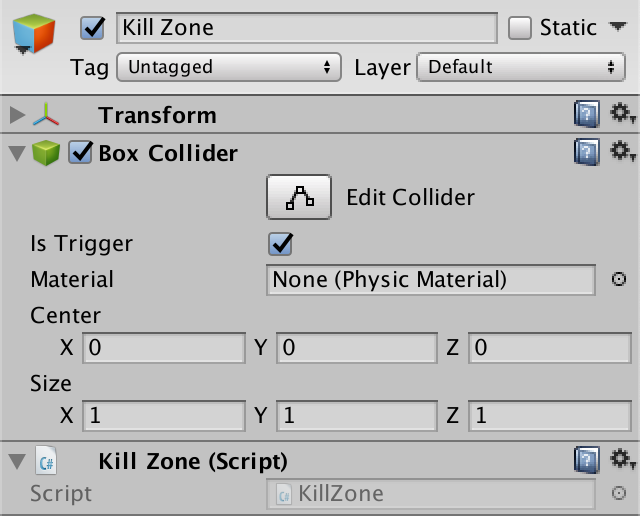
That's not enough to detect entering shapes. Although both the zone and all shapes have colliders, at least one of each much have a rigidbody component attached before the physics engine will make them interact. It doesn't matter which gets the rigidbody, so let's add it to the zone, to keep the shapes as simple as possible.
Adding a rigidbody to something will make it act like a physical object, which includes being affected by gravity. We don't want that, so enable the Is Kinematic option of the rigidbody. That indicates that the object is immovable as far as the physics engine is concerned.
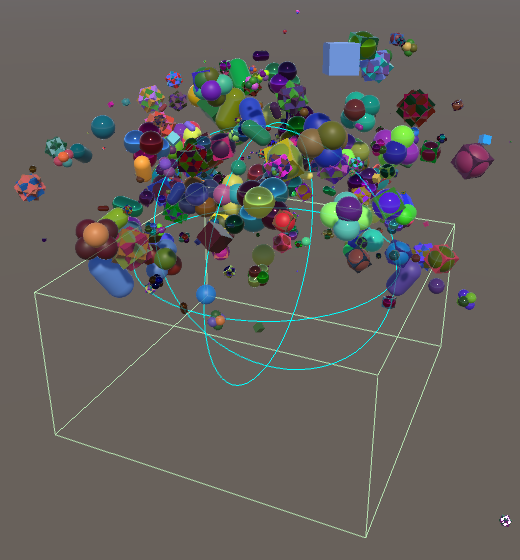
Now shapes that enter the zone immediately die, both when they move into or spawn in the zone. So you can use it to both cut holes in spawn zones and get rid of shapes that move into a forbidden area.
Slow Death
The effect of a kill zone doesn't need to be immediate. As with the manual or automatic destruction of shapes, we can add a dying duration to the zone. If this duration is positive then we add a dying behavior to the shape instead.
	[SerializeField]
	float dyingDuration;

	void OnTriggerEnter (Collider other) {
		var shape = other.GetComponent<Shape>();
		if (shape) {
			if (dyingDuration <= 0f) {
				shape.Die();
			}
			else {
				shape.AddBehavior<DyingShapeBehavior>().Initialize(
					shape, dyingDuration
				);
			}
		}
	}
Again, we'll only do that if the shape isn't already dying.
			else if (!shape.IsMarkedAsDying) {
				shape.AddBehavior<DyingShapeBehavior>().Initialize(
					shape, dyingDuration
				);
			}

Animated Kill Zones
Like spawn zones, kill zone don't need to be fixed in place. They can be animated by making them a child of a rotating object.
Life Zones
We can also take the concept of a kill zone and invert it. The result is a zone in which objects survive, but die as soon as they leave. This works exactly the same, except we need to use an OnTriggerExit method instead of OnTriggerEnter. Duplicate KillZone and turn it into a LifeZone component type with this change.
using UnityEngine;

public class LifeZone : MonoBehaviour {

	[SerializeField]
	float dyingDuration;

	void OnTriggerExit (Collider other) {
		var shape = other.GetComponent<Shape>();
		if (shape) {
			if (dyingDuration <= 0f) {
				shape.Die();
			}
			else if (!shape.IsMarkedAsDying) {
				shape.AddBehavior<DyingShapeBehavior>().Initialize(
					shape, dyingDuration
				);
			}
		}
	}
}
Note that life zones only affect shapes that leave, which means that they must first enter. Thus, shapes that are spawned outside the zone are unaffected by it. But once they enter the zone leaving will mean death.
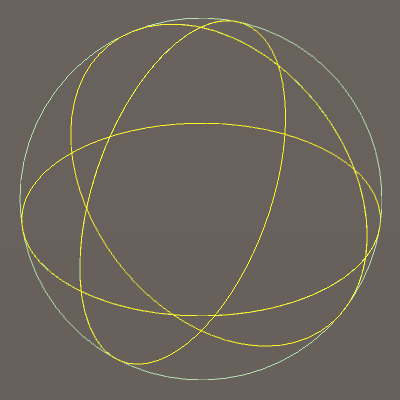
Gizmos
Just like for spawn zones, it's convenient to have a visual indication where kill and life zones are when designing a level. So let's give each an OnDrawGizmos method as well. But while each spawn zone has its own shape, the kill and life zones are defined by their collider. So we have to retrieve the collider and then figure out what type it is. First create a method for KillZone, with a magenta color.
	void OnDrawGizmos () {
		Gizmos.color = Color.magenta;
		Gizmos.matrix = transform.localToWorldMatrix;
		var c = GetComponent<Collider>();
	}
Let's support box and sphere colliders, as they're easiest. Try to cast the collider to BoxCollider. If that works, draw a wire cube and return. If that fails, try SphereCollider. If you want to support more visualizations you'd add them after that.
		var c = GetComponent<Collider>();
		var b = c as BoxCollider;
		if (b != null) {
			Gizmos.DrawWireCube(b.center, b.size);
			return;
		}
		var s = c as SphereCollider;
		if (s != null) {
			Gizmos.DrawWireSphere(s.center, s.radius);
			return;
		}
Copy the method to LifeZone and change the color to yellow.
	void OnDrawGizmos () {
		Gizmos.color = Color.yellow;
		…
	}
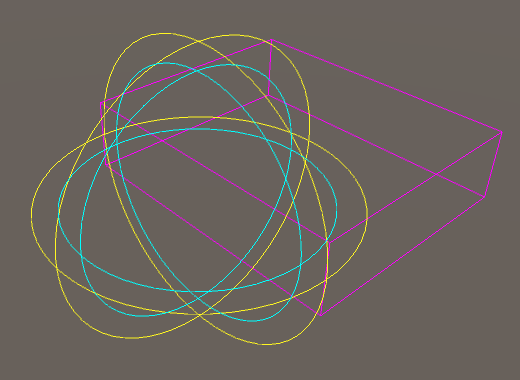
Colliders and Scale
The gizmos appear to work correctly, but things go wrong when you give a zone a scale that isn't uniform. Try this with a sphere collider. Our gizmo deforms as expected, but the collider visualization remains a sphere. This happens because the physics engine doesn't support deformed colliders. When playing, you'll find that indeed the collider's visualization matches the space affected by the zone.
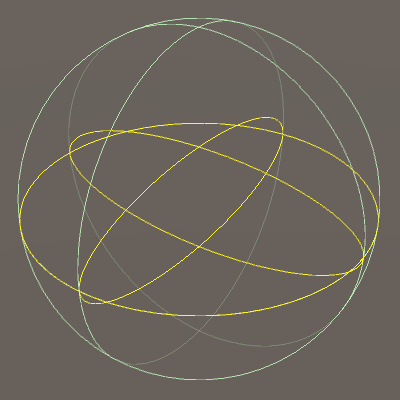
What ends up happening is that the maximum absolute component of the collider's scale is used as its uniform scale. To reproduce this we have to create our own transformation matrix for the sphere gizmo. First, remove the usage of localToWorldMatrix.
//Gizmos.matrix = transform.localToWorldMatrix;
Then construct a custom matrix using the Matrix4x4.TRS method, with the world-space position, rotation, and lossy scale as separate arguments. Do this for both the box and sphere collider. That's enough to fix the box, but the sphere will need more work.
		if (b != null) {
			Gizmos.matrix = Matrix4x4.TRS(
				transform.position, transform.rotation, transform.lossyScale
			);
			Gizmos.DrawWireCube(b.center, b.size);
			return;
		}
		var s = c as SphereCollider;
		if (s != null) {
			Vector3 scale = transform.lossyScale;
			Gizmos.matrix = Matrix4x4.TRS(
				transform.position, transform.rotation, scale
			);
			Gizmos.DrawWireSphere(s.center, s.radius);
			return;
		}
Next, set the sphere's scale to the maximum absolute component of the lossy scale.
			Vector3 scale = transform.lossyScale;
			scale = Vector3.one * Mathf.Max(
				Mathf.Abs(scale.x), Mathf.Abs(scale.y), Mathf.Abs(scale.z)
			);
Apply the same changes to both KillZone and LifeZone.
Shape Colliders
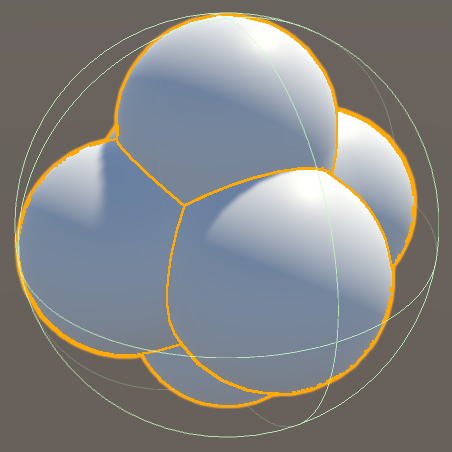
While we're dealing with colliders, let's take a look at the colliders used by our shapes. The simple shapes are fine, but the complex shapes each consist of multiple objects, so also have multiple colliders. The trigger event method will get invoked for all their colliders, but only the collider attached to the root game object that has the Shape component will cause death. For example, only one of the colliders of the composite capsule is used.

We can solve this by removing the colliders from the two child objects and adding them to the root object. But we can go a step further. We only care about interaction with zones, which doesn't need to be very precise. So we can make do with a single sphere collider instead, which reduces the memory footprint of the shape and speeds up the physics engine.
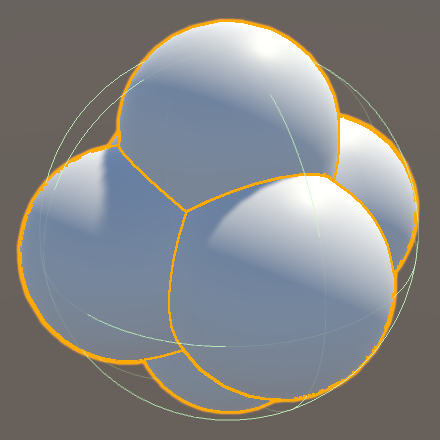
A default sphere collider will fit the entire shape inside it, but extends quite a bit beyond most of it. So let's reduce its radius to 0.9.
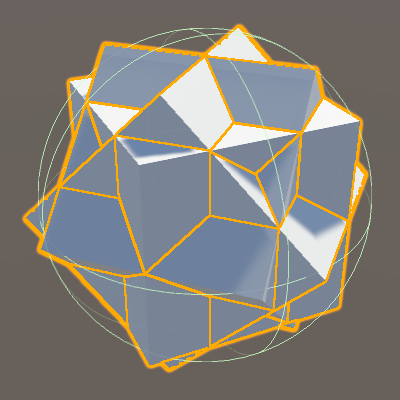
Likewise, we can make do with a single sphere collider for the composite cube, with a radius of 0.8.
And in case of the cube-with-sphere shape we can simply remove the sphere collider of its child object, using only the box collider.
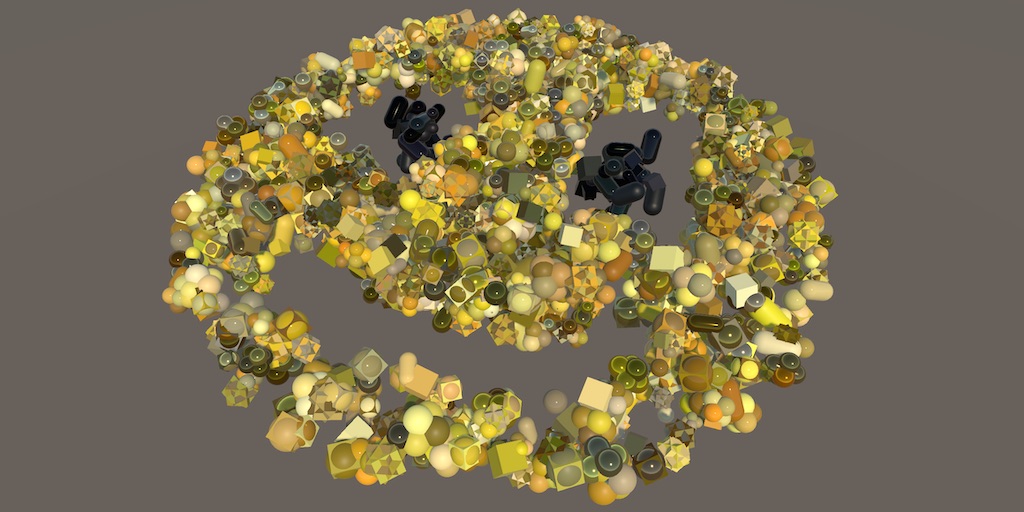
Layers
By mixing spawn, kill, and life zones we can create interesting shape patterns and behavior, but we're limited by the fact that the kill and life zones affect all shapes that touch them. For example, we cannot currently create a region where some shapes can live while others will die. But it is possible to use layers to control which physics entities are able to interact. So all we have to do is assign layers to shapes and zones.
Instead of defining the layer per shape prefab, we'll define them per spawn zone. The zone's layer can be set in the top of the inspector window.

When SpawnZone spawns a shape, have it move the shape to its own layer. That can be done by copying the layer property from one game object to the other.
	public virtual void SpawnShapes () {
		int factoryIndex = Random.Range(0, spawnConfig.factories.Length);
		Shape shape = spawnConfig.factories[factoryIndex].GetRandom();
		shape.gameObject.layer = gameObject.layer;
		…
	}

	void CreateSatelliteFor (Shape focalShape, Vector3 lifecycleDurations) {
		int factoryIndex = Random.Range(0, spawnConfig.factories.Length);
		Shape shape = spawnConfig.factories[factoryIndex].GetRandom();
		shape.gameObject.layer = gameObject.layer;
		…
	}
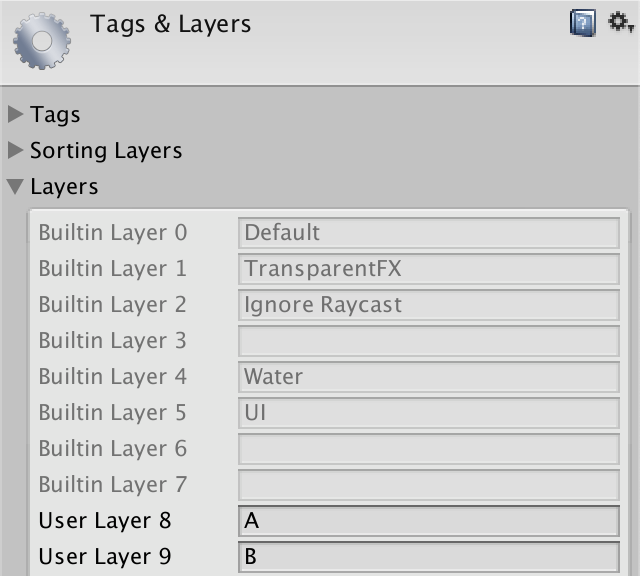
Unity has a few predefined layers that all interact with each other. We'll leave those unchanged and instead add some new layers. That's done via the Tags & Layers window, which you can open via the Layer dropdown menu of a game object and choosing the Add Layer... option. I'll just add two layers, named A and B.
Which layers interact can be adjusted via the Physics window under Edit / Project Settings. It contains a matrix with interaction toggles. Disabled the interaction of the relevant layers.
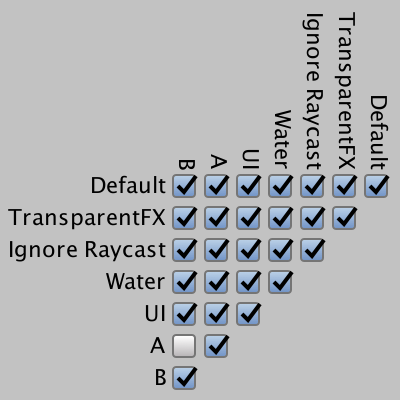
Now you can control which shapes are killed by which zones. Shapes spawned by A zones are killed by A zones, but not by B zones, and vice versa. Shapes spawned by zones on the default layer are killed by both A and B zones. And zones on the default layer kill all shapes.
Updating Level Objects
Having lots of automatic spawn zones and rotating objects means that Unity is once again invoking FixedUpdate methods on multiple objects. Like we did for shapes, we can also consolidate those invocations with our own GameUpdate approach. Besides being a potential performance improvement for complex levels, this also makes it possible to exactly control the update order of everything in our game.
Game Level Objects
Introduce a new GameLevelObject type, which extends PersistableObject and adds a virtual GameUpdate method.
public class GameLevelObject : PersistableObject {

	public virtual void GameUpdate () {}
}
Change RotatingObject so it extends GameLevelObject instead of PersistableObject. Then change its FixedUpdate method so it becomes GameUpdate.
public class RotatingObject : GameLevelObject {

	[SerializeField]
	Vector3 angularVelocity;

	//void FixedUpdate () {
	public override void GameUpdate () {
		transform.Rotate(angularVelocity * Time.deltaTime);
	}
}
Do the same for SpawnZone.
public abstract class SpawnZone : GameLevelObject {

	…

	//void FixedUpdate () {
	public override void GameUpdate () {
		spawnProgress += Time.deltaTime * spawnSpeed;
		while (spawnProgress >= 1f) {
			spawnProgress -= 1f;
			SpawnShapes();
		}
	}

	…
}
If you have other active level object types, change those too.
Refactoring Game Level
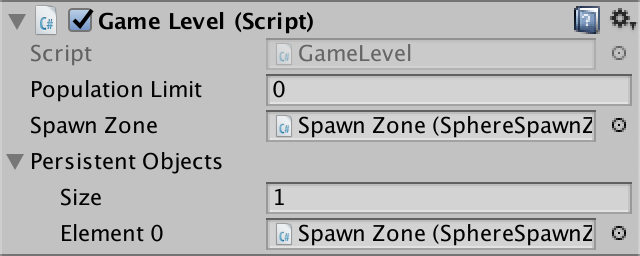
To make the level objects update again we have to invoke their GameUpdate methods. To make that possible, change the type of the GameLevel.persistentObjects elements to GameLevelObject. Because it extends PersistableObject all references in the level scenes remain intact.
	[SerializeField]
	GameLevelObject[] persistentObjects;

	…

	void OnEnable () {
		Current = this;
		if (persistentObjects == null) {
			persistentObjects = new GameLevelObject[0];
		}
	}
As the persistentObject name is no longer accurate, it makes sense to refactor rename the field to levelObjects. However, if we do that the scenes will lose their data. To prevent that, we can tell Unity that we want it to use the old data, if it still exists in the scene asset. That's done by giving it the FormerlySerializedAs attribute from the UnityEngine.Serialization namespace, with its old name as a string argument.
	[UnityEngine.Serialization.FormerlySerializedAs("persistentObjects")]
	[SerializeField]
	GameLevelObject[] levelObjects;

Updating the Objects
It is now up to GameLevel to update all its level objects. Give it its own public GameUpdate method for this purpose.
	public void GameUpdate () {
		for (int i = 0; i < levelObjects.Length; i++) {
			levelObjects[i].GameUpdate();
		}
	}
Finally, have Game invoke the current level's GameUpdate method, as part of its update loop. Update the level after the shapes, so shapes that are automatically spawned aren't immediately updated.
	void FixedUpdate () {
		inGameUpdateLoop = true;
		for (int i = 0; i < shapes.Count; i++) {
			shapes[i].GameUpdate();
		}
		GameLevel.Current.GameUpdate();
		inGameUpdateLoop = false;

		…
	}
Editing Game Level Objects
Centralizing the update of level objects gives us total control, but it also requires that we keep the level objects array of each level up to date. We have to do this manually, but we can add a little editor functionality to make this easier.
Missing Objects
If we forget to add a level object to the array the level is still valid. The object just won't update, which we should notice soon enough. But when designing a level it's not uncommon to delete objects, which causes trouble if they've been added to the array. The missing objects create holes that will generate exceptions in play mode.
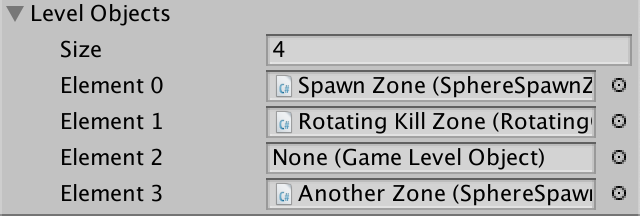
We could have GameLevel skip missing objects, but such errors should be taken care of during the design process. Checking the inspector of the level object should be sufficient to spot missing objects, but they can be hard to notice. So let's make it more obvious.
First, we need a way to determine that we have missing level objects. Add a HasMissingLevelObjects getter property that checks this, returning true when a hole is found and false otherwise. As we'll use the property in the Unity editor the levelObjects array might not exist yet, so we'll have to check that too.
	public bool HasMissingLevelObjects {
		get {
			if (levelObjects != null) {
				for (int i = 0; i < levelObjects.Length; i++) {
					if (levelObjects[i] == null) {
						return true;
					}
				}
			}
			return false;
		}
	}
Next, create a custom inspector class for GameLevel in an Editor folder. That's done by extending Editor and attaching the CustomEditor attribute to it with the GameLevel type as an argument. We'll tweak the inspector by overriding the OnInspectorGUI method. We reproduce the default inspector by invoking DrawDefaultInspector.
using UnityEditor;
using UnityEngine;

[CustomEditor(typeof(GameLevel))]
public class GameLevelInspector : Editor {

	public override void OnInspectorGUI () {
		DrawDefaultInspector();
	}
}
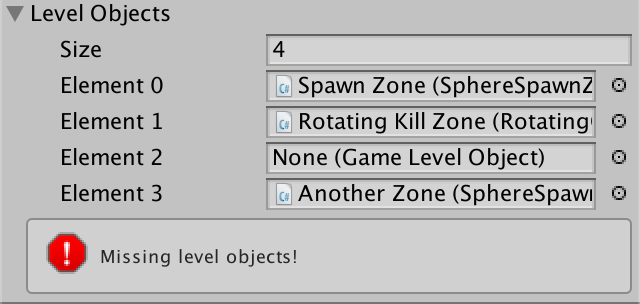
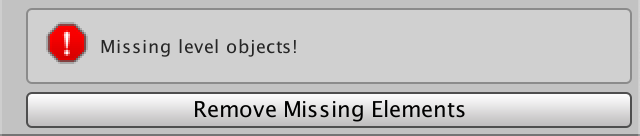
The component being edited can be accessed via the target property. After casting it to GameLevel we can check whether it has missing level objects. If so, make this visually obvious by showing an error message underneath the default inspector. That's done by invoking EditorGUILayout.HelpBox with a string and the error message type.
		DrawDefaultInspector();

		var gameLevel = (GameLevel)target;
		if (gameLevel.HasMissingLevelObjects) {
			EditorGUILayout.HelpBox("Missing level objects!", MessageType.Error);
		}
Removing Missing Elements
Level objects should never be removed, because that would make it impossible to load old data of the level. But when designing an unreleased level we can do as we like. As we're already showing a message when there are missing objects, let's go a step further and also provide a simple way to get rid of all the holes in the array.
Add a public RemoveMissingLevelObjects method to GameLevel. Begin by looping through the array and only counting the holes.
	public void RemoveMissingLevelObjects () {
		int holes = 0;
		for (int i = 0; i < levelObjects.Length; i++) {
			if (levelObjects[i] == null) {
				holes += 1;
			}
		}
	}
Each time we encounter a hole we have to close it, by shifting the rest of the array up one element. We can do that by invoking the System.Array.Copy method. Its first and third arguments are the source and destination array, which are both levelObjects in this case. Its second argument is the index to start copying from and the fourth argument is the first index where it should be copied to. Its final argument is the amount of elements to copy, which is the array's length minus the iterator and the hole.
			if (levelObjects[i] == null) {
				holes += 1;
				System.Array.Copy(
					levelObjects, i + 1, levelObjects, i,
					levelObjects.Length - i - 1
				);
			}
Each time we encounter a hole we shift the array, so we should again visit the same index in case we shifted another hole into it. So decrement the iterator after copying. But we've dealt with one element so should reduce the amount of iterations to match. That can be done by subtracting the amount of holes encountered so far from the array's length in the loop's condition. Likewise, we don't have to copy redundant elements at the end of the array, which we can avoid by subtracting all holes from the amount to copy, instead of always subtracting just one.
		for (int i = 0; i < levelObjects.Length - holes; i++) {
			if (levelObjects[i] == null) {
				holes += 1;
				System.Array.Copy(
					levelObjects, i + 1, levelObjects, i,
					levelObjects.Length - i - holes
				);
				i -= 1;
			}
		}
Once we're done with that we have to get rid of the redundant tail of the array, by reducing its length by the number of holes. We can use System.Array.Resize for that, with the array as a reference parameter along with its new length.
		for (int i = 0; i < levelObjects.Length - holes; i++) {
			…
		}
		System.Array.Resize(ref levelObjects, levelObjects.Length - holes);
Add a button underneath the error message in our custom inspector, by invoking GUILayout.Button with a label. It returns true when the button got pressed, in which case we'll invoke our new RemoveMissingLevelObjects method.
			EditorGUILayout.HelpBox("Missing level objects!", MessageType.Error);
			if (GUILayout.Button("Remove Missing Elements")) {
				gameLevel.RemoveMissingLevelObjects();
			}
To make this work with Unity's undo system, invoke Undo.RecordObject with the game level and a label before making the change.
			if (GUILayout.Button("Remove Missing Elements")) {
				Undo.RecordObject(gameLevel, "Remove Missing Level Objects.");
				gameLevel.RemoveMissingLevelObjects();
			}
The idea is that RemoveMissingLevelObjects only gets invoked while editing the level. Let's enforce that by checking whether Application.isPlayer returns true. If so, log an error and abort the method.
	public void RemoveMissingLevelObjects () {
		if (Application.isPlaying) {
			Debug.LogError("Do not invoke in play mode!");
			return;
		}

		…
	}
Registering Game Level Objects
We can also make it easier to add level objects to level's array. Add a public RegisterLevelObject method to GameLevel for that, with a level object parameter. If there isn't a levelObjects array yet, create one with the provided object. Otherwise, increase the size of the array by one and assign the object to its last element. Again, we only support this while not in play mode.
	public void RegisterLevelObject (GameLevelObject o) {
		if (Application.isPlaying) {
			Debug.LogError("Do not invoke in play mode!");
			return;
		}

		if (levelObjects == null) {
			levelObjects = new GameLevelObject[] { o };
		}
		else {
			System.Array.Resize(ref levelObjects, levelObjects.Length + 1);
			levelObjects[levelObjects.Length - 1] = o;
		}
	}
Each level object should only be included in the array once. Add a public HasLevelObject method to check whether the array already contains the provided object. That makes it possible to check if it is correct to invoke RegisterLevelObject, but also have that method verify this on its own and abort if needed.
	public bool HasLevelObject (GameLevelObject o) {
		if (levelObjects != null) {
			for (int i = 0; i < levelObjects.Length; i++) {
				if (levelObjects[i] == o) {
					return true;
				}
			}
		}
		return false;
	}

	public void RegisterLevelObject (GameLevelObject o) {
		if (Application.isPlaying) {
			Debug.LogError("Do not invoke in play mode!");
			return;
		}

		if (HasLevelObject(o)) {
			return;
		}

		…
	}
Register Menu Item
We're going to add an item to Unity's menu to register a selected level object to the appropriate game level. Let's put the code for the menu item in its own static class, inside an Editor folder. The menu item is created by attaching the MenuItem attribute to a static method, with the item's menu path as an argument. We'll make it available via GameObject / Register Level Object.
using UnityEditor;
using UnityEngine;

static class RegisterLevelObjectMenuItem {

	[MenuItem("GameObject/Register Level Object")]
	static void RegisterLevelObject () {}
}
The currently selected game object can be accessed via Selection.activeGameObject.
	static void RegisterLevelObject () {
		GameObject o = Selection.activeGameObject;
	}
If there is no such object, log a warning and abort.
		GameObject o = Selection.activeGameObject;

		if (o == null) {
			Debug.LogWarning("No level object selected.");
			return;
		}
If a game object is selected, it's either a scene object or part of a prefab asset. We can only register objects in scenes, so should abort if it turns out to be a prefab. We can check that by invoking PrefabUtility.GetPrefabType with the object as an argument. If the result indicates a prefab then we should abort after logging a warning. Provide the object as an additional parameter when logging, so it gets temporarily highlighted in the editor.
		if (o == null) {
			Debug.LogWarning("No level object selected.");
			return;
		}

		if (PrefabUtility.GetPrefabType(o) == PrefabType.Prefab) {
			Debug.LogWarning(o.name + " is a prefab asset.", o);
			return;
		}
Next, get the GameLevelObject component. If there isn't one, abort.
		if (PrefabUtility.GetPrefabType(o) == PrefabType.Prefab) {
			Debug.LogWarning(o.name + " is a prefab asset.", o);
			return;
		}

		var levelObject = o.GetComponent<GameLevelObject>();
		if (levelObject == null) {
			Debug.LogWarning(o.name + " isn't a game level object.", o);
			return;
		}
If we got this far, we must find the appropriate game level to register to. We're going to assume that the level object is always a root object of its scene. Get the object's scene via its scene property. Then loop through the scene's root object array, accessible via its GetRootGameObjects method. If a game level is found, return for now. Otherwise, log a warning.
		if (levelObject == null) {
			Debug.LogWarning(o.name + " isn't a game level object.", o);
			return;
		}

		foreach (GameObject rootObject in o.scene.GetRootGameObjects()) {
			var gameLevel = rootObject.GetComponent<GameLevel>();
			if (gameLevel != null) {
				return;
			}
		}
		Debug.LogWarning(o.name + " isn't part of a game level.", o);
If we found the game level, check whether the object has already been registered and abort if that is the case.
		foreach (GameObject rootObject in o.scene.GetRootGameObjects()) {
			var gameLevel = rootObject.GetComponent<GameLevel>();
			if (gameLevel != null) {
				if (gameLevel.HasLevelObject(levelObject)) {
					Debug.LogWarning(o.name + " is already registered.", o);
					return;
				}
				return;
			}
		}
If we're still going, then we can finally register the object, after recording the game level for the undo system. Let's also log what got registered where, so the designer can be sure that it worked and not silently failed.
				if (gameLevel.HasLevelObject(levelObject)) {
					Debug.LogWarning(o.name + " is already registered.", o);
					return;
				}

				Undo.RecordObject(gameLevel, "Register Level Object.");
				gameLevel.RegisterLevelObject(levelObject);
				Debug.Log(
					o.name + " registered to game level " +
					gameLevel.name + " in scene " + o.scene.name + ".", o
				);
				return;
Multiselection
We don't have to limit the menu item to work with only a single object. Let's make it possible for the designer to select multiple level objects and register them all at once, even if they're part of different levels. We do that by looping through Selection.objects instead of only using Selection.activeGameObject. In this case we're dealing with Object references. So cast each to GameObject if possible and pass the result to the original code, moved to a separate method.
	[MenuItem("GameObject/Register Level Object")]
	static void RegisterLevelObject () {
		foreach (Object o in Selection.objects) {
			Register(o as GameObject);
		}
	}

	static void Register (GameObject o) {
		//GameObject o = Selection.activeGameObject;

		…
	}
It is now possible for our menu item to get invoked while having a mix of assets and scene objects selected, which doesn't make sense. Ideally, the menu item should only be enabled when nothing but game objects are selected. We can enforce that via a validation method.
A validation method works the same as a regular menu item method, except that its attribute has true as an additional argument and it returns whether the menu item should be enabled. By default, all items are always enabled.
	const string menuItem = "GameObject/Register Level Object";

	[MenuItem(menuItem, true)]
	static bool ValidateRegisterLevelObject () {
		return true;
	}

	[MenuItem(menuItem)]
	static void RegisterLevelObject () {
		…
	}
Our item works on a selection, so if nothing is selected—the array's length is zero—then it shouldn't be enabled.
	static bool ValidateRegisterLevelObject () {
		if (Selection.objects.Length == 0) {
			return false;
		}
		return true;
	}
And when at least one of the selected objects isn't a game object our menu item should also be disabled.
		if (Selection.objects.Length == 0) {
			return false;
		}
		foreach (Object o in Selection.objects) {
			if (!(o is GameObject)) {
				return false;
			}
		}
		return true;
Now we can do away with the null check, because we're guaranteed to work on game objects.
	static void Register (GameObject o) {
		//if (o == null) {
		//	Debug.LogWarning("No level object selected.");
		//	return;
		//}

		…
	}
Editor-Only Game Level Code
This all works, but we now have some code in GameLevel that is only used in the Unity editor, so it doesn't need to be included in builds. We can ensure that by using conditional compilation. However, that still mixes editor-only code with other code. It would be convenient if we could extract the editor-only code and put it in a separate asset file. That's possible by using partial classes.
First, add the partial keyword to GameLevel. On its own, this doesn't change anything.
public partial class GameLevel : PersistableObject { … }
Next, duplicate the GameLevel asset file and rename it. The typical naming convention for partial classes is to use ClassName.Purpose.cs for additional partial class files. As we're separating editor-only code, name it GameLevel.Editor.

Open the new file and remove all code except the class definition itself, HasMissingLevelObjects, HasLevelObject, RegisterLevelObject, and RemoveMissingLevelObjects. Or start with an empty file and add the required code. The class definition only has to include partial class GameLevel. You can add public and the extension declaration too, but that's not required. Either leave it all out or use the exact same class declaration.
using UnityEngine;

partial class GameLevel {

	public bool HasMissingLevelObjects { … }

	public bool HasLevelObject (GameLevelObject o) { … }

	public void RegisterLevelObject (GameLevelObject o) { … }

	public void RemoveMissingLevelObjects () { … }
}
Now we can make do with a single conditional compilation block, wrapping the whole class.
#if UNITY_EDITOR

using UnityEngine;

partial class GameLevel { … }

#endif
Finally, remove the identical code from the original class definition, because that has become duplicate code.
This concludes the Object Management series. You should have a decent grasp of how to manage objects in Unity at this point. Want to know when the next tutorial series starts? Keep tabs on my Patreon page!