Multiple Scenes
Loading Levels
- Create a scene in play mode.
- Move objects between scenes.
- Work with multiple scenes.
- Support game levels.
This is the fourth tutorial in a series about Object Management. It's about putting objects in their own scene, working with multiple scenes at once, plus loading and unloading scenes.
This tutorial is made with Unity 2017.4.4f1.
Pool Scene
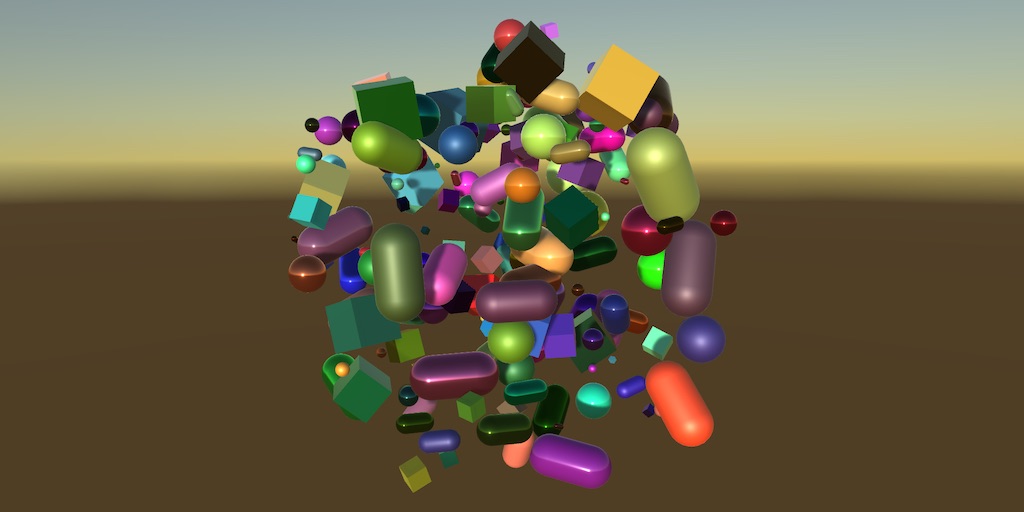
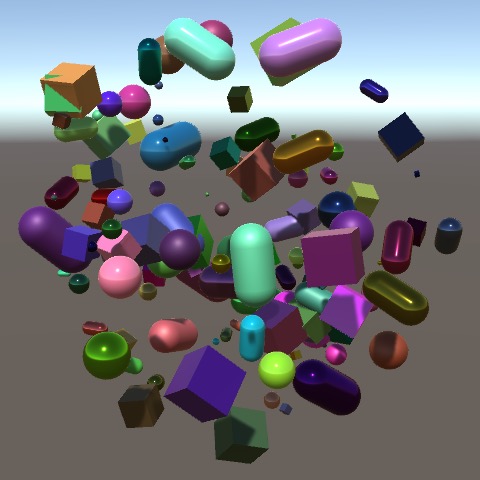
When many shapes are instantiated while in play mode, the scene rapidly fills with objects and the hierarchy window can get quite cluttered. This can make it hard to find a specific object, and can also slow down the editor.
Potential editor slowdowns can be prevented by collapsing the scene hierarchy, or by removing the hierarchy window, but then we can't see the objects anymore. Ideally, we could collapse all shape instances into a single entry in the hierarchy window, while everything else remains visible. There are two ways to do this.
The first option is to create a root object and make all shapes children of that object. Then we can collapse the root object. Unfortunately, this can negatively impact our game's performance when shapes are changed. Whenever an object's active or transform state changes, all its parent objects are notified of this change. So it's best to avoid making objects children of another object when this isn't strictly necessary.
The second option is to put all shapes in a separate scene. They remain root objects without parents, but become part of an extra scene, which can be collapsed in the hierarchy window. Scenes don't care about the state of their objects, so this doesn't slow the game down. This is the option that we'll use.
Creating a Scene While Playing
We want a dedicated scene for containing shape instances. As shape instances only exist in play mode, the scene also only needs to exist while we're in play mode. So we're going to create one via code, not via the editor.
ShapeFactory is responsible for creating, destroying, and recycling shapes, so it should also be responsible for the scene that holds them. To work directly with scenes, it needs to access code from the UnityEngine.SceneManagement namespace, so use it in the ShapeFactory class file.
using System.Collections.Generic;
using UnityEngine;
using UnityEngine.SceneManagement;

[CreateAssetMenu]
public class ShapeFactory : ScriptableObject {
	…
}
We'll create a pool scene to contain all shape instances that can be recycled. All the factory's shapes go into this pool and should never be removed from it. We can use a Scene field to keep track of this pool scene.
Scene poolScene;
We only need a scene when recycling is enabled. When not recycling, managing the instances can be left up to whoever requested them. So we only need to create a scene when we need pools. Thus, at the end of CreatePools invoke SceneManager.CreateScene to make a new scene and keep track of it. The scene needs a name, for which we can simply use the name of the factory. If you use multiple factories, they'd all get their own scene, so make sure to give each a unique name.
	void CreatePools () {
		…
		poolScene = SceneManager.CreateScene(name);
	}

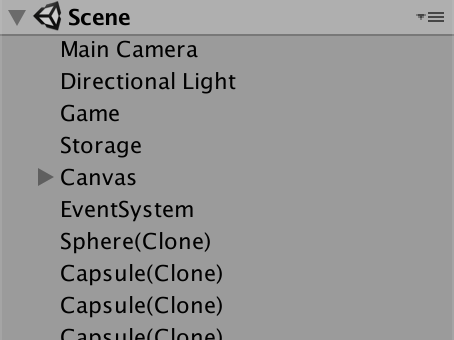
Now a Shape Factory scene appears the first time we create a shape while in play mode, although the shapes aren't put into it yet. The scene vanishes when we stop playing.
Putting Objects in the Pool Scene
When a game object is instantiated, it gets added to the active scene. In our case, the active scene is Scene, the only persistent scene in our project. It is possible to change the active scene, but we don't want the factory to mess with scenes. Instead, we can migrate our shapes to the pool scene after creating them, by invoking SceneManager.MoveGameObjectToScene, with the game object and scene as arguments.
	public Shape Get (int shapeId = 0, int materialId = 0) {
		Shape instance;
		if (recycle) {
			…
			if (lastIndex >= 0) {
				…
			}
			else {
				instance = Instantiate(prefabs[shapeId]);
				instance.ShapeId = shapeId;
				SceneManager.MoveGameObjectToScene(
					instance.gameObject, poolScene
				);
			}
		}
		…
	}

From now on, shapes are neatly put in the Shape Factory scene, which you can collapse in the hierarchy window, or leave open when you want to take a look.
Recovering from Recompilation
The factory is working fine, at least in a build or as long as we remain in play mode. Unfortunately, a recompilation while in play mode messes up our recycling and pool scene.
While Unity serializes the private fields of MonoBehaviour types when compiling, it doesn't do this for ScriptableObject types. This means that the list of pools is lost after a recompilation. The result of this is that CreatePools will get invoked again after a recompilation.
The first obvious problem is that we try to create the pool scene again, which will fail because a scene with that name already exists. We can guard against this by checking whether the pool scene is already loaded, via the Scene.isLoaded property. If so, we abort before creating the scene.
	void CreatePools () {
		…

		if (poolScene.isLoaded) {
			return;
		}

		poolScene = SceneManager.CreateScene(name);
	}
This doesn't appear to work. That's because Scene is a struct, not a direct reference to the actual scene. As it is not serializable, a recompilation resets the struct to its default values, which indicates an unloaded scene. We have to request a fresh connection, via the SceneManager.GetSceneByName method.
		poolScene = SceneManager.GetSceneByName(name);
		if (poolScene.isLoaded) {
			return;
		}

		poolScene = SceneManager.CreateScene(name);
This works, but we only really need to do this while working in the Unity editor, not in builds. We can check if we're in the editor via the Application.isEditor property.
		if (Application.isEditor) {
			poolScene = SceneManager.GetSceneByName(name);
			if (poolScene.isLoaded) {
				return;
			}
		}

		poolScene = SceneManager.CreateScene(name);
The second and slightly less obvious problem is that shape instances that were inactive before a recompilation never get reused. That's because we've lost the lists that kept track of them. We can solve this by repopulating the lists. First, retrieve an array containing all root game objects of the pool scene, via the Scene.GetRootGameObjects method.
		if (Application.isEditor) {
			poolScene = SceneManager.GetSceneByName(name);
			if (poolScene.isLoaded) {
				GameObject[] rootObjects = poolScene.GetRootGameObjects();
				return;
			}
		}
Next, loop through all the objects and grab their shape component. As this is the factory scene, it should only contain shapes, so we always get a component. A null reference error after this point would indicate a problem elsewhere.
			if (poolScene.isLoaded) {
				GameObject[] rootObjects = poolScene.GetRootGameObjects();
				for (int i = 0; i < rootObjects.Length; i++) {
					Shape pooledShape = rootObjects[i].GetComponent<Shape>();
				}
				return;
			}
Check whether the shape is active, via the activeSelf property of its game object. If it is not active, then we have a shape awaiting reuse and must add it to the appropriate pool list.
					Shape pooledShape = rootObjects[i].GetComponent<Shape>();
					if (!pooledShape.gameObject.activeSelf) {
						pools[pooledShape.ShapeId].Add(pooledShape);
					}
Now our pools survive recompilation by rebuilding themselves when needed.
Level 1
Scenes aren't only useful for grouping objects in play mode. Often, projects are partitioned into multiple scenes. The most obvious configuration is one scene per game level. But a game usually has objects that do not belong to a single level, but to the entire game. Instead of putting a copy of those objects in every scene, they can be put in their own scene too. This allows you to break up your project into multiple scenes, but requires multiple scenes to be open at the same time while editing.
Multi-Scene Editing
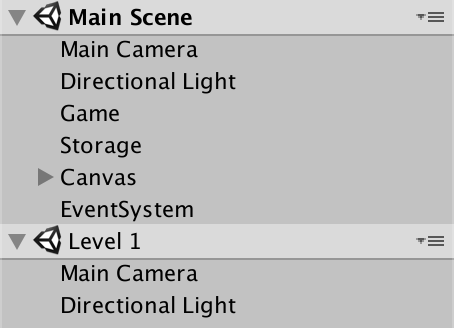
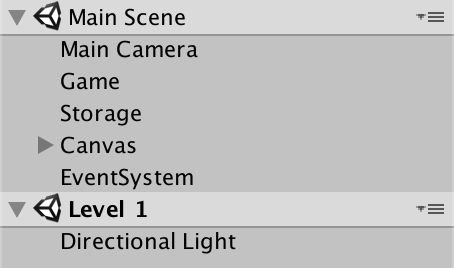
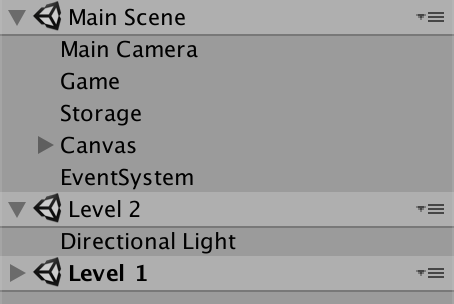
We're going to split our game into two scenes. Our current scene is the main scene, so rename it to Main Scene. Then create a second scene via File / New Scene, named Level 1. This new scene represents the first level of our game.

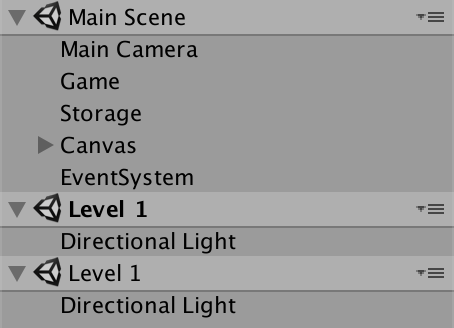
Now open the Level 1 scene, while keeping the Main Scene open as well. This is done by dragging the scene from the project window into the hierarchy window. The Level 1 scene will get added below Main Scene, just like our pool scene appears in play mode. Main Scene is displayed with bold text because it's still the active scene. If you'd enter play mode now, you end up with three scenes: main, level, and factory pool.
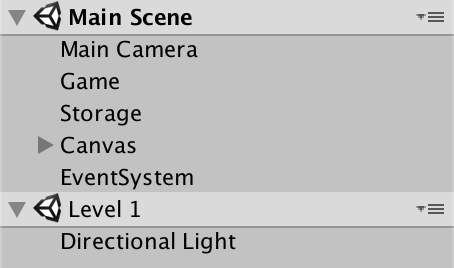
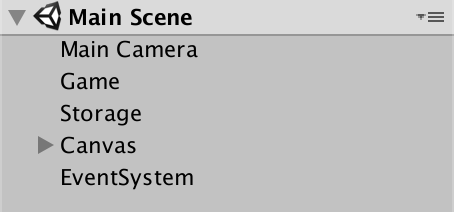
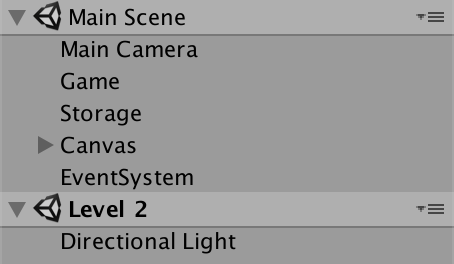
The idea is that the main scene contains everything needed to run the game, no matter which level we're playing. In our case, that's the main camera, the Game object, storage, canvas, and event system. But we'll make the lighting depend on the level. So delete the light from Main Scene and the camera from Level 1.
Scene Lighting
The only thing that we changed is that we put the light in a separate scene, which is also open. The game should function just as before. However, there is a difference. It turns out that the environmental lighting has become very dark.
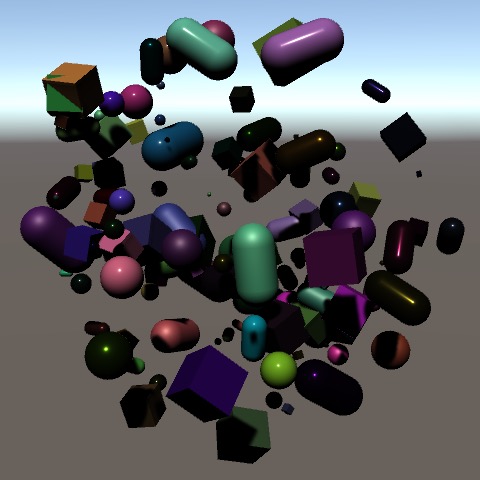
Besides being a collection of game objects, scenes also have their own lighting settings. The environmental lighting changed because the main scene no longer has a light in it, and as a result its environmental lighting has gone dark. We get this result because the lighting settings of the active scene is used.
The level scene has a light in it, with matching environmental lighting. So to fix the lighting, we have to make Level 1 the active scene. This can be done via the Set Active Scene option in the dropdown menu of each scene in the hierarchy window.
Including Multiple Scenes in Builds
With Level 1 as the active scene our game works as expected, at least in the editor. To make it work correct in a build as well we have to make sure that both scenes are included. Go to File / Build Settings… and make sure both scenes are added, either by clicking Add Open Scenes or by dragging them into the Scenes In Build list. Make sure that Main Scene has index 0 and Level 1 has index 1.

From now on, both scenes get added to builds, even when they are not open when building. You could unload a scene, via the Unload Scene option in its dropdown menu. That keeps it in the hierarchy window, but disabled.
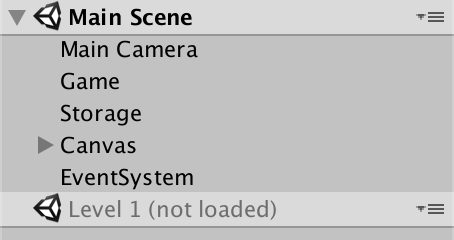
You can also use the Remove Scene option. That unloads and removes it from the hierarchy window. It doesn't delete it from the project.
Loading a Scene
Even though both scenes are included in builds, only the first scene—with index 0—gets loaded when the game build is run. This is the same as having only the main scene open in the editor when entering play mode. To make sure that both levels are loaded, we have to manually load Level 1.
Add a LoadLevel method to Game. In it, invoke SceneManager.LoadScene with the name of our level as an argument.
using System.Collections.Generic;
using UnityEngine;
using UnityEngine.SceneManagement;

public class Game : PersistableObject {

	…

	void LoadLevel () {
		SceneManager.LoadScene("Level 1");
	}

	…
}
Our game doesn't have a splash screen, logo intro, or main menu, so immediately load the level when it awakens.
	void Awake () {
		shapes = new List<Shape>();
		LoadLevel();
	}
This doesn't have the desired effect. Unity unloads all currently open scenes, then loads the requested scene. The result is that we end up with nothing but the light object. This is equivalent to double-clicking on a scene in the editor.
What we want is to load the level scene in addition to what's already loaded, like we did earlier in the editor. This can be done by providing LoadSceneMode.Additive as an additional argument to SceneManager.LoadScene.
	void LoadLevel () {
		SceneManager.LoadScene("Level 1", LoadSceneMode.Additive);
	}
Give it a try in the editor, without having Level 1 loaded. It works, but unfortunately the environmental lighting is again not correct, though this time it is harder to spot. It is slightly too dark.
Once again, we have to make sure that Level 1 is the active scene, this time via code. It's done by invoking SceneManager.SetActiveScene, with a Scene parameter. We can get the required scene data via SceneManager.GetSceneByName.
	void LoadLevel () {
		SceneManager.LoadScene("Level 1", LoadSceneMode.Additive);
		SceneManager.SetActiveScene(SceneManager.GetSceneByName("Level 1"));
	}
Unfortunately, this results in an error. SceneManager.SetActiveScene only works for scenes that are loaded, which it apparently isn't, even though we just invoked LoadScene. That's because loading scenes takes some time. The scene is only fully loaded on the next frame.
Waiting a Frame
Because a loaded scene doesn't become fully loaded immediately, we have to wait until the next frame before we make it the active scene. The easiest way to do this is by turning LoadLevel into a coroutine. Then we can yield once between invoking LoadScene and SetActiveScene, adding a delay of a single frame.
using System.Collections;
using System.Collections.Generic;
using UnityEngine;
using UnityEngine.SceneManagement;

public class Game : PersistableObject {

	…

	void Awake () {
		shapes = new List<Shape>();
		StartCoroutine(LoadLevel());
	}

	…

	IEnumerator LoadLevel () {
		SceneManager.LoadScene("Level 1", LoadSceneMode.Additive);
		yield return null;
		SceneManager.SetActiveScene(SceneManager.GetSceneByName("Level 1"));
	}

	…
}
Baking Lighting
Although Level 1 now correctly becomes the active scene, we still do not get correct environmental lighting. At least, not in the editor. Builds are fine, because all lighting gets properly included. But in the editor automatically generated lighting data doesn't work correctly when loading scenes in play mode. To ensure correct lighting in the editor, we have to turn off the Auto Generate option, found at the bottom of the lighting settings, opened via Window / Lighting / Settings or Window / Rendering / Lighting Settings depending on the Unity version.

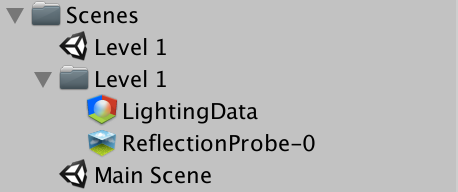
Open the Level 1 scene, make sure that it is the active scene, and click Generate Lighting. Unity will bake the lighting data and save it in a folder next to the scene asset.
These settings are per scene. You only have to manually bake Level 1. We don't use the lighting data of the main scene, so you can leave that one in auto-generate mode.
Asynchronous Loading
How long it takes to load a scene depends on how much it contains. In our case, it's a single light, so it loads very quickly. But in general it can take a while to load, which would freeze the game until finished. To prevent this, it is possible to load scenes asynchronously, via SceneManager.LoadSceneAsync. This begins the process of loading a scene and returns an AsyncOperation object reference, which can be used to check whether the scene has finished loading. Alternatively, it can be used to yield in a coroutine. Let's do that, instead of yielding exactly one frame.
	IEnumerator LoadLevel () {
		//SceneManager.LoadScene("Level 1", LoadSceneMode.Additive);
		//yield return null;
		yield return SceneManager.LoadSceneAsync(
			"Level 1", LoadSceneMode.Additive
		);
		SceneManager.SetActiveScene(SceneManager.GetSceneByName("Level 1"));
	}
Now our game doesn't freeze when loading a level. This means that it's possible that our game's Update method gets invoked an arbitrary amount of times before the level is loaded and has become the active scene. This is a problem, because it makes it possible for the player to issue commands before the level has been loaded. To prevent this, the Game component must disable itself before beginning the loading process, and enable itself again after loading has finished.
	IEnumerator LoadLevel () {
		enabled = false;
		yield return SceneManager.LoadSceneAsync(
			"Level 1", LoadSceneMode.Additive
		);
		SceneManager.SetActiveScene(SceneManager.GetSceneByName("Level 1"));
		enabled = true;
	}
In a more complex game, you would also show and hide a loading screen at these points.
Preventing Double Loading
Loading the level when the game starts works fine, but if we already have the level scene open in the editor we end up loading it a second time when entering play mode.
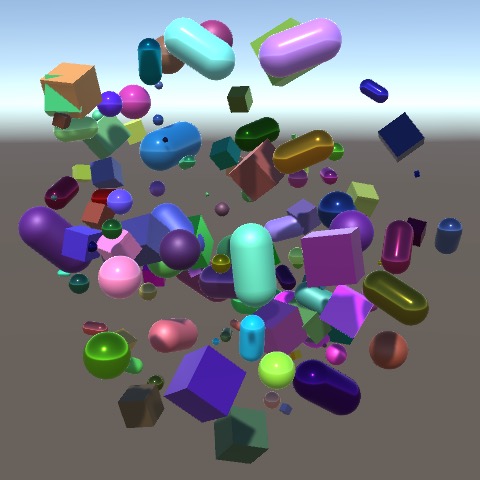
Because our level scene contains a light, we end up with two lights instead, leading to an overbright result.

Once again, this is only a problem when working in the editor. But it's something that we should deal with, because you typically work with an open level scene and enter play mode to test it. You don't want the level to be loaded a second time.
To prevent a double loading a scene, check whether it is already loaded before invoking LoadLevel in Awake. If it is loaded, make sure that it is the active scene and then abort.
	void Awake () {
		shapes = new List<Shape>();

		Scene loadedLevel = SceneManager.GetSceneByName("Level 1");
		if (loadedLevel.isLoaded) {
			SceneManager.SetActiveScene(loadedLevel);
			return;
		}

		StartCoroutine(LoadLevel());
	}
This doesn't work, again because the scene hasn't been marked as loaded yet. Trying it in Awake is too early, but if we delay a bit and use a Start method instead, it works. This is true for all game objects that are part of a scene. Awake gets invoked immediately when the scene is loaded, but doesn't count as loaded yet. Start and later Update invocation happens afterwards, when the scene is officially loaded.
//void Awake () {void Start () { shapes = new List<Shape>(); … }
All this is only necessary when we're in the editor.
	void Start () {
		shapes = new List<Shape>();

		if (Application.isEditor) {
			Scene loadedLevel = SceneManager.GetSceneByName("Level 1");
			if (loadedLevel.isLoaded) {
				SceneManager.SetActiveScene(loadedLevel);
				return;
			}
		}

		StartCoroutine(LoadLevel());
	}
More Levels
Some games have only a single level, but often there are multiple levels. So let's add another level and make it possible to switch between them.
Level 2
To make a second level, you can duplicate the Level 1 scene and name it Level 2. To make them visually distinguishable, open the new scene and adjust its light. For example, set its X rotation to 1 instead of 50, representing a sun just above the horizon. Then bake the lighting of level 2.

Also add level 2 to the build, assigning it build index 2.

Detecting a Loaded Level
While it is possible to have both level scenes open at the same time, it mostly makes sense to work with only a single level. Maybe it's convenient to have multiple levels open to copy or move stuff around, but that should be temporary. When entering play mode, we expect to either have no or exactly one level open, besides the main scene. This works fine when level 1 is open, but if level 2 is open then level 1 gets loaded too when we enter play mode.
To prevent this from happening we have to adjust our level detection in Game.Start. Instead of explicitly checking for Level 1, we have to check for any level. Currently we have two levels, but we should support at least a few more.
What we can do is demand that all level scenes have their name contain the word Level, followed by a space. Then we can loop through all currently loaded scenes, check whether a scene's name contains the required string, and if so make that the active scene.
To loop through all loaded scenes, we can use the SceneManager.sceneCount property to get the count and the SceneManager.GetSceneAt method to get a scene at a specific index.
	void Start () {
		shapes = new List<Shape>();

		if (Application.isEditor) {
			//Scene loadedLevel = SceneManager.GetSceneByName("Level 1");
			//if (loadedLevel.isLoaded) {
			//	SceneManager.SetActiveScene(loadedLevel);
			//	return;
			//}
			for (int i = 0; i < SceneManager.sceneCount; i++) {
				Scene loadedScene = SceneManager.GetSceneAt(i);
				if (loadedScene.name.Contains("Level ")) {
					SceneManager.SetActiveScene(loadedScene);
					return;
				}
			}
		}

		StartCoroutine(LoadLevel());
	}
Now the game sticks with Level 2, if it happens to be open in the editor. This makes it possible to directly play any level, without having to go through an in-game level selection.

Loading a Specific Level
In order to load a specific level inside the game, we have to adjust LoadLevel. Because we only have a few levels, we can manually assign them to the build, giving Level 1 build index 1, Level 2 index 2, and so on. To load one of these levels, we have to add the level's build index as a parameter. Then we use that index when loading the scene, and use GetSceneByBuildIndex instead of GetSceneByName.
	IEnumerator LoadLevel (int levelBuildIndex) {
		enabled = false;
		yield return SceneManager.LoadSceneAsync(
			levelBuildIndex, LoadSceneMode.Additive
		);
		SceneManager.SetActiveScene(
			SceneManager.GetSceneByBuildIndex(levelBuildIndex)
		);
		enabled = true;
	}
By default we load the first level in Start, which has build index 1.
	void Start () {
		…

		StartCoroutine(LoadLevel(1));
	}
Selecting Levels
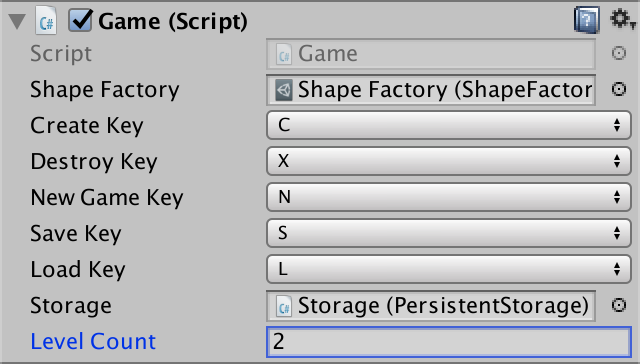
For our simple small game, we'll use the most straightforward way to select a level. Simply press a number key to load the corresponding level. This works for up to nine levels. To make it easy to adjust how many levels we support, add a level count field to Game, then set it to 2 via the inspector.
public int levelCount;
Now we have to check whether the player pressed one of the number keys to load a level. We can do this by looping through all valid build indices. The corresponding key code is KeyCode.Alpha0 plus the index. If the key is pressed, start loading that level and skip the rest of the Update method.
	void Update () {
		…
		else if (Input.GetKeyDown(loadKey)) {
			BeginNewGame();
			storage.Load(this);
		}
		else {
			for (int i = 1; i <= levelCount; i++) {
				if (Input.GetKeyDown(KeyCode.Alpha0 + i)) {
					StartCoroutine(LoadLevel(i));
					return;
				}
			}
		}

		…
	}
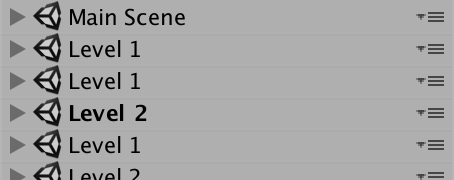
Unloading Levels
We can now switch between our two levels while in play mode, but each time the level gets loaded we get one more open scene, adding to the currently open levels instead of replacing them. That happens because we load them additively.
We can prevent this by keeping track of the build index of the currently loaded level. So add a field for it.
int loadedLevelBuildIndex;
Initialize the index in Start, if we began with a level scene already loaded. Otherwise, it keeps its default value of zero.
				if (loadedScene.name.Contains("Level ")) {
					SceneManager.SetActiveScene(loadedScene);
					loadedLevelBuildIndex = loadedScene.buildIndex;
					return;
				}
After we finished loading a level, also update this index.
	IEnumerator LoadLevel (int levelBuildIndex) {
		…
		loadedLevelBuildIndex = levelBuildIndex;
		enabled = true;
	}
Now we can check whether the index is nonzero, before starting to load a level. If so, then there already is a level scene open. We must unload this scene first, which we do asynchronously by invoking SceneManager.UnloadSceneAsync with the old index. Yield on the unloading before moving on to load the next level.
	IEnumerator LoadLevel (int levelBuildIndex) {
		enabled = false;
		if (loadedLevelBuildIndex > 0) {
			yield return SceneManager.UnloadSceneAsync(loadedLevelBuildIndex);
		}
		yield return SceneManager.LoadSceneAsync(
			levelBuildIndex, LoadSceneMode.Additive
		);
		SceneManager.SetActiveScene(
			SceneManager.GetSceneByBuildIndex(levelBuildIndex)
		);
		loadedLevelBuildIndex = levelBuildIndex;
		enabled = true;
	}
Finally, it makes sense to treat the loading of a level as the beginning of a new game, getting rid of all objects that have been spawned. So invoke BeginNewGame before loading another level.
				if (Input.GetKeyDown(KeyCode.Alpha0 + i)) {
					BeginNewGame();
					StartCoroutine(LoadLevel(i));
					return;
				}
Remembering the Level
At this point we can switch between levels during play, but saving and loading our game still ignores levels. As a result, we can save our shapes in one level and load them in another. We have to make sure that the game remembers which level was saved.
Saving the Level
Saving the level requires that we add additional data to our save file, making it incompatible with older versions of our game. So increment the save version, from 1 to 2.
const int saveVersion = 2;
When the game saves itself, now also write the build index of the currently open level. Let's do this after the shape count, but before writing the shapes.
	public override void Save (GameDataWriter writer) {
		writer.Write(shapes.Count);
		writer.Write(loadedLevelBuildIndex);
		for (int i = 0; i < shapes.Count; i++) {
			…
		}
	}
This approach relies on the specific build indices of our levels, so we cannot change them after this point without breaking backwards compatibility, just like we cannot change the order of the shape prefabs of our factory.
Loading the Level
When loading, we first deal with the special case of the shape count, as usual. Then read the level build index, unless we have an older save file, in which case we always load Level 1. Then immediately start loading that level.
	public override void Load (GameDataReader reader) {
		…
		int count = version <= 0 ? -version : reader.ReadInt();
		StartCoroutine(LoadLevel(version < 2 ? 1 : reader.ReadInt()));
		for (int i = 0; i < count; i++) {
			…
		}
	}
With this approach, we start loading the level while we still need to read and create all shapes. As the level loading is asynchronous, the current level scene is still the loaded scene while we are reading and creating the shapes. Only later will the correct level become loaded and the active scene. This isn't a problem, because we're putting all shapes in a separate factory scene and they don't depend on anything from the levels. This might change in the future, making this process more complex. We'll deal with that when we need to.
The next tutorial is Spawn Zones.