Hex Map 16
Pathfinding
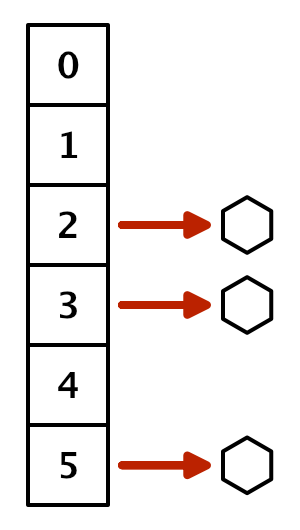
- Highlight cells.
- Pick a search destination.
- Find the shortest path.
- Create a priority queue.
This is part 16 of a tutorial series about hexagon maps. After figuring out the distances between cells, we move on to finding paths between them.
From now on, the Hex Map tutorials are made with Unity 5.6.0. Note that there is a bug in 5.6 that breaks texture arrays in builds on multiple platforms. The workaround is to enable Is Readable via the texture array's inspector.
Highlighting Cells
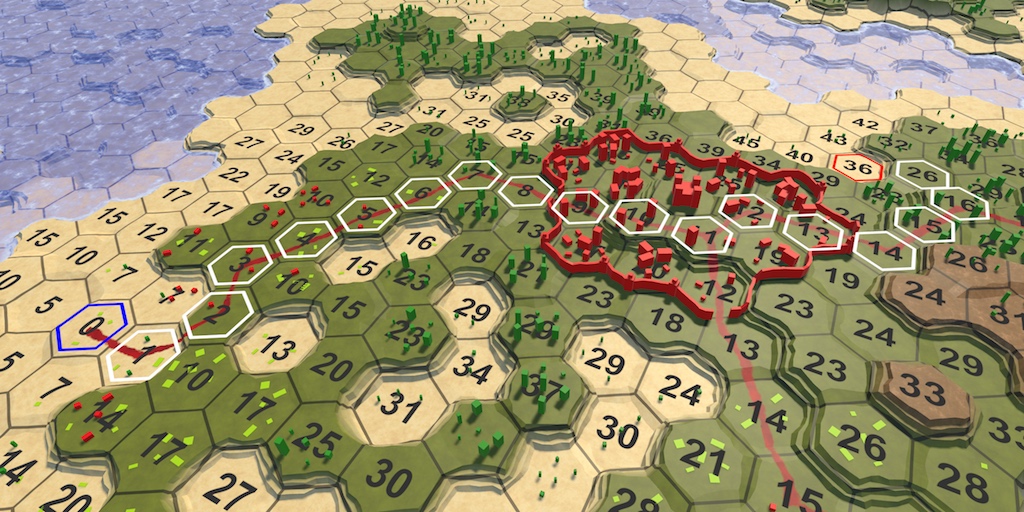
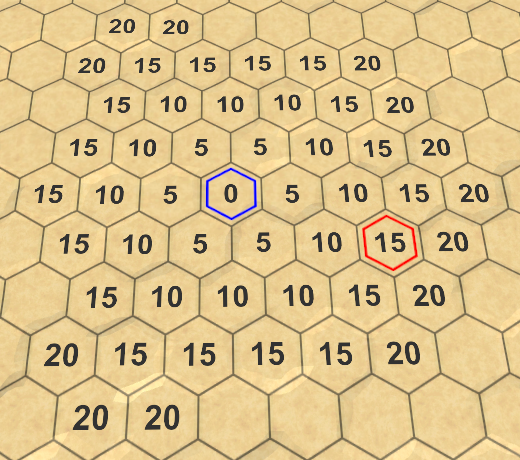
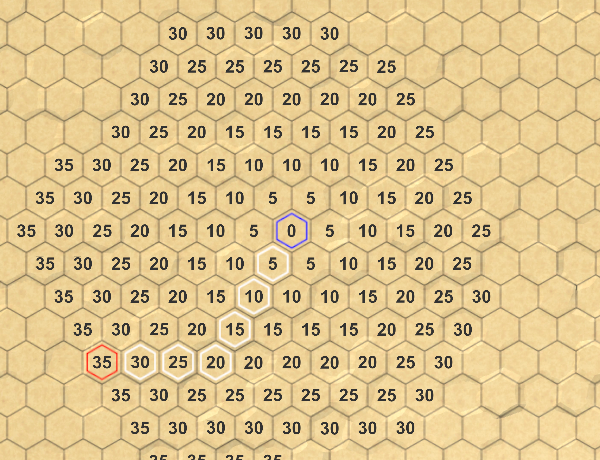
To search for a path between two cells, we first have to select these cells. It's no longer a matter of selecting a single cell and watching the search spread through the map. For example, we first select a starting cell, followed by a destination cell. After making these selections, it would be handy to highlight them. So let's add that functionality. We're not going to create a fancy or efficient highlighting method now, just a quick one to aid development.
Outline Texture
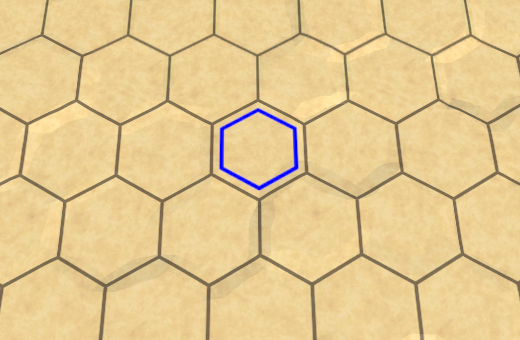
A simply way to highlight cells is by adding an outline to them. The most straightforward way to do this is with a texture that contains a hexagon outline. Here is such a texture. It is transparent except for a white hexagon outline. By making it white, we can colorize it later as we see fit.
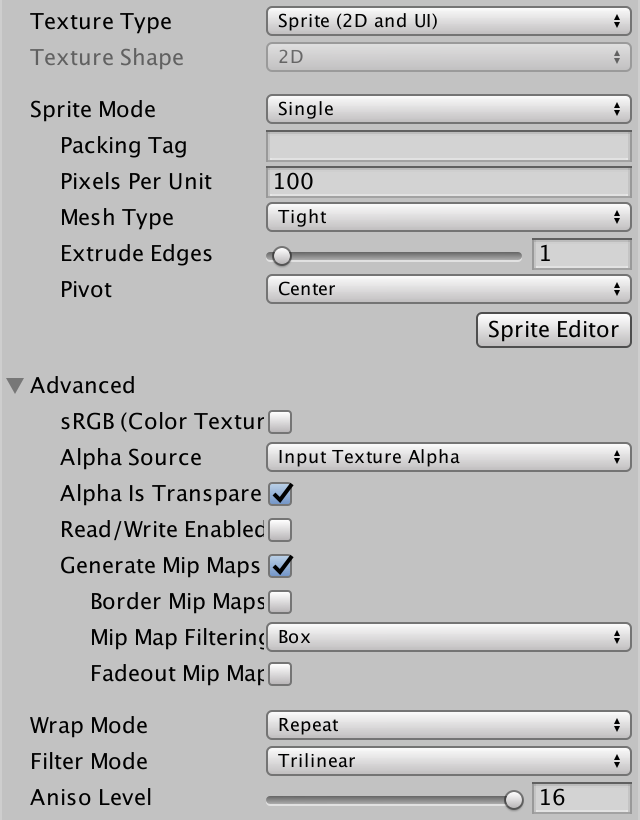
Import the texture and set its Texture Type to Sprite. Its Sprite Mode is Single, with the default settings. Because it's a pure white texture, we don't need sRGB conversion. The alpha channel represents transparency, so enable Alpha is Transparency. I also enabled mip maps and set the Filter Mode to Trilinear, because otherwise mip transitions can be obvious for outlines.
One Sprite Per Cell
The quickest ways to add a potential outline to each cell, is to give each its own sprite. Create a new game object and add an image component to it, via Component / UI / Image, and assign our outline sprite to it. Then, put a Hex Cell Label prefab instance in the scene, make the sprite object a child of it, and apply the changes to the prefab. Then get rid of the instance.
Now every cells has a sprite, but they will be much too large. To make the outlines fit around the cell centers, change the Width and Height of the sprite's transform component to 17.
Drawing on Top of Everything
Because the outline overlaps the cell edge regions, it often ends up below the terrain geometry. This causes part of the outline to disappear. Changing the vertical position of the sprites can prevent this for small elevation changes, but not for cliffs. What we can do instead, is always draw the outlines on top of everything else. We need to create a custom sprite shader for this. We can suffice by copying Unity's default sprite shader and making a few changes.
Shader "Custom/Highlight" {
	Properties {
		[PerRendererData] _MainTex ("Sprite Texture", 2D) = "white" {}
		_Color ("Tint", Color) = (1,1,1,1)
		[MaterialToggle] PixelSnap ("Pixel snap", Float) = 0
		[HideInInspector] _RendererColor ("RendererColor", Color) = (1,1,1,1)
		[HideInInspector] _Flip ("Flip", Vector) = (1,1,1,1)
		[PerRendererData] _AlphaTex ("External Alpha", 2D) = "white" {}
		[PerRendererData] _EnableExternalAlpha ("Enable External Alpha", Float) = 0
	}

	SubShader {
		Tags {
			"Queue"="Transparent"
			"IgnoreProjector"="True"
			"RenderType"="Transparent"
			"PreviewType"="Plane"
			"CanUseSpriteAtlas"="True"
		}

		Cull Off
		ZWrite Off
		Blend One OneMinusSrcAlpha

		Pass {
			CGPROGRAM
			#pragma vertex SpriteVert
			#pragma fragment SpriteFrag
			#pragma target 2.0
			#pragma multi_compile_instancing
			#pragma multi_compile _ PIXELSNAP_ON
			#pragma multi_compile _ ETC1_EXTERNAL_ALPHA
			#include "UnitySprites.cginc"
			ENDCG
		}
	}
}
The first change is to ignore the depth buffer, by making the Z test always succeed.
		ZWrite Off
		ZTest Always
The second change is to draw after all other transparent geometry. Adding 10 to the transparent queue should suffice.
"Queue"="Transparent+10"
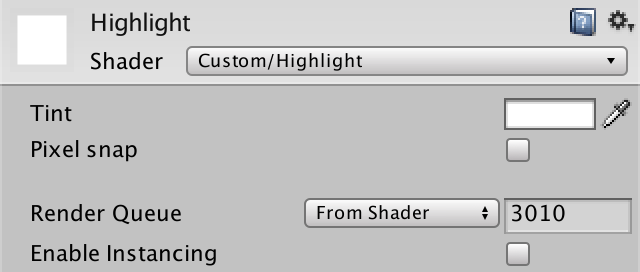
Create a new material that uses this shader. We can ignore all its properties, sticking with the default values. Then have our sprite prefab use this material.
Our highlights are now always visible. Even when a cell is hidden behind higher terrain, its outline will still be drawn on top of everything else. This might not be pretty, but it ensures that we can always spot the highlighted cells, which is useful.
Controlling Highlights
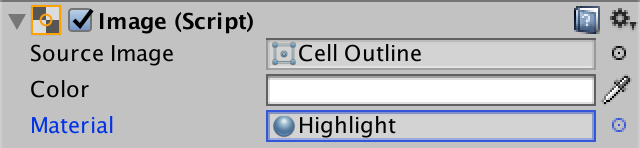
We don't want all cells to be highlighted all the time. In fact, we want to start out with none of them highlighted. We can do this by disabling the image component of the Highlight prefab object.
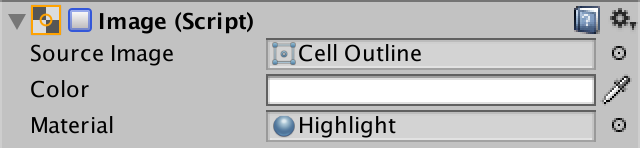
To enable the highlight of a cell, add an EnableHighlight method to HexCell. It has to grab the only child of its uiRect and enable its image component. Create a DisableHighlight method as well.
	public void DisableHighlight () {
		Image highlight = uiRect.GetChild(0).GetComponent<Image>();
		highlight.enabled = false;
	}

	public void EnableHighlight () {
		Image highlight = uiRect.GetChild(0).GetComponent<Image>();
		highlight.enabled = true;
	}
Finally, we can also provide a color to tint the highlight when enabling it.
	public void EnableHighlight (Color color) {
		Image highlight = uiRect.GetChild(0).GetComponent<Image>();
		highlight.color = color;
		highlight.enabled = true;
	}
Finding a Path
Now that we can highlight cells, we can go ahead and select two cells, then search for a path between them. First we have to actually select the cells, then limit the search to finding a path, and finally show that path.
Search Start
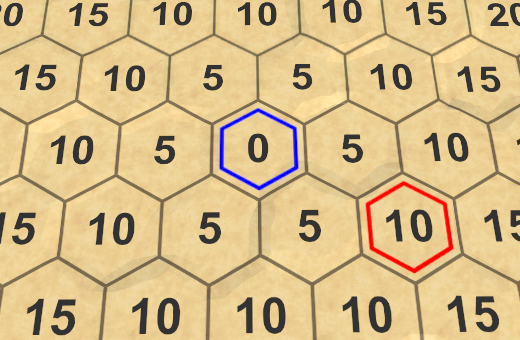
We have two different cells to select, the start and the end point of the search. Let's say that to select the cell to search from, you have to hold down the left shift key while clicking. Doing so will highlight that cell with a blue color. We have to keep a reference to this cell for later searching. Also, when a new starting cell is chosen, the highlight of the old one should be disabled. So add a searchFromCell field to HexMapEditor.
HexCell previousCell, searchFromCell;
Inside HandleInput, we can use Input.GetKey(KeyCode.LeftShift) to check whether the shift key is being held down.
			if (editMode) {
				EditCells(currentCell);
			}
			else if (Input.GetKey(KeyCode.LeftShift)) {
				if (searchFromCell) {
					searchFromCell.DisableHighlight();
				}
				searchFromCell = currentCell;
				searchFromCell.EnableHighlight(Color.blue);
			}
			else {
				hexGrid.FindDistancesTo(currentCell);
			}
Search Destination
Instead of finding all distances to a cell, we're now looking for a path between two specific cells. So rename HexGrid.FindDistancesTo to HexGrid.FindPath and give it a second HexCell parameter. Adjust the Search method as well.
	public void FindPath (HexCell fromCell, HexCell toCell) {
		StopAllCoroutines();
		StartCoroutine(Search(fromCell, toCell));
	}

	IEnumerator Search (HexCell fromCell, HexCell toCell) {
		for (int i = 0; i < cells.Length; i++) {
			cells[i].Distance = int.MaxValue;
		}

		WaitForSeconds delay = new WaitForSeconds(1 / 60f);
		List<HexCell> frontier = new List<HexCell>();
		fromCell.Distance = 0;
		frontier.Add(fromCell);
		…
	}
HexMapEditor.HandleInput now has to invoke the adjusted method, using searchFromCell and currentCell as arguments. Also, we can only look for a path when we know which cell to search from. And we don't have to bother looking for a path when the destination is the same as the start.
			if (editMode) {
				EditCells(currentCell);
			}
			else if (Input.GetKey(KeyCode.LeftShift)) {
				…
			}
			else if (searchFromCell && searchFromCell != currentCell) {
				hexGrid.FindPath(searchFromCell, currentCell);
			}
Once we're going for a search, we should first get rid of all previous highlights. So have HexGrid.Search disable the highlights while it's resetting the distances. As this also disables the highlight of the starting cell, enable it again afterwards. At this point, we can also highlight the destination cell. Let's make it red.
	IEnumerator Search (HexCell fromCell, HexCell toCell) {
		for (int i = 0; i < cells.Length; i++) {
			cells[i].Distance = int.MaxValue;
			cells[i].DisableHighlight();
		}
		fromCell.EnableHighlight(Color.blue);
		toCell.EnableHighlight(Color.red);

		…
	}
Limiting the Search
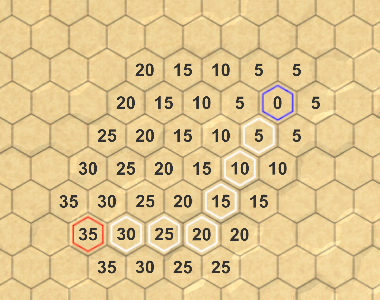
At this point, our search algorithm still computes the distances for all cells that are reachable from the starting cell. This is no longer necessary. We can stop as soon as we've found the final distance to the destination cell. So when the current cell is the destination, we can break out of the algorithm loop.
		while (frontier.Count > 0) {
			yield return delay;
			HexCell current = frontier[0];
			frontier.RemoveAt(0);

			if (current == toCell) {
				break;
			}

			for (HexDirection d = HexDirection.NE; d <= HexDirection.NW; d++) {
				…
			}
		}
Showing the Path
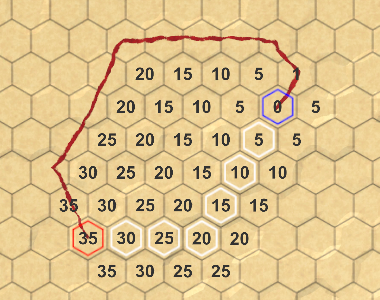
We can find the distance between the start and end of a path, but we do not yet know what the actual path is. To do so, we have to keep track of how each cell was reached. How can we do this?
When adding a cell to the frontier, we do so because it's a neighbor of the current cell. The only exception is the starting cell. All other cells were reached via the current cell. If we keep track of from which cell each cell was reached, we end up with a cell network. Spefically, a tree network with the starting cell as its root. We can use this to construct a path once we reach the destination.
We can store this information by adding another cell reference to HexCell. We don't need to serialize this data, so let's use a default property for it.
public HexCell PathFrom { get; set; }
Back in HexGrid.Search, set the neighbor's PathFrom to the current cell when adding it to the frontier. We also have to change this reference when we find a shorter route to a neighbor.
				if (neighbor.Distance == int.MaxValue) {
					neighbor.Distance = distance;
					neighbor.PathFrom = current;
					frontier.Add(neighbor);
				}
				else if (distance < neighbor.Distance) {
					neighbor.Distance = distance;
					neighbor.PathFrom = current;
				}
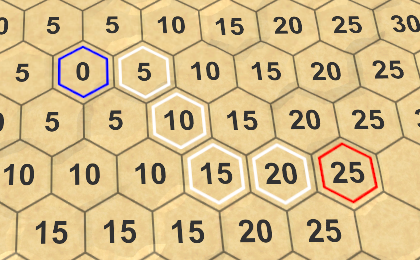
After arriving at the destination, we can visualize the path by following these references back to the starting cell, and highlight them.
			if (current == toCell) {
				current = current.PathFrom;
				while (current != fromCell) {
					current.EnableHighlight(Color.white);
					current = current.PathFrom;
				}
				break;
			}
Note that there are often multiple shortest paths. Which is found depends on the order in which the cells are processed. Some paths might look good, others might look bad, but there's never a shorter path. We'll get back to this later.
Adjusting the Seach Start
Once a starting cell has been chosen, changing the destination cell will trigger a new search. The same should happen when selecting a new starting cell. To make this possible, HexMapEditor also has to remember the destination cell.
HexCell previousCell, searchFromCell, searchToCell;
Using this field, we can also initiate a new search when selecting a new start.
			else if (Input.GetKey(KeyCode.LeftShift)) {
				if (searchFromCell) {
					searchFromCell.DisableHighlight();
				}
				searchFromCell = currentCell;
				searchFromCell.EnableHighlight(Color.blue);
				if (searchToCell) {
					hexGrid.FindPath(searchFromCell, searchToCell);
				}
			}
			else if (searchFromCell && searchFromCell != currentCell) {
				searchToCell = currentCell;
				hexGrid.FindPath(searchFromCell, searchToCell);
			}
Also, we should avoid making the start cell equal to the destination cell.
			if (editMode) {
				EditCells(currentCell);
			}
			else if (
				Input.GetKey(KeyCode.LeftShift) && searchToCell != currentCell
			) {
				…
			}
Smarter Searching
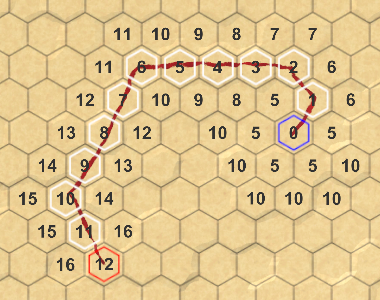
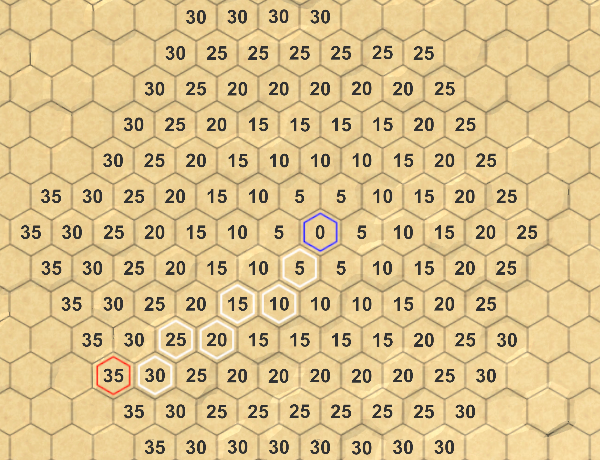
Although our search algorithm finds the shortest path, it spends a lot of time investigating cells that obviously won't be part of that path. Obvious to us, at least. The algorithm doesn't have a high-level view of the map. It cannot see that searching in some directions will be pointless. It prefers to follow roads, even if they lead away from the destination. Can we make it smarter?
Currently, we're only considering a cell's distance from the start when deciding which cell to process next. If we want to be smart about this, we also have to consider the distance to the destination. Unfortunately, we don't know this yet. But we could make an estimate of the remaining distance. Adding that to the cell distance gives us an indication of the total path length that goes through this cell. We can then use that to determine the search priorities for cells.
Search Heuristic
When we're relying on an estimate or guess instead of exactly known data, we say that we use a search heuristic. This heuristic represents our best guess of the remaining distance. We have to determine this value for each cell that we search through, so add an integer property for it to HexCell. We don't need to serialize it, so we can suffice with another default property.
public int SearchHeuristic { get; set; }
How do we guess the remaining distance? In the most ideal case, there would be a road leading straight to the destination. If so, the distance is equal to the unmodified distance between the coordinates of this cell and the destination cell. Let's use that as our heuristic.
As the heuristic doesn't depend on the path traveled so far, it is constant during the search. So we only have to compute it once, when HexGrid.Search adds a cell to the frontier.
				if (neighbor.Distance == int.MaxValue) {
					neighbor.Distance = distance;
					neighbor.PathFrom = current;
					neighbor.SearchHeuristic =
						neighbor.coordinates.DistanceTo(toCell.coordinates);
					frontier.Add(neighbor);
				}
Search Priority
From now on, we'll determine the search priority based on the cell distance plus its heuristic. Let's add a convenient property for this value to HexCell.
	public int SearchPriority {
		get {
			return distance + SearchHeuristic;
		}
	}
To make this work, adjust HexGrid.Search so it uses this property to sort the frontier.
				frontier.Sort(
					(x, y) => x.SearchPriority.CompareTo(y.SearchPriority)
				);
Admissible Heuristic
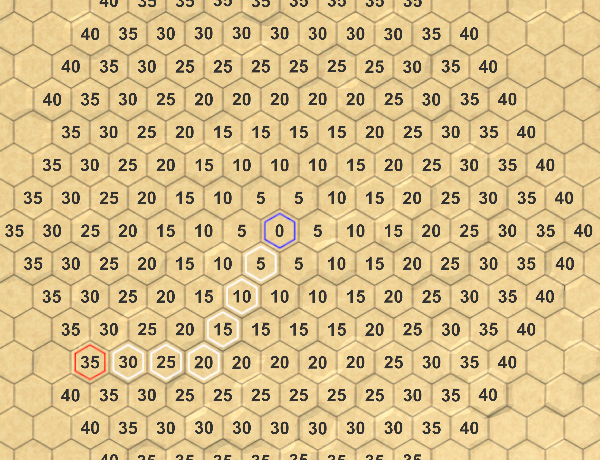
Using our new search priorities, we indeed end up visiting fewer cells. However, on a featureless map the algorithm still processes cells that lie in the wrong direction. This happens because our default movement cost is 5 per step, while the heuristic only adds 1 per step. So the influence of the heuristic isn't very strong.
If the movement costs are the same across the map, then we could use the same costs when determining the heuristic. In our case, that would be our current heuristic times 5. That would drastically reduce the amount of processed cells.
However, if there are roads on the map, we might end up overestimating the remaining distance. As a result, the algorithm can make mistakes and produce a path that isn't actually the shortest.
To guarantee that we find the shortest path, we have to make sure that we never overestimate the remaining distance. This is known as an admissible heuristic. Because our minimum movement cost is 1, we have no choice but to use the same costs when determining the heuristic.
Technically, it's fine to use an even lower cost, but that would only make the heuristic weaker. The lowest possible heuristic is zero, which is simply Dijkstra's algorithm. When the heuristic is nonzero, this algorithm is known as A*, pronounced as A-star.
Priority Queue
Although A* is a good algorithm, our implementation of it is not that efficient. That's because we're using a list to store the frontier, which we have to sort each iteration. As mentioned in the previous tutorial, what we need is a priority queue, but there's no standard implementation of one. Let's now create one ourselves.
Our queue must support an enqueue and a dequeue operation, based on priority. It must also support changing the priority of a cell that's already in the queue. Ideally, we implement this while minimizing searching, sorting, and memory allocations. And we want to keep it simple too.
Creating a Custom Queue
Create a new HexCellPriorityQueue class with the required public methods. We'll use a simple list to keep track of the queue's contents. Also, give it a Clear method to reset the queue, so we can reuse it.
using System.Collections.Generic;

public class HexCellPriorityQueue {

	List<HexCell> list = new List<HexCell>();

	public void Enqueue (HexCell cell) {
	}

	public HexCell Dequeue () {
		return null;
	}

	public void Change (HexCell cell) {
	}

	public void Clear () {
		list.Clear();
	}
}
We store the cell priorities in the cells themselves. So a cell's priority has to be set before it is added to the queue. But in case of a priority change, it is probably useful to know what was the old priority. So let's add that as a parameter to Change.
	public void Change (HexCell cell, int oldPriority) {
	}
It's also useful to know how many cells are in the queue, so add a Count property for that. Simply use a field that is incremented and decremented appropriately.
	int count = 0;

	public int Count {
		get {
			return count;
		}
	}

	public void Enqueue (HexCell cell) {
		count += 1;
	}

	public HexCell Dequeue () {
		count -= 1;
		return null;
	}

	…

	public void Clear () {
		list.Clear();
		count = 0;
	}
Adding to the Queue
When a cell is added to the queue, let's start by simply using its priority as its index, treating the list as a simple array.
	public void Enqueue (HexCell cell) {
		count += 1;
		int priority = cell.SearchPriority;
		list[priority] = cell;
	}
However, that only works if the list is long enough, otherwise we go out of bounds. We can prevent that by adding dummy elements to the list until it has the required length. These empty elements don't reference a cell, so they're created by adding null to the list.
		int priority = cell.SearchPriority;
		while (priority >= list.Count) {
			list.Add(null);
		}
		list[priority] = cell;
But this only stores a single cell per priority, while there will likely be multiple. To keep track of all the cells with the same priority, we have to use another list. While we could use an actual list per priority, we can also add a property to HexCell to link them together. This allows us to create a chain of cells, known as a linked list.
public HexCell NextWithSamePriority { get; set; }
To create the chain, have HexCellPriorityQueue.Enqueue make the newly added cell reference the current value at the same priority, before replacing it.
		cell.NextWithSamePriority = list[priority];
		list[priority] = cell;

Removing from the Queue
To retrieve a cell from the priority queue, we have to access the linked list at the lowest non-empty index. So loop through the list until we find it. If we don't, then the queue is empty and we return null.
We could return any cell from the found chain, because they all have the same priority. It's simplest to return the cell at the start of the chain.
	public HexCell Dequeue () {
		count -= 1;
		for (int i = 0; i < list.Count; i++) {
			HexCell cell = list[i];
			if (cell != null) {
				return cell;
			}
		}
		return null;
	}
To keep a reference to the rest of the chain, use the next cell with the same priority as the new start. If there was only one cell at this priority level, the element will become null and it will be skipped in the future.
			if (cell != null) {
				list[i] = cell.NextWithSamePriority;
				return cell;
			}
Keeping Track of the Minimum
This approach works, but requires us to iterate through the list each time we retrieve a cell. We cannot avoid searching for the lowest non-empty index, but we do not have to start from zero every time. Instead, we could keep track of the minimum priority, and start the search from there. Initially, the minimum is effectively infinite.
	int minimum = int.MaxValue;

	…

	public void Clear () {
		list.Clear();
		count = 0;
		minimum = int.MaxValue;
	}
When a cell is added to the queue, adjust the minimum if necessary.
	public void Enqueue (HexCell cell) {
		count += 1;
		int priority = cell.SearchPriority;
		if (priority < minimum) {
			minimum = priority;
		}
		…
	}
And when dequeuing, use the minimum to iterate through the list, instead of starting at zero.
	public HexCell Dequeue () {
		count -= 1;
		for (; minimum < list.Count; minimum++) {
			HexCell cell = list[minimum];
			if (cell != null) {
				list[minimum] = cell.NextWithSamePriority;
				return cell;
			}
		}
		return null;
	}
This drastically reduces the amount of time we have to spend looping through our priority list.
Changing Priorities
When a cell's priority changes, it has to be removed from the linked list that it's currently a part of. To do so, we have to follow the chain until we find it.
Begin by declaring the head of the old priority list to be the current cell, and also keep track of the next cell. We can directly grab the next cell, because we know that there is at least one cell at this index.
	public void Change (HexCell cell, int oldPriority) {
		HexCell current = list[oldPriority];
		HexCell next = current.NextWithSamePriority;
	}
If the current cell is the changed cell, then it is the head cell and we can cut it away, as if we dequeued it.
		HexCell current = list[oldPriority];
		HexCell next = current.NextWithSamePriority;
		if (current == cell) {
			list[oldPriority] = next;
		}
If not, we have to follow the chain until we end up at the cell in front of the changed cell. That one holds the reference to the cell that has been changed.
		if (current == cell) {
			list[oldPriority] = next;
		}
		else {
			while (next != cell) {
				current = next;
				next = current.NextWithSamePriority;
			}
		}
At this point, we can remove the changed cell from the linked list, by skipping it.
			while (next != cell) {
				current = next;
				next = current.NextWithSamePriority;
			}
			current.NextWithSamePriority = cell.NextWithSamePriority;
After the cell has been removed, it has to be added again so it ends up in the list for its new priority.
	public void Change (HexCell cell, int oldPriority) {
		…
		Enqueue(cell);
	}
The Enqueue method increments the count, but we're not actually adding a new cell. So we have to decrement the count to compensate for that.
		Enqueue(cell);
		count -= 1;
Using the Queue
Now we can use our custom priority queue in HexGrid. We can make do with a single instance that we reuse for all searches.
	HexCellPriorityQueue searchFrontier;

	…

	IEnumerator Search (HexCell fromCell, HexCell toCell) {
		if (searchFrontier == null) {
			searchFrontier = new HexCellPriorityQueue();
		}
		else {
			searchFrontier.Clear();
		}

		…
	}
The Search method now has to enqueue fromCell before starting its loop, and each iteration begins by dequeuing a cell. This replaces the old frontier code.
WaitForSeconds delay = new WaitForSeconds(1 / 60f);// List<HexCell> frontier = new List<HexCell>();fromCell.Distance = 0;// frontier.Add(fromCell);searchFrontier.Enqueue(fromCell); while (searchFrontier.Count > 0) { yield return delay; HexCell current = searchFrontier.Dequeue();// frontier.RemoveAt(0);… }
Adjust the code for adding and changing a neighbor as well. Make sure to remember the old priority before changing it.
				if (neighbor.Distance == int.MaxValue) {
					neighbor.Distance = distance;
					neighbor.PathFrom = current;
					neighbor.SearchHeuristic =
						neighbor.coordinates.DistanceTo(toCell.coordinates);
//					frontier.Add(neighbor);
					searchFrontier.Enqueue(neighbor);
				}
				else if (distance < neighbor.Distance) {
					int oldPriority = neighbor.SearchPriority;
					neighbor.Distance = distance;
					neighbor.PathFrom = current;
					searchFrontier.Change(neighbor, oldPriority);
				}
Finally, we no longer need to sort the frontier.
// frontier.Sort(// (x, y) => x.SearchPriority.CompareTo(y.SearchPriority)// );
As mentioned earlier, which shortest path is found depends on the order in which the cells are processed. Our queue produces a different order than a sorted list, hence you can get different paths. Because we're both adding to and removing from the head of the linked lists for each priority, they function as stacks rather than queues. The cells that were added last get processed first. A side effect of this approach is that the algorithm tends to zigzag. This makes it more likely to produce paths that zigzag as well. Fortunately, such paths tend to look better, so it's a nice side effect.
The next tutorial is Limited Movement.