Rendering 13
Deferred Shading
- Explore deferred shading.
- Fill Geometry Buffers.
- Support both HDR and LDR.
- Work with Deferred Reflections.
This is part 13 of a tutorial series about rendering. The previous installment covered semitransparent shadows. Now we'll look at deferred shading.
This tutorial was made with Unity 5.5.0f3.
Another Rendering Path
Up to this point we've always used Unity's forward rendering path. But that's not the only rendering method that Unity supports. There's also the deferred path. And there are also the legacy vertex lit and the legacy deferred paths, but we won't cover those.
So there is a deferred rendering path, but why would we bother with it? After all, we can render everything we want using the forward path. To answer that question, let's investigate their differences.
Switching Paths
Which rendering path is used is defined by the project-wide graphics settings. You can get there via Edit / Project Settings / Graphics. The rendering path and a few other settings are configured in three tiers. These tiers correspond to different categories of GPUs. The better the GPU, the higher a tier Unity uses. You can select which tier the editor uses via the Editor / Graphics Emulation submenu.
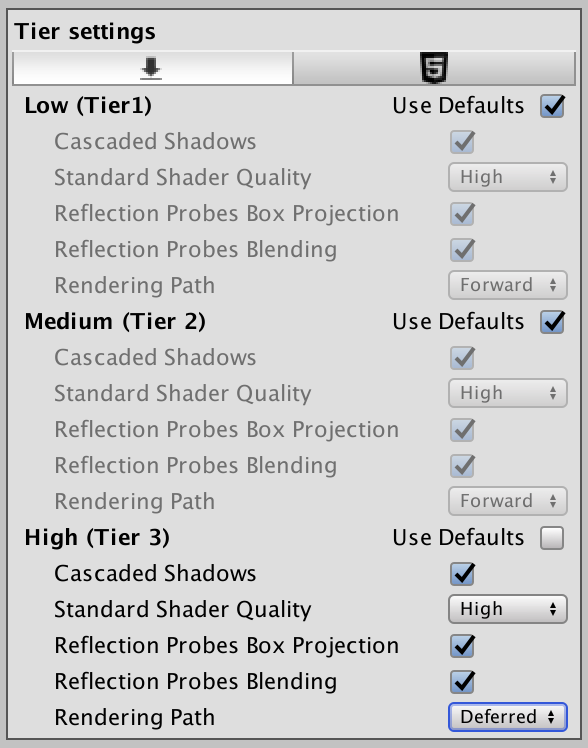
To change the rendering path, disable Use Defaults for the desired tier, then select either Forward or Deferred as the Rendering Path.
Comparing Draw Calls
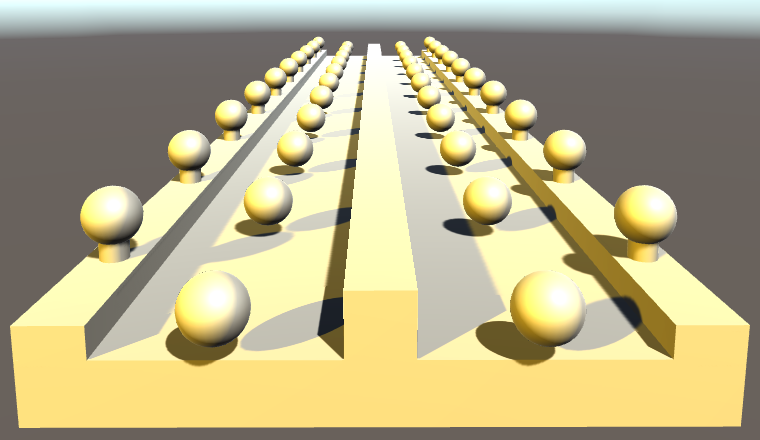
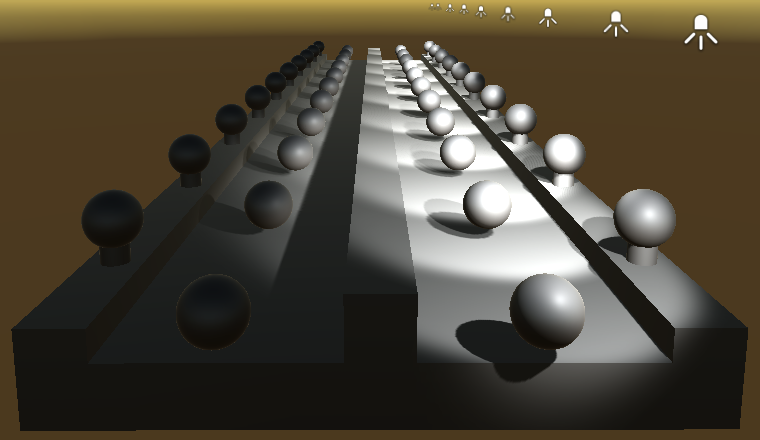
I'll use the Shadows Scene from the Rendering 7, Shadows tutorial to compare both approaches. This scene has its Ambient Intensity set to zero, to make the shadows more visible. Because our own shader doesn't support deferred yet, change the used material so it relies on the standard shader.
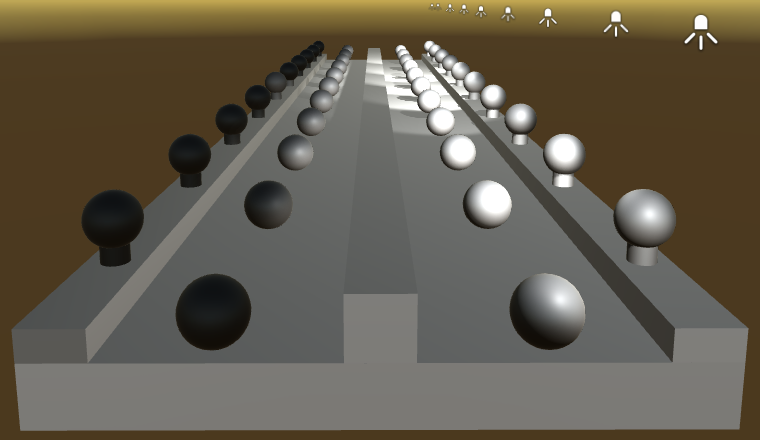
The scene has quite a few objects and two directional lights. Let's look at it both without and with shadows enabled for both lights.

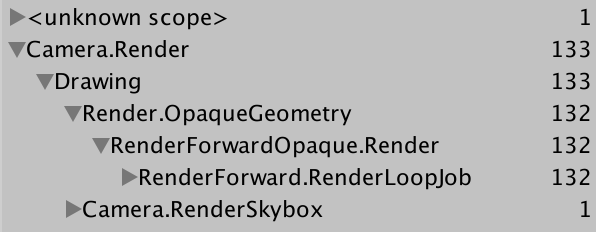
While using the forward rendering path, use the frame debugger to examine how the scene gets rendered.
There are 66 geometry objects in the scene, all visible. If dynamic batching was possible, these could've been drawn with less than 66 batches. However, that only works with a single directional light. As there is an additional light, dynamic batching is not used. And because there are two directional lights, all geometry gets drawn twice. So that's 132 draw calls, 133 with the skybox.
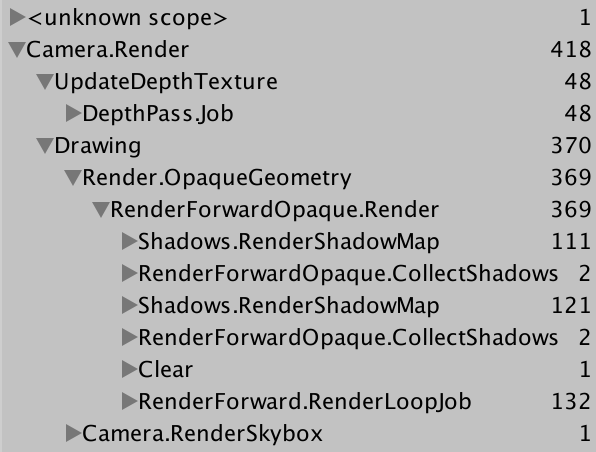
When shadows are enabled, we need more draw calls to generate the cascading shadow maps. Recall how directional shadow maps are created. First, the depth buffer is filled, which requires only 48 draw calls, thanks to some dynamic batching. Then, the cascading shadow maps are created. The first light's shadow map ends up requiring 111 draw calls, while the second one needs 121. These shadow maps are rendered to screen-space buffers, which perform filtering. Then the geometry is drawn, once per light. Doing all this requires 418 draw calls.
Now disable the shadows again and switch to the deferred rendering path. The scene still looks the same, except that MSAA has been turned off. How does it get drawn this time?
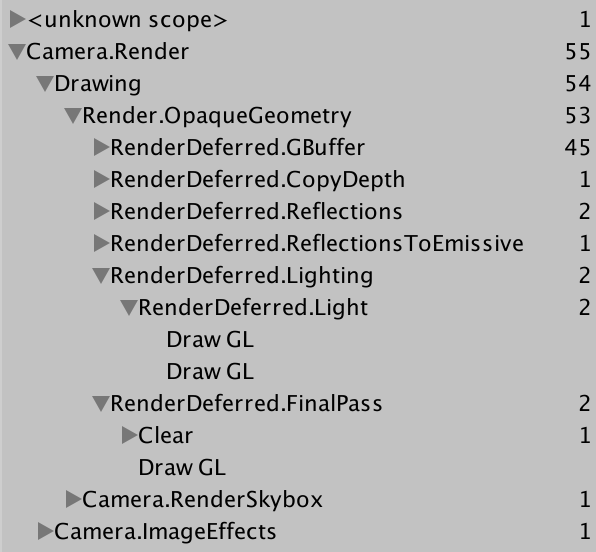
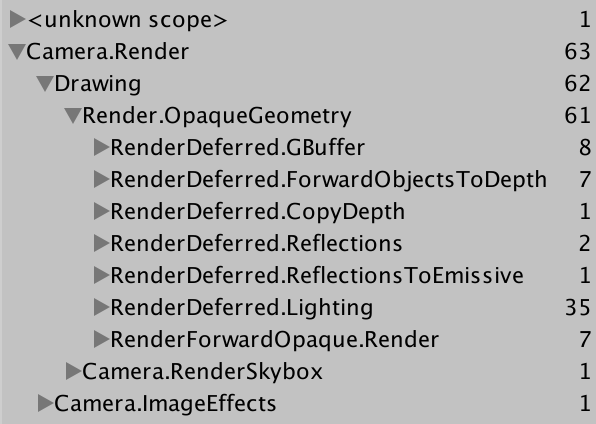
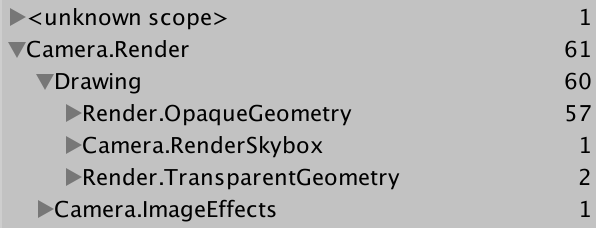
Apparently, a GBuffer gets rendered, which requires 45 draw calls. That's one per object, with some dynamic batching. Then the depth texture gets copied, followed by thee draw calls that do something with reflections. After that, we get to lighting, which requires two draw calls, one per light. Then there's a final pass and the skybox, for a total of 55 draw calls.
55 is quite a bit less than 133. It looks like deferred only draws each object once in total, not once per light. Besides that and some other work, each light gets its own draw call. What about when shadows are enabled?
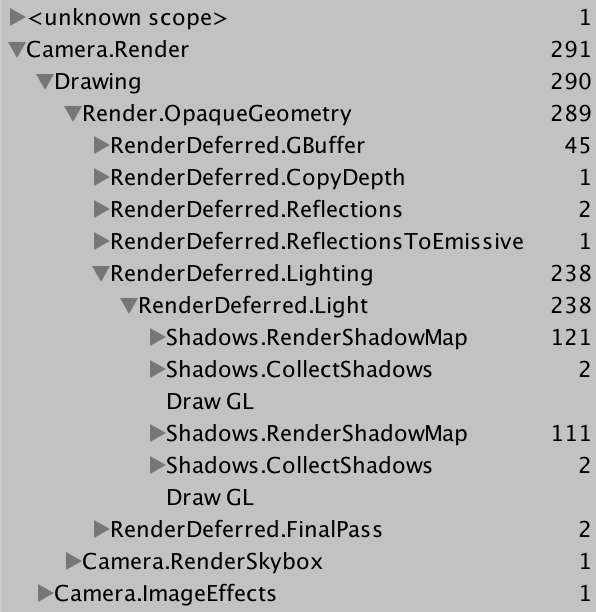
We see that both shadow maps get rendered and then filtered in screen space, right before their lights are drawn. Just like in forward mode, this adds 236 draw calls, for a total of 291. As deferred already created a depth texture, we got that for free. Again, 291 is quite a bit less than 418.
Splitting the Work
Deferred shading appears to be more efficient when rendering more than one light, compared to forward shading. While forward requires one additional additive pass per object per light, deferred doesn't need this. Of course both still have to render the shadow maps, but deferred doesn't have to pay extra for the depth texture that directional shadows need. How does the deferred path get away with this?
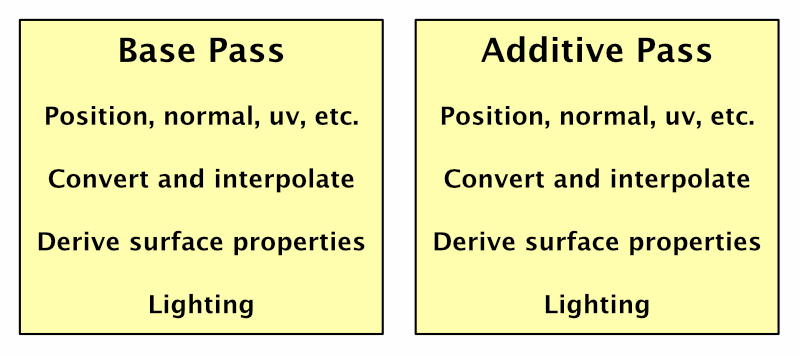
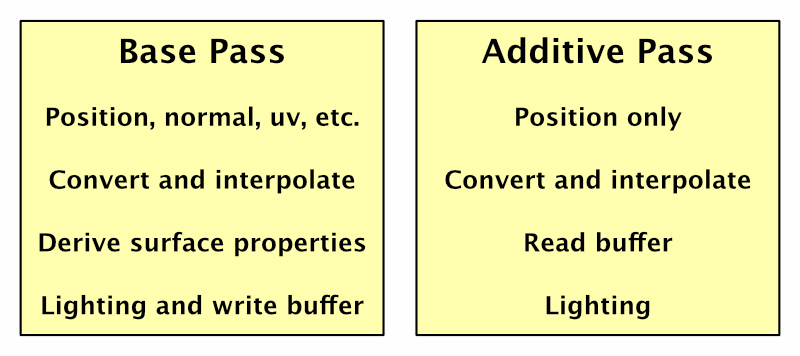
To render something, the shader has to grab the mesh data, convert it to the correct space, interpolate it, retrieve and derive surface properties, and calculate lighting. Forward shaders have to repeat all of this for every pixel light that illuminates an object. Additive passes are cheaper than the base pass, because the depth buffer has already been primed, and they don't bother with indirect light. But they still have to repeat most of the work that the base pass has already done.
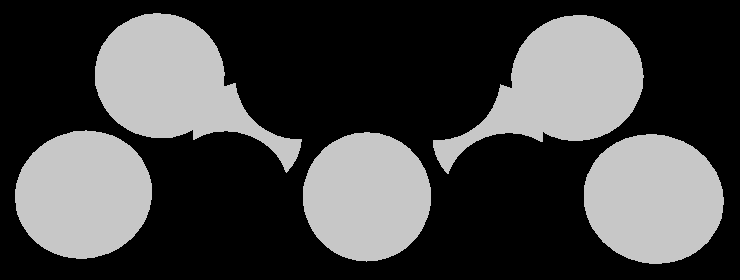
As the geometry's properties are the same every time, why don't we cache them? Have the base pass store them in a buffer. Then additive passes can reuse that data, eliminating duplicate work. We have to store this data per fragment, so we need a buffer that fits the display, just like the depth and the frame buffer.
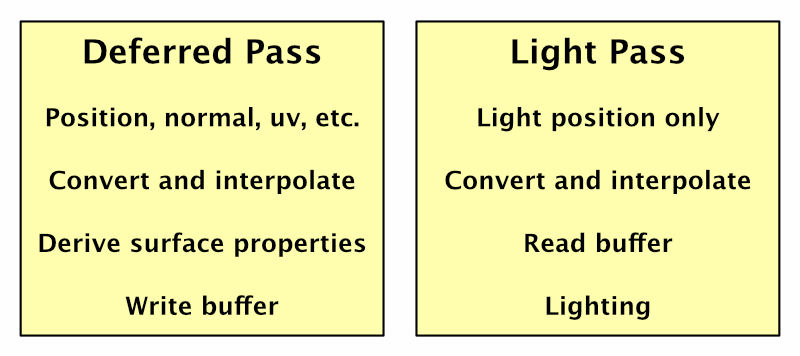
Now we have all the geometry data that we require for lighting available in a buffer. The only thing that's missing is the light itself. But that means we no longer need to render the geometry at all. We can suffice with rendering the light. Furthermore, the base pass only has to fill the buffer. All direct lighting calculations can be deferred until the lights are rendered individually. Hence, deferred shading.
Many Lights
If you're only using a single light, then deferred by itself doesn't provide any benefit. But when using many lights, it shines. Each additional light only adds a little extra work, as long as they don't cast shadows.
Also, when geometry and lights are rendered separately, there is no limit to how many lights can affect an object. All lights are pixel lights and illuminate everything in their range. The Pixel Light Count quality setting does not apply.
Rendering Lights
So how are lights themselves rendered? As directional lights affect everything, they are rendered with a single quad that covers the entire view.
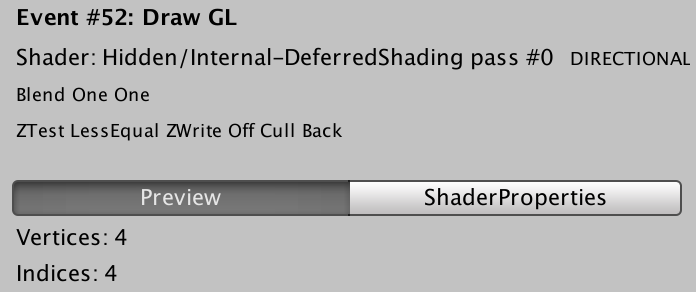
This quad is rendered with the Internal-DeferredShading shader. Its fragment program fetches the geometry data from the buffer and relies on the UnityDeferredLibrary include file to configure the light. Then it computes the lighting, just like a forward shader does.
Spotlights work the same way, except that they don't have to cover the entire view. Instead, a pyramid is rendered that fits the volume that the spotlight illuminates. So only the visible potion of this volume will be rendered. If it ends up completely hidden behind other geometry, no shading is performed for this light.
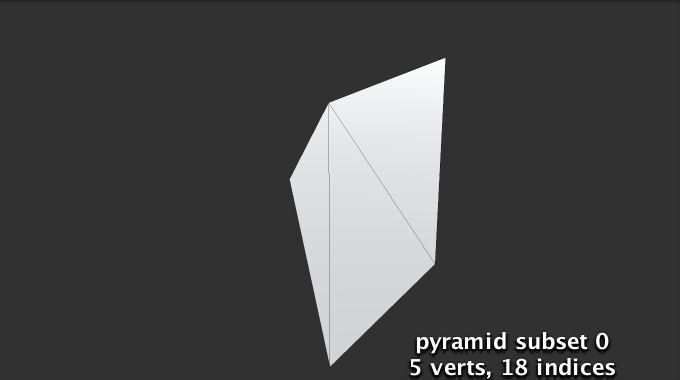
If a fragment of this pyramid is rendered, it will perform lighting calculations. But this only makes sense if there actually is geometry inside the light's volume. Geometry behind the volume need not be rendered, because the light doesn't reach there. To prevent rendering these unnecessary fragments, the pyramid is first rendered with the Internal-StencilWrite shader. This pass writes to the stencil buffer, which can be used to mask which fragments get rendered later. The only case when this technique can't be used is when the light volume intersects the camera's near plane.
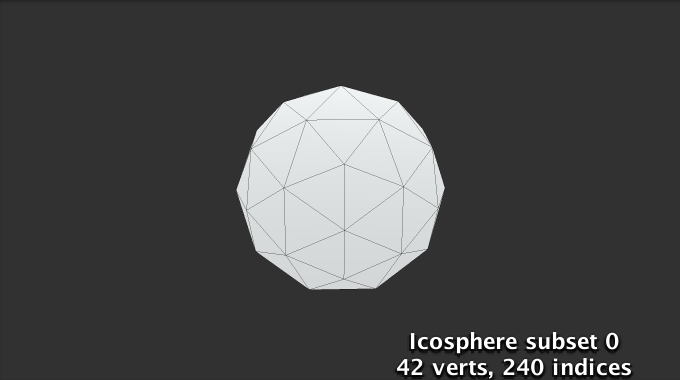
Point lights use the same approach, except with an icosphere instead of a pyramid.
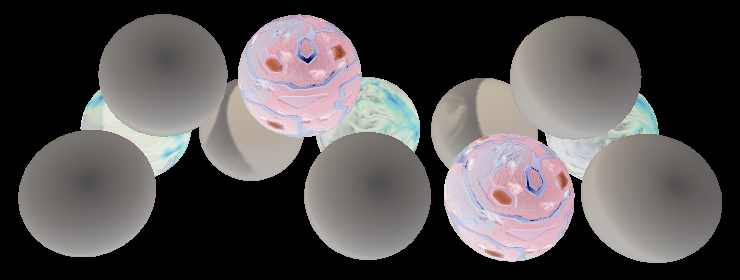
Light Range
If you've been stepping through the frame debugger, you might have noticed that the colors look weird during the deferred lighting phase. It's as if they're inverted, like a photo negative. The final deferred pass converts this intermediate state to the final correct colors.
Unity does this when the scene is rendered with low dynamic range – LDR – colors, which is the default. In this case, the colors are written to an ARGB32 texture. Unity logarithmically encodes the colors to achieve a greater dynamic range than usual for this format. The final deferred pass converts to normal colors.
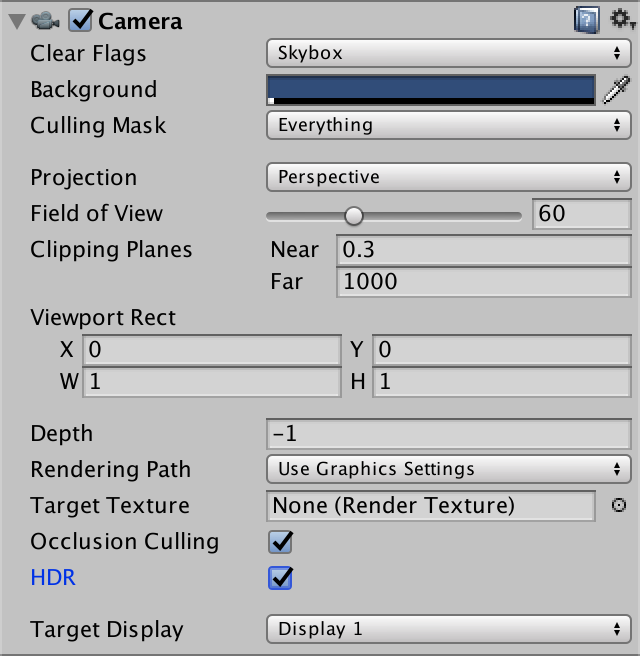
When the scene is rendered in high dynamic range – HDR – Unity uses the ARGBHalf format. In this case, the special encoding is not needed and there is no final deferred pass. Whether HDR is enabled is a property of the camera. Switch it on, so we see normal colors when using the frame debugger.
Geometry Buffers
The downside of caching data is that it has to be stored somewhere. The deferred rendering path uses multiple render textures for this purpose. These textures are known as geometry buffers, or G-buffers for short.
Deferred shading requires four G-buffers. Their combined size is 160 bits per pixel for LDR and 192 bits per pixel for HDR. That's quite a bit more than a single 32-bit frame buffer. Modern desktop GPUs can deal with that, but mobile and even laptop GPUs can have trouble with higher resolutions.
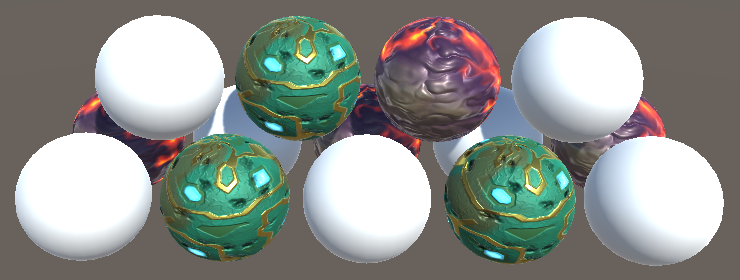
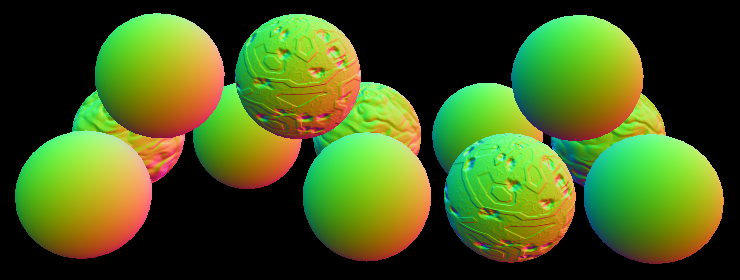
You can inspect some of the data in the G-buffer via the scene window. Use the button at the top left of the window to select a different display mode. It's set to Shaded by default. When using the deferred rendering path, you can choose one of the four Deferred options. For example, Normal shows the RGB channels of the buffer that contains the surface normals.
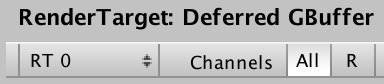
You can also inspects the multiple render targets of a draw call via the frame debugger. There is a dropdown menu to select the render target at the top left of the menu on the right side of the window. The default is the first target, which is RT 0.
Mixing Rendering Modes
Our own shader doesn't support the deferred rendering path yet. So what would happen if some of the objects in the scene were rendered with our shader, while in deferred mode?
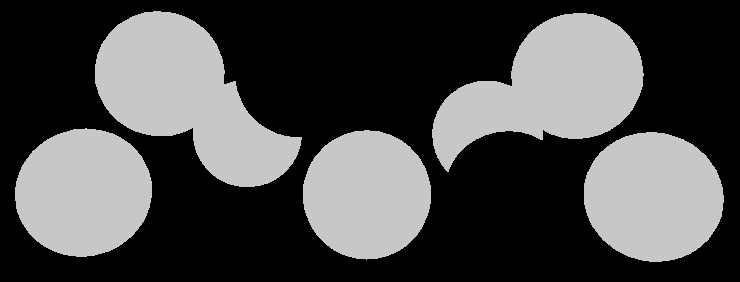
Our objects appear to render fine. It turns out that deferred rendering is done first, followed by an additional forward rendering phase. During the deferred rendering phase, the forward objects do not exist. The only exception is when there are directional shadows. In that case, a depth pass is needed for the forward objects. This is done directly after the G-buffers are filled. As a side effect, the forward objects end up as solid black in the albedo buffer.
This is true for transparent objects as well. They require a separate forward rendering phase, as usual.
Filling the G-Buffers
Now that we have an idea of how deferred shading works, let's add support for it to My First Lighting Shader. This is done by adding a pass with its LightMode tag set to Deferred. The order of the passes doesn't matter. I put it in between the additive and the shadow passes.
		Pass {
			Tags {
				"LightMode" = "Deferred"
			}
		}
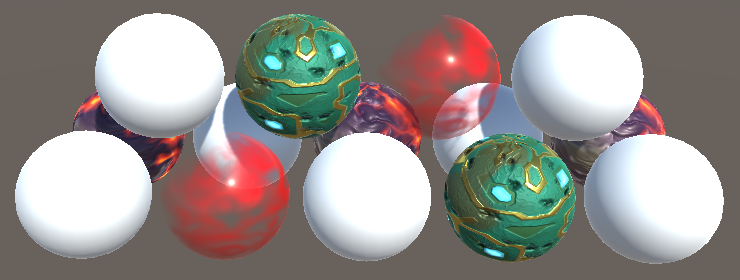
Unity detects that our shader has a deferred pass, so it includes the opaque and cutout objects that use our shader in the deferred phase. Transparent objects will still be rendered in the transparent phase, of course.
Because our pass is empty, everything gets rendered as solid white. We have to add shader features and programs. The deferred pass is mostly the same as the base pass, so copy the contents of that pass, then make a few changes. First, we'll define DEFERRED_PASS instead of FORWARD_BASE_PASS. Second, the deferred pass doesn't need variants for the _RENDERING_FADE and _RENDERING_TRANSPARENT keywords. Third, deferred shading is only possible when the GPU supports writing to multiple render targets. So we'll add a directive to exclude it when those are not supported. I marked these differences.
		Pass {
			Tags {
				"LightMode" = "Deferred"
			}

			CGPROGRAM

			#pragma target 3.0
			#pragma exclude_renderers nomrt

			#pragma shader_feature _ _RENDERING_CUTOUT
			#pragma shader_feature _METALLIC_MAP
			#pragma shader_feature _ _SMOOTHNESS_ALBEDO _SMOOTHNESS_METALLIC
			#pragma shader_feature _NORMAL_MAP
			#pragma shader_feature _OCCLUSION_MAP
			#pragma shader_feature _EMISSION_MAP
			#pragma shader_feature _DETAIL_MASK
			#pragma shader_feature _DETAIL_ALBEDO_MAP
			#pragma shader_feature _DETAIL_NORMAL_MAP

			#pragma vertex MyVertexProgram
			#pragma fragment MyFragmentProgram

			#define DEFERRED_PASS

			#include "My Lighting.cginc"

			ENDCG
		}
Now the deferred pass functions roughly like the base pass. So it ends up writing shaded results to the G-buffers, instead of geometry data. This is not correct. We have to output the geometry data and not compute direct lighting.
Four Outputs
In My Lighting, we have to support two kinds of output for MyFragmentProgram. In the case of the deferred pass, there are four buffers that we need to fill. We do that by outputting to four targets. In all other cases, we can suffice with a single target. Let's define an output structure for this, directly above MyFragmentProgram.
struct FragmentOutput {
	#if defined(DEFERRED_PASS)
		float4 gBuffer0 : SV_Target0;
		float4 gBuffer1 : SV_Target1;
		float4 gBuffer2 : SV_Target2;
		float4 gBuffer3 : SV_Target3;
	#else
		float4 color : SV_Target;
	#endif
};
Adjust MyFragmentProgram so it returns this structure. For the deferred pass, we'll have to assign values to all four outputs, which we'll do shortly. The other passes simply copy the final shaded color.
FragmentOutput MyFragmentProgram (Interpolators i) {
	…

	FragmentOutput output;
	#if defined(DEFERRED_PASS)
	#else
		output.color = color;
	#endif
	return output;
}
Buffer 0
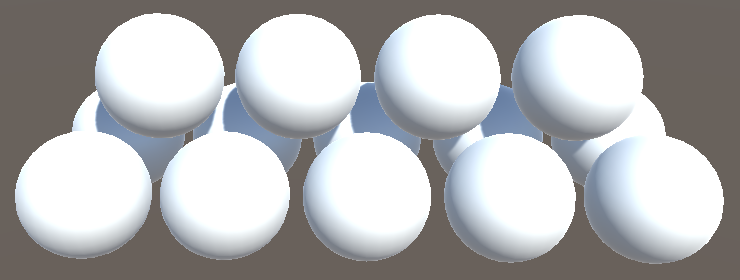
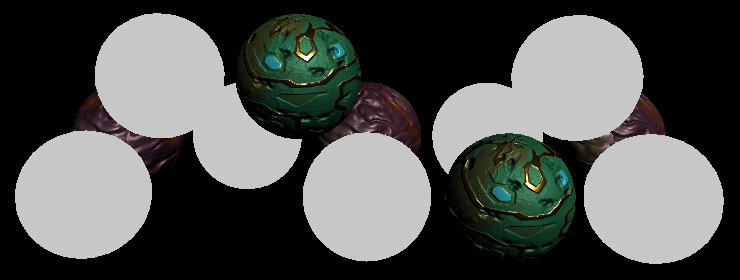
The first G-buffer is used to store the diffuse albedo and the surface occlusion. It's an ARGB32 texture, like a regular frame buffer. Albedo is stored in the RGB channels and the occlusion is stored in the A channel. We know the albedo color at this point, and we can use GetOcclusion to access the occlusion value.
	#if defined(DEFERRED_PASS)
		output.gBuffer0.rgb = albedo;
		output.gBuffer0.a = GetOcclusion(i);
	#else
You can use the scene view or the frame debugger to inspect the contents of the first G-buffer, to verify that we fill it correctly. This will show you its RGB channels. However, the A channel isn't shown. To inspect the occlusion data, you can temporarily assign it to the RGB channels.
Buffer 1
The second G-buffer is used to store the specular color in the RGB channels, and the smoothness value in the A channel. It is also an ARGB32 texture. We know what the specular tint is, and can use GetSmoothness to retrieve the smoothness value.
		output.gBuffer0.rgb = albedo;
		output.gBuffer0.a = GetOcclusion(i);
		output.gBuffer1.rgb = specularTint;
		output.gBuffer1.a = GetSmoothness(i);

The scene view allows us to directly see the smoothness values, so we don't have to use a trick to verify them.
Buffer 2
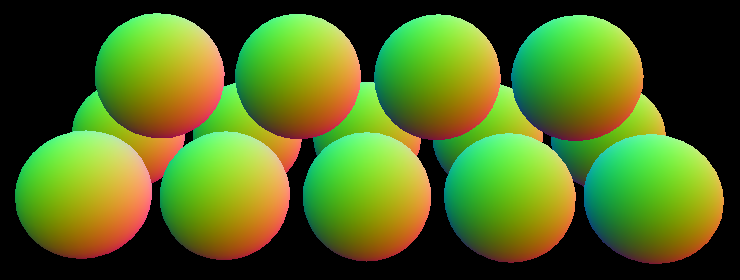
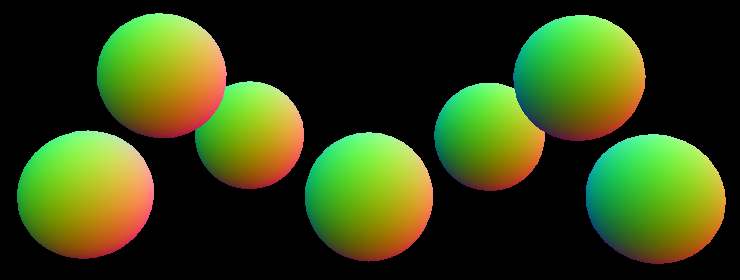
The third G-buffer contains the world-space normal vectors. They're stored in the RGB channels of an ARGB2101010 texture. This means that each coordinate is stored using ten bits, instead of the usual eight, which makes them more precise. The A channel only has two bits – so the total is again 32 bits – but it isn't used, so we'll just set it to 1. The normal is encoded like a regular normal map.
		output.gBuffer1.rgb = specularTint;
		output.gBuffer1.a = GetSmoothness(i);
		output.gBuffer2 = float4(i.normal * 0.5 + 0.5, 1);
Buffer 3
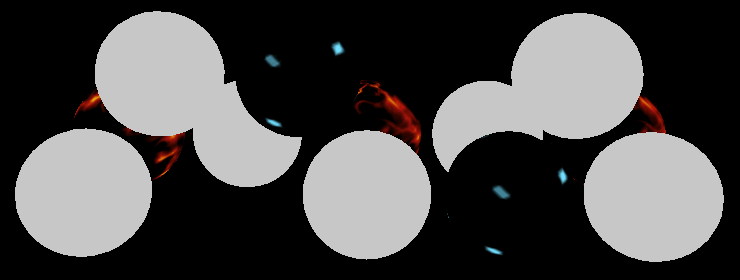
The final G-buffer is used to accumulate the lighting of the scene. Its format depends on whether the camera is set to LDR or HDR. In the case of LDR, it's an ARGB2101010 texture, just like the buffer for normals. When HDR is enabled, the format is ARGBHalf, which stores a 16-bit floating-point value per channel, for a total of 64 bits. So the HDR version is twice as large as the other buffers. Only the RGB channels are used, so the A channel can be set to 1 again.
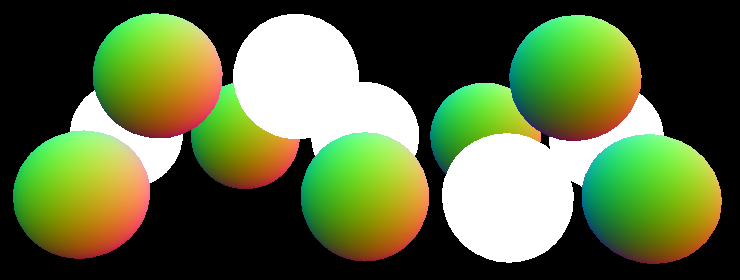
The first light that is added to this buffer is the emissive light. There is no separate light for this, so we have to do it in this pass. Let's begin by using the color that we've already computed.
		output.gBuffer2 = float4(i.normal * 0.5 + 0.5, 1);
		output.gBuffer3 = color;
To preview this buffer, either use the frame debugger, or temporarily assign this color to the first G-buffer.
The color that we're using right now is fully shaded as if there was a directional light, which is incorrect. We can eliminate all the direct light calculations by using a dummy light set to black for the deferred pass.
UnityLight CreateLight (Interpolators i) {
	UnityLight light;

	#if defined(DEFERRED_PASS)
		light.dir = float3(0, 1, 0);
		light.color = 0;
	#else
		#if defined(POINT) || defined(POINT_COOKIE) || defined(SPOT)
			light.dir = normalize(_WorldSpaceLightPos0.xyz - i.worldPos);
		#else
			light.dir = _WorldSpaceLightPos0.xyz;
		#endif

		UNITY_LIGHT_ATTENUATION(attenuation, i, i.worldPos);

		light.color = _LightColor0.rgb * attenuation;
	#endif
	light.ndotl = DotClamped(i.normal, light.dir);
	return light;
}
While we're adjusting CreateLight, let's also get rid of the light.ndotl calculation. Both that structure field and the DotClamped function have been deprecated by Unity.
// light.ndotl = DotClamped(i.normal, light.dir);
We've shut off the direct light, but we still need to include the emissive light. Currently, it's only retrieved for the forward base pass. Make sure it's included in the deferred pass as well.
float3 GetEmission (Interpolators i) {
	#if defined(FORWARD_BASE_PASS) || defined(DEFERRED_PASS)
		…
	#else
		return 0;
	#endif
}
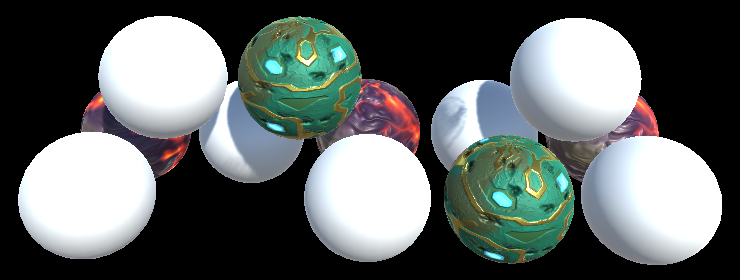
Ambient Light
The result looks good, but it's not complete yet. We're missing the ambient environmental light.
There is no separate pass for the ambient light. Like emissive light, it has to be added when the G-buffers are filled. So let's enable the indirect light for the deferred pass as well.
UnityIndirect CreateIndirectLight (Interpolators i, float3 viewDir) {
	…

	#if defined(FORWARD_BASE_PASS) || defined(DEFERRED_PASS)
		…
	#endif

	return indirectLight;
}

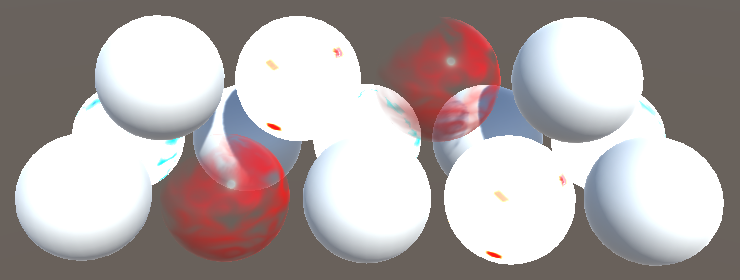
HDR and LDR
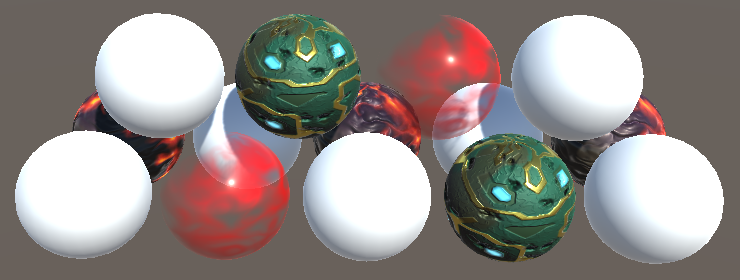
Our shader now produces the same results in both forward and deferred mode. At least, when using an HDR camera. It looks quite wrong in LDR mode.
This happens because Unity expects LDR data to be logarithmically encoded, as described earlier. So we have to use this encoding as well, for the emissive and ambient contribution.
First, we have to know which color range we're using. This is done by adding a multi-compile directive to our pass, based on the UNITY_HDR_ON keyword.
			#pragma shader_feature _DETAIL_NORMAL_MAP

			#pragma multi_compile _ UNITY_HDR_ON
Now we can convert our color data when this keyword has been defined. The logarithmic encoding is done with the formula 2-C, where C is the original color. We can use the exp2 function for that.

	#if defined(DEFERRED_PASS)
		#if !defined(UNITY_HDR_ON)
			color.rgb = exp2(-color.rgb);
		#endif
		…
	#else
		output.color = color;
	#endif
Deferred Reflections
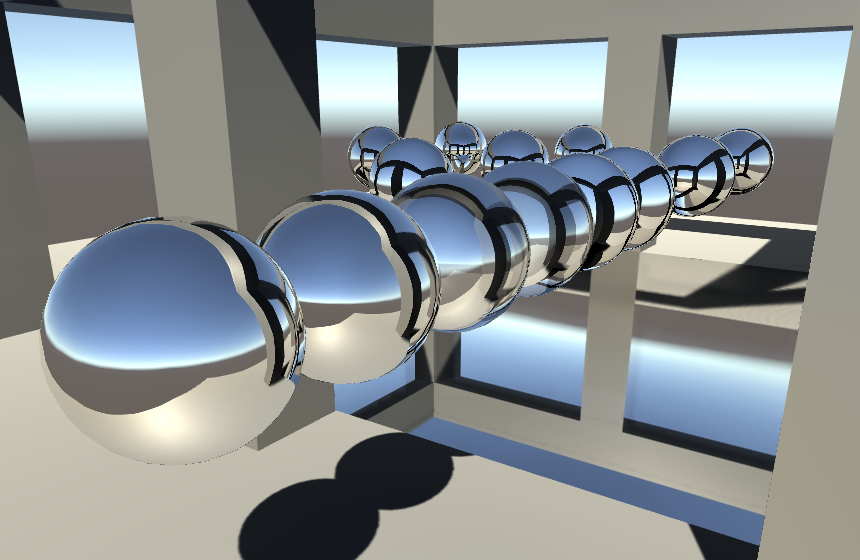
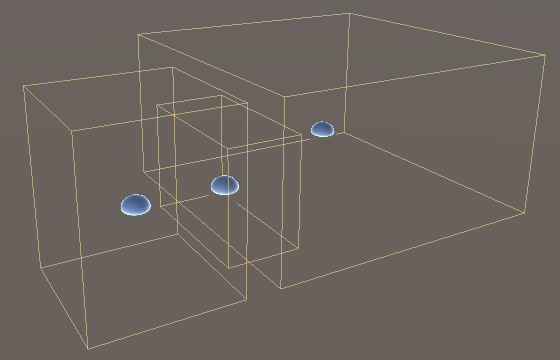
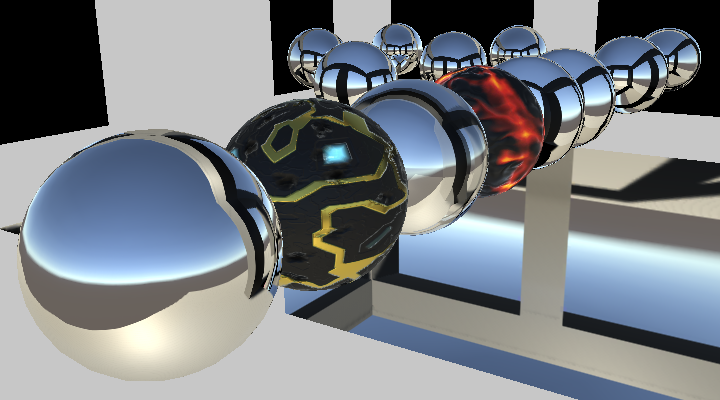
The Rendering 8, Reflections tutorial covered how Unity uses reflection probes to add specular reflections to surfaces. However, the approach described there applies to the forward rendering path. When using the deferred path, a different approach is used by default. I'll use the Reflections Scene to compare both approaches. This scene also has its Ambient Intensity set to zero. After opening the scene, make sure that the material used for the mirrored sphere and floor has its Metallic and Smoothness set to 1. Also, it has to use our shader.
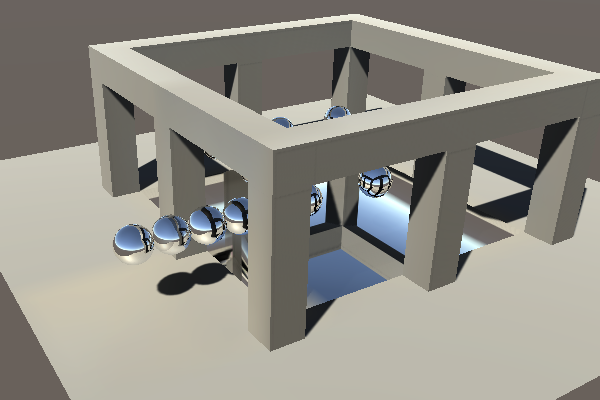

The scene has three reflection probes. One covers the area inside the structure. Another covers a small region outside the structure. These probes do not overlap. The third probe sits in between them and partially overlaps both. It was placed there to create a better blend transition between inside and outside the structure. Take a good look at this region, both in forward and in deferred mode.
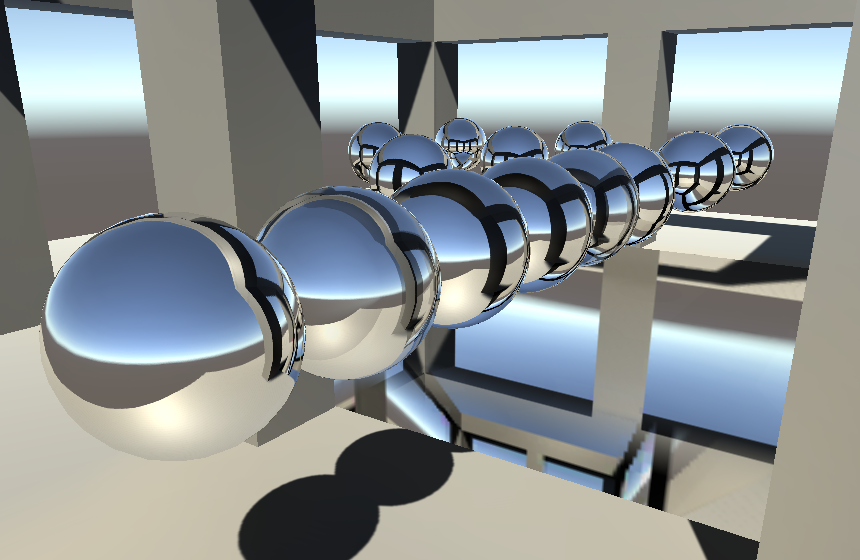
It appears that the middle probe is much stronger in deferred mode. It dominates the middle region of the transition. Worse, it also affects the floor's reflection, which looks quite wrong.
Probes Per Pixel
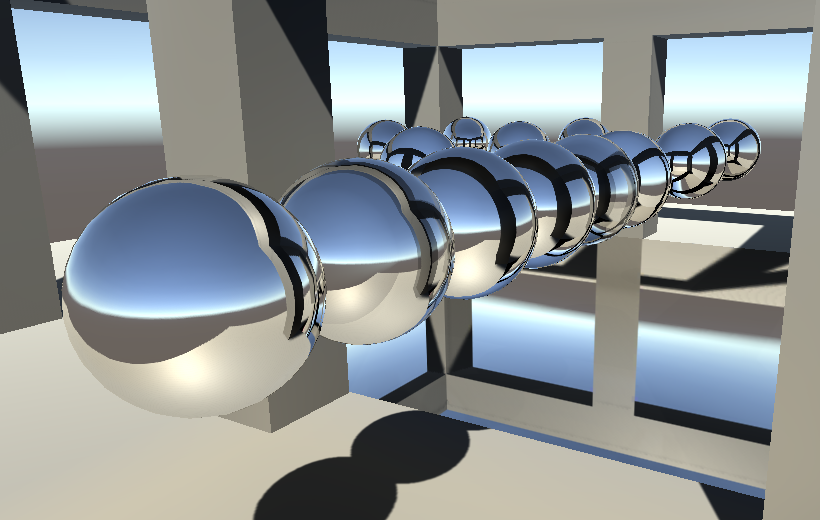
What's different in deferred mode is that the probes aren't blended per object. Instead, they are blended per pixel. This is done by the Internal-DeferredReflections shader. To make this obvious, enlarge the floor mirror so it extends beyond the structure and look at it from a distance. Then compare forward and deferred.
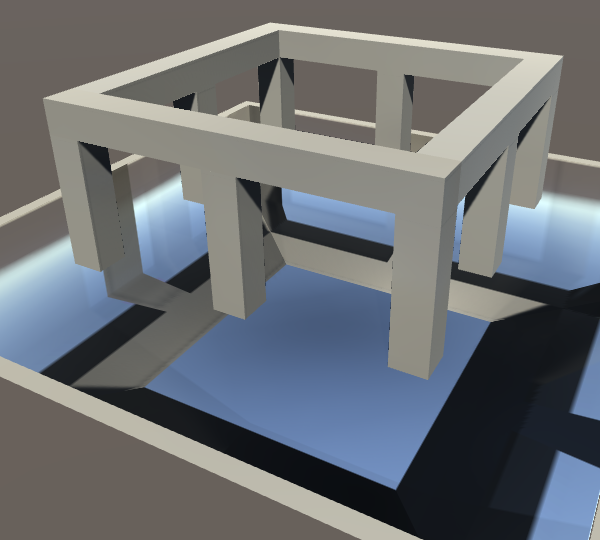
In forward mode, the floor is forced to use the probe inside the structure for its entire surface. As a result, the box projection becomes nonsensical on the outside. You can also see that it blends a little bit with one of the other probes.
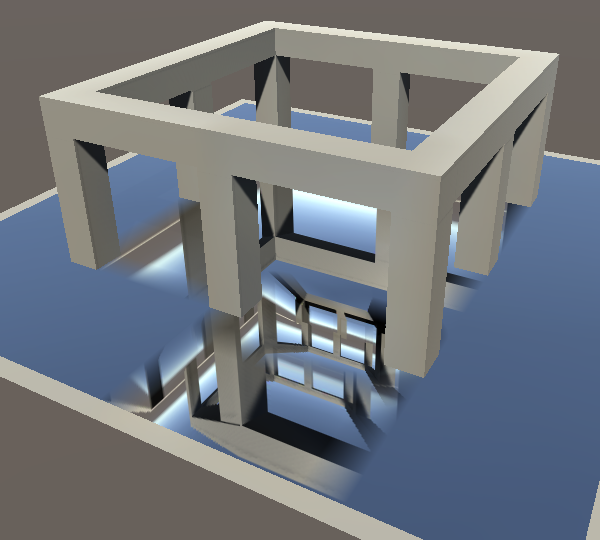
In deferred mode, the reflection probes themselves get rendered. They're projected onto the geometry that intersects their volume. So the reflections of the probe that's inside the structure don't extend beyond their bounds. Actually, they extend a little bit, as they fade out. The same goes for the other two probes.
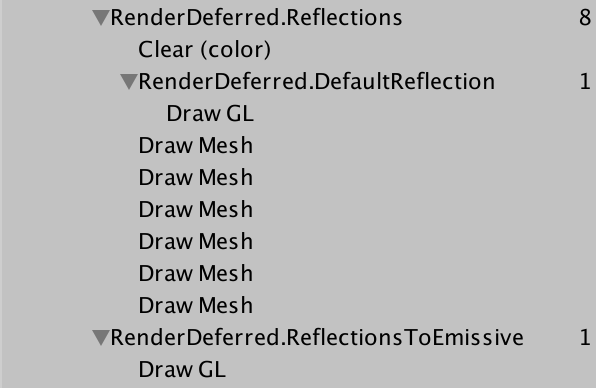
The skybox is rendered first, covering the entire view. Then each probe is rendered, just like lights, except they use cubes.
Each probe ends up completely covering the surfaces inside its volume. Any reflections that were rendered earlier are overwritten. Unity decides the order in which the probes are rendered. It turns out that larger volumes are drawn first and smaller volumes are drawn later. That way, local small probes can overrule probes for larger areas. You can use the Importance value of probes to adjust this order, via their inspector.
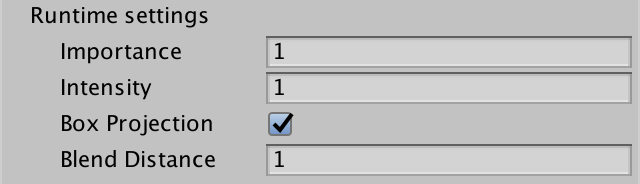
Blend Distance
In deferred mode, a probe's reflections are at full strength inside its volume. But they also extend beyond the volume. They fade out and blend with the other reflections that were already rendered. How far they extend is controlled by the probe's Fade Distance, which is set to one unit by default. This setting is only enabled when the deferred rendering path is used.
The blend distance effectively increases the volume of the reflection probe. The bounds used to calculate the box projection are expanded by the same amount. As a result, box projections that are correct in forward mode can be wrong in deferred mode, and vice versa. In our case, the reflections inside the structure can be fixed by reducing the probe's Blend Distance to zero.
The volume increase due to blend distance is also the reason why the middle probe affects the floor mirror. The probe's expanded volume intersects it. We cannot set this probe's blend distance to zero, because that would eliminate blending. Instead, we have to decrease the vertical size of the probe's volume, so it no longer intersects the floor.
Reflections in the Deferred Pass
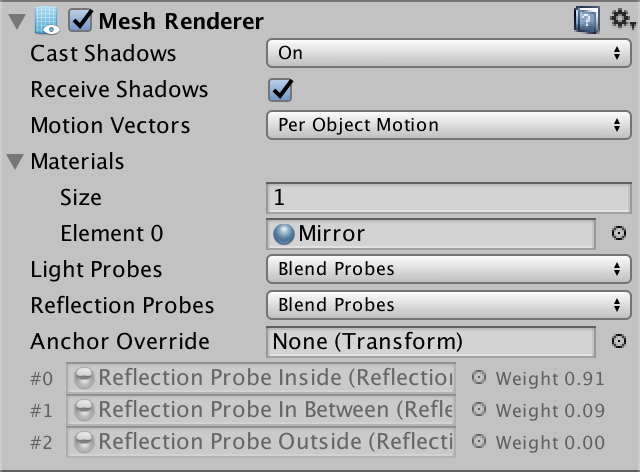
While deferred reflections are efficient and can blend more than two probes per object, there is a downside. It isn't possible to use an Anchor Override to force an object to use a specific reflection probe. But sometimes that's the only way to make sure objects receive the correct reflections. For example, when there are reflection probes both inside and outside a structure that isn't an axis-aligned rectangle.
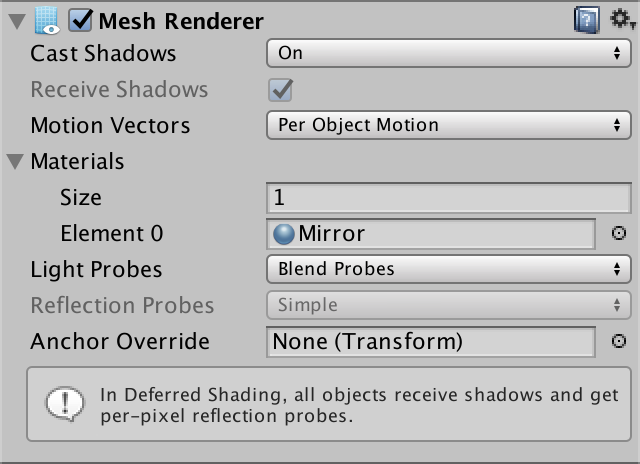
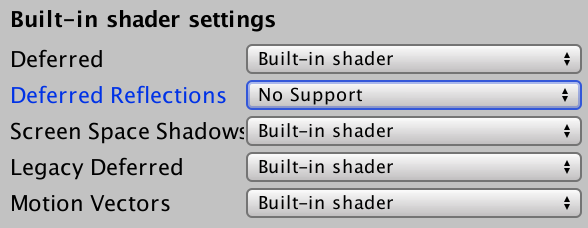
Fortunately, you can disable deferred reflections, via the graphics settings. To do so, switch the Deferred Reflections graphics setting from Built-in Shader to No Support.
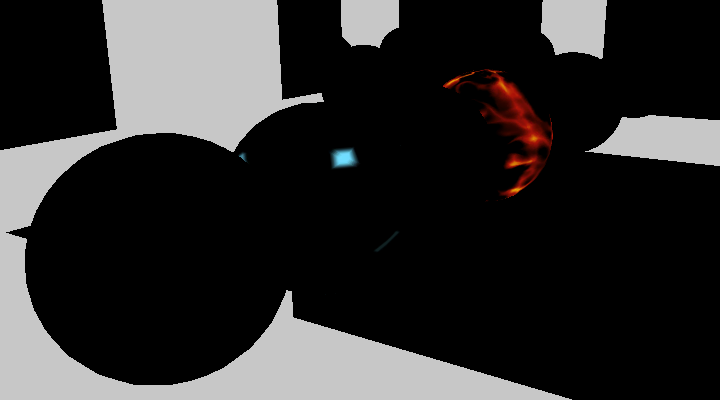
When deferred reflections are disabled, the deferred pass has to blend between reflection probes, like the forward base pass. The result is added to the emissive color. You can see this by inspecting the fourth buffer – RT 3 – via the frame debugger, when the G-buffers are filled.
It turns out that our deferred pass already renders reflections when needed and leaves them black otherwise. In fact, we've been using reflection probes all the time. It's just that they're set to black when not used.
Sampling black probes is a waste of time. Let's make sure that our deferred pass only does so when needed. We can use UNITY_ENABLE_REFLECTION_BUFFERS to check this. It's defined as 1 when deferred reflections are enabled.
UnityIndirect CreateIndirectLight (Interpolators i, float3 viewDir) {
	…

	#if defined(FORWARD_BASE_PASS) || defined(DEFERRED_PASS)
		…

		float occlusion = GetOcclusion(i);
		indirectLight.diffuse *= occlusion;
		indirectLight.specular *= occlusion;

		#if defined(DEFERRED_PASS) && UNITY_ENABLE_REFLECTION_BUFFERS
			indirectLight.specular = 0;
		#endif
	#endif

	return indirectLight;
}
The next tutorial is Fog.