Rendering 19
GPU Instancing
- Render a boatload of spheres.
- Add support for GPU instancing.
- Use material property blocks.
- Make instancing work with LOD groups.
This is part 19 of a tutorial series about rendering. The previous part covered realtime GI, probe volumes, and LOD groups. This time we'll add support for another way to consolidate draw calls into batches.
This tutorial was made with Unity 2017.1.0f3.
Batching Instances
Instructing the GPU to draw something takes time. Feeding it the data to do so, including the mesh and material properties, takes time as well. We already know of two ways to decrease the amount of draw calls, which are static and dynamic batching.
Unity can merge the meshes of static objects into a larger static mesh, which reduces draw calls. Only objects that use the same material can be combined in this way. This comes at the cost of having to store more mesh data. When dynamic batching is enabled, Unity does the same thing at runtime for dynamic objects that are in view. This only works for small meshes, otherwise the overhead becomes too great.
There is yet another way to combine draw calls. It is know as GPU instancing or geometry instancing. Like dynamic batching, this is done at runtime for visible objects. The idea is that the GPU is told to render the same mesh multiple times in one go. So it cannot combine different meshes or materials, but it's not restricted to small meshes. We're going to try out this approach.
Many Spheres
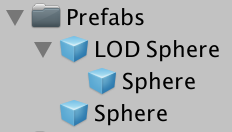
To test GPU instancing, we need to render the same mesh many times. Let's create a simple sphere prefab for this, which uses our white material.

To instantiate this sphere, create a test component which spawns a prefab many times and positions it randomly inside a spherical area. Make the spheres children of the instantiator so the editor's hierarchy window doesn't have to struggle with displaying thousands of instances.
using UnityEngine;
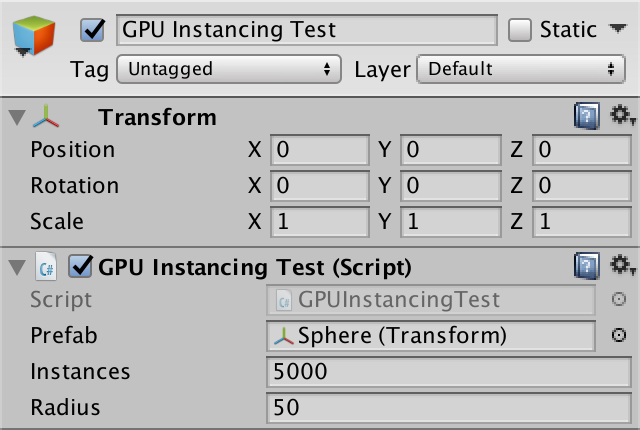
public class GPUInstancingTest : MonoBehaviour {
public Transform prefab;
public int instances = 5000;
public float radius = 50f;
void Start () {
for (int i = 0; i < instances; i++) {
Transform t = Instantiate(prefab);
t.localPosition = Random.insideUnitSphere * radius;
t.SetParent(transform);
}
}
}
Create a new scene and put a test object in it with this component. Assign the sphere prefab to it. I'll use it to create 5000 sphere instances inside a sphere of radius 50.
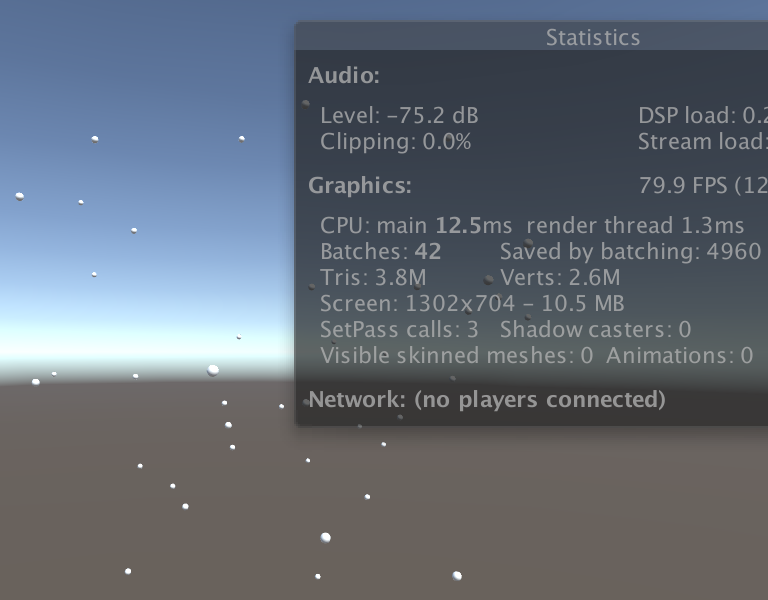
With the test object positioned at the origin, placing the camera at (0, 0, -100) ensures that the entire ball of spheres is in view. Now we can use the statistics panel of the game window to determine how all the objects are drawn. Turn off the shadows of the main light so only the spheres are drawn, plus the background. Also set the camera to use the forward rendering path.
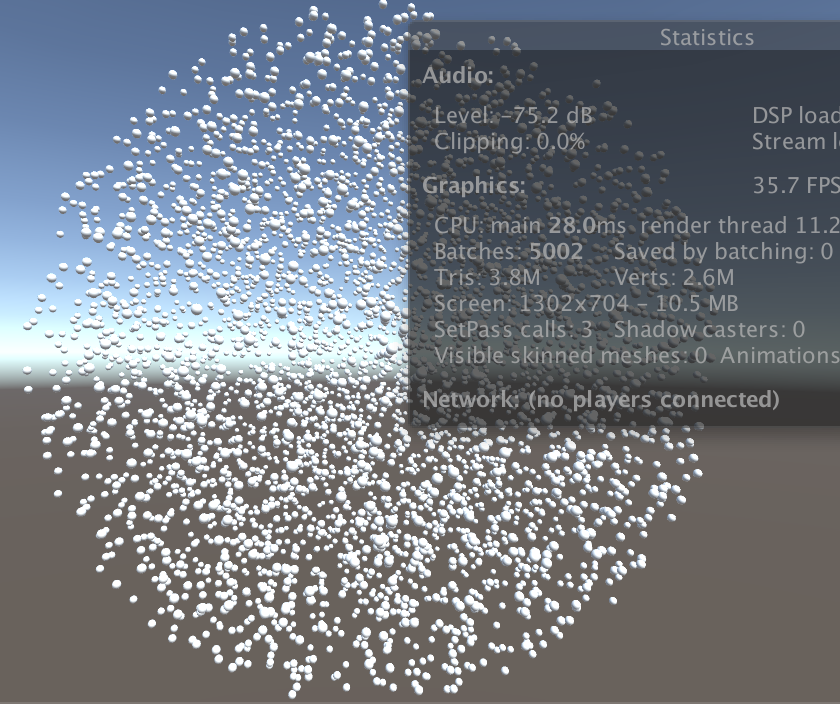
In my case, it takes 5002 draw calls to render the view, which is mentioned as Batches in the statistics panel. That's 5000 spheres plus two extra for the background and camera effects.
Note that the spheres are not batched, even with dynamic batching enabled. That's because the sphere mesh is too large. Had we used cubes instead, they would've been batched.
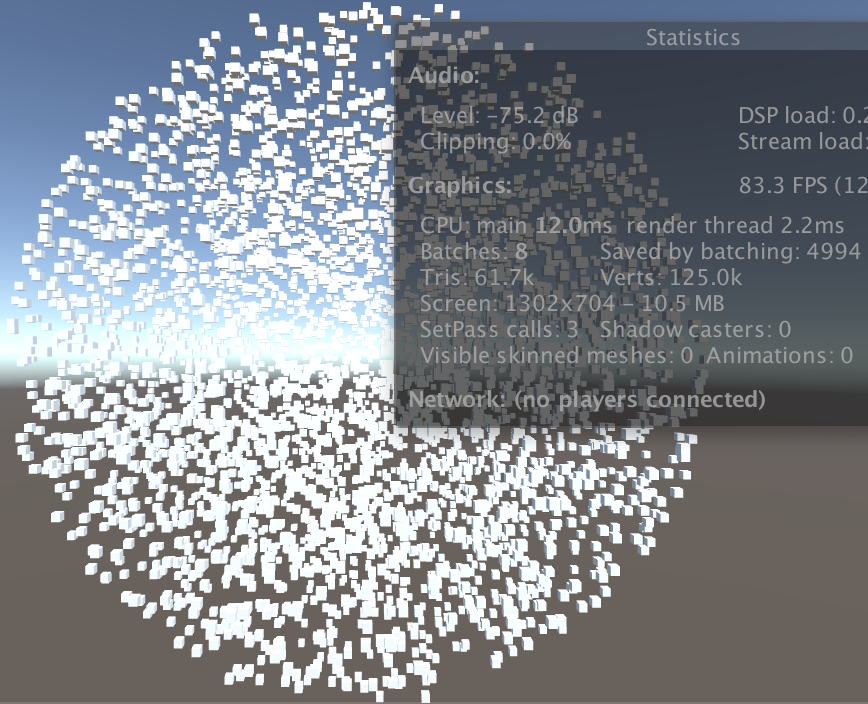
In the case of cubes, I only end up with eight batches, so all cubes are rendered in six batches. That's 4994 fewer draw calls, reported as Saved by batching in the statistics panel. In my case it also reports a much higher frame rate. 83 instead of 35 fps. This is a measure of the time to render a frame, not the actual frame rate, but it's still a good indication of the performance difference. The cubes are faster to draw because they're batched, but also because a cube requires far less mesh data than a sphere. So it's not a fair comparison.
As the editor generates a lot of overhead, the performance difference can be much greater in builds. Especially the scene window can slow things down a lot, as it's an extra view that has to be rendered. I have it hidden when in play mode to improve performance.
Supporting Instancing
GPU instancing isn't possible by default. Shaders have to be designed to support it. Even then, instancing has to be explicitly enabled per material. Unity's standard shaders have a toggle for this. Let's add an instancing toggle to MyLightingShaderGUI as well. Like the standard shader's GUI, we'll create an Advanced Options section for it. The toggle can be added by invoking the MaterialEditor.EnableInstancingField method. Do this is a new DoAdvanced method.
	void DoAdvanced () {
		GUILayout.Label("Advanced Options", EditorStyles.boldLabel);

		editor.EnableInstancingField();
	}
Add this section at the bottom of our GUI.
	public override void OnGUI (
		MaterialEditor editor, MaterialProperty[] properties
	) {
		this.target = editor.target as Material;
		this.editor = editor;
		this.properties = properties;
		DoRenderingMode();
		DoMain();
		DoSecondary();
		DoAdvanced();
	}
Select our white material. An Advanced Options header is now visible at the bottom of its inspector. However, there isn't a toggle for instancing yet.

The toggle will only be shown if the shader actually supports instancing. We can enabled this support by adding the #pragma multi_compile_instancing directive to at least one pass of a shader. This will enable shader variants for a few keywords, in our case INSTANCING_ON, but other keywords are also possible. Do this for the base pass of My First Lighting Shader.
			#pragma multi_compile_fwdbase
			#pragma multi_compile_fog
			#pragma multi_compile_instancing

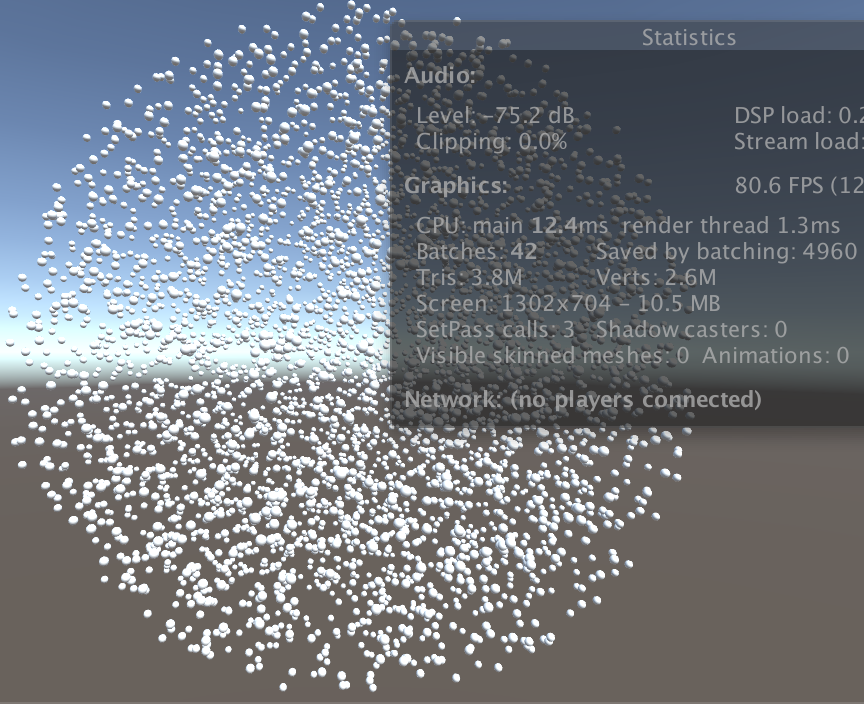
Our material now has an Enable Instancing toggle. Checking will change how the spheres are rendered.
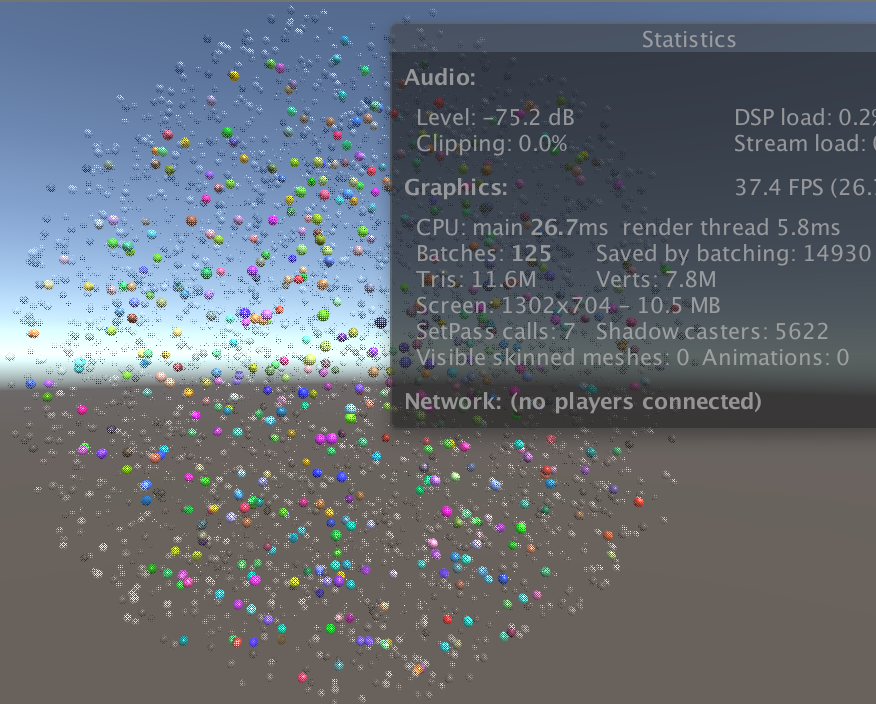
In my case, the number of batches has been reduces to 42, which means that all 5000 spheres are now rendered with only 40 batches. The frame rate has also shot up to 80 fps. But only a few spheres are visible.
All 5000 spheres are still being rendered, it's just that all spheres in the same batch end up at the same position. They all use the transformation matrix of the first sphere in the batch. This happens because the matrices of all spheres in a batch are now send to the GPU as an array. Without telling the shader which array index to use, it always uses the first one.
Instance IDs
The array index corresponding to an instance is known as its instance ID. The GPU passes it to the shader's vertex program via the vertex data. It is an unsigned integer named instanceID with the SV_InstanceID semantic on most platforms. We can simply use the UNITY_VERTEX_INPUT_INSTANCE_ID macro to include it in our VertexData structure. It is defined in UnityInstancing, which is included by UnityCG. It gives us the correct definition of the instance ID, or nothing when instancing isn't enabled. Add it to the VertexData structure in My Lighting.
struct VertexData {
	UNITY_VERTEX_INPUT_INSTANCE_ID
	float4 vertex : POSITION;
	…
};
We now have access to the instance ID in our vertex program, when instancing is enabled. With it, we can use the correct matrix when transforming the vertex position. However, UnityObjectToClipPos doesn't have a matrix parameter. It always uses unity_ObjectToWorld. To work around this, the UnityInstancing include file overrides unity_ObjectToWorld with a macro that uses the matrix array. This can be considered a dirty macro hack, but it works without having to change existing shader code, ensuring backwards compatibility.
To make the hack work, the instance's array index has to be globally available for all shader code. We have to manually set this up via the UNITY_SETUP_INSTANCE_ID macro, which must by done in the vertex program before any code that might potentially need it.
InterpolatorsVertex MyVertexProgram (VertexData v) {
	InterpolatorsVertex i;
	UNITY_INITIALIZE_OUTPUT(Interpolators, i);
	UNITY_SETUP_INSTANCE_ID(v);
	i.pos = UnityObjectToClipPos(v.vertex);
	…
}
The shader can now access the transformation matrices of all instances, so the spheres are rendered at their actual locations.
Batch Size
It is possible that you end up with a different amount of batches than I get. In my case, 5000 sphere instances are rendered in 40 batches, which means 125 spheres per batch.
Each batch requires its own array of matrices. This data is send to the GPU and stored in a memory buffer, known as a constant buffer in Direct3D and a uniform buffer in OpenGL. These buffers have a maximum size, which limits how many instances can fit in one batch. The assumption is that desktop GPUs have a limit of 64KB per buffer.
A single matrix consists of 16 floats, which are four bytes each. So that's 64 bytes per matrix. Each instance requires an object-to-world transformation matrix. However, we also need a world-to-object matrix to transform normal vectors. So we end up with 128 bytes per instance. This leads to a maximum batch size of `64000 / 128 = 500`, which could render 5000 spheres in only 10 batched.
Although the maximum is 64KB for desktops, most mobiles are assumed to have a maximum of only 16KB. Unity copes with this by simply dividing the maximum by four when targeting OpenGL ES 3, OpenGL Core, or Metal. Because I'm using OpenGL Core in the editor, I end up with a maximum batch size of `500 / 4 = 125`.
You can disable this automatic reduction by adding the compiler directive #pragma instancing_options force_same_maxcount_for_gl. Multiple instancing options are combined in the same directive. However, that might lead to failure when deploying to mobile devices, so be careful.
Instancing Shadows
Up to this point we have worked without shadows. Turn the soft shadows back on for the main light and make sure that the shadow distance is enough to include all spheres. As the camera sits at -100 and the sphere's radius is 50, a shadow distance of 150 is enough for me.
Rendering shadows for 5000 spheres takes a toll on the GPU. But we can use GPU instancing when rendering the sphere shadows as well. Add the required directive to the shadow caster pass.
			#pragma multi_compile_shadowcaster
			#pragma multi_compile_instancing
Also add UNITY_VERTEX_INPUT_INSTANCE_ID and UNITY_SETUP_INSTANCE_ID to My Shadows.
struct VertexData {
	UNITY_VERTEX_INPUT_INSTANCE_ID
	…
};

…

InterpolatorsVertex MyShadowVertexProgram (VertexData v) {
	InterpolatorsVertex i;
	UNITY_SETUP_INSTANCE_ID(v);
	…
}
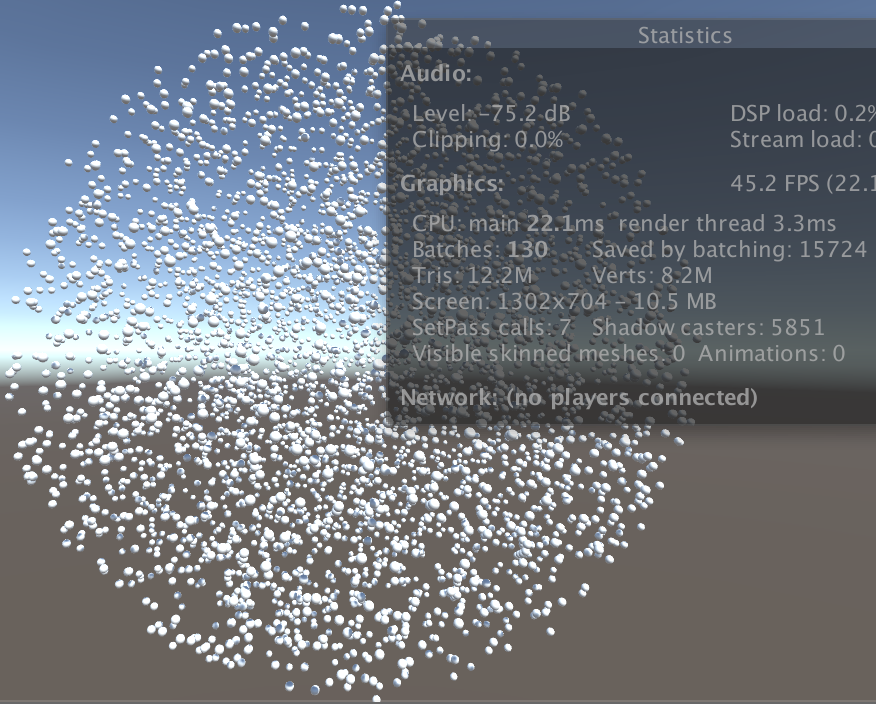
Now it is a lot easier to render all those shadows.
Multiple Lights
We've only added support for instancing to the base pass and the shadow caster pass. So batching won't work for additional lights. To verify this, deactivate the main light and add a few spotlights or point lights that affect many spheres each. Don't bother turning on shadows for them, as that would really drop the frame rate.
It turns out that spheres that aren't affected by the extra lights are still batched, along with the shadows. But the other spheres aren't even batched in their base pass. Unity doesn't support batching for those cases at all. To use instancing in combination with multiple lights, we have no choice but to switch to the deferred rendering path. To make that work, add the required compiler directive to the deferred pass of our shader.
			#pragma multi_compile_prepassfinal
			#pragma multi_compile_instancing

After verifying that it works for deferred rendering, switch back to the forward rendering mode.
Mixing Material Properties
One limitation of all forms of batching is that they are limited to objects that have identical materials. This limitation becomes a problem when we desire variety in the objects that we render.
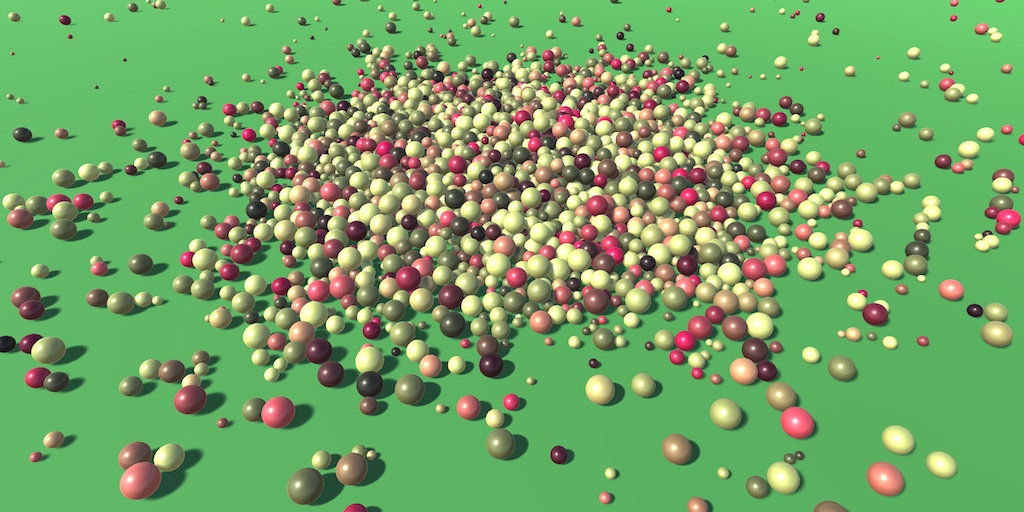
Randomized Colors
As an example, let's vary the colors of our spheres. Assign a random color to each instance's material after it has been created. This will implicitly create a duplicate of the shared material, so we end up with 5000 material instances in memory.
	void Start () {
		for (int i = 0; i < instances; i++) {
			Transform t = Instantiate(prefab);
			t.localPosition = Random.insideUnitSphere * radius;
			t.SetParent(transform);

			t.GetComponent<MeshRenderer>().material.color =
				new Color(Random.value, Random.value, Random.value);
		}
	}
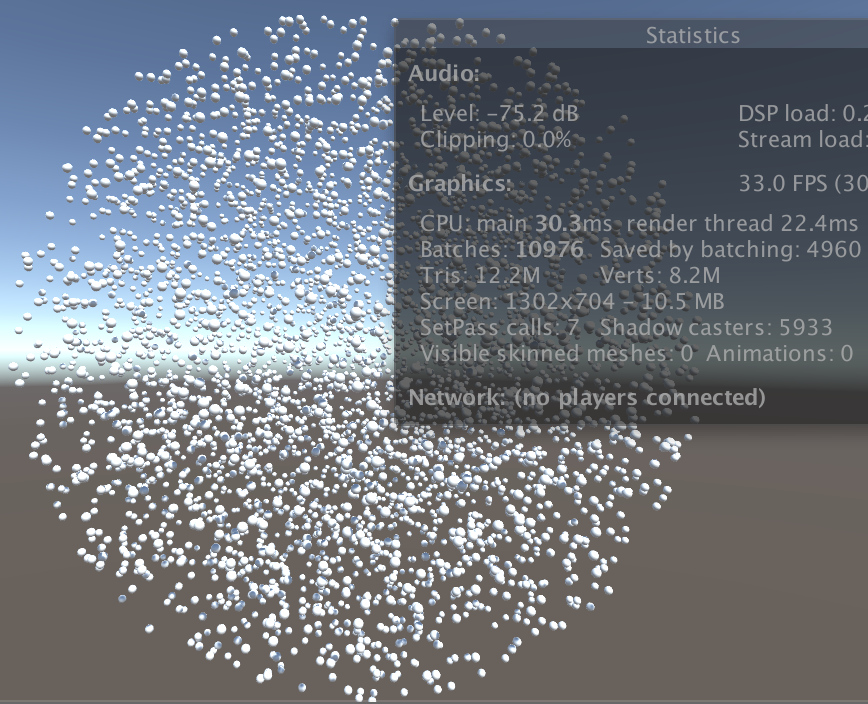
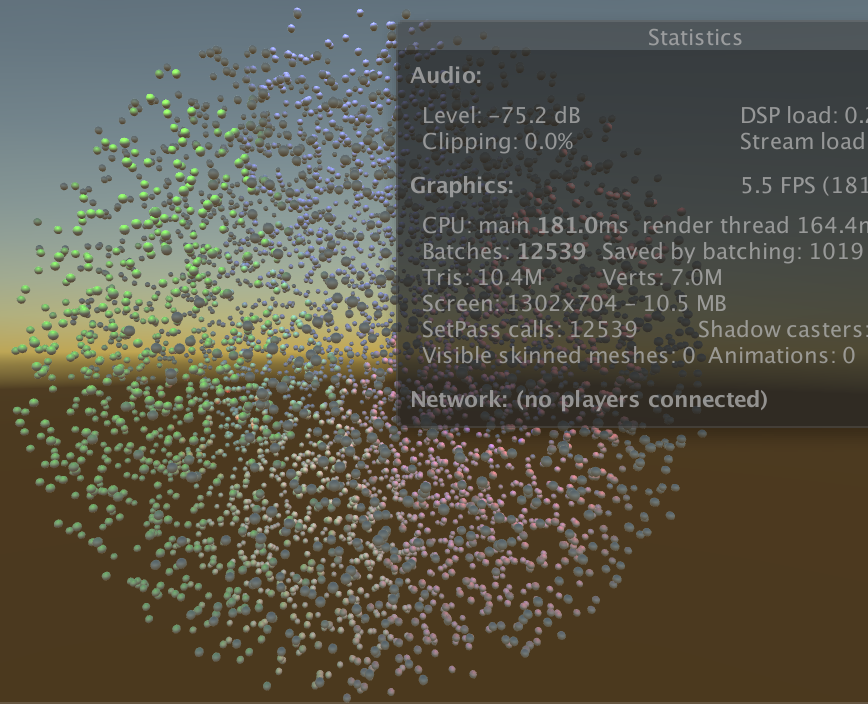
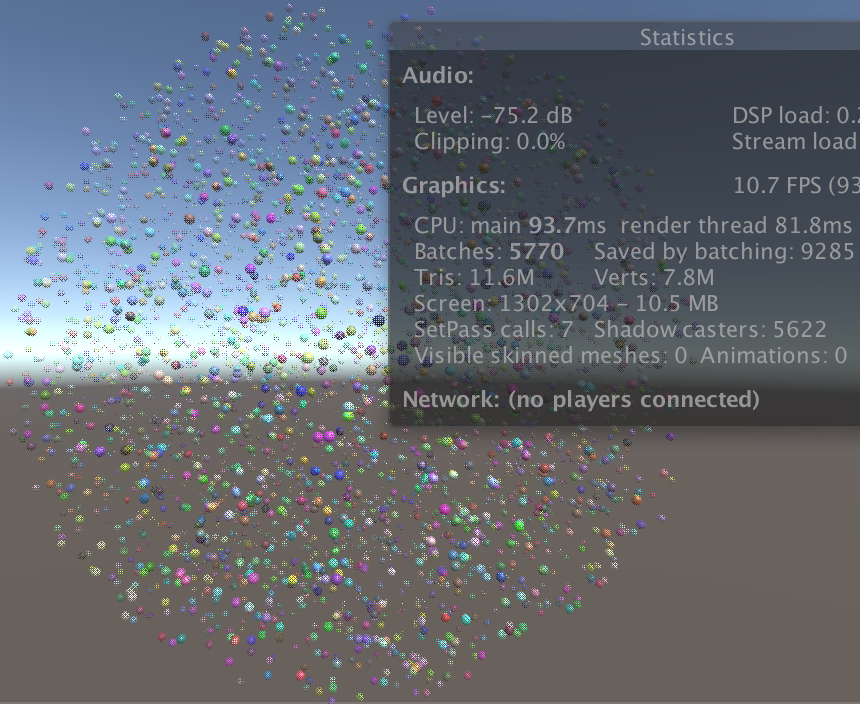
Even though we have enabled batching for our material, it no longer works. Turn of shadows to see this more clearly. We're back to one draw call per sphere. And as each now has its own material, the shader state has to be changed for each sphere as well. This is shown in the statistics panel as SetPass calls. It used to be one for all spheres, but now it's 5000. As a result, my frame rate has dropped to 10fps.
Material Property Blocks
Instead of creating a new material instance per sphere, we can also use material property blocks. These are small objects which contain overrides for shader properties. Instead of directly assigning the material's color, set the color of a property block and pass that to the sphere's renderer.
// t.GetComponent<MeshRenderer>().material.color =// new Color(Random.value, Random.value, Random.value);MaterialPropertyBlock properties = new MaterialPropertyBlock(); properties.SetColor( "_Color", new Color(Random.value, Random.value, Random.value) ); t.GetComponent<MeshRenderer>().SetPropertyBlock(properties);
The MeshRenderer.SetPropertyBlock method copies the data of the block, so there is no dependency on the block that we have locally created. This allows us to reuse one block to configure all of our instances.
	void Start () {
		MaterialPropertyBlock properties = new MaterialPropertyBlock();
		for (int i = 0; i < instances; i++) {
			Transform t = Instantiate(prefab);
			t.localPosition = Random.insideUnitSphere * radius;
			t.SetParent(transform);

//			MaterialPropertyBlock properties = new MaterialPropertyBlock();
			properties.SetColor(
				"_Color", new Color(Random.value, Random.value, Random.value)
			);
			t.GetComponent<MeshRenderer>().SetPropertyBlock(properties);
		}
	}
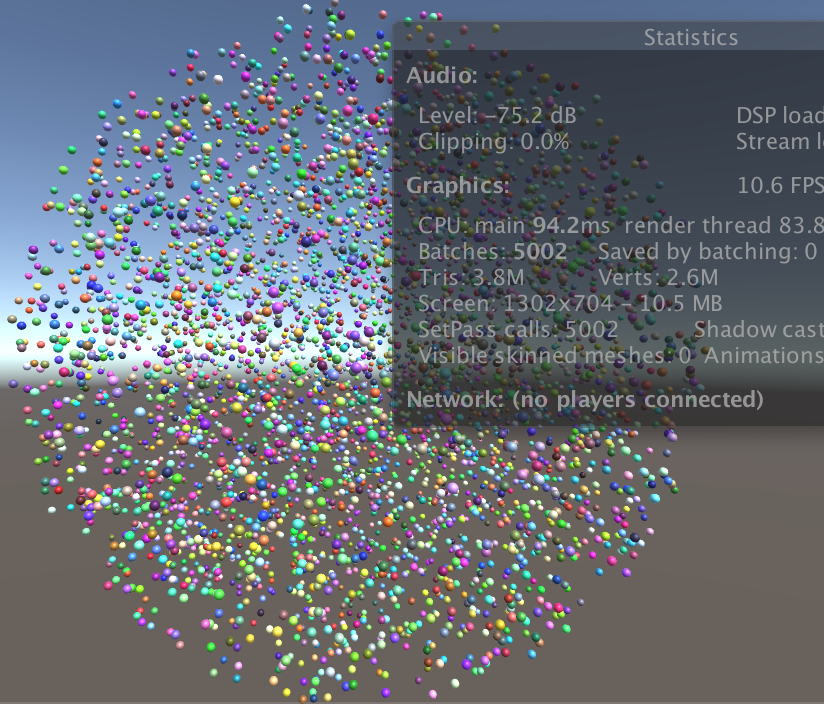
After this change, we're back to one SetPass call for all our spheres. But they're also white again. That's because the GPU doesn't know about the property overrides yet.
Property Buffers
When rendering instanced objects, Unity makes the transformation matrices available to the GPU by uploading arrays to its memory. Unity does the same for the properties stored in material property blocks. But for this to work, we have to define an appropriate buffer in My Lighting.
Declaring an instancing buffer works like creating a structure such as the interpolators, but the exact syntax varies per platform. We can use the UNITY_INSTANCING_CBUFFER_START and UNITY_INSTANCING_CBUFFER_END macros to take care of the difference. When instancing is enabled, they do nothing.
Put the definition of our _Color variable inside an instancing buffer. The UNITY_INSTANCING_CBUFFER_START macro requires a name parameter. The actual name doesn't matter. The macro prefixes it with UnityInstancing_ to prevent name clashes.
UNITY_INSTANCING_CBUFFER_START(InstanceProperties)
	float4 _Color;
UNITY_INSTANCING_CBUFFER_END
Like the transformation matrices, the color data will be uploaded to the GPU as an array when instancing is enabled. The UNITY_DEFINE_INSTANCED_PROP macro takes care of the correct declaration syntax for us.
UNITY_INSTANCING_CBUFFER_START(InstanceProperties)// float4 _Color;UNITY_DEFINE_INSTANCED_PROP(float4, _Color) UNITY_INSTANCING_CBUFFER_END
To access the array in the fragment program, we need to know the instance ID there as well. So add it to the interpolator structures.
struct InterpolatorsVertex {
	UNITY_VERTEX_INPUT_INSTANCE_ID
	…
};

struct Interpolators {
	UNITY_VERTEX_INPUT_INSTANCE_ID
	…
};
In the vertex program, copy the ID from the vertex data to the interpolators. The UNITY_TRANSFER_INSTANCE_ID macro defines this simple operation when instancing is enabled and does nothing otherwise.
InterpolatorsVertex MyVertexProgram (VertexData v) {
	InterpolatorsVertex i;
	UNITY_INITIALIZE_OUTPUT(Interpolators, i);
	UNITY_SETUP_INSTANCE_ID(v);
	UNITY_TRANSFER_INSTANCE_ID(v, i);
	…
}
At the beginning of the fragment program, make the ID globally available, just like in the vertex program.
FragmentOutput MyFragmentProgram (Interpolators i) {
	UNITY_SETUP_INSTANCE_ID(i);
	…
}
Now we have to access the colors either simply as _Color when instancing isn't used, and as _Color[unity_InstanceID] when instancing is enabled. We can use the UNITY_ACCESS_INSTANCED_PROP macro for that.
float3 GetAlbedo (Interpolators i) {
	float3 albedo =
		tex2D(_MainTex, i.uv.xy).rgb * UNITY_ACCESS_INSTANCED_PROP(_Color).rgb;
	…
}

float GetAlpha (Interpolators i) {
	float alpha = UNITY_ACCESS_INSTANCED_PROP(_Color).a;
	…
}
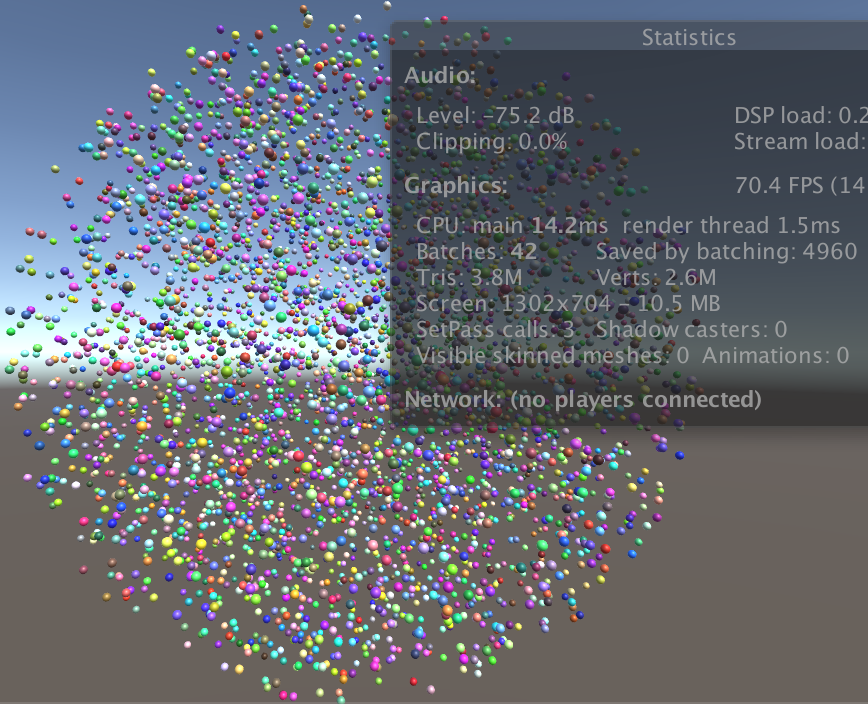
Now our randomly-colored spheres are batched again. We could make other properties variable in the same way. This is possible for colors, floats, matrices, and four-component float vectors. If you wanted to vary textures, you could use a separate texture array and add the indices to an instancing buffer.
Multiple properties can be combined in the same buffer, but keep the size limitation in mind. Also be aware that the buffers are partitioned into 32-bit blocks, so a single floats requires the same space as a vector. You can also use multiple buffers, but there's a limit for that too and they don't come for free. Every property that gets buffered becomes an array when instancing is enabled, so only do this for properties that need to vary per instance.
Shadows
Our shadows also depend on the color. Adjust My Shadows so it can support a unique color per instance as well.
//float4 _Color;UNITY_INSTANCING_CBUFFER_START(InstanceProperties) UNITY_DEFINE_INSTANCED_PROP(float4, _Color) UNITY_INSTANCING_CBUFFER_END … struct InterpolatorsVertex { UNITY_VERTEX_INPUT_INSTANCE_ID … }; struct Interpolators { UNITY_VERTEX_INPUT_INSTANCE_ID … }; float GetAlpha (Interpolators i) { float alpha = UNITY_ACCESS_INSTANCED_PROP(_Color).a; … } InterpolatorsVertex MyShadowVertexProgram (VertexData v) { InterpolatorsVertex i; UNITY_SETUP_INSTANCE_ID(v); UNITY_TRANSFER_INSTANCE_ID(v, i); … } float4 MyShadowFragmentProgram (Interpolators i) : SV_TARGET { UNITY_SETUP_INSTANCE_ID(i); … }
LOD Instancing
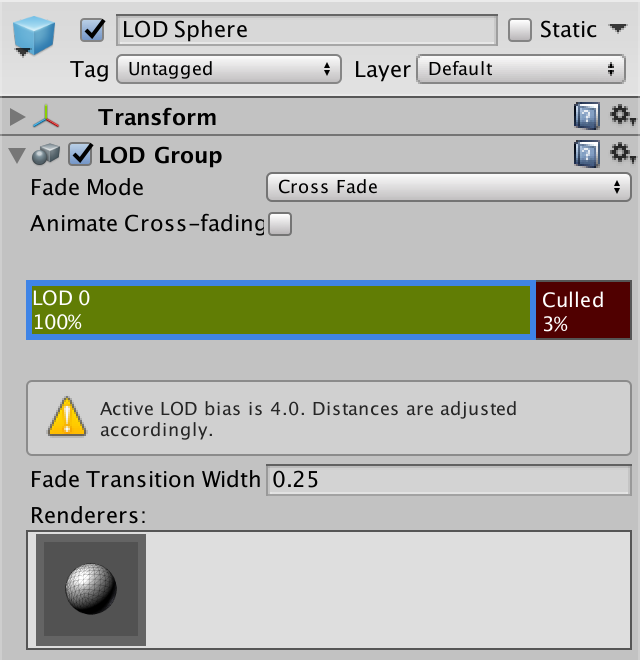
Last time, we added support for LOD groups. Let's see whether they are compatible with GPU instancing. Create a new prefab with a LOD group that only contains one sphere with our white material. Set it to Cross Fade and configure it so LOD 0 gets culled at 3% with a transition width of 0.25. That gives us a nice transition range for our visibly small spheres.
Assing this prefab to our test object, instead of the regular sphere. As this object doesn't have a mesh renderer itself, we will get errors when entering play mode at this point. We have to adjust GPUInstancingTest.Start so it accesses the renderer of the child objects, if the root object doesn't have a renderer itself. While we're at it, make sure that it works both with simple objects and LOD groups with an arbitrary amount of levels.
// t.GetComponent<MeshRenderer>().SetPropertyBlock(properties);MeshRenderer r = t.GetComponent<MeshRenderer>(); if (r) { r.SetPropertyBlock(properties); } else { for (int ci = 0; ci < t.childCount; ci++) { r = t.GetChild(ci).GetComponent<MeshRenderer>(); if (r) { r.SetPropertyBlock(properties); } } }
We now get fading spheres, unfortunately without efficient batching. Unity is able to batch spheres that end up with the same LOD fade factor, but it would be better if they could be batched as usual. We could achieve this by replacing unity_LODFade with a buffered array. We can instruct Unity's shader code do this by adding the lodfade instancing option for each pass that supports instancing.
			#pragma multi_compile_instancing
			#pragma instancing_options lodfade
Now our shaders support both optimal instancing and LOD fading at the same time.
The next tutorial is Parallax.