Programming a Clock
This is the second tutorial in a series that introduces you to the Godot Engine, version 4. It follows Making a Clock and adds code to animate the clock, using GDScript.
Project Continuation
This tutorials comes after Making a Clock. You can either continue working in the project of that tutorial or make a duplicate of its project folder and import that as a new one via Godot's project manager. You can also download the finished project for the first tutorial from the repository and work from there.
The title of this second tutorials is Programming a Clock
and I named the Godot project as such in the repository. You can change your project's name via the General › Application › Config › Name project setting. I mentioned that it is a project setting, so I omitted Project › Project Settings... from the setting path. I will do that for all project and editor settings from now on.
Background Color
This tutorial is all about behavior and doesn't make any visual changes to our clock. But to still visually distinguish this tutorial a bit from the previous one I subtly changed the scene's background color. This can be done via the General › Rendering › Environment › Default Clear Color project setting. I made it bluish gray, hex 484969.

GDScript
To make our clock do something we need to give it a script. This is like a movie script that tells actors what to do, except in this case it would apply to the clock. The clock is controlled by Godot so we need to tell Godot what to do with it. This is programming.
Programming is done by writing computer code. There are many programming languages that allow us to create a script for computers to execute. In this case we're going to write a Godot script, known as GDScript.
Why not C#?
Currently, GDScript runs on anything that runs Godot, which is not yet the case for C#. Also, GDScript can be written directly in the Godot editor with good integration and access to documentation.
As a programmer it is valuable to be flexible and be able to work with many languages and programming paradigms so you know their strengths and weakness. GDScript might not be as performant nor as versatile as C#, but it is often good enough to get the job done.
Once you know how to program in GDScript the switch to C# should be fairly straightforward, and vice versa. You'll likely find that being familiar with both is a boon.
Attaching a Script to the Clock
If you have a node selected in the Scene
panel an icon will be displayed to the right of the search bar. It looks like a scroll with a small plus sign. Clicking it will open the Attach Node Script
window for that node. You could also use the Attach Script context menu option.
After doing that for the Clock
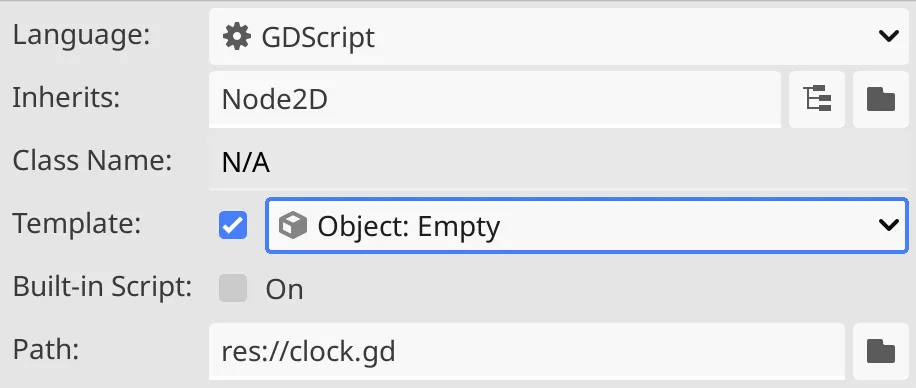
node the window presents us with a few options. First is the Language, for which we pick the default and likely only option, being GDScript. Second is which node type the script Inherits from, which matches the type of the selected node, being Node2D in our case. We skip the Class Name and won't use a Template. Either disable the template or set it to Object: Empty
, which is equivalent. The Built-in Script option would store the script as part of the scene instead of in a separate file. You usually want to store them in separately. Finally, the Path controls where the script gets stored. This gets prefilled with res://clock.gd
, which means it will be stored in a clock.gd
file in the project root folder, using the snake_case naming convention. The GD file extension stands for Godot.
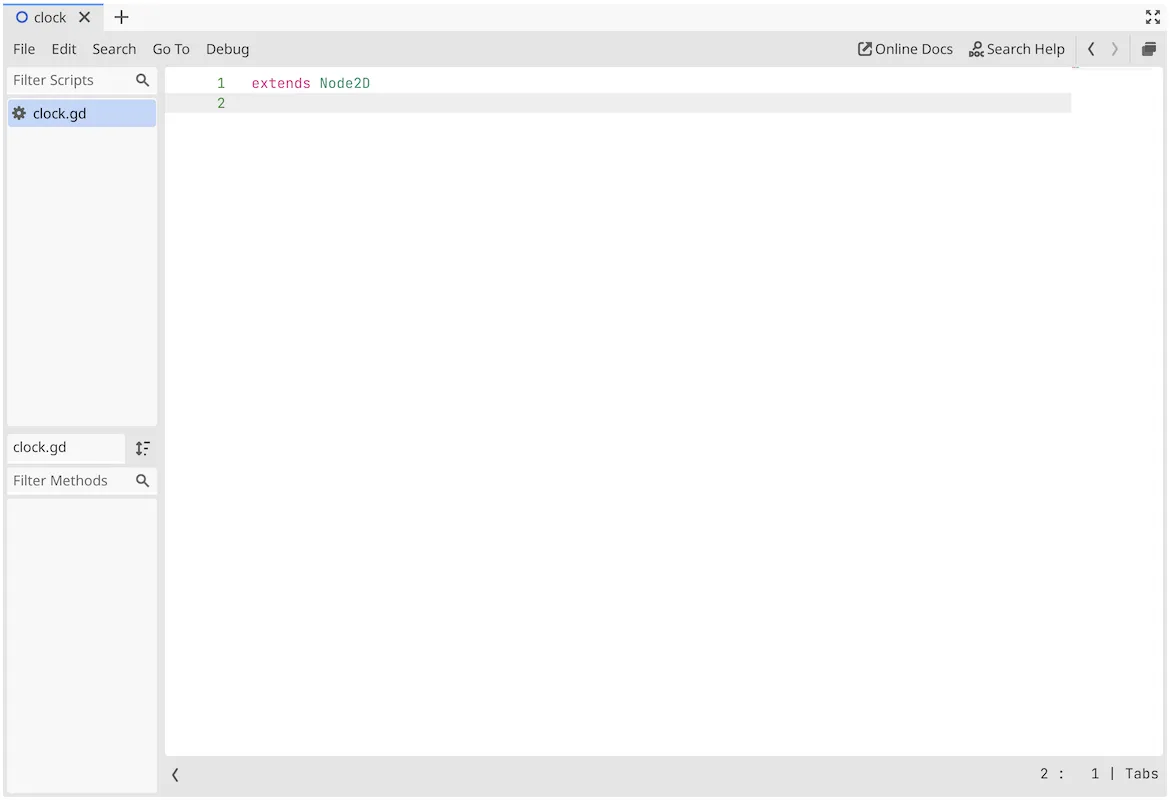
After clicking the Create button at the bottom of the window the script will be generated and the editor viewport will switch to Script mode, showing Godot's script editor.
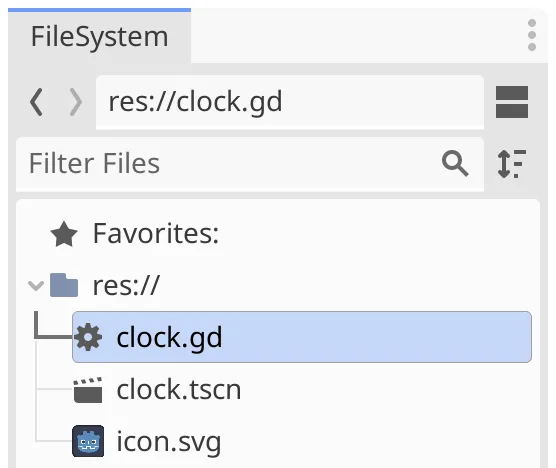
Our script file can be seen in the FileSystem
panel, next to our scene file.
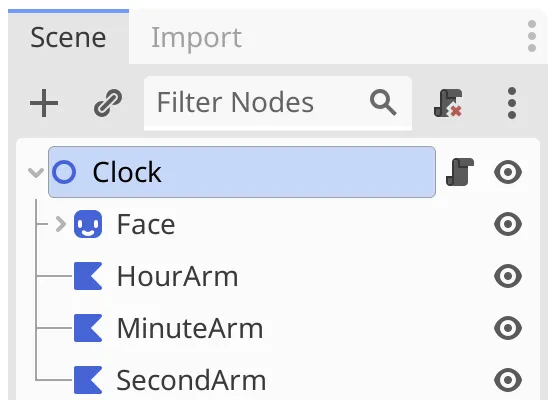
Also, the Scene
panel now shows a scroll icon next to our Clock
node to indicate that there is a script attached to it. Clicking it will open the script editor with that script selected. Besides that, when the node is selected the top of the panel will contain a remove-script icon instead of an add-script icon.
The First Line of Code
Now that we have a script we can start writing programming code. Even though we didn't use a template the script already contains one line of code:
extends Node2DThis line got inserted because we indicated that the script inherits Node2D. In GDScript that's declared at the top of the file, by writing extends following by a type. Thus our scripts extends, which means that it adds to or replaces, the functionality of Node2D.
Note that the words of the script are color-coded. This is known as syntax highlighting, which makes it easier to interpret the code at a glance. Which colors are used depends on the editor theme.
Why doesn't the code editor match my theme?
This happens when the editor theme colors have been adjusted. Go to editor settings and set General › Text Editor › Theme › Color Theme to Default.
Godot only uses color, but this website also has a bold & italic code setting that applies those styles to further distinguish between different kinds of words and symbols. For example, enabling it would make the extends keyword bold.
Besides the code itself the editor also shows the line numbers in the gutter to the left of the code. These aren't part of the script, they're to make it easier to find specific lines.
Defining a Function
We define behavior by writing a function. GDScript functions are somewhat similar to mathematical functions, but can also do other things besides evaluating math.
To indicate that we declare a function we write func at the start of a line. The convention is to put two blank lines between functions and anything else. After the keyword func comes the name of the function that we want to define. Start by typing re and then wait for Godot's autocomplete suggestions to appear.
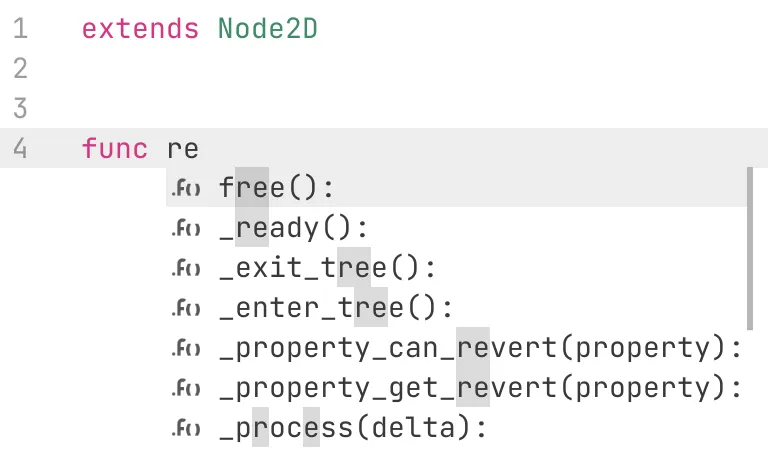
The suggestions match existing functions that our type has inherited from Node2D, and the type that Node2D has inherited from, and so on. We're going to redefine the _ready() function, overriding its default functionality. Pick it from the list or type it manually.
The convention is to write function names in snake_case, so lowercase with underscores to separate words. Also, special functions meant to be overridden or that are supposed to be private to a type have a leading underscore by convention.
We need to write the function name with opening and closing parentheses after it, followed by a colon. The parentheses define the parameters for the function, but because this function doesn't have any there is nothing in between them. The colon indicates the end of the function header, also known as its signature, and the start of the function body that comes next.
Code changes are styled as if they are selected, to make them stand out.
extends Node2D


func _ready():
A function without a body is invalid so if we don't type anything after it Godot will mark the line and indicate that there is an error. This will go away when we add the body.
GDScript uses code indentation with tabs to indicate code scope. The body of a function starts on the line after its header, indented by one tab, which looks like four spaces by default. To create a minimal function that does nothing, use the single pass statement for the function body.
func _ready():
	pass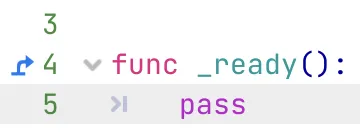
What does the >| symbol mean?
It is a visualization of the TAB character. You can turn it off in the project settings by disabling General › Text Editor › Appearance › Whitespace › Draw Tabs.
This website has a similar setting, visible code tabs, that also allows you to see tabs. However, is uses thin vertical lines instead and doesn't show the first tab.
Once our code is valid the editor will display two new icons. First, the bent arrow next to the function signature indicates that it is a function that overrides inherited behavior. Clicking it will open a new tab in the editor showing the documentation for that function. You can also hold down CONTROL, or ⌘ on Macs, and click anything to jump to its documentation or where it is defined.
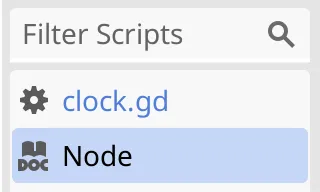
The list of opened scripts and documentation pages are shown in a panel on the left side of the code editor. You can navigate between these documents and close then via their context menu.
Second, there is a downward-pointing icon next to the func keyword. This is the code-folding icon that can be used to collapse and hide all code of the function's body. When collapsed the arrow will point to the right. This is purely visual, it doesn't change the code. Code folding is available for multiple code sections, not just function bodies.
Debugging
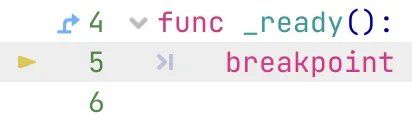
We can debug our script, to check whether it works as it should. The idea is that _ready() gets invoked once, when the node is ready for operation. To test this replace the pass statement with breakpoint.
func _ready():
	breakpoint
This indicates a point where the flow of the program should be interrupted. Godot will pause code execution when it reaches this point. Save the script and run the scene. Indeed execution of our debug scene will halt, the Godot editor will claim focus, and the code editor will jump to the breakpoint, marking the current execution line with an arrowhead.
Below the code editor the Stack Trace
panel will be shown. It gives more details about the current program state. The self
member refers to the node itself, which is our clock.
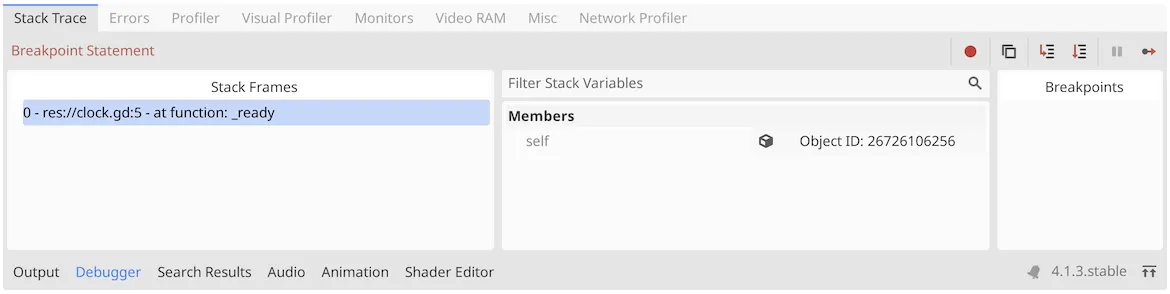
The toolbar buttons at the top right of the Stack Trace
can be used to step through the code or resume normal execution. You can also stop the debug program as usual by pressing the stop button at the top right of the Godot editor. You can also quit the running scene itself, but it is paused and unresponsive until normal execution has been resumed.
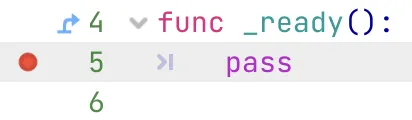
We don't want to always interrupt the program flow when our clock is ready, so revert the function's body back to pass.
func _ready():
	pass
Instead of coding an explicit break point we can also add implicit ones by clicking on the left side of the gutter. This will add a dot to indicate a break point for that line. This works the same as a coded break point, except that these are listed in the Stack Trace
panel.
Why use an explicit breakpoint?
Hard-coded break points are part of the code and thus can be shared with others, via source control or by copying the script file. Implicit break points are not part of the code and thus cannot be shared this way.
Getting an Arm
Our clock should show the current time. In order to do so we must rotate its arms. The arms are child nodes of the Clock
node, which has our script. We can gain access to a child by invoking the get_node() function, by writing that function's name followed by parentheses, replacing pass. Autocomplete can be used to pick the function, and then autocomplete will also suggests possible values for the argument that we must provide.
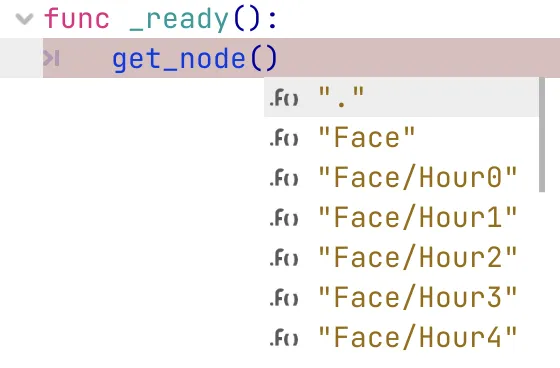
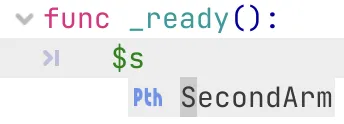
The get_node() function requires a single argument, placed between its parentheses. The suggested arguments are of the string type, which is text written between quotes. These are double quotes by convention, but single quotes could also be used. Note that these are simple quotes, not special opening and closing quotes. The suggestions show relative paths to the child nodes of our clock. Let's pick the SecondArm
child node.
What does "." refer to?
It is the relative path to the node itself.
func _ready():
	get_node("SecondArm")
The get_node() function will parse the string, convert it into a node path, and use that to retrieve the appropriate node. We can also make it explicit that we're providing a node path and not an arbitrary string, by writing ^ before the opening quotes, which is known as the caret or hat symbol.
get_node(^"SecondArm")This technically doesn't get us the node, as a node consists of a whole bunch of data, but a reference that points to its location in system memory. As these node references are used a lot there is a shorthand notation for invoking get_node(^"path"), which is $"path". Such convenient shorthands are known as syntactic sugar.
func _ready():
	$"SecondArm"
And if the path doesn't contain any spaces, which it shouldn't by convention, then we can also omit the quotes.
$SecondArmNote that autocompletion also works when writing $.
Rotating an Arm
Before we start rotating the arms, set the Transform › Rotation property of all arms to zero via their inspector, if they aren't zero already. This makes our clock indicate 00:00:00.
Now that we have a reference to SecondArm
we can access its data and functions, by writing a dot after it followed by what we want to access. This allows us to change its .rotation property. We do that by assigning a value to it, using the = sign. Let's indicate 30 seconds, which would require rotating the arm 180°.
$SecondArm.rotation = 180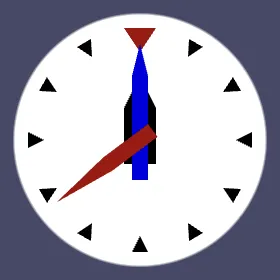
After saving, running our scene will now show a rotated arm, but it indicates the wrong time. This happens because the .rotation property uses radians instead of degrees. We can fix this by using the .rotation_degrees property instead.
$SecondArm.rotation_degrees = 180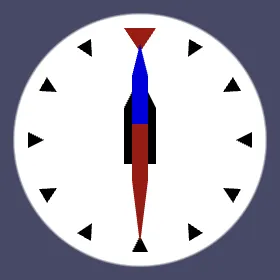
Radians are a different unit for angles. They're based on the properties of circles. They're typically expressed as multiples of π or PI, which is a circle's circumference:diameter ratio, being roughly 3.14. In GDScript it is known as PI. This corresponds to half a rotation, thus we can use it instead of 180°.
$SecondArm.rotation = PIA full rotation would be twice that, which is also the circumference:radius ratio, known as τ or TAU, and available in GDScript as TAU. By dividing that by 60 we get the rotation for a single second. Division is done with a slash.
$SecondArm.rotation = TAU / 60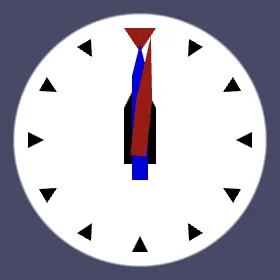
Why should we use radians?
Although rotations are shows as degrees in the inspector, they are stored as radians. The .rotation_degrees property is a wrapper for .rotation that converts degrees to radians for us. When setting the rotation via code we can skip this step. It's a bit more efficient that way and the only difference is that we use τ instead of 360 as a basis.
Rotations are rational numbers, which means that they can have arbitrary fractions. The convention is to make this explicit when working with rational numbers, so we should write 60.0. The value 60 would represent an integer, which doesn't have a fractional part.
$SecondArm.rotation = TAU / 60.0Setting the Time
Now that we know how to rotate the arms we can make our clock display the current time.
Getting the Current Time
Godot has a global Time type that provides functionality to get the time of the system that Godot is running on. Invoke its get_time_dict_from_system() function, before rotating the arm.
func _ready():
	Time.get_time_dict_from_system()
	$SecondArm.rotation = PI
This gives us the current time, from which we can extract the second, minute, and hour. As we're going to access the time data more than once we'll temporarily store what the function gave us. We do this by assigning it to current_time, which is a bit of temporary data that we define local to the body of the function. As this data can vary it's known as a variable. We declare a new one by writing the keyword var in front of it. Variable names are also snake_case by convention.
var current_time = Time.get_time_dict_from_system()To see how this works put a break point on this line and run the scene.
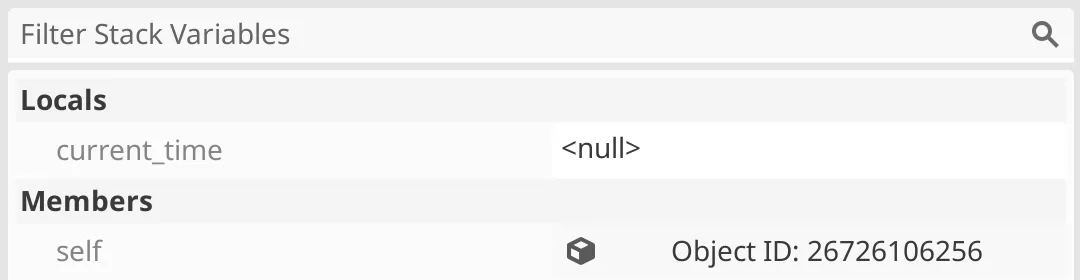
Execution will pause when reaching the line that is about to get the time and assign it to our variable. The local variable is shown in the Stack Trace
panel, but because the assignment hasn't happened yet it currently has no value, which is indicated with <null>
.
Also, Godot will indicate a nonfatal error, stating that our variable is assigned to but never used. It suggests prefixing it with an underscore to indicate that this is intended behavior, but we won't do that.
Step over the current line so current_time gets its value. It turns out that it is a reference to a dictionary with three entries, listed as Dictionary (size 3)
. Clicking it will open the dictionary, which shows us its key-value pairs. Its keys are strings and its values are integers, containing the current hour, minute, and second.

Synchronizing the Arms
We can retrieve a value from a dictionary by invoking it like a function, passing it a key. The only difference is that in this case we must use square brackets. Do this to retrieve the current second and multiply it with the single-second rotation. Multiplication is indicated with an asterisk.
	var current_time = Time.get_time_dict_from_system()
	$SecondArm.rotation = current_time["second"] * TAU / 60.0
If the keys are properly named we can also use a shorthand that treats them as properties of the dictionary.
$SecondArm.rotation = current_time.second * TAU / 60.0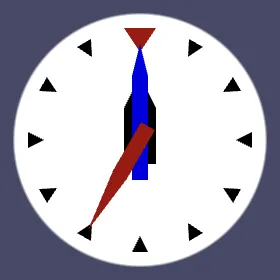
Do this for the minute and hour as well, copying and adjusting the approach used for the second. As there are twelve hours per full rotation we have to divide by twelve for the hours instead of by 60.
	$SecondArm.rotation = current_time.second * TAU / 60.0
	$MinuteArm.rotation = current_time.minute * TAU / 60.0
	$HourArm.rotation = current_time.hour * TAU / 12.0
Updating the Clock
We now set the time correctly, but only once at the start. To make it constantly update itself we have to override a different function, specifically _process(). This function gets invoked repeatedly, every time our app updates itself.
func _process():
	var current_time = Time.get_time_dict_from_system()
	$SecondArm.rotation = current_time.second * TAU / 60.0
	$MinuteArm.rotation = current_time.minute * TAU / 60.0
	$HourArm.rotation = current_time.hour * TAU / 12.0
How often _process() gets invoked depends on the frame rate of our app. The main program loop progresses everything once per frame. Many factors affect the update speed so it is not constant. Hence how much time has passes since the last frame varies. This is why _process() has a delta parameter that indicates the time delta, meaning how much time has passed, in seconds. We must write it in between its parentheses.
func _process(delta):Although we must declare the parameter to properly override the function, currently we don't need to use it. To indicate that prefix it with an underscore, so Godot won't complain about it.
func _process(_delta):When running the scene our clock will now update itself to stay synchronized with the system time.
Rotation per Seconds
Our clock updates itself to continuously show the current time. However, the arms rotate in discrete steps. This can be fine for the second arm and acceptable for the minute arm, but it is bad for the hour arm. It stays stuck exactly on the last our until it jumps to the next one. A better clock would move the arms gradually.
We can make all arms move each second if we base all their rotations on seconds. To do that declare a seconds variable after current_time and set it to the total seconds, which is the current second plus the current minute times 60 plus the current hour times 3600. That would result in a long line of code, too long for the convention of a maximum of 80 characters. Let's break up the calculation by putting its three parts on a separate line each, after the variable declaration. The convention is to indent multi-line expressions like this by two extra tabs.
	var current_time = Time.get_time_dict_from_system()
	var seconds =
			current_time.second +
			current_time.minute * 60 +
			current_time.hour * 3600
	$SecondArm.rotation = current_time.second * TAU / 60.0
This will make Godot complain because it expects single-line expressions only. We get around this by wrapping our expression in parentheses, which by convention sit on the lines above and below the expression.
	var seconds = (
			current_time.second +
			current_time.minute * 60 +
			current_time.hour * 3600
	)
To base the rotation of the second arm on the total seconds we have to divide them by 60 and take the remainder. We can do this with the modulo operation, which is done with the percent symbol. Put it in parentheses to indicate that it is done before and separate from the conversion from seconds to radians.
$SecondArm.rotation = (seconds % 60) * TAU / 60.0This works for the second arm, so it might make sense to do the same for the minute arm. The only extra step would be to convert from seconds to minutes first, by dividing by 60.
$MinuteArm.rotation = ((seconds / 60) % 60) * TAU / 60.0However, if both the total seconds and 60 are integers then we would perform an integer division, which won't have fractions so we'd only get whole minutes out of this. By making them explicitly rational we get a rational number division.
	var seconds = (
			current_time.second +
			current_time.minute * 60.0 +
			current_time.hour * 3600.0
	)
	$SecondArm.rotation = (seconds % 60) * TAU / 60.0
	$MinuteArm.rotation = ((seconds / 60.0) % 60) * TAU / 60.0
Unfortunately we now get an error indicating that the modulo operator won't work. That's because it's only defined for integers. Fortunately we can use the global fmod() function instead, which calculates the floating-point modulo on its two parameters. Use this for all three arms, dividing by 3600 to convert from seconds to hours for the hour arm.
	$SecondArm.rotation = fmod(seconds, 60.0) * TAU / 60.0
	$MinuteArm.rotation = fmod(seconds / 60.0, 60.0) * TAU / 60.0
$HourArm.rotation = fmod(seconds / 3600.0, 12.0) * TAU / 12.0Continuous Rotation
Although rotating in discrete steps per second can be acceptable, let's go a step further and make the arms rotate continuously, as smoothly as the frame rate allows. As the time dictionary only gets us whole seconds we have to keep track of the elapsed time ourselves.
Begin by declaring a seconds variable outside _process(), in between the extends statement and the function. This makes it a member of our script, becoming part of the node's data. The convention is to put two blank lines on both sides of the script variable declaration section.
extends Node2D


var seconds


func _process(_delta):
Shouldn't seconds be marked as private, with an underscore?
You could do that, but our clock will keep running fine even if other code changes its seconds data. So an indication that it is public can be considered appropriate.
After that, instead of declaring a local seconds variable inside _process() assign to the node's variable instead.
	seconds = (
			current_time.second +
			current_time.minute * 60.0 +
			current_time.hour * 3600.0
	)
Third, switch back to overriding _ready(), so the seconds are set once when our clock is ready to run.
func _ready():
	var current_time = Time.get_time_dict_from_system()
Fourth, decouple the rotation of the arms from _ready(), doing it in a new _process() function. This time we will use its delta parameter, so don't give it an underscore prefix.
func _ready():
	var current_time = Time.get_time_dict_from_system()
	seconds = (
			current_time.second +
			current_time.minute * 60.0 +
			current_time.hour * 3600.0
	)


func _process(delta):
	$SecondArm.rotation = fmod(seconds, 60.0) * TAU / 60.0
	$MinuteArm.rotation = fmod(seconds / 60.0, 60.0) * TAU / 60.0
	$HourArm.rotation = fmod(seconds / 3600.0, 12.0) * TAU / 12.0
Finally, make the seconds equal to the last know seconds plus the current delta. That will make our clock keep track of its own elapsed time relative to its start time.
func _process(delta):
	seconds = seconds + delta
	$SecondArm.rotation = fmod(seconds, 60.0) * TAU / 60.0
Won't this lead to numeric precision issues after a while?
Theoretically yes, but Godot uses 64-bit numbers so it will take such a long time to become an issue that you can ignore it.
We can use += as a shorthand for adding to a variable so we don't have to write it twice. This also works for similar operations like subtraction and multiplication.
func _process(delta):
	seconds += delta
Code Structure
Although our code works we can do a few things to improve it.
Reusing Node References
Each time we access a node path Godot has to go look for the requested node. This means that we're looking up three nodes each time our clock gets processed. This seems wasteful because we always get the same nodes. So let's store the node references in our clock node, by declaring second_arm, minute_arm, and hour_arm variables for them.
var seconds
var second_arm
var minute_arm
var hour_arm
We could get the node references in _ready(), but it would be more convenient to directly assign them to the variables as default values where we define them.
var seconds
var second_arm = $SecondArm
var minute_arm = $MinuteArm
var hour_arm = $HourArm
Although we can assign default values to script variables, these values are set before the node is ready, thus fetching node references don't work yet. We can get around this by adding an annotation to the variables. Annotations start with an @ symbol and are written in front of a variable declaration. In this case we need the @onready annotation, which effectively moves the variable assignment to the beginning of _ready().
var seconds

@onready var second_arm = $SecondArm
@onready var minute_arm = $MinuteArm
@onready var hour_arm = $HourArm
Now we only fetch the node references once when the clock is ready and can reuse them in _process(), avoiding redundant lookups.
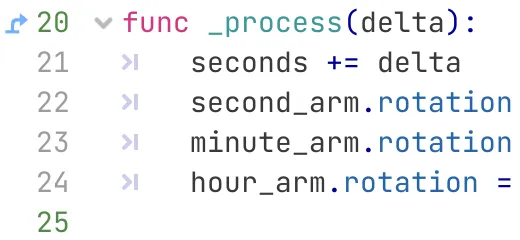
func _process(delta):
	seconds += delta
	second_arm.rotation = fmod(seconds, 60.0) * TAU / 60.0
	minute_arm.rotation = fmod(seconds / 60.0, 60.0) * TAU / 60.0
	hour_arm.rotation = fmod(seconds / 3600.0, 12.0) * TAU / 12.0
Is this necessary for performance?
Our clock is so lightweight that it won't be noticeable, but in general it is a good idea to avoid repeating the same thing as much as possible and instead cache things in variables. Even a little overhead adds up if it exists in many places. But you'd often get things working first and later look for ways to make it more efficient.
Static Typing
Although we know the types of what we've been working with, up to this point we haven't made that explicit. GDScript is dynamically typed and can work with implicit typing, but it also supports explicitly mentioning the types of things. This is known as static typing.
There are two main benefits of static typing. First, it adds clarity and avoids ambiguity. Second, it allows Godot to make some optimizations to make the script run faster. A downside is that the code is a bit more verbose. Another downside is that if a variable has a static type only values of that type can be assigned to it. Dynamic typing does not have this limitation, however in general this flexibility is not a boon as it makes things ambiguous.
The code editor subtly colors the line numbers to indicate whether code is explicitly typed. Green lines are deemed type-safe while gray lines are deemed type-unsafe. For example, our entire _process() function is deemed unsafe from a statically-typed point of view.
To use static typing we have to add type hints to the code. We can also instruct Godot to add these to autocomplete suggestions, by enabling the editor setting General › Text Editor › Completion › Add Type Hints.
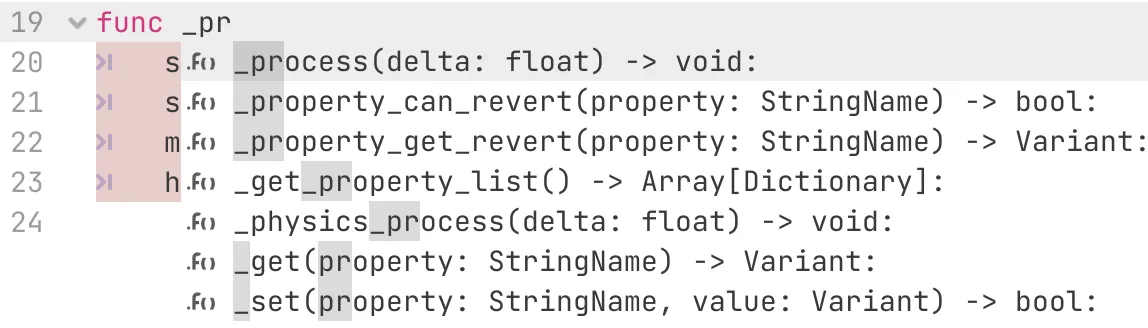
As the autocomplete suggestions show us, there are two kinds of type hints. The first is for variables and parameters. Their type is declared by writing a colon after them followed by the type name. Let's add the type hint for the delta parameter of _process(). It is a rational number, which is represented by the float type.
Why is it known as a float?
Rational numbers can be written in scientific notation, which is useful for writing very large or very small values. For example 100, 1000000, and one divided by 100 are written as 1×10², 1×10⁶, and 1×10⁻². Using the same notation, 5030 would be written as 5.03×10³. This notation also makes it easy to limited the precision of a number to a fixed amount of digits, regardless of its order of magnitude.
Programs usually store rational numbers using a format similar to the scientific notation, except with base two instead of base ten. Godot also does this. Such values are known as floating-point values because the position of the point of separation between integer and fractional part depends on the number's magnitude. It can thus be considered to float, hence the name float.
Note that scientific notation is used to limit the precision of numbers. A float value is limited in the same way, being more precise for values close to zero and losing precision the larger they get. However, Godot uses 64-bit float values thus precision is so high that it is usually not an issue. 64-bit floating-point values are commonly known as doubles because 32-bit is used as the baseline, but in GDScript they're simply named float.
func _process(delta: float):Now we know that delta is a float. The second kind of type hint is for whatever the function might return as its result. For example, fmod() returns a float. This is done by writing an arrow, made with - and >, after the function declaration followed by its return type, before the colon. The _process() function returns nothing, which we indicate with the void keyword.
func _process(delta: float) -> void:The same is true for _ready().
func _ready() -> void:Godot can optionally show code ligatures, which are alternative representations for certain character combinations. This is purely visual and does not change the code. These can be enabled via the editor setting General › Interface › Code Font Contextual Ligatures, changing it to Enabled. This website also has a code ligatures setting.
The convention is to be consistent, either using static typing everywhere or not at all. So let's add type hints to our script's variables as well. First seconds, which is a float.
var seconds: floatAfter that come the node references to the arms. These are Node2D nodes, so we use that as the variable type. Do this for second_arm.
@onready var second_arm: Node2D = $SecondArmThis is not enough for Godot to mark the variable declaration as safe, because a node path gives us a reference of the more generic Node type. We know the more specific type of our clock's arms, so we can tell Godot to treat these references as if they were Node2D, by writing the keyword as after the reference followed by that type.
@onready var second_arm: Node2D = $SecondArm as Node2DThis will make Godot cast the reference's type to Node2D, if that is possible. If the cast would be invalid the result would be null, representing an non-existing reference.
Shouldn't it be Polygon2D instead?
The arms are indeed Polygon2D nodes, but our script doesn't need to be aware of this detail. It is enough to know that they're Node2D nodes. That way the arms could've been made with another node type that extends Node2D as well.
Inferred Static Types
We're now writing Node2D twice, which is redundant. We can omit the explicit type declaration of the variable, removing it and bringing the colon and assignment together, forming the implicit type assignment :=. This means that the variables type is determined by its initial value. The difference with a regular assignment is that it enforces a static type for the variable, which would be dynamic otherwise. Only values of a matching type can be assigned to it later. Use this approach for all three arms.
@onready var second_arm := $SecondArm as Node2D
@onready var minute_arm := $MinuteArm as Node2D
@onready var hour_arm := $HourArm as Node2D
We can also use it for seconds, by initializing it to zero using a floating-point value.
var seconds := 0.0And we can also use it for the current_time variable of _ready(). As we use it to store a reference to a dictionary its type will be Dictionary.
var current_time := Time.get_time_dict_from_system()Unsafe Dictionary
The only portion of our code that is still marked as unsafe is where we set the seconds based on the current_time dictionary. Currently Godot does not support typed dictionary values, so we cannot make this fully type-safe. However, we can at least make the assignment to seconds type-safe by explicitly creating a float using its constructor function, which is float invoked as a function with a single argument. Then we can make the total seconds calculation itself integer-only.
	seconds = float(
			current_time.second +
			current_time.minute * 60 +
			current_time.hour * 3600
	)
This leaves us with three unsafe lines, a single multi-line expression, which we know to contain integers only.
Clock Configuration
Our clock is currently a regular clock that always displays the current time. Let's add a few configuration options to make it a bit more flexible.
Start Time
As we set the seconds of the clock once it is simple to change how we initialize its time. Let's make it possible to choose between the system time, which we currently use, and a random time.
To make configuration easy we introduce a SYSTEM_TIME constant, set to zero. This works like declaring a variable except that it uses the const keyword and the naming convention is UPPERCASE_SNAKE_CASE. As the name suggests, these are values that cannot be changed. Script constants are declaring above regular variables by convention. We put a blank line in between them to as well, grouping different kinds of declarations together.
extends Node2D


const SYSTEM_TIME := 0

var seconds := 0.0
Then we also introduce a constant for the second option, RANDOM_TIME, set to one.
const SYSTEM_TIME := 0
const RANDOM_TIME := 1
Next, declare a start_time variable set to SYSTEM_TIME by default.
var start_time := SYSTEM_TIME
var seconds := 0.0
We use this variable to configure the clock. To make it possible to do this via the inspector add the @export annotation to it. That exports the variable to the editor, making it available as a node property. Whatever it is set to via the inspector gets saved with the scene and overrides the default value.
@export var start_time := SYSTEM_TIME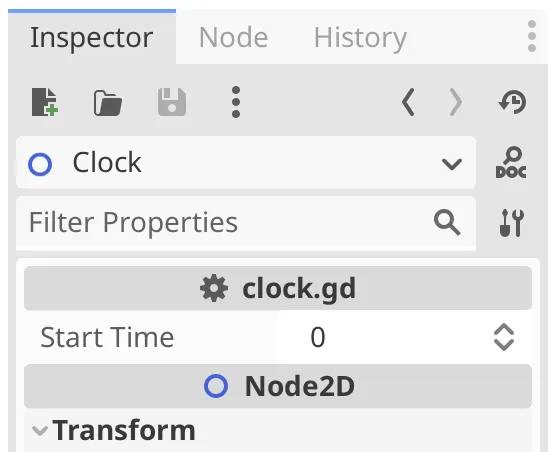
It is a good idea to add a little documentation to configuration options. We can do that by adding a code comment line above it. Such lines start with a #, followed by a space by convention, unless when used to comment-out code.
# What time to use for the starting time of the clock.
@export var start_time := SYSTEM_TIME
And when the comment starts with ## Godot will use it for the documentation that it generates for whatever is defined below the comment. It will show up in the tooltip of the property when hovering the cursor over its name.
## What time to use for the starting time of the clock.
@export var start_time := SYSTEM_TIME
This works, but having to use numerical values to configure the start time is unintuitive. We can improve this by grouping our constants, turning then into an enumeration. This is done by writing enum followed by its name and then a comma-separated list of constant names, within curly brackets. We don't need to assign values to the constants in this case, as they will implicitly by set to 0, 1, 2, and so on. Name the enumeration StartTimeMode.
#const SYSTEM_TIME := 0
#const RANDOM_TIME := 1
enum StartTimeMode { SYSTEM_TIME, RANDOM_TIME }
Note that I left the old code that got replaced for reference, using # to comment it out, and striking it through to indicate deletion. The deleted code will not be shown again in further code fragments.
The default value of start_time now becomes StartTimeMode.SYSTEM_TIME, implicitly making it a StartTimeMode enumeration value. Godot will use this to show a dropdown list in the inspector, containing the constants as options, though formatted differently for readability.
@export var start_time := StartTimeMode.SYSTEM_TIME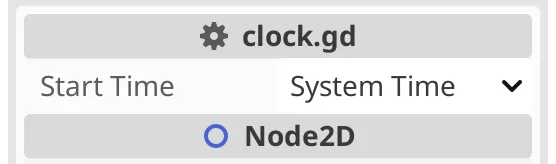
Random Start Time
If start_time is equal to StartTimeMode.RANDOM_TIME then we should set seconds to some random value. Do this at the start of _ready(), using the if keyword followed by an equality check, for which the == operator is used, which is written as two = symbols to distinguish it from an assignment. End the check with a colon.
func _ready() -> void:
	if start_time == StartTimeMode.RANDOM_TIME:

	var current_time := Time.get_time_dict_from_system()
The code that should run when this is the case must be indented one extra step, similar to how code is indented for a function. There we pick a random second in a range of twelve hours, which is 43200 seconds, using the global randf_range() function, which requires minimum and maximum float values to define a range.
	if start_time == StartTimeMode.RANDOM_TIME:
		seconds = randf_range(0.0, 43200.0)

	var current_time := Time.get_time_dict_from_system()
Our current code would pick a random time if our clock is configured for that and otherwise would skip that section of code. But after that it will always pick the current time, overriding the random time. We fix this by adding the else keyword followed by a colon in between both code sections, indenting the system-time section one step.
	if start_time == StartTimeMode.RANDOM_TIME:
		seconds = randf_range(0.0, 43200)
	else:
		var current_time := Time.get_time_dict_from_system()
		seconds = float(
				current_time.second +
				current_time.minute * 60 +
				current_time.hour * 3600
		)
Now we only pick one of the two approaches based on start_time. If it's random then we use randf_range(), otherwise we use Time.get_time_dict_from_system().
Fixed Start Time
Let's add a third option for a fixed start time. Add FIXED_TIME for this to our enumeration.
enum StartTimeMode { SYSTEM_TIME, RANDOM_TIME, FIXED_TIME }A fixed time has to be explicitly configured, so introduce exported start_hour, start_minute, and start_second variables for this, all set to zero by default. We use integers for these values, mimicking the system time.
@export var start_time := StartTimeMode.SYSTEM_TIME
@export var start_hour := 0
@export var start_minute := 0
@export var start_second := 0
We can use the alternative @export_range annotation to restrict the inspector properties to valid ranges for hours, minutes, and seconds. The range is configured as if invoking the annotation as a function with two arguments.
@export_range(0, 11) var start_hour := 0
@export_range(0, 59) var start_minute := 0
@export_range(0, 59) var start_second := 0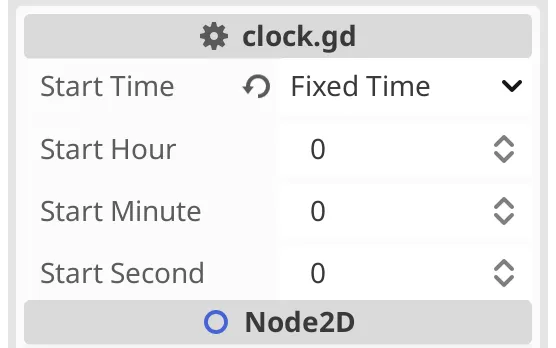
To make their usage clear let's group them in the inspector. This is done by adding a stand-alone @export_group annotation directly above them, passing it a string to name the group, for which we use Fixed Start Time
. This groups all properties that are declared afterwards together in a collapsible group.
@export_group("Fixed Start Time")
@export var start_hour := 0
@export var start_minute := 0
@export var start_second := 0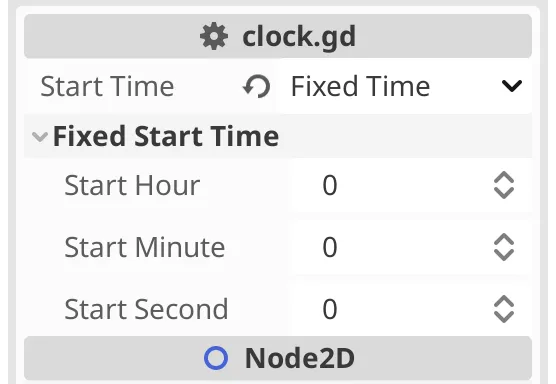
We could add a third case for the fixed time option to _ready() by putting an elif, meaning else-if, section in between the existing two. But we're going to use a different approach. If the time is not random, so in the else case, we check whether start_time is not equal to StartTimeMode.FIXED_TIME. This is done with the inequality operator !=. If so, we keep using the system time, now indented yet another step.
How do I type !=?
If you have code ligatures enabled then it looks like a wide equals sign with a dash through it, which is the mathematical sign for inequality. However, in code it is written as ! followed by =.
func _ready() -> void:
	if start_time == StartTimeMode.RANDOM_TIME:
		seconds = randf_range(0.0, 43200)
	else:
		if start_time != StartTimeMode.FIXED_TIME:
			var current_time := Time.get_time_dict_from_system()
			seconds = float(
					current_time.second +
					current_time.minute * 60 +
					current_time.hour * 3600
			)
After that, also check whether our clock isn't set to system time. If so, use the configured start time.
		if start_time != StartTimeMode.FIXED_TIME:
			var current_time := Time.get_time_dict_from_system()
			seconds = float(
					current_time.second +
					current_time.minute * 60 +
					current_time.hour * 3600
			)
		if start_time != StartTimeMode.SYSTEM_TIME:
			seconds = start_second + start_minute * 60 + start_hour * 3600
Note that we can directly assign an integer expression to a float variable, this conversion is implicit. The opposite is not possible implicitly, because there might be a fractional part that would disappear during conversion.
Offset Start Time
We implemented support for fixed time in a roundabout way in order to easily support a fourth start-time mode: OFFSET_TIME. Add it to our enumeration.
enum StartTimeMode { SYSTEM_TIME, RANDOM_TIME, FIXED_TIME, OFFSET_TIME }The idea of offset time is that the system time and configured time are added together. This allows for clocks to show different time zones or run slightly out of sync. The only change required to make this work is to add the fixed time to whatever the current seconds are, which is either zero or the system time.
		if start_time != StartTimeMode.SYSTEM_TIME:
			seconds += start_second + start_minute * 60.0 + start_hour * 3600.0
Let's adjust our property group name to reflect that the configured time can be used for either a fixed or an offset start time.
@export_group("Fixed or Offset Start Time")And also allow for negative hours to be configured, to make it easy to use negative time zone offsets.
@export_range(-11, 11) var start_hour := 0Multi-Line Enumerations
Although our enumeration declaration still fits on a single line, let's turn it into a multi-line declaration for readability. As it's using brackets this is possible.
enum StartTimeMode {
	SYSTEM_TIME,
	RANDOM_TIME,
	FIXED_TIME,
	OFFSET_TIME
}
This also makes it easier to read changes committed to source control, in case an option gets added or removed. To make this work for adding an option to the end as well, the convention is to add a trailing comma to the list. This comma is nonfunctional but allowed.
enum StartTimeMode {
	SYSTEM_TIME,
	RANDOM_TIME,
	FIXED_TIME,
	OFFSET_TIME,
}
Clock Speed
Let's wrap up this tutorial by making the speed at which the clock runs configurable as well. We do this by including an exported time_scale float variable, set to 1 by default. Make it the first exposed property.
@export var time_scale := 1.0
## What time to use for the starting time of the clock.
@export var start_time := StartTimeMode.SYSTEM_TIME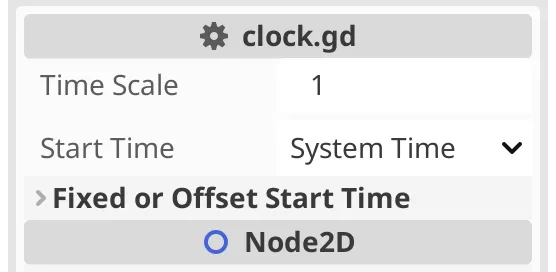
To apply the time scale we multiply delta with it before we adjust seconds in _process().
seconds += delta * time_scaleThe time scale can be zero, which would make the clock stand still. It is also possible to use a negative time scale, which would make the clock run backwards. Let's give it a documentation comment to make clear that this is supported.
## Time scale of the clock, can be negative.
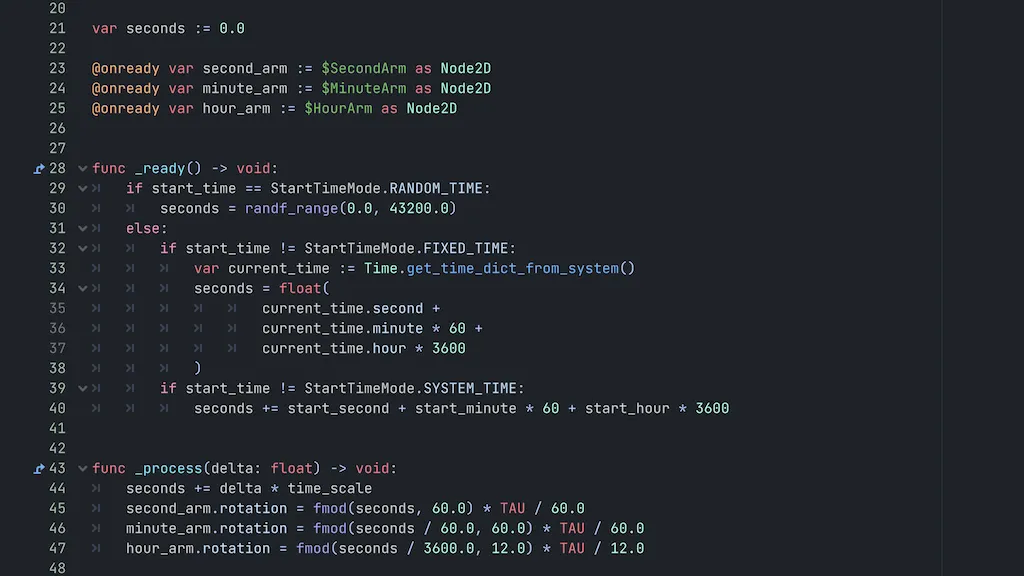
@export var time_scale := 1.0This marks the end of my second introduction tutorial for Godot. Below is the entire script that we created.
extends Node2D


enum StartTimeMode {
	SYSTEM_TIME,
	RANDOM_TIME,
	FIXED_TIME,
	OFFSET_TIME,
}

## Time scale of the clock, can be negative.
@export var time_scale := 1.0
## What time to use for the starting time of the clock.
@export var start_time := StartTimeMode.SYSTEM_TIME

@export_group("Fixed or Offset Start Time")
@export_range(-11, 11) var start_hour := 0
@export_range(0, 59) var start_minute := 0
@export_range(0, 59) var start_second := 0

var seconds := 0.0

@onready var second_arm := $SecondArm as Node2D
@onready var minute_arm := $MinuteArm as Node2D
@onready var hour_arm := $HourArm as Node2D


func _ready() -> void:
	if start_time == StartTimeMode.RANDOM_TIME:
		seconds = randf_range(0.0, 43200.0)
	else:
		if start_time != StartTimeMode.FIXED_TIME:
			var current_time := Time.get_time_dict_from_system()
			seconds = float(
					current_time.second +
					current_time.minute * 60 +
					current_time.hour * 3600
			)
		if start_time != StartTimeMode.SYSTEM_TIME:
			seconds += start_second + start_minute * 60 + start_hour * 3600


func _process(delta: float) -> void:
	seconds += delta * time_scale
	second_arm.rotation = fmod(seconds, 60.0) * TAU / 60.0
	minute_arm.rotation = fmod(seconds / 60.0, 60.0) * TAU / 60.0
	hour_arm.rotation = fmod(seconds / 3600.0, 12.0) * TAU / 12.0
The next tutorial is Many Clocks.