Hex Map 23
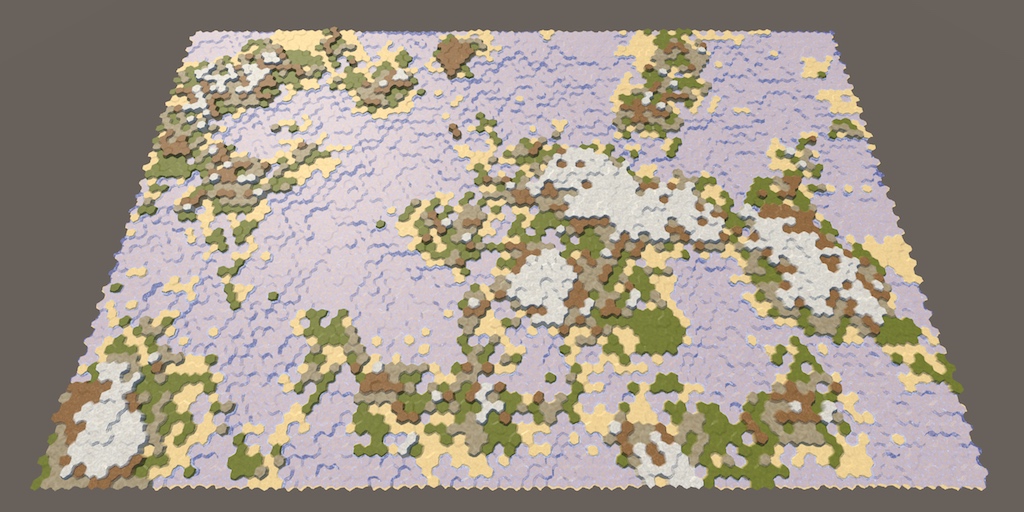
Generating Land
- Fill new maps with generated landscapes.
- Raise chunks of land above the water, and sink some.
- Control how much land appears, how high, and how erratic it is.
- Support multiple configuration options to create varied maps.
- Make it possible to generate the same map again.
This is part 23 of a tutorial series about hexagon maps. It is the first of a few tutorials that will cover how to generate maps procedurally.
This tutorial is made with Unity 2017.1.0.
Generating Maps
While we can manually create any map we like, this can take a lot of time. It would be convenient if our app could help a designer get started by generating a map for them, which they could them modify as desired. A step further is to do away with manual design entirely, fully relying on the app itself to generate a finished map for us. That would make it possible to play a game with a new map every time, ensuring that each new game session will be different. Not knowing the layout of the map you'll play on beforehand is essential when exploration is a big part of a game that's meant to be played more than once. To make all this possible, we have to create an algorithm for generating maps.
What kind of map-generating algorithm you need depends on the kind of maps that your app requires. There isn't a single best approach for this, but there will always be a trade-off between believability and playability.
Believability is about the player of a game accepting that a map is possible and real. This doesn't mean that maps have to appear like they're part of our planet. They could be for another planet or a completely different reality. But if it's supposed to represent earthen terrain, it should at least somewhat look the part.
Playability concerns whether maps support the gameplay experience that you're going for. It is often at odds with believability. For example, while mountain ranges might look great, they also logically severely limit the movement and vision of units. If that's not desired, you have to make do without mountains, which might lower believability and limits the expressiveness of your game. Alternatively, you could keep mountains but lessen their impact on gameplay, which might also lower believability.
Besides that, there's also feasibility. For example, you could produce a very realistic-looking earth-like planet by simulating plate tectonics, erosion, rainfall, volcanic eruptions, meteor impacts, lunar influence, and so on. But that will take a long time to develop. Also, generating such a planet might take a while, and players won't appreciate having to wait minutes before they can start a new game. So while simulation can be a powerful tool, it has a cost.
Games are full with trade-offs between believability, playability, and feasibility. Sometimes, these trade-offs go unnoticed, seem perfectly normal, or are arbitrary, inconsistent, or jarring, depending on the choices and priorities of whoever made the game. This isn't limited to map generation, but it's something that you have to be very aware of when developing a procedural map generator. You could end up spending a lot of time creating an algorithm that generates beautiful maps that are also useless for the game you're trying to make.
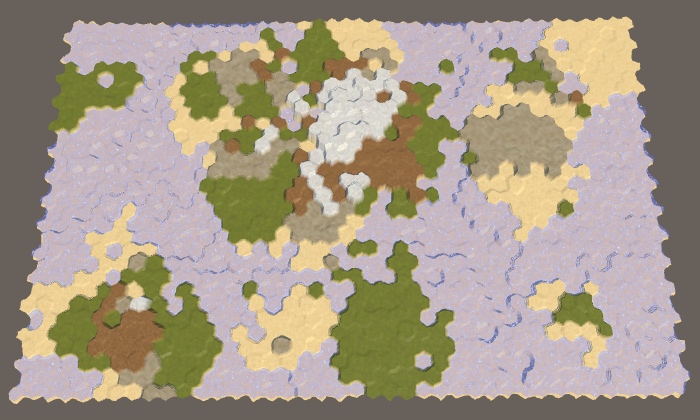
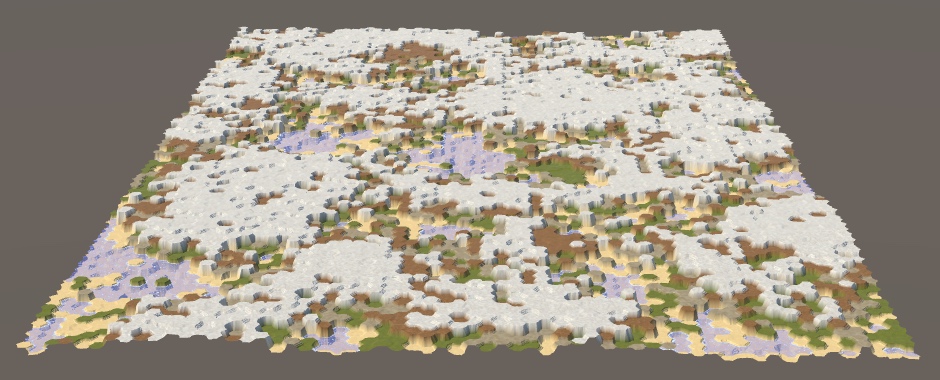
In this tutorial series we're going for earth-like terrain. It should look interesting, with a lot of variety, no large homogenous areas. The scale of the terrain will be large, with maps covering one or more continents, oceanic regions, or even an entire planet. We want to have reasonable control over the geography, including the landmass, climate, how many regions there are, and how rough the terrain is. This tutorial will lay the foundation for the landmass.
Starting in Edit Mode
As we're going to focus on the map and not gameplay, it's convenient to directly start our app in edit mode. That way we'll immediately see the maps. So adjust HexMapEditor.Awake to set the edit mode to true and enable the edit mode shader keyword. Also adjust the default state of the edit toggle in the GUI.
	void Awake () {
		terrainMaterial.DisableKeyword("GRID_ON");
		Shader.EnableKeyword("HEX_MAP_EDIT_MODE");
		SetEditMode(true);
	}
Map Generator
Because procedural map generation requires quite a bit of code, we're not going to add that to HexGrid directly. Instead, we'll create a new HexMapGenerator component for it, keeping HexGrid unaware of it. This also makes it easier to switch to a different algorithm later, if you would like to.
The generator requires a reference to the grid, so give it a public field for that. Besides that, add a public GenerateMap method that will do the algorithm's work. Give it the map dimensions as parameters, then have it use those to create a new empty map.
using System.Collections.Generic;
using UnityEngine;

public class HexMapGenerator : MonoBehaviour {

	public HexGrid grid;

	public void GenerateMap (int x, int z) {
		grid.CreateMap(x, z);
	}
}
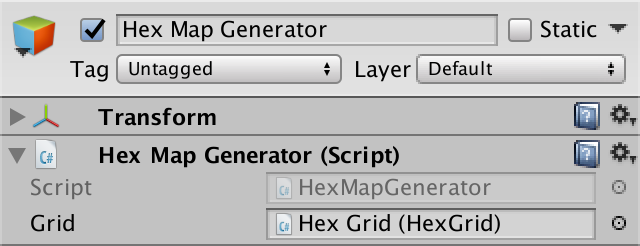
Add an object with the HexMapGenerator component to the scene and hook it up to the grid.
Adjusting the New Map Menu
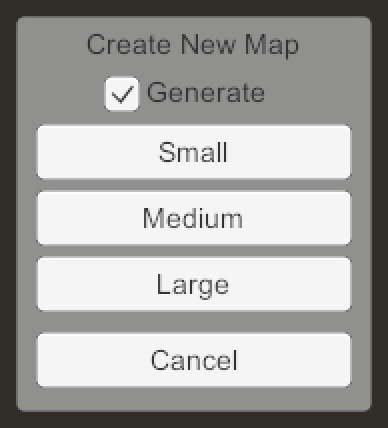
We'll adjust NewMapMenu so it can also generate maps, besides creating empty ones. We'll control what it does via a boolean generateMaps field, which is set to true by default. Create a public method to set this field, like the we did for toggle options of HexMapEditor. Add a corresponding toggle to the menu UI and connect it to the method.
	bool generateMaps = true;

	public void ToggleMapGeneration (bool toggle) {
		generateMaps = toggle;
	}
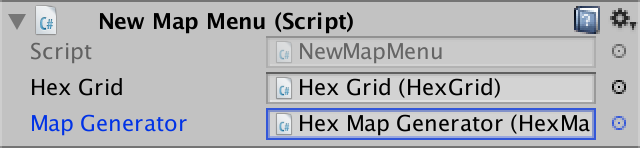
Give the menu a reference to the map generator. Then have it invoke the generator's GenerateMap method instead of directly going for the grid's CreateMap, when appropriate.
	public HexMapGenerator mapGenerator;

	…

	void CreateMap (int x, int z) {
		if (generateMaps) {
			mapGenerator.GenerateMap(x, z);
		}
		else {
			hexGrid.CreateMap(x, z);
		}
		HexMapCamera.ValidatePosition();
		Close();
	}
Accessing the Cells
To do its work, the generator will need to access the grid's cells. HexGrid already has public GetCell methods, which require either a position vector or hex coordinates. The generator doesn't need to work with either, so let's also add two convenient HexGrid.GetCell method that work with either offset coordinates or a cell index.
	public HexCell GetCell (int xOffset, int zOffset) {
		return cells[xOffset + zOffset * cellCountX];
	}

	public HexCell GetCell (int cellIndex) {
		return cells[cellIndex];
	}
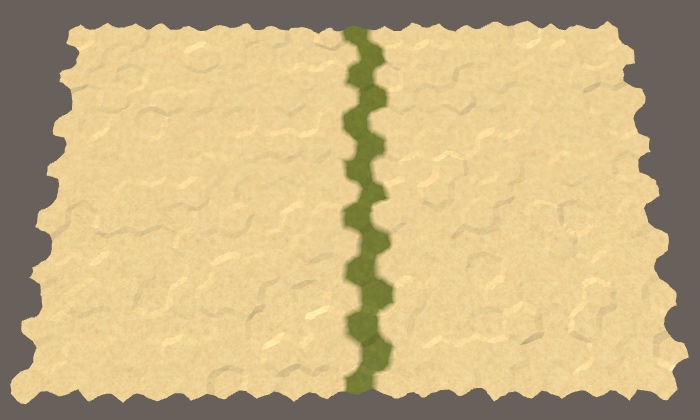
Now HexMapGenerator can directly retrieve cells. For example, after a new map has been created, set the terrain of the middle cell column to grass, using offset coordinates.
	public void GenerateMap (int x, int z) {
		grid.CreateMap(x, z);
		for (int i = 0; i < z; i++) {
			grid.GetCell(x / 2, i).TerrainTypeIndex = 1;
		}
	}
Creating Land
When generating a map, we conceptually start without any land. You can imagine the entire world is covered with one big ocean. Land is created when part of the ocean floor is pushed upward so much it rises above the water. We have to decide how much land is created this way, where it appears, and in what shape.
Raising Terrain
We start small, by raising a single chunk of land above the water. Create a RaiseTerrain method for this, with a parameter to control the size of the chunk. Invoke this method in GenerateMap, replacing the earlier test code. Let's start with a small chunk of land, consisting of seven cells.
	public void GenerateMap (int x, int z) {
		grid.CreateMap(x, z);
//		for (int i = 0; i < z; i++) {
//			grid.GetCell(x / 2, i).TerrainTypeIndex = 1;
//		}
		RaiseTerrain(7);
	}

	void RaiseTerrain (int chunkSize) {}
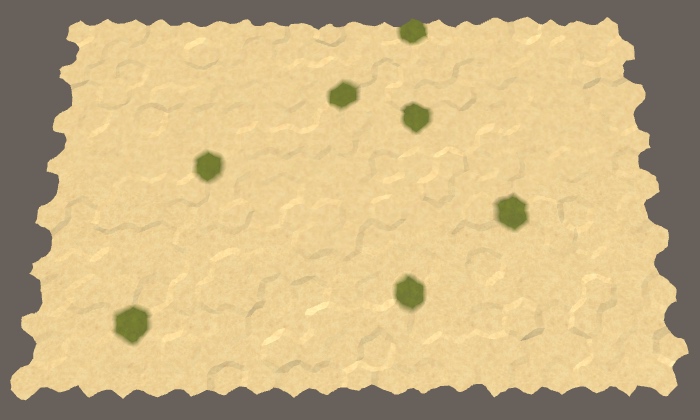
For now, we'll simply use the grass terrain type to indicate raised land, with the initial sand terrain representing the ocean. We'll make RaiseTerrain grab a random cell and adjust its terrain type, until we have the desired amount of land.
To get a random cell, add a GetRandomCell method that determines a random cell index and retrieves the corresponding cell from the grid.
	void RaiseTerrain (int chunkSize) {
		for (int i = 0; i < chunkSize; i++) {
			GetRandomCell().TerrainTypeIndex = 1;
		}
	}

	HexCell GetRandomCell () {
		return grid.GetCell(Random.Range(0, grid.cellCountX * grid.cellCountZ));
	}
As we might end up needed lots of random cells—or loop through all cells multiple times—let's keep track of the amount of cells in HexMapGenerator itself.
	int cellCount;

	public void GenerateMap (int x, int z) {
		cellCount = x * z;
		…
	}

	…

	HexCell GetRandomCell () {
		return grid.GetCell(Random.Range(0, cellCount));
	}
Creating a Single Chunk
While we're turning seven random cells into land, they can be anywhere. They're most likely don't form a single chunk of land. We might also end up picking the same cell multiple times, ending up with less than the desired amount of land. To solve both problems, only the first cell can be picked without constraint. After that, we must only pick cells that are adjacent to those that we have chosen earlier. These limitations are quite similar to those of pathfinding, so let's use the same approach here.
Give HexMapGenerator its own priority queue and search frontier phase counter, just like HexGrid.
	HexCellPriorityQueue searchFrontier;

	int searchFrontierPhase;
Make sure that the priority queue exists before we will need it.
	public void GenerateMap (int x, int z) {
		cellCount = x * z;
		grid.CreateMap(x, z);
		if (searchFrontier == null) {
			searchFrontier = new HexCellPriorityQueue();
		}
		RaiseTerrain(7);
	}
After a new map has been created, the search frontier of all cells is zero. But if we're going to search cells while generating a map, we're going to increase their search frontier in the process. If we do a lot of searching, they might end up ahead of the search frontier phase recorded by HexGrid. That could break the pathfinding of units. To prevent this, reset the search phase of all cells to zero at the end of the map generation process.
		RaiseTerrain(7);
		for (int i = 0; i < cellCount; i++) {
			grid.GetCell(i).SearchPhase = 0;
		}
RaiseTerrain must now search for appropriate cells instead of picking them all at random. This process is quite similar to the way we search in HexGrid. However, we're never going to visit cells more than once, so we can suffice by increasing the search frontier phase by 1 instead of 2. Then initialize the frontier with the first cell, which is random. Make sure to set its distance and heuristic to zero besides setting its search phase, as usual.
	void RaiseTerrain (int chunkSize) {
//		for (int i = 0; i < chunkSize; i++) {
//			GetRandomCell().TerrainTypeIndex = 1;
//		}
		searchFrontierPhase += 1;
		HexCell firstCell = GetRandomCell();
		firstCell.SearchPhase = searchFrontierPhase;
		firstCell.Distance = 0;
		firstCell.SearchHeuristic = 0;
		searchFrontier.Enqueue(firstCell);
	}
The search loop after that is also mostly familiar. Besides continuing until the frontier is empty, we should also stop when the chunk has reached the desired size, so keep track of that. Each iteration, dequeue the next cell, set its terrain type, increase the size, then go through that cell's neighbors. All neighbors are simply added to the frontier, if they hadn't already been added. We don't have to do any other comparisons or adjustments. Once we're done, make sure to clear the frontier.
		searchFrontier.Enqueue(firstCell);

		int size = 0;
		while (size < chunkSize && searchFrontier.Count > 0) {
			HexCell current = searchFrontier.Dequeue();
			current.TerrainTypeIndex = 1;
			size += 1;

			for (HexDirection d = HexDirection.NE; d <= HexDirection.NW; d++) {
				HexCell neighbor = current.GetNeighbor(d);
				if (neighbor && neighbor.SearchPhase < searchFrontierPhase) {
					neighbor.SearchPhase = searchFrontierPhase;
					neighbor.Distance = 0;
					neighbor.SearchHeuristic = 0;
					searchFrontier.Enqueue(neighbor);
				}
			}
		}
		searchFrontier.Clear();
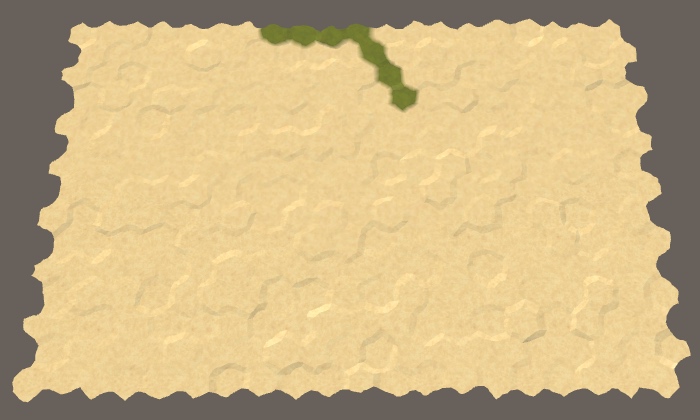
We now get a single chunk of the desired size. It will only end up smaller if there weren't enough cells available. Because of the way the frontier is filled, it always produces a line of cells moving northwest. It only changes direction when it reaches the edge of the map.
Keeping the Cells Together
Chunks of land are rarely shaped like a line, and even if they are the don't always have the same orientation. To change the shape of the chunk, we have to change the priorities of the cells. We can use the first random cell as the center of the chunk. Then the distance of all other cells is relative to that point. This will give higher priority to cells that are closer to the center, which should cause the chunk to grow around its center instead of in a line.
		searchFrontier.Enqueue(firstCell);
		HexCoordinates center = firstCell.coordinates;

		int size = 0;
		while (size < chunkSize && searchFrontier.Count > 0) {
			HexCell current = searchFrontier.Dequeue();
			current.TerrainTypeIndex = 1;
			size += 1;

			for (HexDirection d = HexDirection.NE; d <= HexDirection.NW; d++) {
				HexCell neighbor = current.GetNeighbor(d);
				if (neighbor && neighbor.SearchPhase < searchFrontierPhase) {
					neighbor.SearchPhase = searchFrontierPhase;
					neighbor.Distance = neighbor.coordinates.DistanceTo(center);
					neighbor.SearchHeuristic = 0;
					searchFrontier.Enqueue(neighbor);
				}
			}
		}
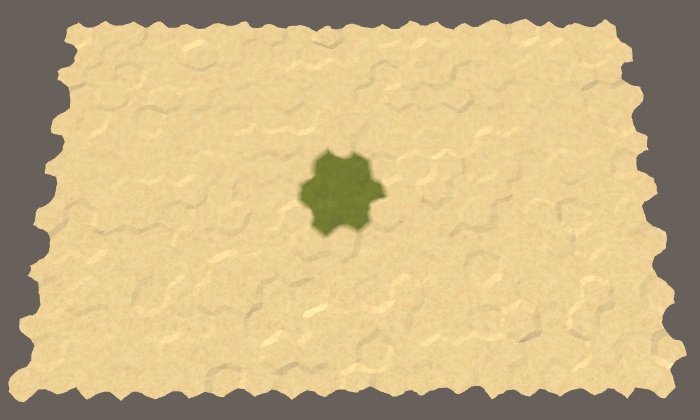
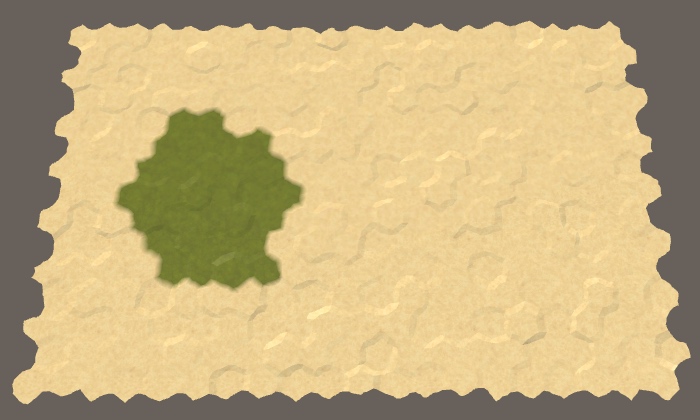
Indeed, our seven cells are now always neatly packed in a compact hexagonal area, unless the center cell happens to lie on the edge of the map. Let's try it with chunk size 30 as well.
RaiseTerrain(30);
Again, we always get the same shape, although it's not the right amount of cells to form a neat hexagon. Because the chunk's radius is larger, it's also more likely to be close enough to a map edge to be forced into a different shape.
Randomizing the Land Shape
We don't want all chunks to look the same, so let's mess up the cell priorities a bit. Each time we're adding a neighbor cell to the frontier, if the next Random.value number is less than some threshold, set that cell's heuristic to 1 instead of 0. Let's use 0.5 as the threshold, which means most likely half of the cells will be affected.
					neighbor.Distance = neighbor.coordinates.DistanceTo(center);
					neighbor.SearchHeuristic = Random.value < 0.5f ? 1: 0;
					searchFrontier.Enqueue(neighbor);
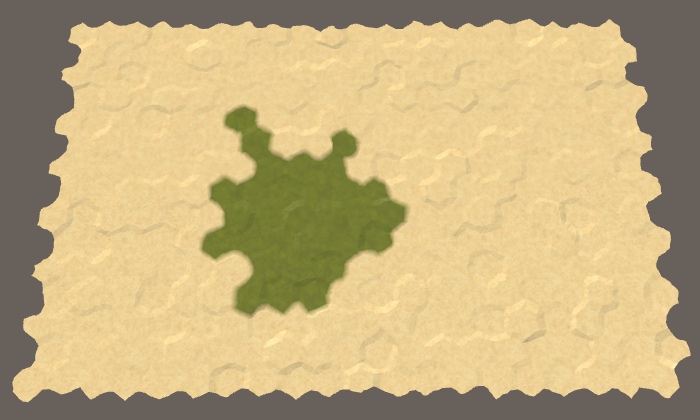
By increasing a cell's search heuristic we ensure that it will be visited later than expected. This causes other cells that are one step further away from the center to be visited earlier, unless their heuristic has been increased too. This means that if we increased the heuristic of all cells by the same amount, there would be no effect. So a threshold of 1 would have no effect, just like a threshold of 0. And a threshold of 0.8 would be equivalent to 0.2. Thus a probability of 0.5 makes the search process the most jittery.
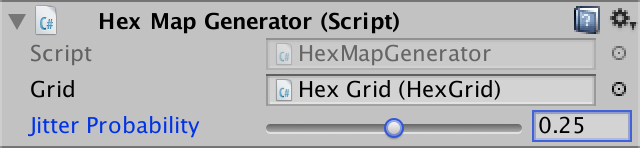
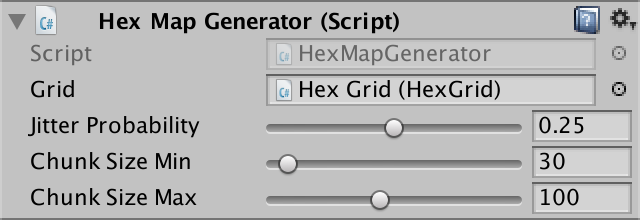
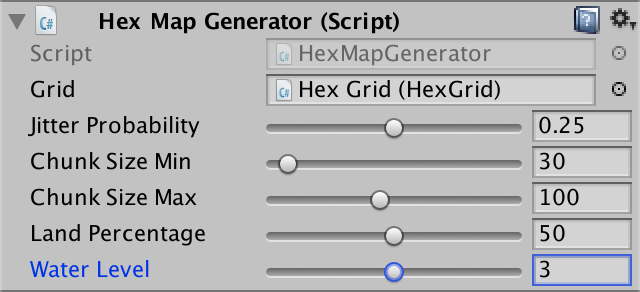
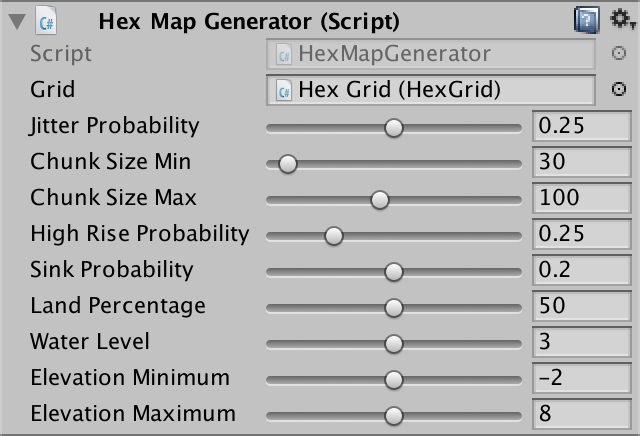
Which jitter probability is best depends on what kind of terrain you're aiming for, so let's make it configurable. Add a public float jitterProbability field to the generator, with a Range attribute constrained to 0–0.5. Give it a default value equal to the average of its range, so 0.25. This allows us to configure our generator via the Unity inspector window.
	[Range(0f, 0.5f)]
	public float jitterProbability = 0.25f;
Now use this probability instead of the fixed value to decide whether the heuristic should be set to 1.
					neighbor.SearchHeuristic =
						Random.value < jitterProbability ? 1: 0;
We use the heuristic values 0 and 1. While you could use larger heuristic values as well, this will greatly exacerbate the deformation of the chunk, likely turning it into a bunch of ribbons.
Raising Multiple Chunks
We're not limited to generating a single chunk of land. For example, put the invocation of RaiseTerrain inside a loop so we get five chunks.
		for (int i = 0; i < 5; i++) {
			RaiseTerrain(30);
		}
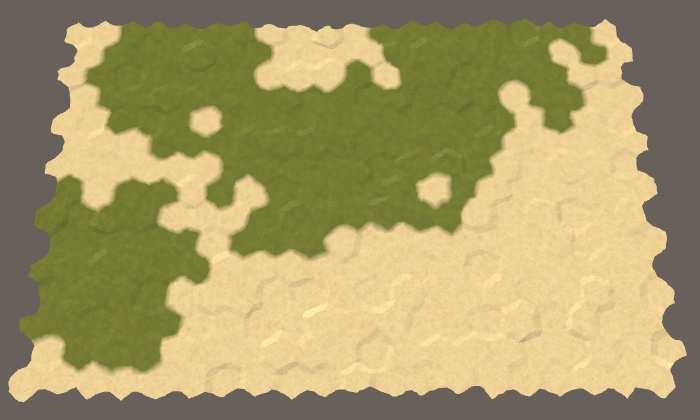
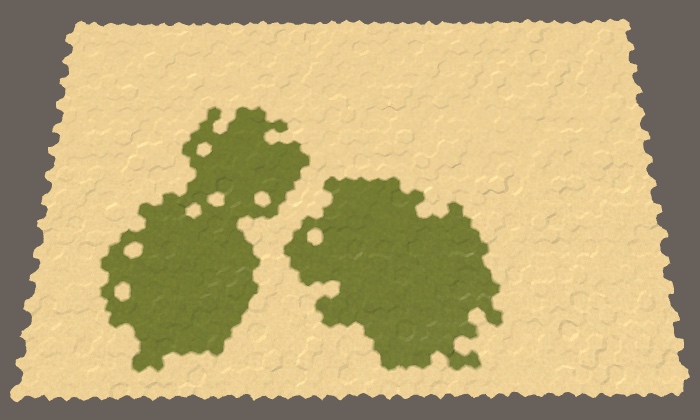
Although we're now generating five chunks of size 30 each, we're not guaranteed to get 150 cell's worth of land. As each chunk is created in isolation, they're not aware of each other, so they can overlap. This is fine, because it can produce more varied landscapes that a bunch of isolated chunks.
To make the land even more varied, we can also vary the size of each chunk. Add two integer fields to control the minimum and maximum chunk sizes that are allowed. Give them each a reasonably large range, like 20–200. I've set the default minimum to 30 and the default maximum to 100.
	[Range(20, 200)]
	public int chunkSizeMin = 30;

	[Range(20, 200)]
	public int chunkSizeMax = 100;
Use these field to randomly determine the chunk size when invoking RaiseTerrain.
RaiseTerrain(Random.Range(chunkSizeMin, chunkSizeMax + 1));
Making Enough Land
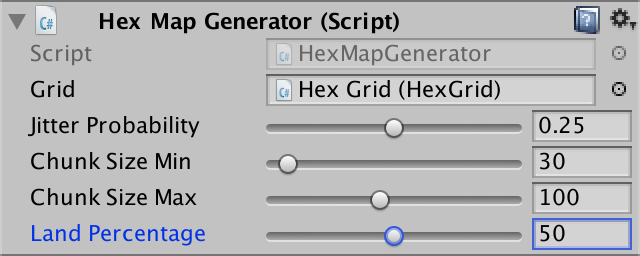
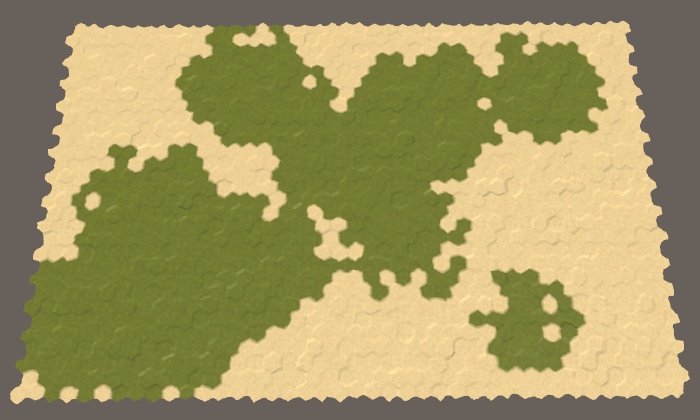
At this point we do not have much control over how much land gets generated. While we could add a configuration option for the amount of chunks, the chunk sizes are still random and they could overlap a little or a lot. Thus, the amount of chunks doesn't guarantee how much of the map ends up as land. So let's add an option to directly control the land percentage, expressed an an integer. As 100% land or water isn't interesting, set its range to 5–95, with a default of 50.
	[Range(5, 95)]
	public int landPercentage = 50;
To make sure that we end up with the desired amount of land, we simply have to keep raising chunks of terrain until we have enough. This requires us to keep track of our progress, which makes the land generation more complex. So let's replace our current loop that raises some chunks with the invocation of a new CreateLand method. The first thing that method does is calculate how many cells have to become land. That amount is our land budget.
	public void GenerateMap (int x, int z) {
		…
//		for (int i = 0; i < 5; i++) {
//			RaiseTerrain(Random.Range(chunkSizeMin, chunkSizeMax + 1));
//		}
		CreateLand();
		for (int i = 0; i < cellCount; i++) {
			grid.GetCell(i).SearchPhase = 0;
		}
	}

	void CreateLand () {
		int landBudget = Mathf.RoundToInt(cellCount * landPercentage * 0.01f);
	}
CreateLand is going to invoke RaiseTerrain as long as there's still land budget to be spent. To prevent going over budget, adjust RaiseTerrain so it takes the budget as an additional parameter. Once it's done, it should return the remaining budget.
// void RaiseTerrain (int chunkSize) {int RaiseTerrain (int chunkSize, int budget) { … return budget; }
Each time a cell is taken out of the frontier and turned into land, the budget should be decremented. If the entire budget is spent after that, we have to abort the search and cut the chunk short. Make sure to only do this if the current cell isn't land yet.
		while (size < chunkSize && searchFrontier.Count > 0) {
			HexCell current = searchFrontier.Dequeue();
			if (current.TerrainTypeIndex == 0) {
				current.TerrainTypeIndex = 1;
				if (--budget == 0) {
					break;
				}
			}
			size += 1;

			…
		}
Now CreateLand can keep raising land as long as it has budget.
	void CreateLand () {
		int landBudget = Mathf.RoundToInt(cellCount * landPercentage * 0.01f);
		while (landBudget > 0) {
			landBudget = RaiseTerrain(
				Random.Range(chunkSizeMin, chunkSizeMax + 1), landBudget
			);
		}
	}
Sculpting with Elevation
Land isn't just a flat slab solely defined by its coastline. It can also have varied elevation, containing hills, mountains, valleys, lakes, and so on. Large elevation differences exist because of the interactions between slowly-moving tectonic plates. While we're not going to simulate this, our chunks of land are somewhat like these plates. Our chunks don't move, but they do overlap. This is something that we can make use of.
Pushing Land Upward
Each chunk represents a portion of land that has been pushed up from the ocean floor. So let's always increment the elevation of the current cell that we're processing in RaiseTerrain and see what happens.
			HexCell current = searchFrontier.Dequeue();
			current.Elevation += 1;
			if (current.TerrainTypeIndex == 0) {
				…
			}
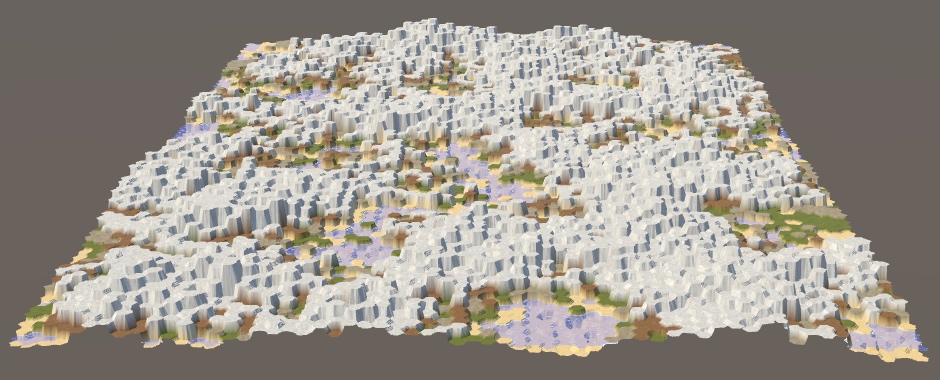
We're getting some elevation, but it's hard to see clearly. We can make it obvious by using a different terrain type for each elevation level, like geological stratification. This is just for the purpose of making it obvious, so we can simply use the elevation level as the terrain index.
Instead of updating a cell's terrain type each time its elevation changes, let's create a separate SetTerrainType method to set all terrain types once.
	void SetTerrainType () {
		for (int i = 0; i < cellCount; i++) {
			HexCell cell = grid.GetCell(i);
			cell.TerrainTypeIndex = cell.Elevation;
		}
	}
Invoke this method after the land has been created.
	public void GenerateMap (int x, int z) {
		…
		CreateLand();
		SetTerrainType();
		…
	}
Now RaiseTerrain no longer has to worry about terrain type and can focus on elevation. This requires a change in its logic. When the current cell's new elevation is 1, it has just become land, so the budget decrements, which could end the chunk's growth.
			HexCell current = searchFrontier.Dequeue();
			current.Elevation += 1;
			if (current.Elevation == 1 && --budget == 0) {
				break;
			}

//			if (current.TerrainTypeIndex == 0) {
//				current.TerrainTypeIndex = 1;
//				if (--budget == 0) {
//					break;
//				}
//			}
Adding Water
Let's make it explicit which cells are land or water, by setting the water level of all cells to 1. Do this in GenerateMap, before creating the land.
	public void GenerateMap (int x, int z) {
		cellCount = x * z;
		grid.CreateMap(x, z);
		if (searchFrontier == null) {
			searchFrontier = new HexCellPriorityQueue();
		}
		for (int i = 0; i < cellCount; i++) {
			grid.GetCell(i).WaterLevel = 1;
		}
		CreateLand();
		…
	}
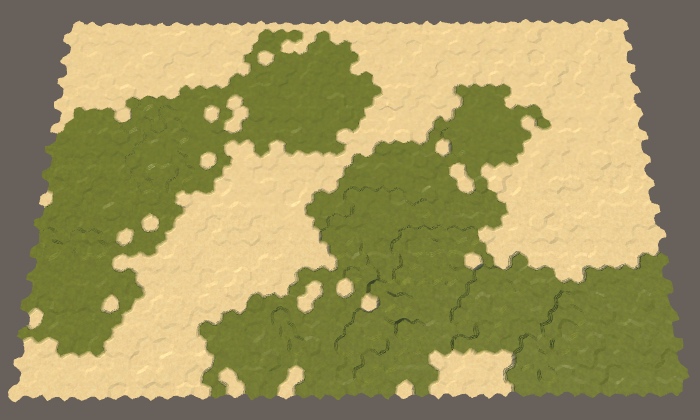
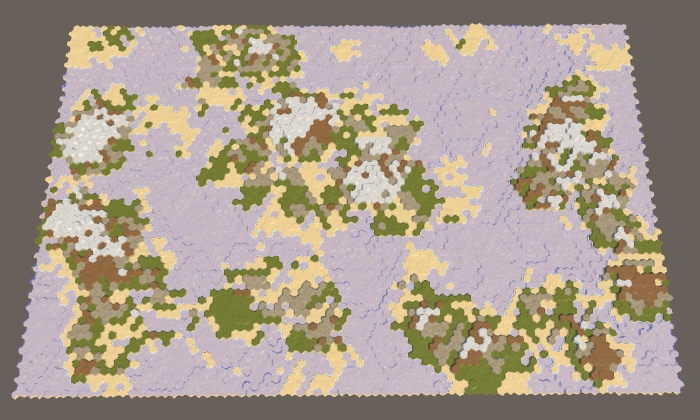
Now we can use all terrain types to represent land layers. All underwater cells remain sand, as well as the lowest land cells. This is done by subtracting the water level from the elevation and using that as the terrain type index.
	void SetTerrainType () {
		for (int i = 0; i < cellCount; i++) {
			HexCell cell = grid.GetCell(i);
			if (!cell.IsUnderwater) {
				cell.TerrainTypeIndex = cell.Elevation - cell.WaterLevel;
			}
		}
	}
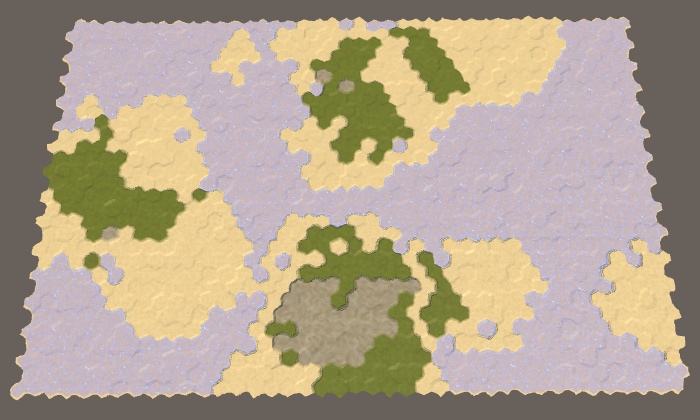
Raising the Water Level
We're not limited to a fixed water level of 1. Let's make it configurable via a public field with range 1–5 and a default of 3. Use this level to initialize the cells.
	[Range(1, 5)]
	public int waterLevel = 3;

	…

	public void GenerateMap (int x, int z) {
		…
		for (int i = 0; i < cellCount; i++) {
			grid.GetCell(i).WaterLevel = waterLevel;
		}
		…
	}
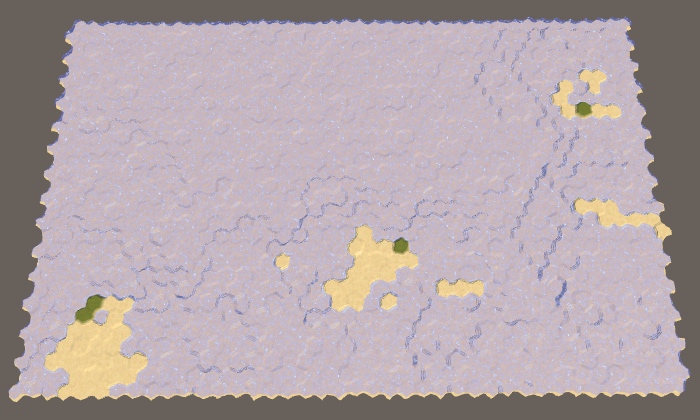
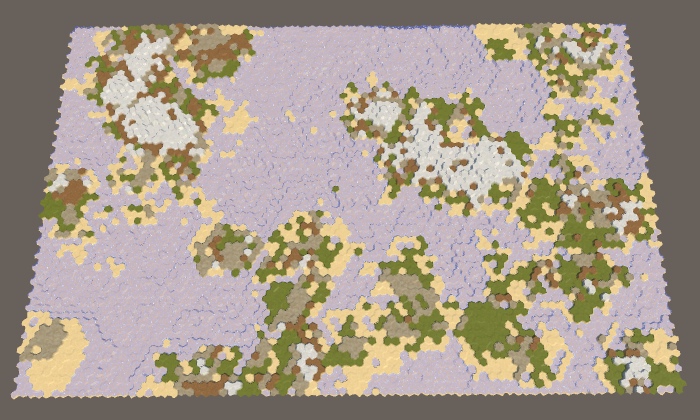
When the water level is 3, we end up with much less land than expected. This happens because RaiseTerrain still assumes that the water level is 1. Let's fix this.
			HexCell current = searchFrontier.Dequeue();
			current.Elevation += 1;
			if (current.Elevation == waterLevel && --budget == 0) {
				break;
			}
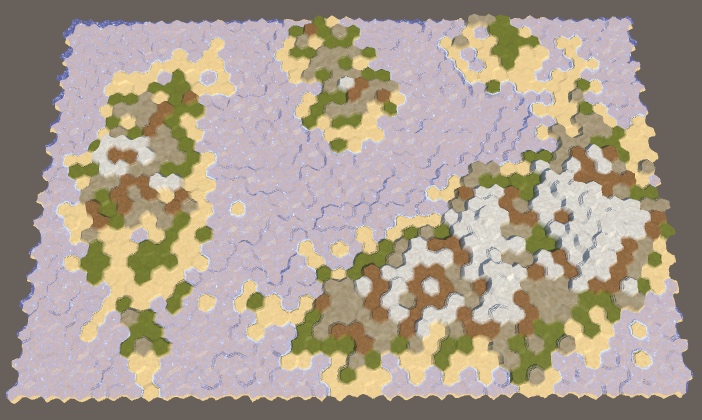
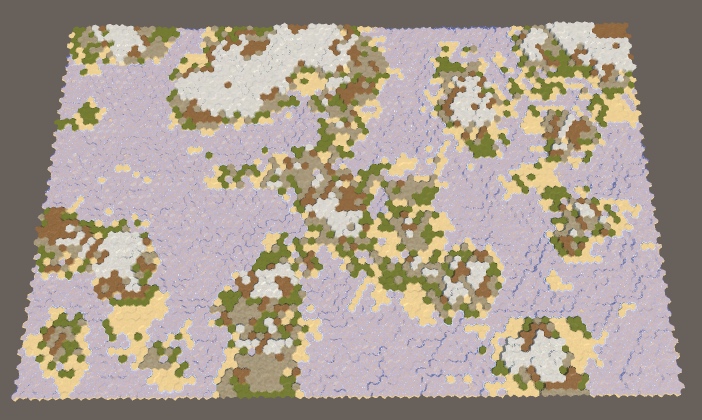
The effect of using a higher water level is that cells don't immediately become land. When the water level is 2, the first chunk is still fully underwater. The ocean floor has risen, but it's still submerged. Only when at least two chunks overlap is land formed. The higher the water level, the more chunks need to be stacked to produce land. The result of this is that higher water levels make the land more erratic. Also, when more chunks are needed it's more likely that they end up stacked on top of already existing land, which makes mountain ranges more common and flat land more rare, just like using smaller chunks does.
Vertical Movement
Up to this point we've only raised chunks upward one elevation level at a time, but it doesn't have to be limited to this.
High-Rise Chunks
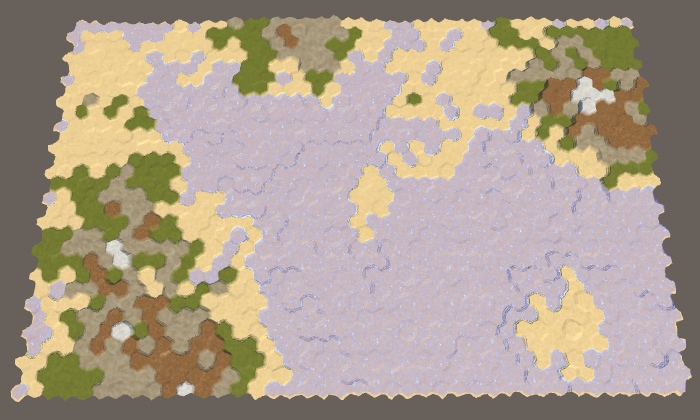
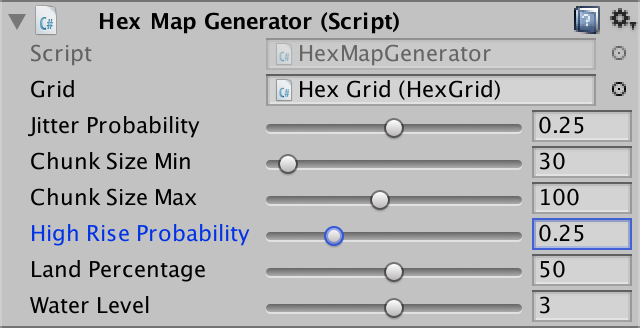
Although each chunk increases the elevation of its cells by one level, cliffs can occur. This happens when the edges of two chunks touch. That can produce isolated cliffs, but longer strings of cliffs are rare. We can make those a lot more common by increasing the elevation of chunks by more than one step. But we should only do this for a fraction of the chunks. If all chunks were high-rises, the terrain would become very hard to navigate. So let's make it configurable with a probability field, with default value 0.25.
	[Range(0f, 1f)]
	public float highRiseProbability = 0.25f;
While we could use any elevation increase for high-rising chunks, it gets out of hand fast. An elevation difference of 2 already creates cliffs, so that's sufficient. Because this makes it possible to skip the elevation that equals the water level, we have to change how we determine that a cell has turned into land. If it used to be below the water level but is now at the same level or above it, then we made a new land cell.
		int rise = Random.value < highRiseProbability ? 2 : 1;
		int size = 0;
		while (size < chunkSize && searchFrontier.Count > 0) {
			HexCell current = searchFrontier.Dequeue();
			int originalElevation = current.Elevation;
			current.Elevation = originalElevation + rise;
			if (
				originalElevation < waterLevel &&
				current.Elevation >= waterLevel && --budget == 0
			) {
				break;
			}
			size += 1;

			…
		}
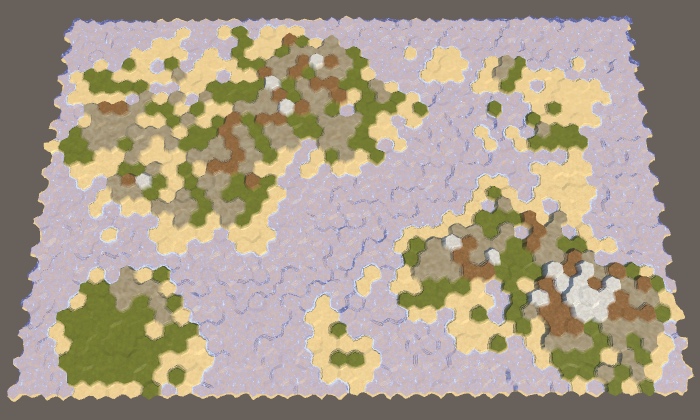
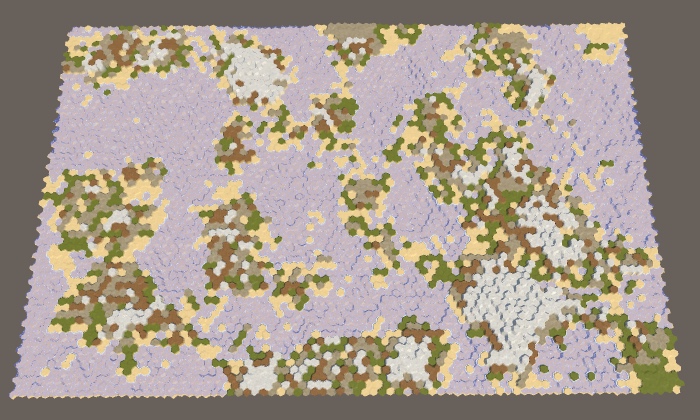
Sinking Land
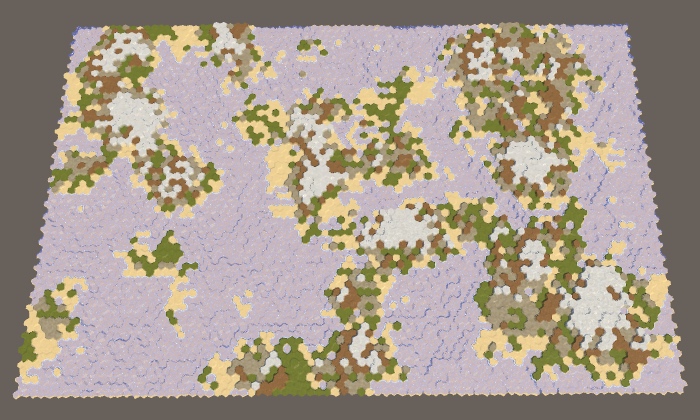
Land doesn't always go up, sometimes it goes down as well. When land sinks low enough, it submerges and is lost. We're currently not doing this. Because we only push chunks upward, the land tends to look like a collection of fairly round areas mashed together. If we sometimes push a chunk downward instead, we can end up with more varied shapes.
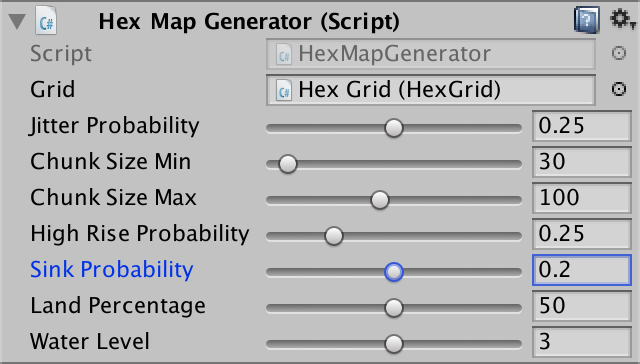
Controlling how often we sink land can be done with another probability field. Because sinking can destroy land, we should always make it less likely to sink than to raise. Otherwise it might take a very long time to reach the desired land percentage, if we ever get there. So let's use a maximum sink probability of 0.4, with a default of 0.2.
	[Range(0f, 0.4f)]
	public float sinkProbability = 0.2f;
Sinking a chunk is similar to raising one, with a few differences. So duplicate the RaiseTerrain method and change its name to SinkTerrain. Instead of determining an amount to rise, we need an amount to sink by, which can use the same logic. Meanwhile, the comparisons to check for whether we passed through the water surface have to be reversed. Also, we're not limited by the the budget when sinking terrain. Instead, each land cell that is lost reclaims spent budget, so we should increment it and keep going.
	int SinkTerrain (int chunkSize, int budget) {
		…

		int sink = Random.value < highRiseProbability ? 2 : 1;
		int size = 0;
		while (size < chunkSize && searchFrontier.Count > 0) {
			HexCell current = searchFrontier.Dequeue();
			int originalElevation = current.Elevation;
			current.Elevation = originalElevation - sink;
			if (
				originalElevation >= waterLevel &&
				current.Elevation < waterLevel
//				&& --budget == 0
			) {
//				break;
				budget += 1;
			}
			size += 1;

			…
		}
		searchFrontier.Clear();
		return budget;
	}
Each iteration inside the CreateLand loop we should now either raise or sink a chunk of land, depending on the sink probability.
	void CreateLand () {
		int landBudget = Mathf.RoundToInt(cellCount * landPercentage * 0.01f);
		while (landBudget > 0) {
			int chunkSize = Random.Range(chunkSizeMin, chunkSizeMax - 1);
			if (Random.value < sinkProbability) {
				landBudget = SinkTerrain(chunkSize, landBudget);
			}
			else {
				landBudget = RaiseTerrain(chunkSize, landBudget);
			}
		}
	}

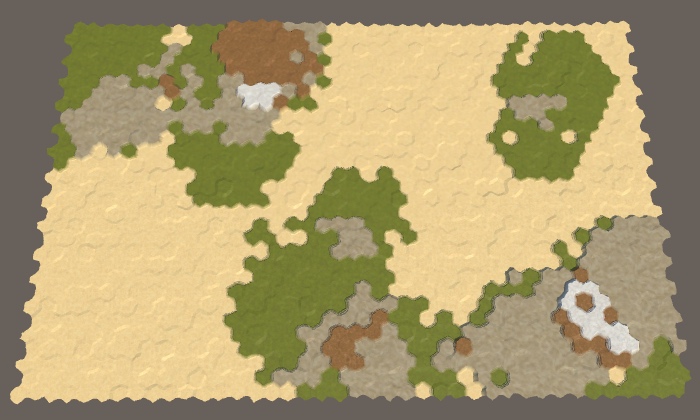
Limiting Elevation
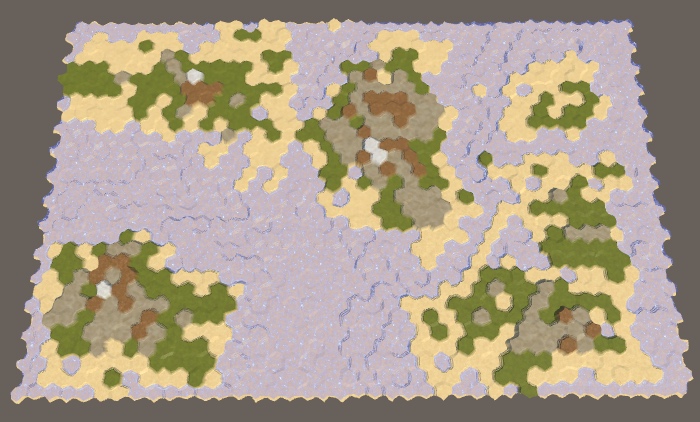
At this point we're potentially stacking many chunks, sometimes multiple high-rises, part of which can sink and later rise again. This can produce very high and sometimes also very low elevations, especially when a high land percentage is desired.
To keep elevation in check, let's add a configurable minimum and maximum. A reasonable minimum could be somewhere between −4 and 0, while an acceptable maximum can fall in the 6–10 range. Set the default values to −2 and 8. These lie outside the allowed range when manually editing a map, so you might want to adjust the slider of the editor UI, or not.
	[Range(-4, 0)]
	public int elevationMinimum = -2;

	[Range(6, 10)]
	public int elevationMaximum = 8;
In RaiseTerrain, we should now ensure that we do not go above the maximum allowed elevation. We'll do this by checking whether the new elevation of the current cells would end up too high. If so, we skip it, not adjusting its elevation and also not adding its neighbors. This will cause chunks to avoid areas that are already at their highest, growing around them.
			HexCell current = searchFrontier.Dequeue();
			int originalElevation = current.Elevation;
			int newElevation = originalElevation + rise;
			if (newElevation > elevationMaximum) {
				continue;
			}
			current.Elevation = newElevation;
			if (
				originalElevation < waterLevel &&
				newElevation >= waterLevel && --budget == 0
			) {
				break;
			}
			size += 1;
Do the same in SinkTerrain, but for the minimum elevation.
			HexCell current = searchFrontier.Dequeue();
			int originalElevation = current.Elevation;
			int newElevation = current.Elevation - sink;
			if (newElevation < elevationMinimum) {
				continue;
			}
			current.Elevation = newElevation;
			if (
				originalElevation >= waterLevel &&
				newElevation < waterLevel
			) {
				budget += 1;
			}
			size += 1;
Storing Negative Elevation
Currently, our saving and loading code cannot deal with negative elevations. That's because we're storing elevation as a byte. A negative number will convert into a large positive one when saved. So saving and then loading a generated map can result in some very high cells appearing that were originally submerged.
We could support negative elevation by storing it as an integer instead of a byte. However, we still don't need to support many elevation levels. We could also offset the value we store, adding 127. That makes it possible to correctly store elevations in the −127–128 range with a single byte. Let's do that. Adjust HexCell.Save accordingly.
	public void Save (BinaryWriter writer) {
		writer.Write((byte)terrainTypeIndex);
		writer.Write((byte)(elevation + 127));
		…
	}
As we've changed how we store map data, increment SaveLoadMenu.mapFileVersion to 4.
const int mapFileVersion = 4;
Finally, adjust HexCell.Load so it subtracts 127 from the elevation loaded from version 4 files.
	public void Load (BinaryReader reader, int header) {
		terrainTypeIndex = reader.ReadByte();
		ShaderData.RefreshTerrain(this);
		elevation = reader.ReadByte();
		if (header >= 4) {
			elevation -= 127;
		}
		…
	}
Recreating the Same Map
By now we can already create a wide variety of maps. Each time we generate a new one, the result will be random. We can only control the characteristics of the maps via the configuration options, not its exact shape. But sometimes we want to recreate the exact same map again. For example, to share a nice map with someone else. Or to start again after editing it manually. It's also useful during development. So let's make this possible.
Using a Seed
We're using Random.Range and Random.value to make the map generation process unpredictable. To get the same pseudorandom sequence again, we have to use the same seed value. We've already used this approach before, in HexMetrics.InitializeHashGrid. It first stores the current state of the number generator, initialized it with a specific seed, then later restores it back to its old state. We can use the same approach for HexMapGenerator.GenerateMap. Again, we remember the old state and restore it once we're done, so we do not influence anything else that uses Random.
	public void GenerateMap (int x, int z) {
		Random.State originalRandomState = Random.state;
		…
		Random.state = originalRandomState;
	}
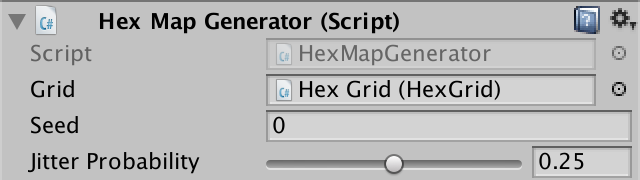
Next, we're going to expose the seed that we used to generate the last map. This is done via a public integer field.
public int seed;
Now we need a seed value to initialize Random. To create random maps we have to use a random seed. The most straightforward approach might appear to use Random.Range to generate an arbitrary seed value. To not affect the original random state, we have to do this after storing it.
	public void GenerateMap (int x, int z) {
		Random.State originalRandomState = Random.state;
		seed = Random.Range(0, int.MaxValue);
		Random.InitState(seed);

		…
	}
As we restore the random state after we're done, if we immediately generate another map we'll end up with the same seed value. Also, we don't know how the original random state has been initialized. So while it can serve as an arbitrary starting point, we need something more to randomize it per invocation.
There are various ways to initialize random number generators. In this case, can just combine a few arbitrary values that change a lot so it's very unlikely to generate the same map again. For example, let's use the lower 32 bits of the system time expressed in ticks, plus the current run time of our app. Combine these values with the bitwise exclusive-OR operation, so we don't end up with an obviously increasing number.
		seed = Random.Range(0, int.MaxValue);
		seed ^= (int)System.DateTime.Now.Ticks;
		seed ^= (int)Time.unscaledTime;
		Random.InitState(seed);
The resulting number can be negative, which doesn't look nice for a publicly-exposed seed. We can force it to be positive by bitwise masking it with the maximum integer value, which sets the sign bit to zero.
		seed ^= (int)Time.unscaledTime;
		seed &= int.MaxValue;
		Random.InitState(seed);
Reusing the Seed
We're still generating random maps, but we can now see which seed value is used for each. To recreate the same map again, we have to instruct the generator to reuse its seed value, instead of making a new one. We'll do this by adding a toggle via a boolean field.
public bool useFixedSeed;
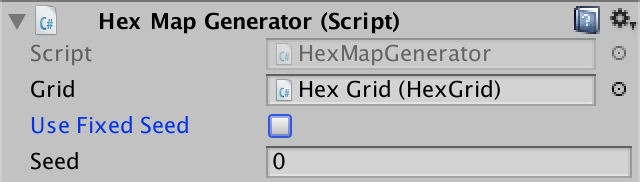
When a fixed seed should be used, we simply skip generating a new seed in GenerateMap. If we don't edit the seed field manually, this results in the exact same map being generated again.
		Random.State originalRandomState = Random.state;
		if (!useFixedSeed) {
			seed = Random.Range(0, int.MaxValue);
			seed ^= (int)System.DateTime.Now.Ticks;
			seed ^= (int)Time.time;
			seed &= int.MaxValue;
		}
		Random.InitState(seed);
Now it's possible to copy the seed value of a map that you like and store it somewhere, to later generate it again. Keep in mind that you only get the same map if you use the exact same generator settings. So the same map size, but also all the other configuration options. Even a small change to one of the probabilities can produce a completely different map. So besides the seed, you also have to remember all settings.
The next tutorial is Regions and Erosion.