Hex Map 18
Units
- Place units on the map.
- Save and load units.
- Find paths for units.
- Move units around.
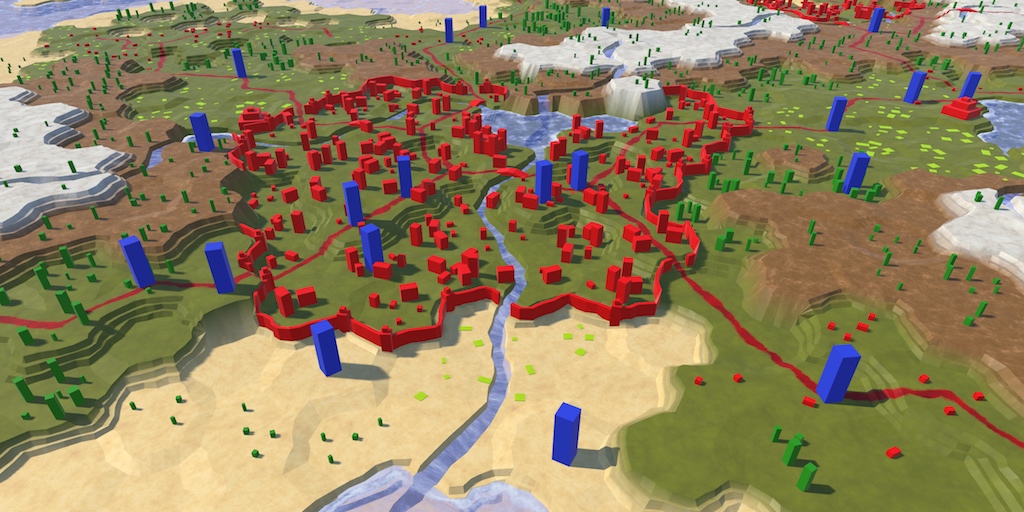
This is part 18 of a tutorial series about hexagon maps. Now that we've figured out how to do pathfinding, let's put some units on the map.
Creating Units
So far, we've only dealt with cells and their immobile features. Units are different, because they are mobile. A unit can represent anything at any scale, from one person or vehicle to an entire army. In this tutorial, we'll limit ourselves to a single generic unit type. Once we have that covered we'll move on to supporting a mix of unit types.
Unit Prefab
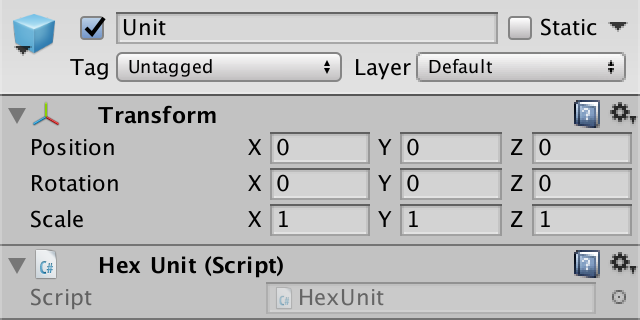
To work with units, create a new HexUnit component type. Start with an empty MonoBehaviour for now, we'll add functionality to it later.
using UnityEngine;

public class HexUnit : MonoBehaviour {
}
Create an empty game object with this component, which should become a prefab. This is the root object for a unit.
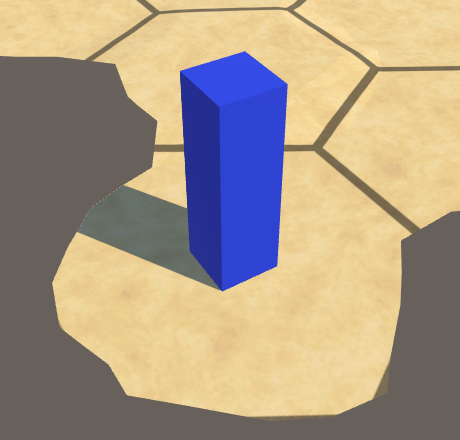
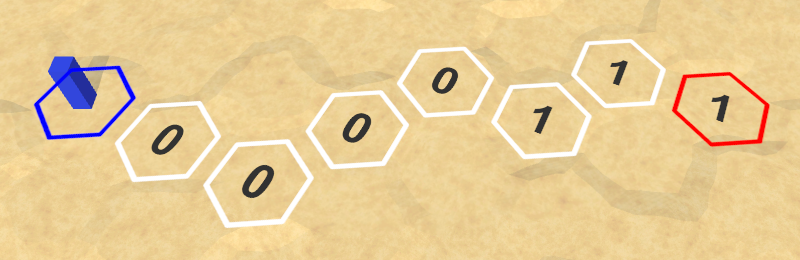
Add a 3D model to represent the unit as a child object. I simply used a scaled cube, which I gave a blue material. The root object defines the ground level for the unit, so offset the child accordingly.

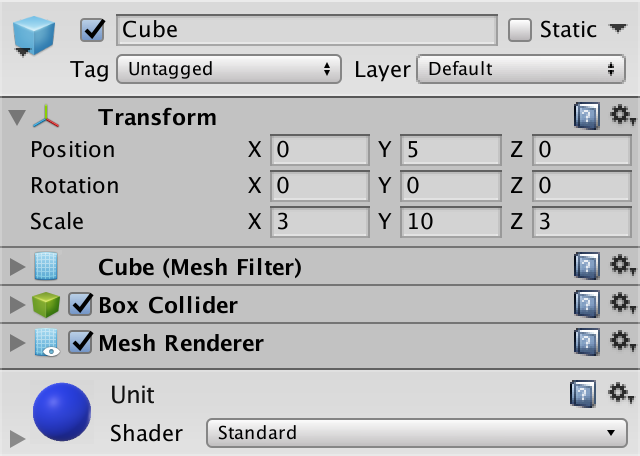
Giving the unit a collider will make it easier to select them later. The collider of the default cube works fine. Just make sure that the collider fits inside a single cell.
Instantiating Units
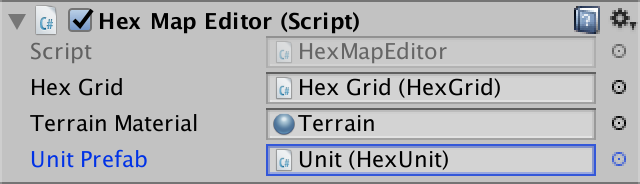
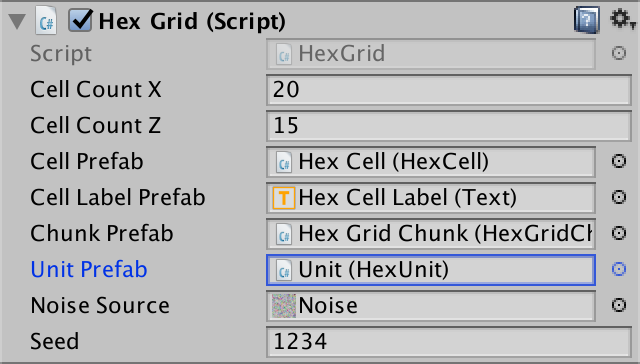
As we have no gameplay yet, spawning units is done in edit mode. So it's the responsibility of HexMapEditor to create them. It needs the prefab to do this, so add a HexUnit unitPrefab field for it and hook it up.
public HexUnit unitPrefab;
When creating units, we're going to place them on the cell that's underneath the cursor. HandleInput has code to find this cell when editing the terrain. We now need it for units as well, so let's move the relevant code to its own method.
	HexCell GetCellUnderCursor () {
		Ray inputRay = Camera.main.ScreenPointToRay(Input.mousePosition);
		RaycastHit hit;
		if (Physics.Raycast(inputRay, out hit)) {
			return hexGrid.GetCell(hit.point);
		}
		return null;
	}
Now we can use this method in HandleInput, simplifying it.
	void HandleInput () {
//		Ray inputRay = Camera.main.ScreenPointToRay(Input.mousePosition);
//		RaycastHit hit;
//		if (Physics.Raycast(inputRay, out hit)) {
//			HexCell currentCell = hexGrid.GetCell(hit.point);

		HexCell currentCell = GetCellUnderCursor();
		if (currentCell) {
			…
		}
		else {
			previousCell = null;
		}
	}
Next, add a new CreateUnit method that uses GetCellUnderCursor as well. If there's a cell, instantiate a new unit.
	void CreateUnit () {
		HexCell cell = GetCellUnderCursor();
		if (cell) {
			Instantiate(unitPrefab);
		}
	}
To keep the hierarchy clean, let's use the grid as the parent for all unit game objects.
	void CreateUnit () {
		HexCell cell = GetCellUnderCursor();
		if (cell) {
			HexUnit unit = Instantiate(unitPrefab);
			unit.transform.SetParent(hexGrid.transform, false);
		}
	}
The simplest way to add support for creating units to HexMapEditor is via a key press. Adjust the Update method so it invokes CreateUnit when the U key is pressed. Like HandleInput, this should only happen if the cursor is not on top of a GUI element. First check whether we should edit the map, and if not check whether we should add a unit. If so, invoke CreateUnit.
	void Update () {
//		if (
//			Input.GetMouseButton(0) &&
//			!EventSystem.current.IsPointerOverGameObject()
//		) {
//			HandleInput();
//		}
//		else {
//			previousCell = null;
//		}

		if (!EventSystem.current.IsPointerOverGameObject()) {
			if (Input.GetMouseButton(0)) {
				HandleInput();
				return;
			}
			if (Input.GetKeyDown(KeyCode.U)) {
				CreateUnit();
				return;
			}
		}
		previousCell = null;
	}
Positioning Units
It is now possible to create units, but they all end up at the origin of the map. The next step it to put them in the right place. This requires that units are aware of their location. So add a Location property to HexUnit to identify the cell that they are occupying. When setting it, adjust the unit's position so it matches the cell's.
	public HexCell Location {
		get {
			return location;
		}
		set {
			location = value;
			transform.localPosition = value.Position;
		}
	}

	HexCell location;
Now HexMapEditor.CreateUnit has to assign the cell under the cursor to the unit's location. Then the units will end up where they're expected.
	void CreateUnit () {
		HexCell cell = GetCellUnderCursor();
		if (cell) {
			HexUnit unit = Instantiate(unitPrefab);
			unit.transform.SetParent(hexGrid.transform, false);
			unit.Location = cell;
		}
	}
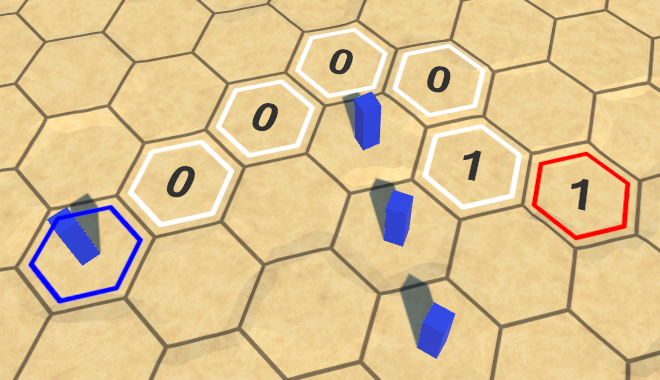
Unit Orientation
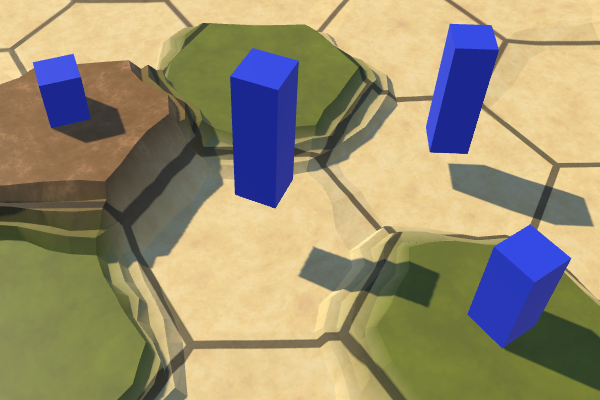
Currently, all unit have the same orientation, which looks quite rigid. To liven things up, add an Orientation property to HexUnit. This is a float which represents the unit's rotation around the Y axis, in degrees. When setting it, adjust the unit's actual game object rotation accordingly.
	public float Orientation {
		get {
			return orientation;
		}
		set {
			orientation = value;
			transform.localRotation = Quaternion.Euler(0f, value, 0f);
		}
	}

	float orientation;
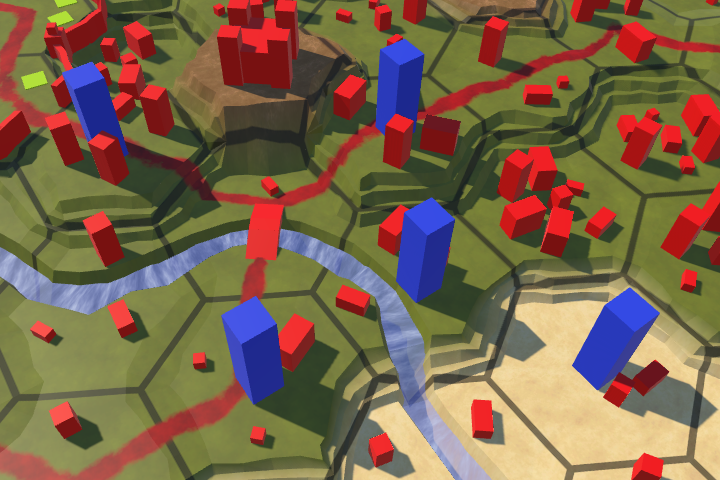
In HexMapEditor.CreateUnit, assign a random rotation, between 0 and 360 degrees.
	void CreateUnit () {
		HexCell cell = GetCellUnderCursor();
		if (cell) {
			HexUnit unit = Instantiate(unitPrefab);
			unit.transform.SetParent(hexGrid.transform, false);
			unit.Location = cell;
			unit.Orientation = Random.Range(0f, 360f);
		}
	}
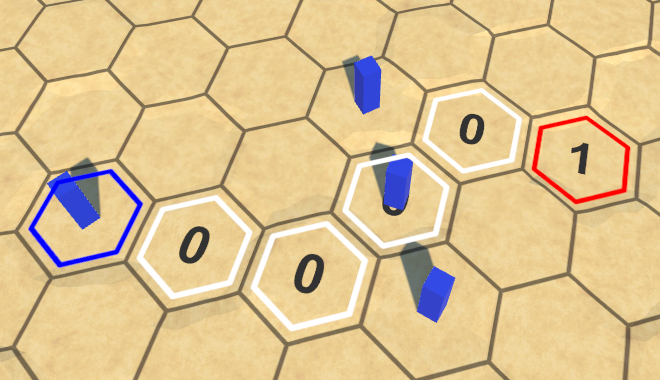
One Unit Per Cell
The units look good, except when multiple are created in the same location. Then we get overlapping cubes, which looks bad.

Some games allow multiple units in the same location, while other do not allow this. As a single unit per cell is easier to work with, we'll go for this option. That means that we should only create a new unit if the current cell is not occupied. To make it possible to know this, add a default Unit property to HexCell.
public HexUnit Unit { get; set; }
Use this property in HexUnit.Location to make the cell aware that there is a unit standing on it.
	public HexCell Location {
		get {
			return location;
		}
		set {
			location = value;
			value.Unit = this;
			transform.localPosition = value.Position;
		}
	}
Now HexMapEditor.CreateUnit can check whether the current cell is available.
	void CreateUnit () {
		HexCell cell = GetCellUnderCursor();
		if (cell && !cell.Unit) {
			HexUnit unit = Instantiate(unitPrefab);
			unit.Location = cell;
			unit.Orientation = Random.Range(0f, 360f);
		}
	}
Editing Occupied Cells
While units are correctly positioned initially, it can go wrong when their locations are edited later. If a cell's elevation is changed, the unit occupying it will end up either hovering above it, or sinking into it.
The solution is to validate the unit's location after a change has been made. Add a method for this to HexUnit. Currently, we only care about the unit's position, so just set it again.
	public void ValidateLocation () {
		transform.localPosition = location.Position;
	}
We should validate the unit's location whenever we refresh a cell, which is when either the Refresh or RefreshSelfOnly methods of HexCell are invoked. Of course this is only required when there's actually a unit in the cell.
	void Refresh () {
		if (chunk) {
			chunk.Refresh();
			…
			if (Unit) {
				Unit.ValidateLocation();
			}
		}
	}

	void RefreshSelfOnly () {
		chunk.Refresh();
		if (Unit) {
			Unit.ValidateLocation();
		}
	}
Removing Units
Besides creating units, it is also useful to be able to destroy them. So add a DestroyUnit method to HexMapEditor. It has to check whether there's a unit in the cell under the cursor, and if so destroy that unit's game object.
	void DestroyUnit () {
		HexCell cell = GetCellUnderCursor();
		if (cell && cell.Unit) {
			Destroy(cell.Unit.gameObject);
		}
	}
Note that we're going through the cell to reach the unit. Hovering over the cell that contains a unit is enough to interact with it. So units don't need to have a collider for this to work. However, giving them a collider makes it easier to point at them, because it blocks the rays that would otherwise end up hitting a cell behind the unit.
Let's use left shift plus the U key to trigger the destruction of a unit in Update, instead of creating one.
			if (Input.GetKeyDown(KeyCode.U)) {
				if (Input.GetKey(KeyCode.LeftShift)) {
					DestroyUnit();
				}
				else {
					CreateUnit();
				}
				return;
			}
In case we're going to create and destroy many units, let's be tidy and clean up property when getting rid of a unit. This means explicitly clearing the cell's unit reference. Add a Die method to HexUnit to take care of this, plus the destruction of its own game object.
	public void Die () {
		location.Unit = null;
		Destroy(gameObject);
	}
Invoke this method in HexMapEditor.DestroyUnit instead of destroying the unit directly.
	void DestroyUnit () {
		HexCell cell = GetCellUnderCursor();
		if (cell && cell.Unit) {
//			Destroy(cell.Unit.gameObject);
			cell.Unit.Die();
		}
	}
Saving and Loading Units
Now that we can have units on the map, we must include them in the saving and loading process. There are two ways we could approach this. The first is to write a unit's data when its cell is written, so cell and unit data will be mixed. The other way is to keep cell and unit data separate. While the first approach might appear more straightforward to implement, the second one gives us more structured data. Keeping the data separate will make it easier to work with in the future.
Keeping Track of Units
To save all units together, we have to keep track of them. We'll do this by adding a unit list to HexGrid. This list should contain all the units on the map.
List<HexUnit> units = new List<HexUnit>();
Whenever a new map is created or loaded, we have to get rid of all units currently on the map. To facilitate this, create a ClearUnits method that kills everything in the list and empties it.
	void ClearUnits () {
		for (int i = 0; i < units.Count; i++) {
			units[i].Die();
		}
		units.Clear();
	}
Invoke this method in CreateMap and Load. Let's do so after the path is cleared.
	public bool CreateMap (int x, int z) {
		…

		ClearPath();
		ClearUnits();
		…
	}

	…

	public void Load (BinaryReader reader, int header) {
		ClearPath();
		ClearUnits();
		…
	}
Adding Units to the Grid
We now have to add new units to the list when we create them. Let's define an AddUnit method for that, which also takes care of positioning the unit and settings its parent.
	public void AddUnit (HexUnit unit, HexCell location, float orientation) {
		units.Add(unit);
		unit.transform.SetParent(transform, false);
		unit.Location = location;
		unit.Orientation = orientation;
	}
HexMapEditor.CreatUnit can now suffice with invoking AddUnit with a newly instantiated unit, its location, and a random orientation.
	void CreateUnit () {
		HexCell cell = GetCellUnderCursor();
		if (cell && !cell.Unit) {
//			HexUnit unit = Instantiate(unitPrefab);
//			unit.transform.SetParent(hexGrid.transform, false);
//			unit.Location = cell;
//			unit.Orientation = Random.Range(0f, 360f);
			hexGrid.AddUnit(
				Instantiate(unitPrefab), cell, Random.Range(0f, 360f)
			);
		}
	}
Removing Units from the Grid
Add a method for removing a unit to HexGrid as well. Simply remove the unit from the list and tell it to die.
	public void RemoveUnit (HexUnit unit) {
		units.Remove(unit);
		unit.Die();
	}
Invoke this method in HexMapEditor.DestroyUnit, instead of directly killing the unit.
	void DestroyUnit () {
		HexCell cell = GetCellUnderCursor();
		if (cell && cell.Unit) {
//			cell.Unit.Die();
			hexGrid.RemoveUnit(cell.Unit);
		}
	}
Saving Units
As we are going to store all units together, we have to remember which cells they are occupying. The most robust way to do this is by storing the coordinates of their locations. To make this possible, add a Save method to HexCoordinates, which writes its X and Z fields.
using UnityEngine;
using System.IO;

[System.Serializable]
public struct HexCoordinates {

	…

	public void Save (BinaryWriter writer) {
		writer.Write(x);
		writer.Write(z);
	}
}
The Save method for HexUnit can now write the unit's coordinates, and its orientation. That is all unit data that we have at this point.
using UnityEngine;
using System.IO;

public class HexUnit : MonoBehaviour {

	…

	public void Save (BinaryWriter writer) {
		location.coordinates.Save(writer);
		writer.Write(orientation);
	}
}
As HexGrid keeps track of the units, its Save method will take care of writing the unit data. First write how many units there are, then loop through the units.
	public void Save (BinaryWriter writer) {
		writer.Write(cellCountX);
		writer.Write(cellCountZ);

		for (int i = 0; i < cells.Length; i++) {
			cells[i].Save(writer);
		}

		writer.Write(units.Count);
		for (int i = 0; i < units.Count; i++) {
			units[i].Save(writer);
		}
	}
We have changed what we save, so increase the version number in SaveLoadMenu.Save to 2. The old loading code could still work fine, because it will simply not read the unit data. However, the version increase is needed to communicate that there is unit data in the file.
	void Save (string path) {
		using (
			BinaryWriter writer =
			new BinaryWriter(File.Open(path, FileMode.Create))
		) {
			writer.Write(2);
			hexGrid.Save(writer);
		}
	}
Loading Units
Because HexCoordinates is a struct, it doesn't make much sense to add a regular Load method to it. Instead, make it a static method that reads and returns the stored coordinates.
	public static HexCoordinates Load (BinaryReader reader) {
		HexCoordinates c;
		c.x = reader.ReadInt32();
		c.z = reader.ReadInt32();
		return c;
	}
Because the amount of units is variable, we do not have pre-existing units to load data into. We could create new unit instances before we load their data, but that would require HexGrid to instantiate new units while loading. It's better to leave that up to HexUnit. So we'll use a static HexUnit.Load method as well. Let's begin by just reading the unit data. To read the float for the orientation, use the BinaryReader.ReadSingle method.
	public static void Load (BinaryReader reader) {
		HexCoordinates coordinates = HexCoordinates.Load(reader);
		float orientation = reader.ReadSingle();
	}
The next step is to instantiate a new unit. However, we need a reference to the unit prefab for this. To keep it simple for now, let's add a static field for it to HexUnit.
public static HexUnit unitPrefab;
To set this reference, let's abuse HexGrid once more, like we're doing for the noise texture. We'll move on to a better approach when we'll support multiple unit types.
	public HexUnit unitPrefab;

	…

	void Awake () {
		HexMetrics.noiseSource = noiseSource;
		HexMetrics.InitializeHashGrid(seed);
		HexUnit.unitPrefab = unitPrefab;
		CreateMap(cellCountX, cellCountZ);
	}

	…

	void OnEnable () {
		if (!HexMetrics.noiseSource) {
			HexMetrics.noiseSource = noiseSource;
			HexMetrics.InitializeHashGrid(seed);
			HexUnit.unitPrefab = unitPrefab;
		}
	}
After hooking up the field, we no longer need a direct reference in HexMapEditor. It can use HexUnit.unitPrefab instead.
// public HexUnit unitPrefab;… void CreateUnit () { HexCell cell = GetCellUnderCursor(); if (cell && !cell.Unit) { hexGrid.AddUnit( Instantiate(HexUnit.unitPrefab), cell, Random.Range(0f, 360f) ); } }
Now we can instantiate a new unit in HexUnit.Load. Instead or returning it, we can use the loaded coordinates and orientation to add it to the grid. Add a HexGrid parameter to make this possible.
	public static void Load (BinaryReader reader, HexGrid grid) {
		HexCoordinates coordinates = HexCoordinates.Load(reader);
		float orientation = reader.ReadSingle();
		grid.AddUnit(
			Instantiate(unitPrefab), grid.GetCell(coordinates), orientation
		);
	}
At the end of HexGrid.Load, read the unit count and use it to load all the stored units, passing itself as an additional argument.
	public void Load (BinaryReader reader, int header) {
		…

		int unitCount = reader.ReadInt32();
		for (int i = 0; i < unitCount; i++) {
			HexUnit.Load(reader, this);
		}
	}
Of course this only works for save files that are at least version 2, otherwise there are no units to load.
		if (header >= 2) {
			int unitCount = reader.ReadInt32();
			for (int i = 0; i < unitCount; i++) {
				HexUnit.Load(reader, this);
			}
		}
We can now correctly load version 2 files, so increase the supported version number to 2 in SaveLoadMenu.Load.
	void Load (string path) {
		if (!File.Exists(path)) {
			Debug.LogError("File does not exist " + path);
			return;
		}
		using (BinaryReader reader = new BinaryReader(File.OpenRead(path))) {
			int header = reader.ReadInt32();
			if (header <= 2) {
				hexGrid.Load(reader, header);
				HexMapCamera.ValidatePosition();
			}
			else {
				Debug.LogWarning("Unknown map format " + header);
			}
		}
	}
Moving Units
Units are mobile, so we should be able to move them around the map. We already have code for pathfinding, but so far we've only tested it for arbitrary locations. We have to remove the old testing UI and make a new UI for controlling units.
Cleaning Up the Map Editor
Moving units along paths is part of actual gameplay. It doesn't belong in the map editor. So get rid of all the code related to pathfinding in HexMapEditor.
// HexCell previousCell, searchFromCell, searchToCell;HexCell previousCell; … void HandleInput () { HexCell currentCell = GetCellUnderCursor(); if (currentCell) { if (previousCell && previousCell != currentCell) { ValidateDrag(currentCell); } else { isDrag = false; } if (editMode) { EditCells(currentCell); }// else if (// Input.GetKey(KeyCode.LeftShift) && searchToCell != currentCell// ) {// if (searchFromCell != currentCell) {// if (searchFromCell) {// searchFromCell.DisableHighlight();// }// searchFromCell = currentCell;// searchFromCell.EnableHighlight(Color.blue);// if (searchToCell) {// hexGrid.FindPath(searchFromCell, searchToCell, 24);// }// }// }// else if (searchFromCell && searchFromCell != currentCell) {// if (searchToCell != currentCell) {// searchToCell = currentCell;// hexGrid.FindPath(searchFromCell, searchToCell, 24);// }// }previousCell = currentCell; } else { previousCell = null; } }
With this code eliminated, we have no reason to keep the editor active when we're not in edit mode. So instead of using a field to keep track of the mode, we can simply enable or disable the HexMapEditor component. The editor also doesn't need to care about the UI labels anymore.
// bool editMode;… public void SetEditMode (bool toggle) {// editMode = toggle;// hexGrid.ShowUI(!toggle);enabled = toggle; } … void HandleInput () { HexCell currentCell = GetCellUnderCursor(); if (currentCell) { if (previousCell && previousCell != currentCell) { ValidateDrag(currentCell); } else { isDrag = false; }// if (editMode) {EditCells(currentCell);// }previousCell = currentCell; } else { previousCell = null; } }
Because we're not in map editing mode by default, disable the editor when it awakens.
	void Awake () {
		terrainMaterial.DisableKeyword("GRID_ON");
		SetEditMode(false);
	}
Using a raycast to find the current cell under the cursor is something that we need to do both for map editing and controlling units. And maybe later for other things too. Let's move the raycasting logic in HexGrid, in a new GetCell method with a ray parameter.
	public HexCell GetCell (Ray ray) {
		RaycastHit hit;
		if (Physics.Raycast(ray, out hit)) {
			return GetCell(hit.point);
		}
		return null;
	}
HexMapEditor.GetCellUniderCursor can simply invoke this method with the cursor ray.
	HexCell GetCellUnderCursor () {
		return
			hexGrid.GetCell(Camera.main.ScreenPointToRay(Input.mousePosition));
	}
Game UI
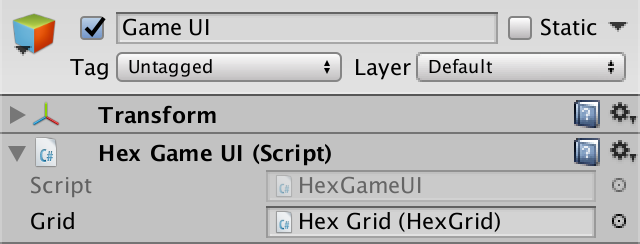
We'll use a new component to take care of the game-mode UI. At this time that only involves selecting and moving units. Create a new HexGameUI component type for it. It only needs a reference to the grid to do its job.
using UnityEngine;
using UnityEngine.EventSystems;

public class HexGameUI : MonoBehaviour {

	public HexGrid grid;
}
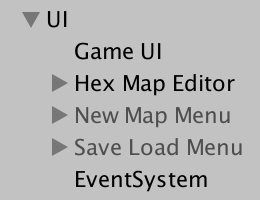
Add this component to a new game object in the UI hierarchy. It doesn't need to have its own object, but that makes it obvious that we have a separate UI for the game.
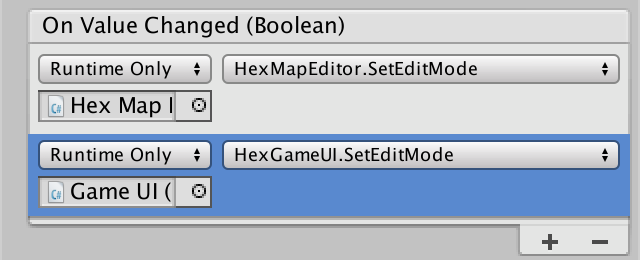
Give HexGameUI a SetEditMode method, just like HexMapEditor. The game UI should be enabled when we're not in edit mode. Also, this is the place to toggle the labels, because the game UI will work with paths.
	public void SetEditMode (bool toggle) {
		enabled = !toggle;
		grid.ShowUI(!toggle);
	}
Add the game UI's method to the event list of the edit mode toggle. This means that both methods will be invoked when the player changes the mode.
Keeping Track of the Current Cell
Depending on what's happening, HexGameUI needs to know which cell is currently underneath the cursor. So give it a currentCell field.
HexCell currentCell;
Create an UpdateCurrentCell method, which uses HexGrid.GetCell with the cursor ray, to update the field.
	void UpdateCurrentCell () {
		currentCell =
			grid.GetCell(Camera.main.ScreenPointToRay(Input.mousePosition));
	}
When updating the current cell, we might like to know whether it has changed. Have UpdateCurrentCell return whether that's the case.
	bool UpdateCurrentCell () {
		HexCell cell =
			grid.GetCell(Camera.main.ScreenPointToRay(Input.mousePosition));
		if (cell != currentCell) {
			currentCell = cell;
			return true;
		}
		return false;
	}
Selecting a Unit
Before we can move a unit, we have to select one first, and keep track of it. So add a selectedUnit field.
HexUnit selectedUnit;
When we attempt a selection, we should begin by updating the current cell. If there is a current cell, the unit occupying that cell becomes the selected unit. If the cell doesn't have a unit, then we end up with no unit selected. Create a DoSelection method for this.
	void DoSelection () {
		UpdateCurrentCell();
		if (currentCell) {
			selectedUnit = currentCell.Unit;
		}
	}
We'll support selecting units with a regular mouse click. So add an Update method that performs the selection when mouse button 0 is activated. Of course we only bother with this when the cursor is not on top of a GUI element.
	void Update () {
		if (!EventSystem.current.IsPointerOverGameObject()) {
			if (Input.GetMouseButtonDown(0)) {
				DoSelection();
			}
		}
	}
At this point we can select a single unit at a time with a mouse click. And clicking on an empty cell will deselect whatever unit we had selected. But we don't get any visual feedback about this yet.
Unit Pathfinding
When a unit is selected, we can use its location as the starting point for pathfinding. We won't require another button press to activate this. Instead, we'll automatically find and show the path between the unit's location and the current cell. Do this always in Update, except when a selection is performed, by invoking a DoPathfinding method if we have a unit.
	void Update () {
		if (!EventSystem.current.IsPointerOverGameObject()) {
			if (Input.GetMouseButtonDown(0)) {
				DoSelection();
			}
			else if (selectedUnit) {
				DoPathfinding();
			}
		}
	}
DoPathfinding simply updates the current cell and invokes HexGrid.FindPath if there's a destination. We'll again use a fixed speed of 24.
	void DoPathfinding () {
		UpdateCurrentCell();
		grid.FindPath(selectedUnit.Location, currentCell, 24);
	}
Note that we don't have to find a new path every update, only when the current cell has changed.
	void DoPathfinding () {
		if (UpdateCurrentCell()) {
			grid.FindPath(selectedUnit.Location, currentCell, 24);
		}
	}
We now see paths appear when moving the cursor around while a unit is selected, which also makes it obvious which unit is selected. However, the paths aren't always properly cleared. First, let's clear the old path if the cursor ends up outside the map.
	void DoPathfinding () {
		if (UpdateCurrentCell()) {
			if (currentCell) {
				grid.FindPath(selectedUnit.Location, currentCell, 24);
			}
			else {
				grid.ClearPath();
			}
		}
	}
Of course this requires HexGrid.ClearPath to be public, so make that adjustment.
	public void ClearPath () {
		…
	}
Second, clear the old path when a selection is made.
	void DoSelection () {
		grid.ClearPath();
		UpdateCurrentCell();
		if (currentCell) {
			selectedUnit = currentCell.Unit;
		}
	}
Finally, clear the path when the edit mode is changed.
	public void SetEditMode (bool toggle) {
		enabled = !toggle;
		grid.ShowUI(!toggle);
		grid.ClearPath();
	}
Only Search for Valid Destinations
We don't always find a path, because sometimes there's no way to reach the destination cell. That is fine. But sometimes the destination cell itself is invalid. For example, we've decided that paths cannot include underwater cells. But this might depend on the unit. So let's add a method to HexUnit which tells us whether a cell is a valid destination. Underwater cells aren't.
	public bool IsValidDestination (HexCell cell) {
		return !cell.IsUnderwater;
	}
Also, we support only one unit per cell. So the destination cell is also invalid if it is occupied.
	public bool IsValidDestination (HexCell cell) {
		return !cell.IsUnderwater && !cell.Unit;
	}
Use this method in HexGameUI.DoPathfinding to ignore invalid destinations.
	void DoPathfinding () {
		if (UpdateCurrentCell()) {
			if (currentCell && selectedUnit.IsValidDestination(currentCell)) {
				grid.FindPath(selectedUnit.Location, currentCell, 24);
			}
			else {
				grid.ClearPath();
			}
		}
	}
Moving to the Destination
If we have a valid path, then it should be possible to move the unit to the destination. HexGrid knows whether this this the case. Have it expose this information via a new read-only HasPath property.
	public bool HasPath {
		get {
			return currentPathExists;
		}
	}
To move the unit, add a DoMove method to HexGameUI. This method will be invoked when a move command is issued and we have a unit selected. So it should check whether we have a path, and if so change the unit's location. For now, we'll directly teleport the unit to the destination. We'll make it actually traverse the path in a later tutorial.
	void DoMove () {
		if (grid.HasPath) {
			selectedUnit.Location = currentCell;
			grid.ClearPath();
		}
	}
Let's use a right mouse click – mouse button 1 – to order a move. Check for this when we have a selection. The alternative is to perform pathfinding.
	void Update () {
		if (!EventSystem.current.IsPointerOverGameObject()) {
			if (Input.GetMouseButtonDown(0)) {
				DoSelection();
			}
			else if (selectedUnit) {
				if (Input.GetMouseButtonDown(1)) {
					DoMove();
				}
				else {
					DoPathfinding();
				}
			}
		}
	}
Now we can move units around! But they sometimes refuse to find a path to certain cells. Specifically, cells that used to have a unit in them. This happens because HexUnit doesn't update its old location when a new one is set. To fix this, clear the unit reference of its old location.
	public HexCell Location {
		get {
			return location;
		}
		set {
			if (location) {
				location.Unit = null;
			}
			location = value;
			value.Unit = this;
			transform.localPosition = value.Position;
		}
	}
Avoiding Units
Pathfind now works correctly and units can be teleported across the map. Although they cannot move to cells that already have a unit in them, units that happen to stand on the path are ignored.
It is typical for units of the same faction to be able to move through each other, but we don't have unit factions yet. So let's treat all units as unaffiliated, blocking each other's paths. We can do this by skipping occupied cells in HexGrid.Search.
				if (
					neighbor == null ||
					neighbor.SearchPhase > searchFrontierPhase
				) {
					continue;
				}
				if (neighbor.IsUnderwater || neighbor.Unit) {
					continue;
				}
The next tutorial is Animating Movement.